
Official DaVinci Resolve 15 Free Training
DaVinci Resolve is a beast of a program. In a few short years it’s gone from a high-end colour grading hardware and software solution that was attainable only for top colorists working in expensive suites, to a free application anyone can download and use, on relatively affordable hardware.
It’s now continuing to establish it’s dominance as a high-powered all-in-one tool for video editing, audio mixing, colour grading, visual effects and delivery. It’s used by editors, colorists and DITs on a daily basis the world over.
So if you want to wrap your noodle around this monstrous application, who better to learn from than the people that made it. In this post I’ve brought together all of the most recent ‘official’ training videos and resources from Blackmagic Design.
Historically, Blackmagic Design haven’t been the most active on their YouTube channel, until a recent pivot, when they started pumping out hours of free expert training on every aspect of DaVinci Resolve 15!
If you were to watch every video in this post it would take you just over eight hours!
At the time of writing the latest update to DaVinci Resolve was version 15.2.2 on the 13th December 2018.
Blackmagic Design have also recently released their updated Definitive Guide to DaVinci Resolve 15 book, which in paperback will cost you [amazon_link asins=’0999391364′ template=’PriceLink’ store=’jonelwfiledi-20′ marketplace=’US’ link_id=’3bff503e-0519-11e9-b9c4-d12fef55e54e’] but if you’re happy to browse through it’s 560 pages on an iPad or Kindle then you can snap it up at the bargain price of just $5.99.
That makes WAY more sense than the cost of the paperback, especially given how often the software is update with new features, workflow improvements and user interface changes.
Similarly, Mary Plummer’s, new book Introduction to Fairlight Audio post with DaVinci Resolve 15, normally costs [amazon_link asins=’0999391372′ template=’PriceLink’ store=’jonelwfiledi-20′ marketplace=’US’ link_id=’88992699-14cd-11e9-8148-1763950c4a80′] but is a steal at just $2.96 in Kindle format.
At 606 pages it’s not slouch either, and it’s depth reflects just how massive an addition Blackmagic Design’s acquisition of Fairlight audio was, when it folded it into Resolve a few years ago.
So for less than $10 you could have over a 1000 pages of expert training on DaVinci Resolve, not to mention the epic (and also free) user manual written in large part by colorist Alexis Van Hurkman which stretches to whopping 2,623 pages and is the best user manual you will ever read.
UPDATE – Download Every Blackmagic Design Training Book for Free!
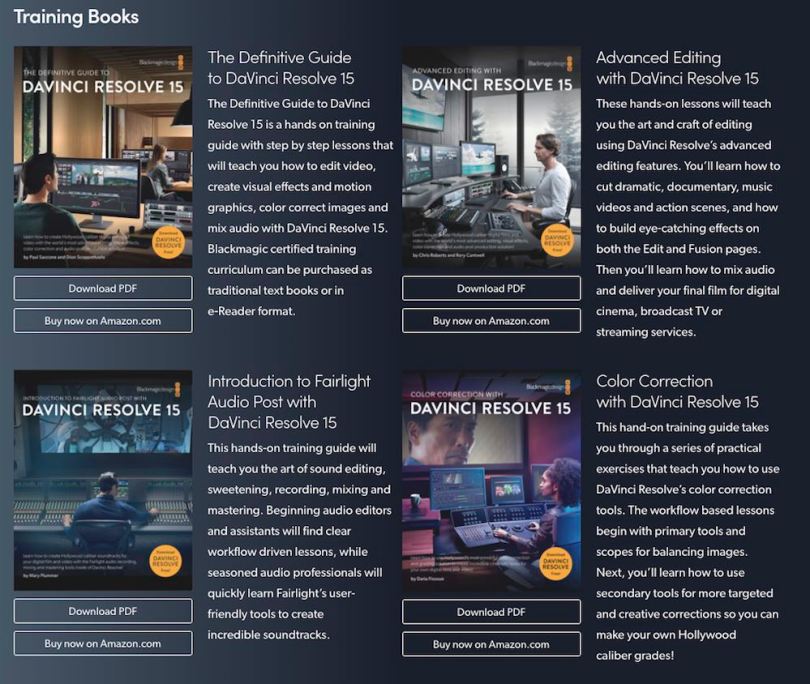
You can now download all four of Blackmagic Design’s training books in PDF form for free, from their website, or if you prefer buy them in hardcopy or ebook format from Amazon.
Currently there are four titles available:
The Definitive Guide to DaVinci Resolve 15 by Paul Saccone and Dion Scoppettuolo (395 pages)
Advanced Editing with DaVinci Resolve 15 by Chris Roberts and Rory Cantwell (374 pages)
Introduction to Fairlight Audio Post with DaVinci Resolve 15 by Mary Plummer (425 pages)
Color Correction with DaVinci Resolve 15 by Daria Fissoun (322 pages)
Download them today!
If you’re a little behind the times, or just failing to keep up with Blackmagic’s relentless software development team, then you might want a little refresher on what was included in DaVinci Resolve 15.1 which was released mid-September 2018.
This previous post on DaVinci Resolve 15 Tips and Training also has a ton of information on what was added up to version 15.1.1 and dozens of free tutorials and tips from working colorists.
DaVinci Resolve 15.2 came with a huge number of improvements and new features, which you can read about in full here. Subsequently 15.2.2 introduced a slew of bug fixes and stability performances.
Notable new features in 15.2 include:
- Improved Edit timeline performance and responsiveness
- A visual keyboard customization utility to find, add and modify shortcuts
- Per-module customizable shortcuts, including module specific actions and context menus
- Displaying duplicate frame ranges for clips on the timeline on the Edit page
- Cleaning up and flattening video tracks on the Edit timeline
- ResolveFX Beauty in DaVinci Resolve Studio
- ResolveFX Blanking Fill for portrait videos
- FairlightFX Multiband Compressor
- FairlightFX Stereo Fixer
- Decoding Panasonic 8K SHV clips in DaVinci Resolve Studio
This is really only the tip of the iceberg so be sure to check out the full release notes here if you want to read through the finer details.
Learn to Edit, Mix, Grade and Finish in DaVinci Resolve 15
https://www.youtube.com/watch?v=oEuFP7U7tB8
Paul Saccone, senior director of marketing for Blackmagic Design, delivers a 45 minute introduction to editing in DaVinci Resolve 15. Use the timestamps below to jump through the content.
It’s also worth noting that you can download the project and media used in this training video for free from Blackmagic Design, to follow along with at home.
- 00:22 Create new project and import media
- 01:19 Navigate interface
- 02:28 Organise media pool
- 03:14 Add media to timeline
- 13:10 Insert and overwrite edits
- 16:35 Trim media
- 22:13 Add transitions
- 25:56 Refine audio levels
- 32:45 Retime media
- 35:51 Animate with keyframes and apply FX
- 42:04 Create custom titles
Sherwin, a certified DaVinci Resolve trainer, gives you a dedicated 20 minute tutorial on making the most of the Media page and how to organise your footage, sync dailies and add valuable metadata.
- 0:38 Navigating the Interface
- 2:33 Importing Media and Creating Bins
- 4:18 View Options: Thumbnail or List View
- 5:35 Renaming Clips and Setting Poster Frames
- 7:57 Manually Syncing Footage
- 9:57 AutoSync
- 12:44 Metadata Panel
- 13:33 Tagging Clips with Metadata
- 14:55 Creating and Using Smart Bins
- 16:46 Using Metadata to Batch Rename Clips
Daria O. Fissoun is a London based colorist and trainer, who has an excellent teaching style with a succinct and straightforward delivery which makes her easy to follow.
In this half hour tutorial she walks you through the details of the using the Delivery page to create dailies, add burn-ins and other useful tasks.
- 00:08 Deliver page navigation
- 04:18 Preset categories
- 07:17 Set up YouTube render
- 12:28 Create dailies
- 15:27 Apply data burn-in
- 20:55 Additional job setup controls
If you like Daria’s clear and concise delivery style then you should definitely check out her YouTube channel, Goat’s Eye View, which I’ve referenced tutorials from in numerous previous DaVinci Resolve tutorial round ups.
At just shy of 2 hours, this tutorial from Daria O. Fissoun walks you through everything you need to know to achieve your first colour grade in DaVinci Resolve, including reading scopes, adding power windows and ensuring your grade not only looks good, but also matches across the entire scene.
You can download the example project and practice media Daria is working with here.
- 00:14 Color page interface and navigation
- 06:13 Understanding scopes
- 08:29 Primary grade with color wheels
- 29:24 Balance and create look with curves
- 43:31 Organise stills in gallery
- 46:43 Match clips for continuity
- 58:42 Use flags to filter media
- 01:02:40 Secondary grading with windows
- 01:14:07 Keying with qualifier
- 01:28:28 Node anatomy and node editor workflows
- 01:43:16 Apply ResolveFX
- 01:50:00 Copy grades across clips
- 01:52:53 Export and import stills
For a further 30 minutes Daria provides an in-depth guide on to use the DaVinci Resolve Mini Panel when colour grading in DaVinci Resolve.
- 00:09 Adjust luminance using rings
- 01:17 Color correct and grade with trackballs
- 02:51 Navigate timeline
- 04:30 Trackball keys
- 10:37 Use adjustment controls
- 14:41 Switch between palettes
- 16:46 Create looks with curves
- 23:03 Apply window and perform tracking
- 27:43 Secondary selection with qualifier
For more information and reviews on colour grading control panels check out these detailed posts:
- Affordable Colour Grading Control Surfaces
- Blackmagic Design Colour Grading Panels Reviewed
- Colour Grading with a Tangent Ripple
- Editing and Grading with a Tangent Element Kb
- Using a Palette Gear for Film Editing and Colour Grading
- Tangent Wave2 Colour Grading Panel Reviewed
- Using an Elgato Stream Deck for Editing and Grading
In the next two videos, editor and visual effects artist Tony Gallardo delivers a solid introduction to using Fusion for visual effects and motion graphics work. You can follow Tony on Twitter here or check out his excellent YouTube channel here.
I’ve frequently included Tony’s tutorials on Fusion and Resolve in previous posts which you can check out here:
- DaVinci Resolve 15 Tips and Training – Including an excellent VFX breakdown from Tony and colorist Juan Salvo
- The Best Post Production Presentations from NAB 2018
- Getting Started with Fusion in DaVinci Resolve 15
- Getting Started with Fusion 9
- DaVinci Resolve 14 Colour Grading Tutorials
An hour and a half over two videos Tony covers a lot of ground, which makes it an excellent watch for anyone looking to use Fusion properly for the first time.
In Fusion VFX and Graphics, Tony demonstrates:
- 00:32 Interface
- 04:25 Understanding Nodes
- 06:15 Organizing Nodes
- 07:02 Adding Nodes
- 10:27 Accessing Clips Inside Fusion Page
- 12:00 Importing Media from Media Pool
- 12:38 Understanding the Merge Node
- 14:04 Merge Node Inputs
- 14:56 Compositing with the Merge Node
- 15:44 Adjusting Image Scale and Position
- 16:25 Using the Inspector
- 18:03 How Nodes Effect Each Other
- 19:15 Effects Mask
- 20:45 Building a Title
- 21:27 Text Node
- 24:40 Stylizing Text
- 26:58 Animating with Keyframes
- 30:30 Adjusting Keyframes with Keyframe Editor and Spline Editors
- 34:04 Intro to Tracking
- 36:00 Using Composite Modes
- 37:40 2D Tracker Node
- 39:56 Compositing with the Tracker Node
- 41:00 Creating a Travel Matte
- 43:58 Intro to Green Screen Compositing
- 44:16 Using Select Tool Shortcut
- 46:25 Swapping Merge Node Inputs
- 47:32 Renaming Nodes
- 48:10 Organizing the Node Editor
- 49:26 Group Nodes
- 50:20 Underlay Nodes
In this follow up video Tony delivers an introduction to working in 3D in Fusion including creating animated 3D text with 3D particles as part of the final effect.
You can download the example project and follow along media from Blackmagic Design for this lesson.
- 00:49 Generating 3D text
- 02:13 Customising 3D materials
- 10:15 Animating with a follower modifier
- 13:18 Controlling a 3D camera
- 18:24 Creating 3D particle systems
- 26:23 Adding 2D effects to 3D graphics
- 31:09 Designing atmospheric elements
- 40:59 Branching 3D shapes and repurposing camera data
Blackmagic Design’s Mary Plummer delivers an extensive 140 minute two-part tutorial on using the Fairlight audio page in DaVinci Resolve. As far as I can remember this is probably the longest dedicated Fairlight tutorial for DaVinci Resolve that I’ve seen online.
Given how important high quality sound design is to a finished project and how powerful the (developing) Fairlight integration is, it’s well worth spending the time learning how to make the most of ‘this part’ of DaVinci Resolve.
You can download Mary’s example project and practice media from Blackmagic Design here.
- 0:00 Introduction: Developing a Soundtrack
- 0:25 Getting to know the Interface of DaVinci Resolve Fairlight
- 3:22 Evaluating the edited scene
- 5:47 Extending an audio clip
- 6:21 Zoom controls
- 8:28 Viewing the scene on the Edit page
- 9:20 Balancing volume levels
- 11:15 Using the Inspector / Using meters as a guide
- 14:00 Working with fade handles and volume keyframes
- 20:00 Customizing the interface
- 21:17 Working with Timeline Markers
- 21:25 Using the Markers Index
- 23:00 Creating a Marker
- 24:30 Previewing audio clips in the Media Pool
- 26:35 Editing audio clips to the timeline
- 27:05 Naming, coloring and moving a track
- 30:05 Creating a new track
- 32:32 Using video and audio scrollers in the timeline
- 35:00 Working with Dialogue
- 37:00 Recording Voiceover
- 38:40 Disable /Enable Clips
- 39:38 Recording / patching tracks
- 41:50 Using titles as a script prompt
- 45:30 Working in Track Layers
- 47:40 Moving and splitting clips in track layers
- 48:49 Using the Range selection tool
- 49:54 Moving layered audio clips in the timeline
- 51:44 Dialogue Editing
- 54:16 Moving clips to different tracks
- 55:40 Cut and paste clips to new tracks
- 57:48 Previewing the finished checkerboard edit
- 59:10 Scrolling the timeline in fixed playhead mode
- 1:00:00 Repairing dialogue clips
- 1:00:29 Using the FairlightFX De-Hummer plugin
- 1:02:22 Looped playback
- 1:04:37 Cache audio effects in the timeline
- 1:05:53 Replace dialogue with another take from the Media Pool
In part 2 of her Fairlight audio tutorial Mary moves on to demonstrating how to mix and deliver your final sound track, including using various effects to polish the sound and managing the mix through bus assignments and sub-mixes.
- 0:00 Introduction
- 0:34 Balancing clip levels
- 6:20 Adding keyframes to change levels within a clip
- 7:00 Listen /Play again shortcut
- 8:25 Loop Playback
- 14:28 Normalize audio levels
- 16:20 Normalize multiple clips Relative / Independent
- 17:14 Reducing sibilance with the De-esser plugin
- 19:05 Exploring clip EQ and sweeping a bell curve
- 21:15 Applying De-Esser Plugin
- 24:00 Working with track Dynamics
- 25:45 Using the Compressor
- 32:37 Applying track EQ
- 34:30 Using the Chorus FairlightFX Plugin
- 37:00 Sound Design – Create a heart monitor sound effect
- 38:46 Create a new timeline for the effect
- 39:16 Create a stereo track
- 39:36 Working with the Test Tone Settings (oscillator)
- 40:20 Patch the system test tones for recording
- 42:40 Pink noise levels in the track and loudness meters
- 47:10 Changing pitch
- 47:50 Bouncing the finished effect as a new clip
- 51:55 Mixing like tracks into stems
- 53:30 Creating new submix buses and mains
- 55:35 Assigning tracks to buses
- 58:05 Patching buses and mains in the Mixer
- 58:58 Bouncing Mix to Track to create stems
- 1:00:55 Finishing
- 1:02:29 Track panning
- 1:02:57 Link Group / Tracks
- 1:05:45 Deliver Page /Output settings


The Blackmagic DaVinci Resolve books are available as free pdf downloads from the Blackmagic training page https://www.blackmagicdesign.com/products/davinciresolve/training
Thanks for sharing with us, this is very valuable information and its all in one link.
I run the Dallas DaVinci Resolve User Group, this is our second year, for sure I
share your link to the group.
Thanks Yasir, hope it’s going well!