
Colour Grading with a Tangent Ripple
The new Tangent Ripple
- Discover the affordable Tangent Ripple colour grading control panel
- Learn how to set up your Tangent Ripple in Resolve, Premiere or FCPX
- Check out reviews from first time users and post production professionals
If you’re looking for an affordable colour grading control surface then the popular Tangent Ripple just might be the very best option on the market right now.
Priced at just $350, the Ripple is especially useful if you’re a colorist in training or an editor looking to upgrade their skills, and that’s precisely who it has been designed for. Demand for the device has been so high, with a large number of pre-orders received, that it took Tangent’s shipments a few months to catch up.
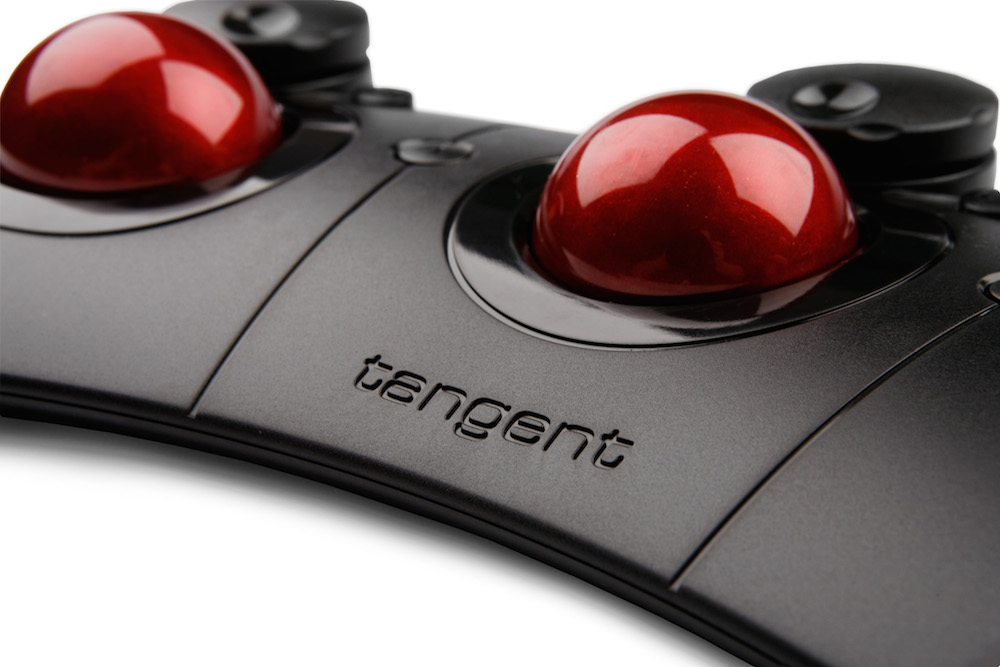
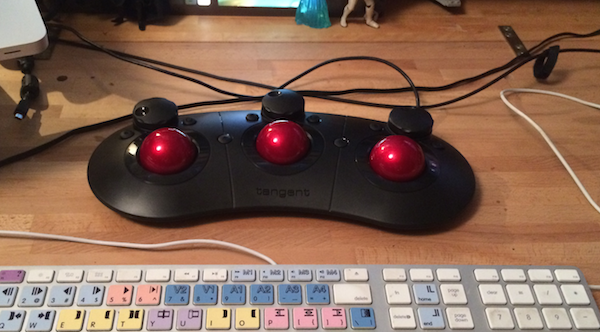
The Ripple’s core features are:
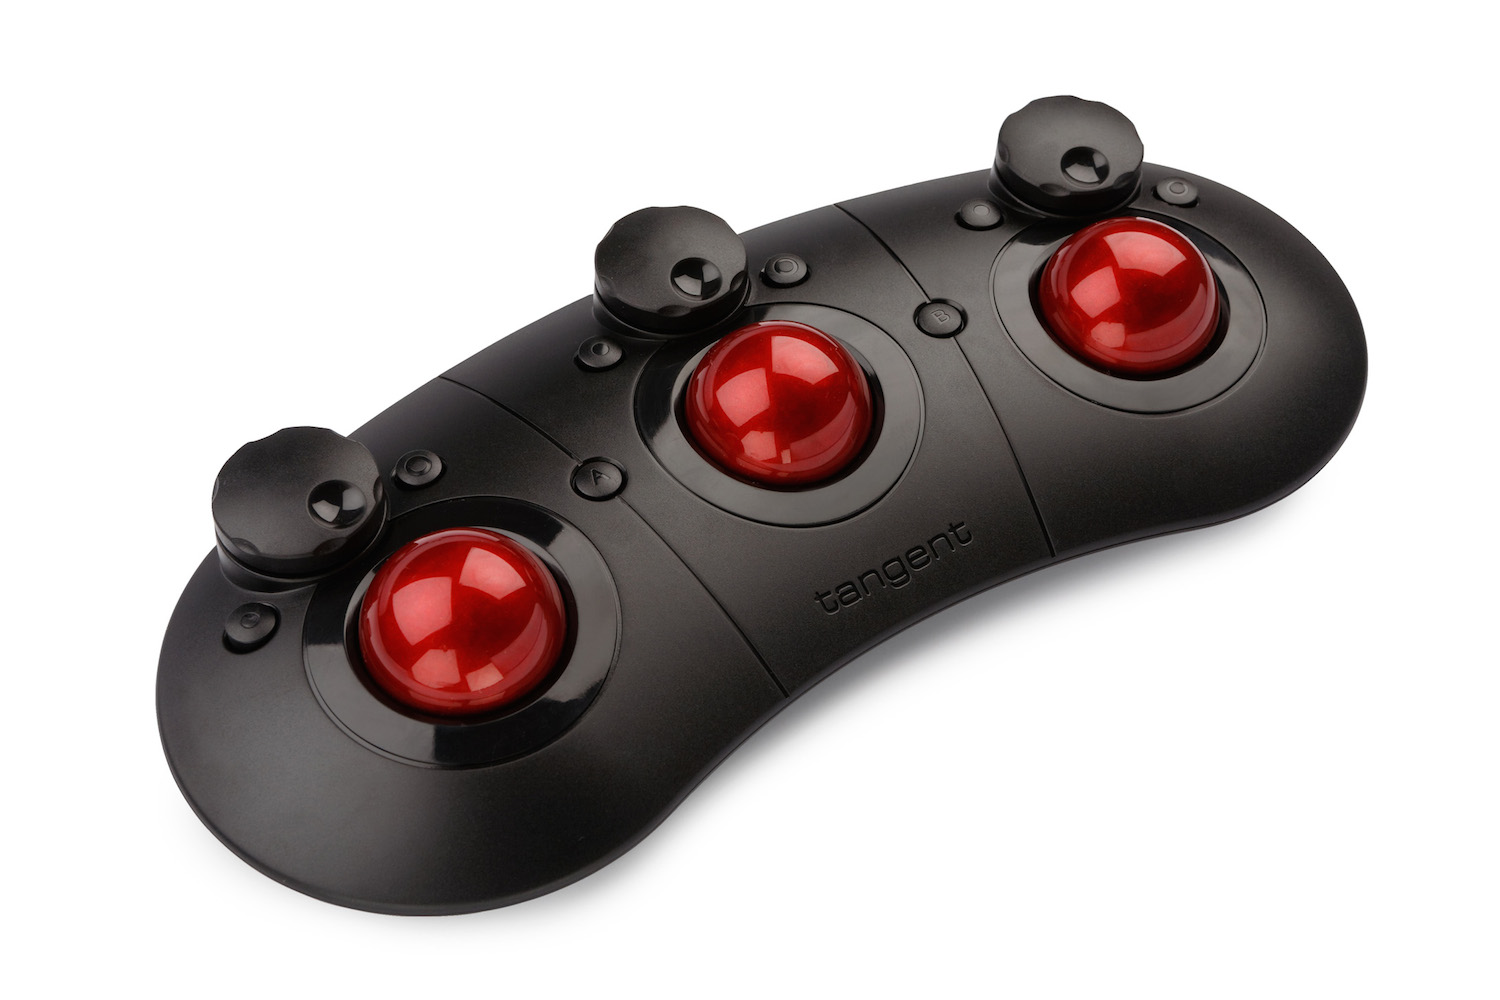
- 3 trackerballs with dials for masters
- High resolution optical pick-ups for the balls and dials
- Independent reset buttons for the balls and dials
- Programmable A and B buttons
- USB powered with integral cable
- Light-weight compact size (desk foot print 325mm x 148mm)
I first included the Tangent Ripple, and much more expensive Tangent Element panels, in my round up of Affordable Colour Grading Control Surfaces, which will give you some other ideas and suggestions depending on your price point and requirements.
In this post I thought I’d draw together some of the best reviews and tutorials for getting started with the Tangent Ripple and tips on how to make the most of it.
Buy the Tangent Ripple on Amazon Global Stores

The Tangent Element
The Tangent Ripple’s Newest Feature
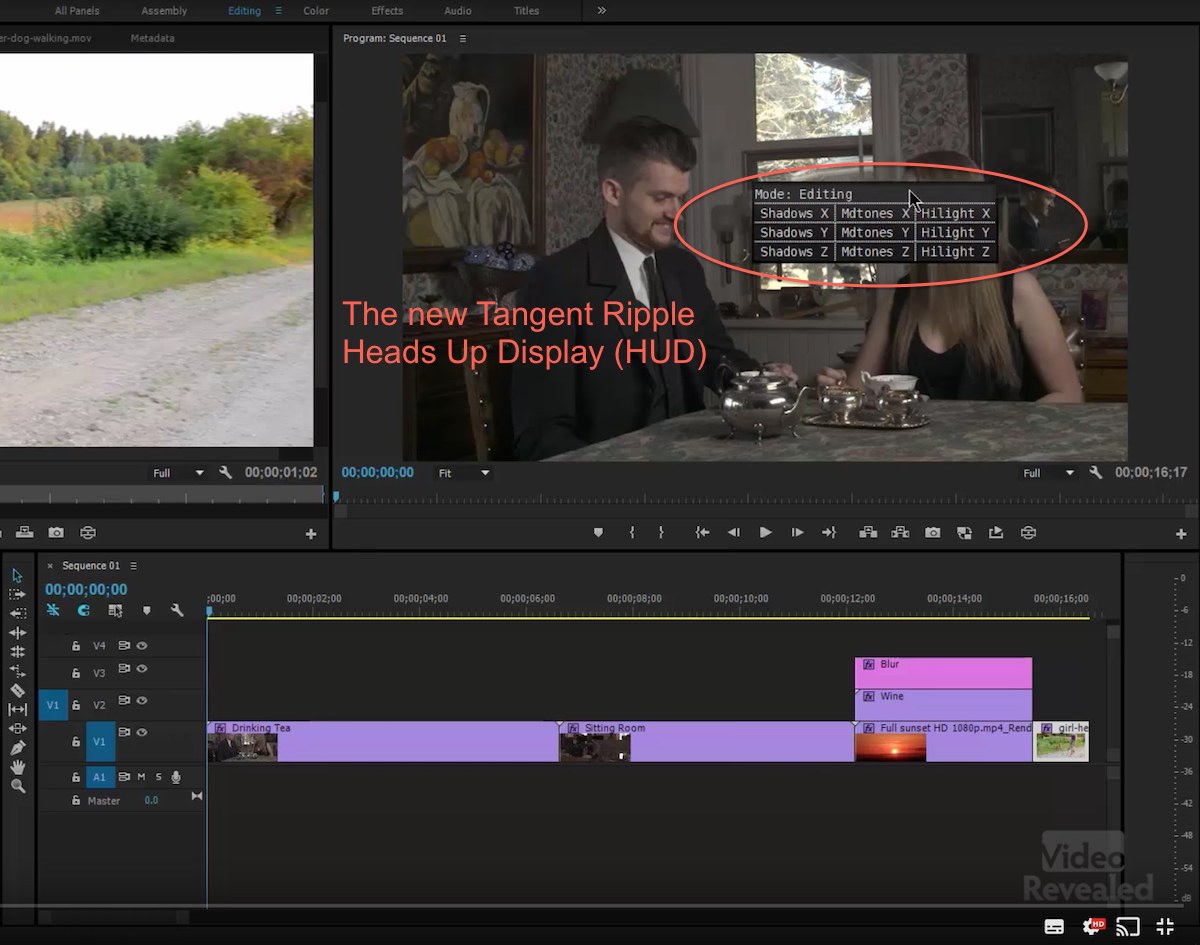
Image from VideoRevealed. Click to enlarge.
As of August 10th 2016 the Tangent HUB, the software interface with which you customise what each of your controls are mapped to (the Tangent Mapper), now includes a HUD, or Heads Up Display.
This is a fantastic new feature which has been specifically designed for users of products like the Ripple which doesn’t have any kind of physical display built in, unlike the Tangent Element, pictured above.
The HUD now allows you to see, via a floating window on screen, what your controls are currently mapped to, and updates as you cycle through different ‘banks’ of mappings.
According to the Tangent site you can have as many banks as you like and control what triggers the HUD to pop up and how long it remains on the screen for.
For example, you may have the balls mapped to lift, gamma, gain in bank 1, but in bank 2 you may them mapped to control sizing. You can add as many banks as you like and use the A or B button to step through the banks.
Using the HUD will massively increase the usefulness of the Ripple, because you won’t be trying to remember what’s controls what, or have to keep glancing over at some kind of cheat sheet.
You can learn more about the Tangent Mapper and the HUD in the 60 page user manual here.
Quick Tips on Using a Tangent Ripple
 Download the latest drivers and user documents from Tangent’s regularly updated support page.
Use the Tangent Mapper software to set up the the Head’s Up Display (HUD) to provide you with a visual reminder of your custom control mappings. Use the A/B buttons to cycle through the banks of memorised controls. Download the Tangent Mapper manual here.
Use the Ripple with any of the four element panels, or more likely if you’re out for an affordable option with the free element-vs (free for an hour a day) or £80/$100 iPad app. This emulates the functionality of the element panels buttons, dials and rings in a mult-touch enabled environment. Without the HUD it also displays what commands your controls are mapped to.
Make sure the USB cable is seated properly under the Ripple so it doesn’t wobble and grips the desk more effectively.
Don’t forget the balls will fall out if you tip it upside down!
How to set up a Tangent Ripple in DaVinci Resolve
You can learn how to set up your Tangent Ripple with DaVinci Resolve in under 5 minutes thanks to Casey Faris’ whistle-stop video tutorial. Casey also goes on to cover Premiere, but scroll down for more details on that.
Casey points out that currently the Ripple isn’t directly supported in Resolve, but instead uses the Element-TK panel preferences which essentially provide the same functionality. This also means that the A button currently doesn’t function as it’s not mapped to anything from Blackmagic Design’s side of things. The B button by-passes your entire grade.
The essential steps are pretty simple and (taken from the Tangent user guide) as follows:
- Install DaVinci Resolve.
- Install the Tangent Hub.
- Plug in the Ripple panel.
- Start Resolve.
- Set Resolve preferences to use ‘Tangent Devices Element’.
- Quit and restart Resolve.
- Ripple will now control the Colour Wheels in Resolve.
For a detailed step-by-step guide, download the official Resolve support document from Tangent.
How to set up a Tangent Ripple in Premiere Pro
In this 24 minute tutorial Colin Smith from VideoRevealed walks through how to use and customise the Tangent Ripple with the Lumetri colour panel in Adobe Premiere Pro. If you’re planning on grading in Premiere with the Ripple this is the best tutorial I’ve seen so far, on using the tool to it’s full potential.
It’s pretty straight forward to get set up at first, just go to Premiere Pro > Preferences > Control Surface > Device Class > select ‘Tangent’ and hit ‘Add’.
What’s great about Colin’s tutorial is that he shows you how to use each of the Ripple’s controls and some of the unique default mappings within Premiere for each of sections of the Lumetri panel, which go pretty deep.
Colin also walks through a couple of ‘gotchas’, including the fact that the Curves section isn’t yet mapped and how to use the Tangent Mapper, which is the intuitive customisation software at about 15.33 in. There are a massive number of customisable controls with the integration between the Ripple and Premiere including editing options and many other commands.
You can also download an official support document for using the Ripple with Premiere Pro, as well as the Tangent Mapper manual here.
When it comes to setting up your colour grading panel like a pro, one source to take some inspiration from are the professional colorists behind Mixing Light.com.
They have put together a series of free tutorials, (normally it’s a subscription site) on how best to optimise your Tangent Element for use with the Lumetri panel in Premiere Pro. Although this is for the much more capable and more expensive Tangent Elements panel, you can pick up a lot of great tips and tricks to apply to your Ripple and/or for use with the element-vs iPad app.
Patrick’s post covers:
- You’ll learn how the Tangent Mapper works
- We’ll look at a few shortcomings of the Default map that kind’a discourage me from using the control surface
- You’ll learn how to create a new map set and completely break through those drawbacks
- Then I’ll share with you several ideas on additional optimizations that will completely change your relationship with the Lumetri effect
- Finally, you’ll see the one feature, with the Tangent control surfaces, that blows the doors off working in DaVinci Resolve!
Also check out Part 1 – How to set up your Tangent Element panels for use with the Lumetri Panel in Premeire Pro.
The entire line of modern Tangent control surfaces are now supported with the Premiere Pro CC 2015.3 update. This includes the Element, the Wave and the newest Tangent hardware, the Ripple. In this Insight, I’ll show you how well this new integration works. Frankly, I’m impressed.
And since the Adobe team utilised the Tangent Hub software APIs, as an end user you’ll be able to customise the default settings with your own flourishes and favourite features.
For a lot more information on the Tangent Element check out this post on Affordable Colour Grading Control Panels.
UPDATE – A new insight specifically on the Ripple
Patrick has added a new video looking specifically at working with the Ripple in Premiere and Resolve, which is pretty in-depth at 17 minutes long. This new post is part of the subscription site, but you can access it with the free 24 hour test drive.
Using a Tangent Ripple with FCPX
When it comes to colour grading in FCPX with the Tangent Element and the Tangent Ripple, Steve Martin and Travis Richmond from Ripple Training are some of the best people to take you through the process.
The boys get to the meat of the tutorial at 2 minutes in. The most important thing you need to know about the Tangent Ripple is that it currently does not work with the native colour grading tool, the colour board, in FCPX.
This means you need to use a third party FCPX grading solution like Color Finale from Color Grading Central.com. This is what Steve demonstrates how to use in the video above. It’s interesting to note that Steve mentions that they are demoing with a beta-version of a soon-to-be-released Pro version of Color Finale.
The depth of the interaction between the Ripple and the app is essentially down to the developer (e.g. Adobe, Apple, Colour Grading Central, Blackmagic Design), which is why Adobe’s Premiere integration is the deepest of them all, because they’ve chosen to do that.
That said, you can still get the essentials of colour grading done faster with a Ripple in FCPX.
To learn more about colour grading in FCPX you can buy Ripple Training’s 2 hour tutorial title for $69, which Steve mentions at the end of the episode.
UPDATE – Color Finale Pro and Tangent Ripple Review

In his first (and free!) insight for Mixing Light, Christophe Delaunay takes a look at how to get set up with the Tangent Ripple and the new release of Color Finale Pro, for faster grading in FCPX.
Color Finale Pro from Color Grading Central, is packed with some excellent new features including the ACES colour management, support for all Tangent devices, saveable grade presets and much more. It also helpfully installs side-by-side with the original release of Color Finale, to ensure backwards compatibility on all your projects.
Christophe shares some really helpful tips on how to get the best experience out of your combination of the Ripple and Color Finale Pro, as well as some solutions to common problems. If you’re aiming to do a lot of grading this way then you’ll definitely want to read this article!
https://vimeo.com/119422039
In this video from colorist and colorgradingcentral.com founder, Denver Riddle, you can get a detailed look at how to use Color Finale Pro to grade your projects and see it in action with the Tangent Ripple.
If you want to check out the fuller review of the Tangent Element specifically, you can in this previous episode of Macbreak Studio.
Tangent Ripple Reviews
To get a better look at the Ripple and a few initial user opinions I thought I’d pull together some of the best reviews online.
I included colorist and YouTube tutorial creator Casey Faris’ succinct and balanced review in my Affordable Colour Grading Control Panel’s post but I thought it was worth repeating here.
“a solid unit that looks professional and has great controls with a few little quirks… for the price I’d give it 4/5 stars. If you’re looking for something to help you with an occasional colour grading project this is probably a good buy…”
This thread over on colorist community site Lift Gamma Gain has a variety of comments from colorists around the world, and with various levels of expertise, chimming in on their thoughts and experiences with the Ripple.
More interestingly, it also includes responses from Tangent’s Chris Rose:
We would have liked to have had clips to keep the balls in place, but due to the size and price we were trying to work to this was not possible. The Ripple is not alone in this, the Avid panel also doesn’t have anything to keep the balls in place. In reality, it’s not likely that you’ll be turning the panel upside down during day to day use.
As for the small size of the dials, these were as large as we could make them for the size of the panel and the position they need to occupy.

For probably the most comprehensive write up I’ve seen on the Ripple, check out editor and ProVideoCoalition blogger Scott Simmons detailed review, which includes thoughts on the build quality and feel of the device along with step-by-step instructions on how to get it set up.
There is no power light on the Ripple, nothing to indicate it’s working or connected to your system as it sits on the desk. If you look into the trackerball cradle with the balls installed you can just make out the red optical light to know the Ripple is getting power from the USB connection. It would be nice if there was some little power light visible when looking at the Ripple.
Scott also helpfully demonstrates how to expand the functionality of the Ripple with the element-vs iPad app, pictured above.
[The element-vs] was quite usable on its own, but as a button and knob surface that can sit alongside the Ripple, I think it provides some brand new usefulness without the cost of an Element set. With a touch or swipe you can move the element-Vs between the different layouts and get the benefit of their functionality.
Editor Shane Ross shares his initial impressions on the nimble colour grading control surface in this ‘mini-review’ concluding that:
Using the controls in my little test was a great experience. The responsiveness is just what I want, not too sensitive. I had issues with another panel I used, I couldn’t seem to get it just right. This was just right out of the box. I took to it right away.
As I said, it’s a simple control surface, but I’m a simple colorist, without the need of complex controls. To that end, the Ripple is just what I needed for all my professional, and family video, needs. In short, I really really like it.
Great to see the Mapper in action, it is a really cool tool. Not used it since Apple Color days
— icolorist (@icolorist) June 2, 2016
UPDATE – October 2016
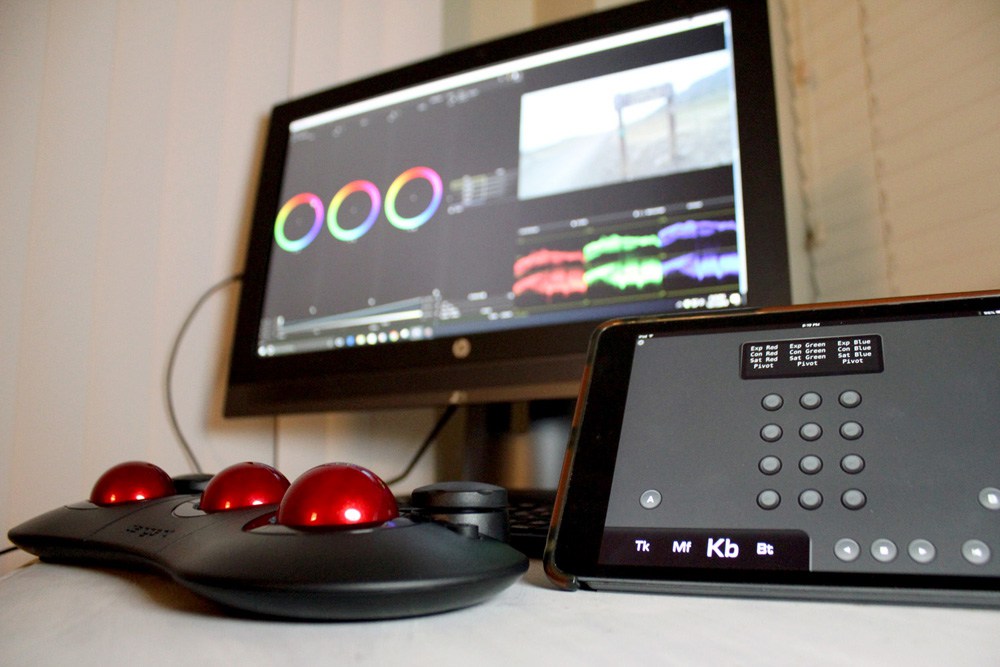
Editor Brady Betzel has recently tested out the Tangent Ripple with both DaVinci Resolve and Premiere Pro and shared his experiences on postperspective.com. In the picture above you can see the Ripple being used in tandem with the free Element Vs app to add greater functionality.
Brady’s review is a great read for anyone interested in buying a Ripple and Brady shares some really helpful tips on working with the Ripple effectively.
In my opinion, the best button press for the Ripple is the “B” button, which cycles you through the Lumetri panels.
Inside of Premiere, if you hold the “A” button for alternate mapping and hit the “B” button, you will toggle the bypass off and on.
While editing in Premiere, I used the Ripple to do color adjustments even when the Lumetri panel wasn’t on screen. I could cycle through the different Lumetri tabs, make adjustments and continue to edit using keyboard functions fast — an awesome feature both Tangent and Adobe should be promoting more, in my opinion.
Check out Brady’s full review here.
You can run @Blackmagic_News #Resolve 12.5 on a @Microsoft Surface Pro w/ an @intel #Iris GPU: https://t.co/wy98kFruJy via @postPerspective pic.twitter.com/EIOWwPFMCT
— Brady Betzel (@allbetzroff) October 12, 2016
In another recent post, Brady was running DaVinci Resolve on a Microsoft Surface tablet in conjunction with a Tangent Ripple – an extremely portable set up! Check that out in more detail here.
UPDATE Feb 2017

The PremiereBro also takes a detailed look at setting up and working with the Tangent Ripple in Premiere Pro, in this excellent post.
There’s some great insights along with the detailed set up guide, like this tip on moving custom mappings to different machines.
It’s easy to move the Ripple from one workstation to the next, but what about the mapping? How do I port my custom Ripple map from one workstation to another? I posed this question to the Tangent team.
Custom mappings can be exported to an XML file and then reimported into a new system. In the Mapper go to File > Manage Control Maps and choose the map you wish to save. Hit the Export button and choose where the file should be saved e.g. on to a USB stick. To Reimport, follow the same process but choose Import instead. —TangentSimple enough! Take it a step further and backup your custom Ripple map to your Creative Cloud.


