
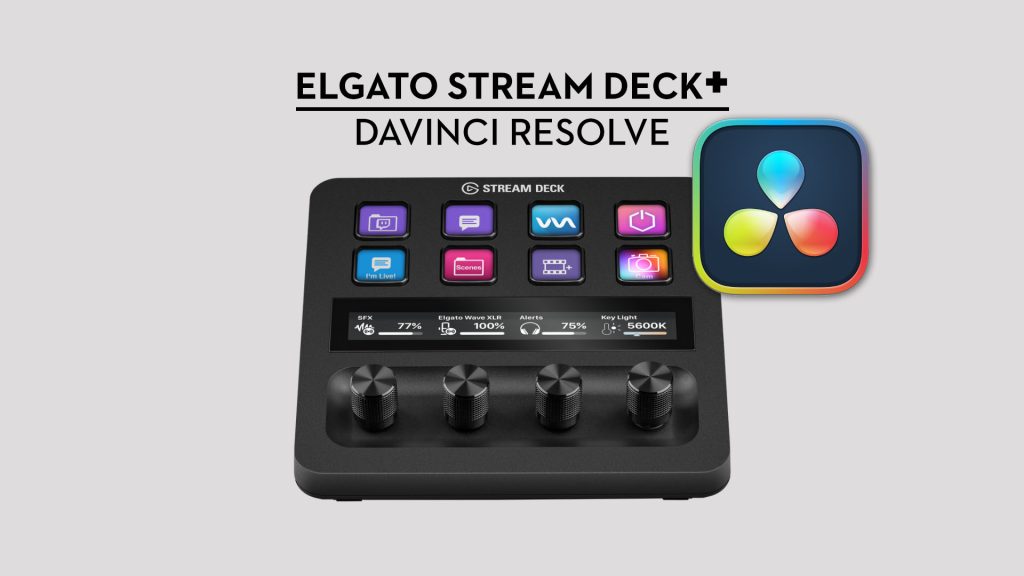
Can you use the new Stream Deck Plus as a colour grading control surface for DaVinci Resolve?
Yes and no.
If you want to have complete control within DaVinci Resolve with the Stream Deck Plus then you’ll need to invest in an affordable plugin to unlock that functionality.
Is that investment worth it?
Absolutely.
Without the plugin, you can set up the buttons and dials on your Stream Deck + to activate keyboard shortcuts inside DaVinci Resolve, which does let you use a good number of Resolve’s features but you’re limited to only those controls that have a keyboard shortcut mapping.
However, with Sideshowfx’s DaVinci Resolve Color Panel for Mac and Windows, you can turn your Stream Deck Plus into a fully fledged colour grading control panel for DaVinci Resolve!
This makes it a very affordable, portable and efficient colour grading control panel that editors, DITs and junior colorists will appreciate, whilst also enabling professional colorists with existing control panels and surfaces to expand their set up and add extra functionality.
In this sponsored article I’m take a close look at the Sideshowfx Stream Deck Plus Color Panel for Mac, offer some tips for getting the most out of it and even chat to Todd Hallam the founder of Sideshowfx.
If you want even more insights and resources on getting started with your Elgato Stream Deck or Stream Deck Plus, including free profiles to download, check out these articles:
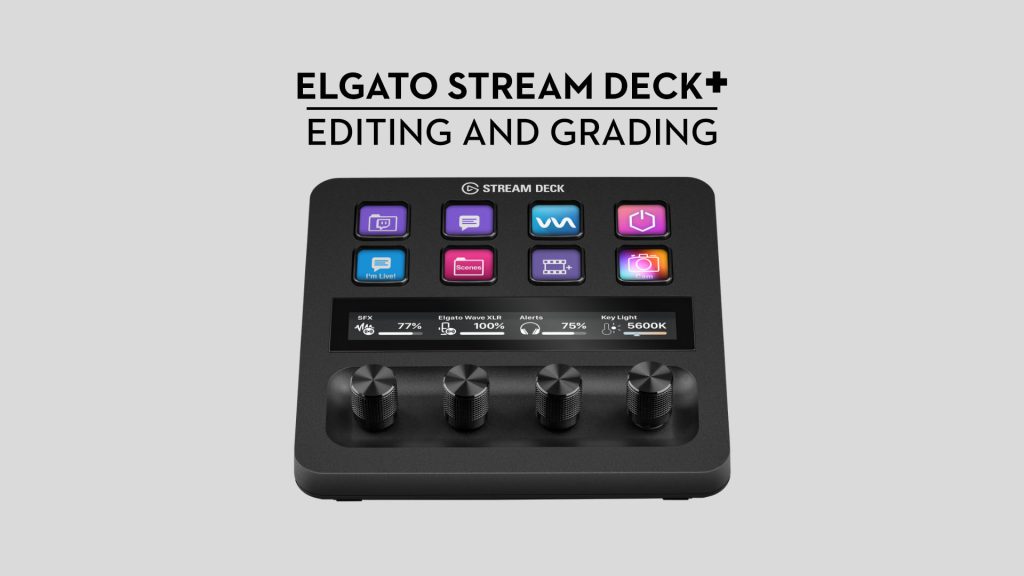
- Using the Stream Deck+ for Video Editing and Colour Grading
- Using an Elgato Stream Deck for Video Editing and Colour Grading
- DIY & Custom Video Editing Gear
Using the Stream Deck + with DaVinci Resolve
What is it?
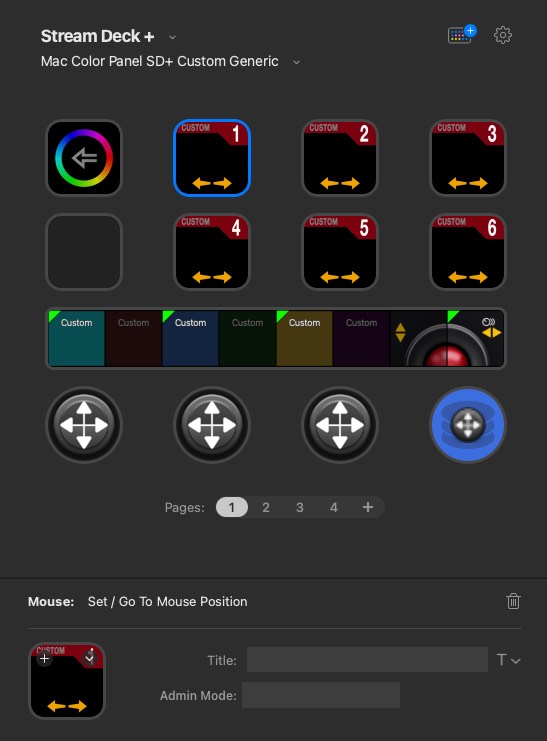
The Sideshowfx Color Panel, now available for both Mac and Windows, allows you to have tactile control over all of the ‘available parameters’ in the DaVinci Resolve Color page.
It does this by using a custom built software plugin to locate and assign mouse position coordinates to the Stream Deck Plus’ shortcut keys and dials, opening up a massive amount of functionality that isn’t otherwise available.
(As an aside this ability to leverage mouse point coordinates will be rolling out to many more of Sideshowfx’s profile packs in the coming months – hopefully including a Premiere Pro pack!)
Why would you want this?
Buying a complete panel like the Blackmagic Design Micro ($859/£695) or the Tangent Element Wave 2 ($855/£840) or Element Suite ($2860) will be far more expensive than the Stream Deck + ($199/£199) and the Color Panel pack ($44.99).
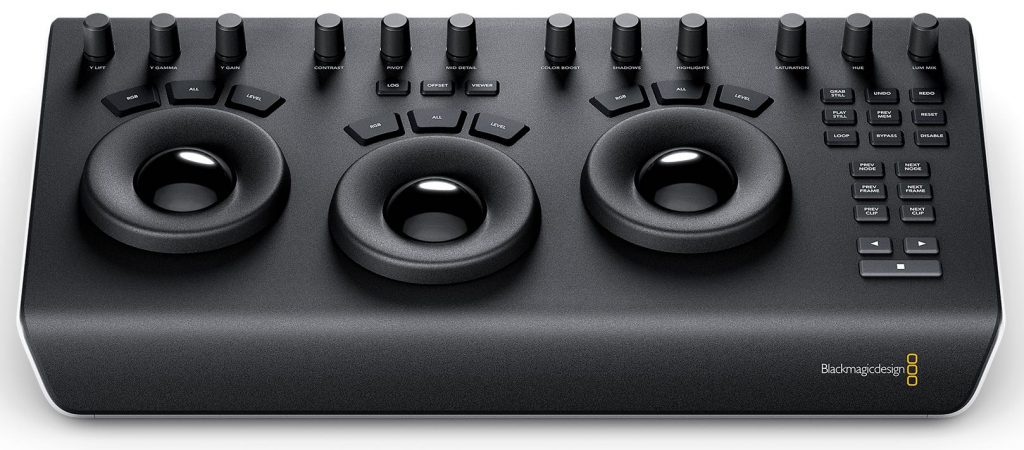
Granted, in comparison to the Stream Deck Plus, those other panels feature far more physical controls and are supported by direct API access to the DaVinci Resolve software but they also cost 3x times the price!
Also if you already own a smaller panel and want to add extra functionality or custom controls, this is a great way to do so at an affordable price point. Furthermore, Blackmagic Design’s panels aren’t customisable in any way.
What do you get?
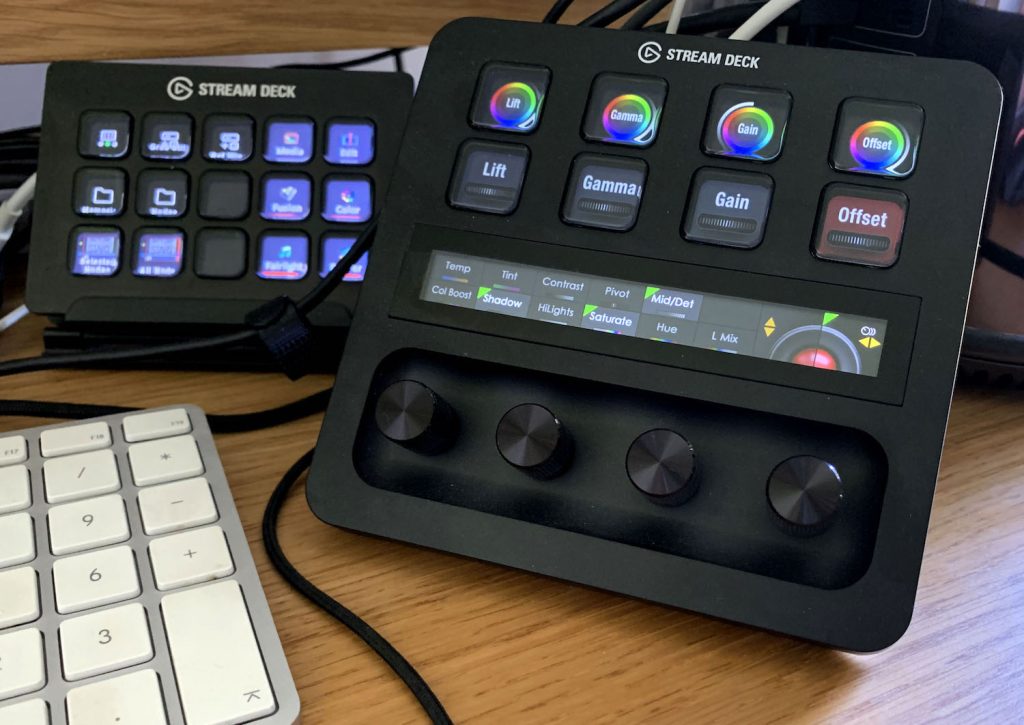
As the Color Panel is aimed squarely aimed at recreating a colour grading panel experience with the Stream Deck Plus’ buttons, dials and Touch Strip, the UI elements that the Color Panel actually controls are all located in the Color page of Resolve.
These include:
- Primary Colour
- Primary Log
- Primary HDR
- Dolby Vision
- RAW
- Secondary Qualifiers
- Power Windows
- Tracking
- Mattes and Keys
- Sizing
- Printer Lights
- Curves
- Magic Mask
- Blur
- RGB Mixer
- Color Warper
- OFX parameters via Custom Keys
Prebuilt Supported Resolutions
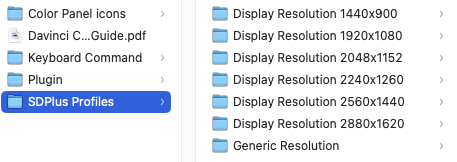
Currently the pack includes 6 presets for common single display resolutions, such as 1440 x 900, 2048 x 1152, 2560 x 1440 etc. as well as an un-programmed ‘Generic’ profile. This last profile will enable you to map your own mouse positions for a single display in another resolution or when using dual monitors.
The Color Panel also includes hundreds of custom shortcut icons for labelling each button. These are used by the 18 different, interconnected profiles.
For a complete set of shortcuts for the rest of Resolve, you could also purchase the Stream Deck XL Pro Profiles pack with its 1500 custom icons and over 1300 programmed keys.
What is the installation and set up process
One of the hallmarks of SideshowFX’s products is that their supporting documentation is excellent. The 175 page installation PDF is no exception and guides you through everything with step by step instructions in clearly illustrated, labelled and comprehensive detail.
The 30 minute video above and the PDF will more than suffice but the gist of the installation is…
Resolve Studio – Ideal set up using a prebuilt display resolution
- Install the custom Resolve keyboard shortcut layout
- Install the 18 interconnected Stream Deck + profiles
- Reset Resolve UI
- Hide Mac dock
- Enable Dolby, HDR10+ and HDR VIVID (for icon alignment) in Project Settings > Color Management
- Assign and interconnect the profiles
Free version of Resolve with prebuilt display resolution
- Same as above
- Only you don’t have HDR icons so you will need to assign mouse coordinates to the header keys
Everything I’ve described above, may sound like a lot but in reality it takes about 5 minutes. I’m working on a single 4K (3840 x 2160) display so next I’ll need to program the coordinates myself.
Tip – Select all the Stream Deck + profiles in the installation folder and double click to install them all in one go, rather than working your way through them one by one.

Tip – DaVinci Resolve Studio Users – Turn on the HDR functions in DaVinci Resolve > Project Settings > Color Management to make these icons appear on the Color page. Do this before any other customisation to the header icons, as turning these on shifts the position of all the other icons along. Otherwise if you want to use these later, you will need to remap the position of the other icons.
Programming Mouse Coordinates
This is once again very easy, to do, and the simple ‘press and hold for a second’ functionality built into the Sideshowfx plugin, works well.
The only downside of the wealth of controls that the Color Panel maps, is that you will need to map a mouse-point co-ordinate for each and every one. Which in aggregate is quite time consuming.
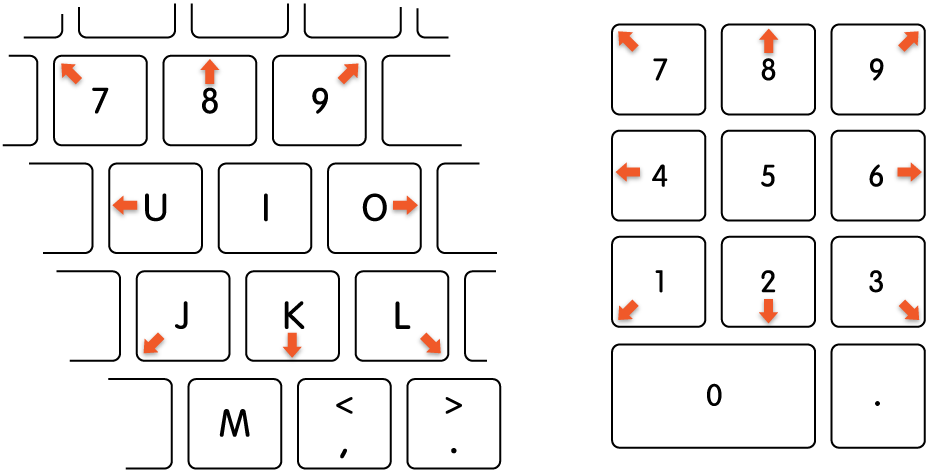
Tip – Look into using one of Mac OS’s accessibly features, Mouse Keys, which lets you control the mouse pointer with your number pad or keyboard, for some fine grain control over moving your mouse around during the set up process. I use a Wacom tablet and getting the mouse to always stay in the precise position required was occasionally annoying.
Hitting Alt/Option 5 times will toggle Mouse Keys on and off.
Where can I learn more?
Just keep reading!
Or, if you want to check out these tools for yourself directly, hit these quick links below:
- Sideshowfx Stream Deck Plus DaVinci Resolve Color Panel for Mac
- Sideshowfx Stream Deck Plus DaVinci Resolve Color Panel for Windows
- Sideshowfx Stream Deck 15 Key Pro Profiles V4.5
Sideshowfx DaVinci Resolve Color Panel Review
In this portion of the article I’ll share my thoughts on working with both the Stream Deck Plus and the Sideshowfx Color Panel in DaVinci Resolve, along with a few tips I picked up along the way.
Pros and Cons of Grading with the Stream Deck Plus and Color Panel Plugin
Pros
The number of controls that this system gives you access to is a little overwhelming. They have been pretty exhaustive in their attempt to map ‘all of the accessible’ controls! This is great!
Thanks to the Mouse move plugin you can actually use the Stream Deck Plus in this way with any other adjustable control on any page in Resolve, or in fact, with any application you want! (More on this below)
Grading with dials is superior to moving a mouse around, in most instances, because you can keep your eyes on the image whilst making adjustments, instead of ping-ponging back and forth between the image and the UI.
The price point for unlocking all of this hands on control is about 3 x cheaper than other entry level colour grading panels.
Cons
That there isn’t a pre-built 4K display setting is kind of annoying, given how ubiquitous the display resolution is in the professional’s edit suite, but hopefully one will be included soon.
Mapping every single control is quite fiddly and time-consuming, so if you you’re lucky enough to be running a pre-built profile, count your blessings. But once set up, the system works very well.
On a more minor note, the need to interconnect the custom profiles is a less-time consuming annoyance but to Sideshowfx’s credit, this is a limitation of the Stream Deck customisation software itself, in that it doesn’t allow you to save interconnections within presets.
Grading with the dials as a proxy for the mouse doesn’t work well for some UI elements such as the colour wheels, where you want to move it around smoothly, rather then scrolling left, then up then left again, for example.
Tips for getting more out of the Color Panel
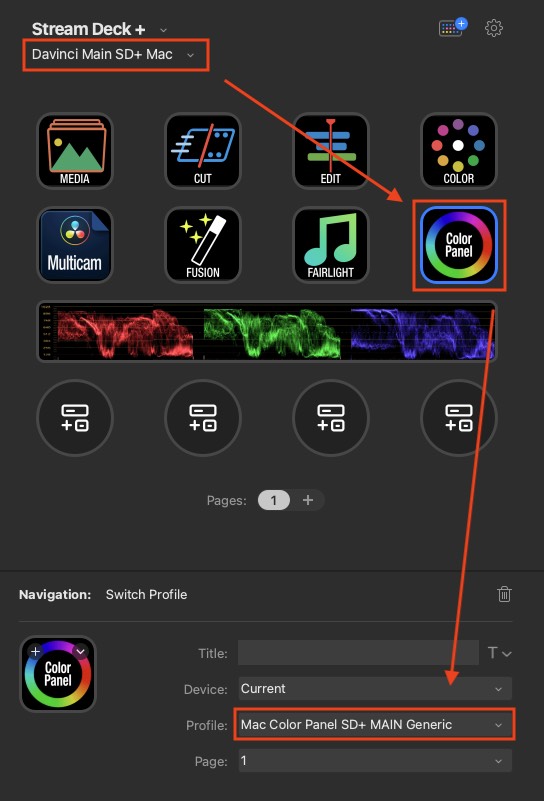
Tip – If you’re running both the Sideshowfx DaVinci Resolve Pro Profiles and the Sideshowfx Color Panel system you can’t have both mapped to automatically appear when you switch applications to DaVinci Resolve, as sensibly, the Stream Deck only allows one profile to be assigned to each application.
To combine access to both I simply remapped the ‘Printer Lights’ key of the DaVinci Main SD+ Mac profile to the Mac Color Panel SD+ MAIN Generic profile. And remapped the top-left Home key of the Mac Color Panel SD+ MAIN Generic profile back to the DaVinci Main SD+ Mac profile.
Tip – Given that everyone does things differently, all of the pre-built layouts and Stream Deck pages are unlikely to fit your workflow exactly, so instead of suffering frustration, duplicate the profile and then customise it to fit your needs.
Copy and paste keys around, remap shortcuts etc. It will be well worth the time and effort.
My Experience Grading with Stream Deck Plus
Given that I am working on a 4K monitor, one of my biggest concerns before installing the Sideshowfx plugin was how long it was going to take me to program in all of my mouse point coordinates into my Stream Deck Plus using the Generic profile.
I won’t lie, it does take a while, but it is also very easy.
So just put a good podcast on and get it done. Using the Mac OS Mouse Keys made it a lot quicker in a few instances, especially for some of the fine needle work such as the per-colour-channel controls.
Also follow the PDF instructions, they are excellent, detailed and very clear.

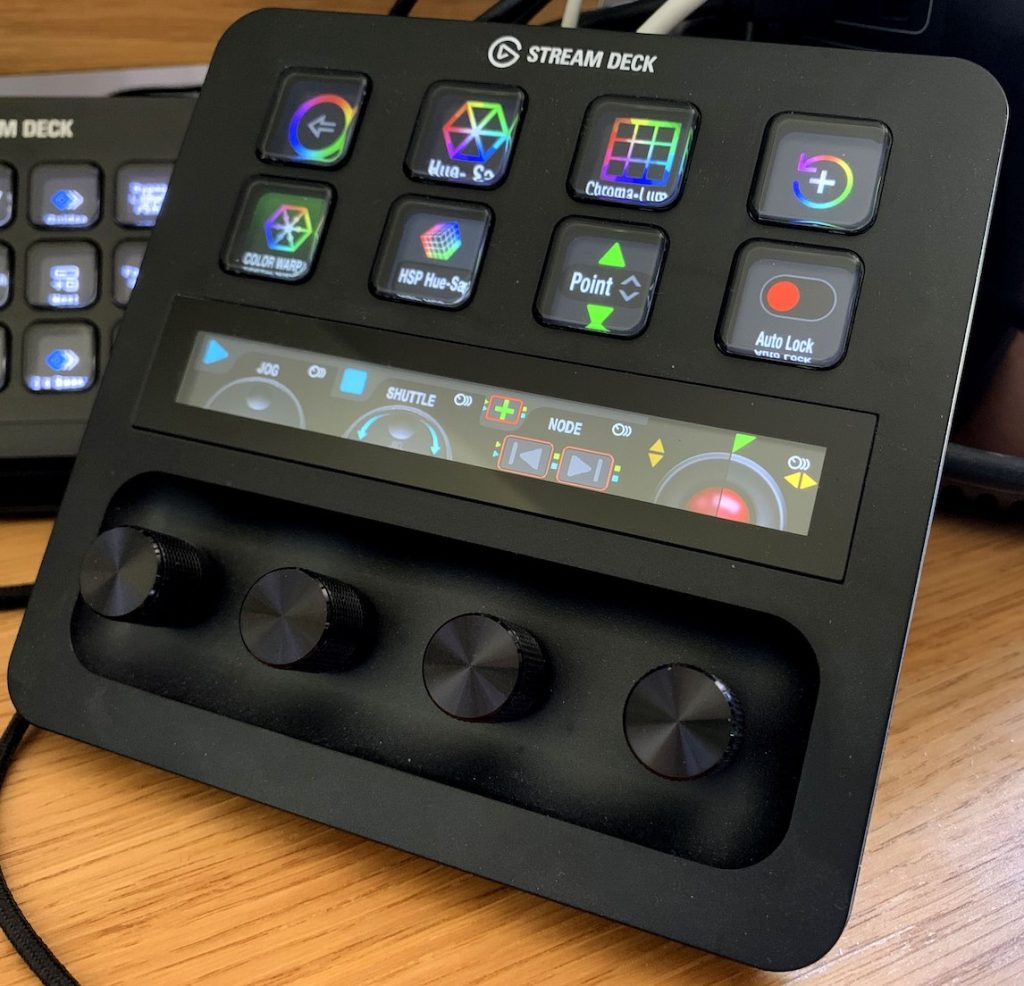
I was surprised by how well the quad-function buttons on the touch strip worked too. When I first saw them I thought they would be too tiny to hit accurately, but I was able to activate the correct control pretty much every time.
Customise and control anything!
The Sideshowfx plugin that records and stores the mouse point co-ordinates is not tied to DaVinci Resolve specifically, so there’s nothing to stop you using it with any other control on the other pages in Resolve, or in fact in any other app.
I tested this briefly with Adobe Premiere Pro, adjusting Lumetri controls, but the results were a little mixed with the way in which Premiere interpreted the scrolling mouse moves. Sometimes it would work perfectly, but other times with a few too many turns it would ping back to its starting position.
Maybe there is more going on inside the plugin to make this work effectively, so it will be interesting to see if a Sideshowfx Premiere Pro pack will deliver better results.
I’ll definitely keep experimenting with this outside of Resolve but it’s worth remembering that the power is there for you to play with!
Back in Resolve, you should definitely make use of the Custom page in the Color Panel set up, although you can of course duplicate any page in the Stream Deck profile manager and then replace any mouse command with another.
Actually Grading With it
The process of grading with the Stream Deck Plus can be a fun and productive one, as long as you embrace the inherent limitations.
What do I mean by this?
Some controls works very well with a dial interface. All of the sliders, number inputs etc. function effectively just by assigning a mouse point co-ordinate. You can then keep your eyes fixed on the final image while you tweak things, instead of whipping between the control and the image.
This makes for a more enjoyable and focused grading experience.
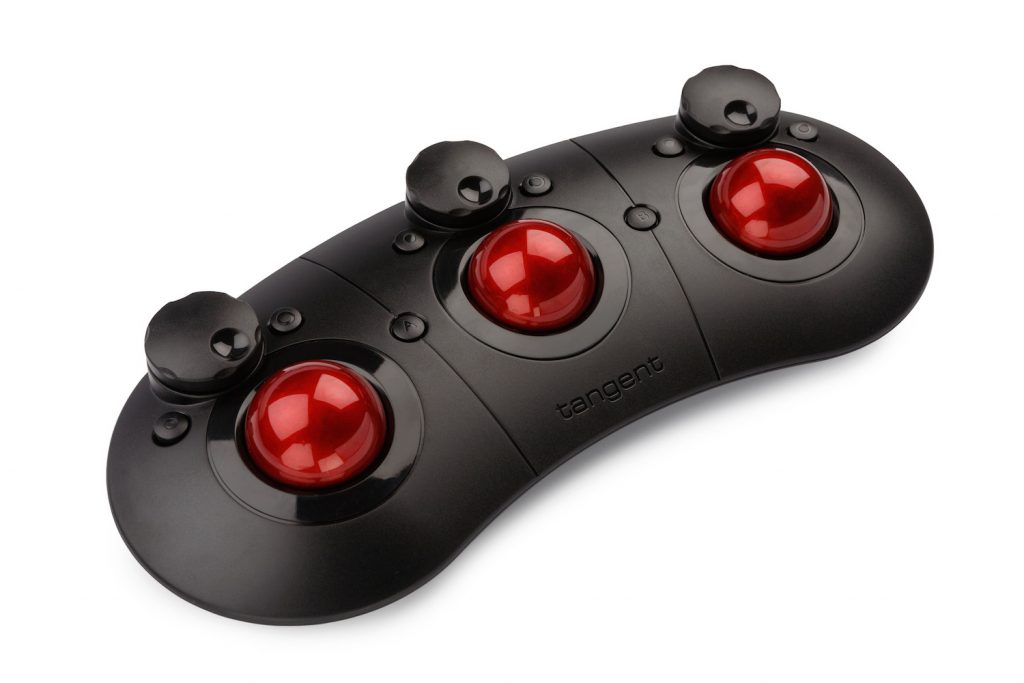
Other UI elements such as the colour wheels and some of the secondaries are more cumbersome to work with when controlling them with a dial and mouse-proxy. Just using the mouse would be better and faster. Ideally, you would actually have trackballs for a really fluid interaction, instead of the mouse.
So in this regard, yes it’s worth it for the vast majority of the main grading controls but in some specific cases, it’s not. Hence, embracing inherent limitations.
Also compared to a colour grading panel you can only adjust one control at a time, as otherwise the mouse wouldn’t know where to be! This is a drawback in comparison to a fully-fledged panel which can access the Resolve API but it’s not necessarily a fair basis for comparison, given how unmatched the price points are!
But I mention it to set some expectations around the fluidity of the grading experience, which is what you’re really hoping for in a tactile interface.
One of the controls I’ve always wanted to be able to interact with using dials or sliders, is the RGB Mixer. This tool seems to make sense to be able to control physically with a less/more control for each colour channel.
With the Stream Deck Plus this works very well, and can help to tease out those ‘little bit less red’ corrections with ease.
For colorists, editors and DITs looking to expand and customise their existing control surfaces, the Stream Deck Plus and Sideshowfx Color Panel is an affordable and flexible option.
As an editor who mostly grades all of his projects, I can see this combination becoming a core part of my own colour grading workflow, supported by my Wacom tablet for certain tasks.
Free Updates
One of the great things about buying any icon pack and profile set from Sideshowfx is that they regularly update their products with improvements and new features and that all these updates are free for life!
For example, they recently added Speed Editor style shortcuts to their Resolve pack and in May 2023 they added these improvements:
- Integration of the new Sideshowfx Mouse Move plugin
- Transform Page added – giving you control over the Transform Properties in Inspector
- Custom Page added – allows you to add your own custom actions to any properties you want to control (such as effect parameters)
Price is cheap!
Do it.
All of this control and functionality, plus a re-usable mouse-point plugin for only $44.99!
What are you waiting for?
- Sideshowfx Stream Deck Plus DaVinci Resolve Color Panel for Mac
- Sideshowfx Stream Deck Plus DaVinci Resolve Color Panel for Windows
My Ultimate Conclusion
So can you really grade with the Stream Deck Plus and Color Panel and is it worth the money?
Yes and no.
Yes, it is worth the money and yes you can grade with it, but no it can’t totally replace a colour grading panel experience, at least not on it’s own.
The addition of the dials on the Stream Deck Plus gives you tactile interaction with a ton of controls in DaVinci Resolve, and other creative software, that work extremely well with a ‘more/less’ turn of the dial. This is a big win.
Sideshowfx’s Color Panel system, with its bespoke mouse-pointer plugin, opens up access to all of those controls in a very satisfying way. This is another big win.
Conversely, trying to use something with multi-positional input, such as the colour wheels, is far too slow and cumbersome trying to scroll around on X-Y coordinates, here the mouse or preferably some trackballs would be a much better option.
That said, if you’re an editor/colorist/DIT with any kind of existing panel, even just the Tangent Ripple, then adding this combination of SD+ and Sideshowfx Color Panel to your set up, will allow you to place a vast array of bespoke controls at your fingertips. This is a very compelling reason to make this investment, especially compared to the cost of a full suite of panels.
If you already own the SD+ and working in Resolve then buying the Sideshowfx Color Panel plugin and profiles is a no brainer. It’s less than $50 and gives you a ton of control.
Interview with Sideshowfx – The Story Behind the Resolve Color Panel
Why put the time, energy and money into creating this product?
Colorists have long wanted a cost-effective solution to using the color parameters in Davinci without having to pay for a dedicated panel.
With the popularity of Stream Deck devices and how quickly they are being adopted by the creative community, we saw an opportunity to provide a solution that would allow them to use the device they already have for this purpose.
In creating this we have also made available access to controls that can only be hardware-accessed if you were to purchase a panel costing many thousands of dollars.
What was the plugin writing process like and what challenges did you have to overcome?
The challenge initially is how do we access these controls in software that has a closed API?
We knew the answer laid in XY coordinate recording and mapping so we needed to create a plugin that would not only record the positions but be able to store and recall them.
We have a long standing relationship with our plugin developer and his unparalleled commitment and attention to detail made the process pretty smooth.
There were many challenges along the way in finding the right user experience with minimal setup and they were always meant with enthusiasm as the team knew we were creating a plugin thats uses could reach far beyond our initial aim.
To this day we are still modifying and expanding the plugin and are able to make the Stream Deck device do many more things than it is capable of out of the box.
We will be updating many of our current titles over the coming months that will take advantage of the plugin and will allow us to control many more aspects of the user interface.
What are some things people shouldn’t miss when using the Color Panel?
Don’t miss reading the manual! There are set up procedures we detailed explicitly in our manual that are required for successful use of the pack.
How can professional colorists best customise it to their existing set up?
Customisation is the one thing we have always encouraged our customers to do. It is through customisation that the pack really becomes suited to how you like to work.
This pack, like all of our products, ships with a layout that mirrors the host software it supports but if you find you need a few primaries right beside a few tracking controls, for example, you’re free to move them around if that makes more sense to how you prefer to work.
What feedback have you had so far from users?
Overwhelming positive.
We do hear from customers who leave us great comments as well as helpful advice to how we could make it even better.
We read and listen to our users so we know if we’re hitting the right target, or understand where there may be areas of improvement.
This is the most recent review…
This version is very powerful, it really works and with great configuration options.
It made me want to have two interfaces! My income has increased in the colour grading process.
Color Panel User
Take This Further
Check out these previous posts if you’re considering buying an affordable colour grading control panel, or one of Blackmagic Design’s official DaVinci Resolve panels.


