
Using the Stream Deck+ for Video Editing and Colour Grading
- New Stream Deck Plus – A Video Editors Review
- Setting Up a Stream Deck Plus for Video Editing and Colour Grading
- Download Free Stream Deck Plus Profiles
What’s it like to use the new Elgato Stream Deck Plus + for video editing and colour grading?
Get set for a deep dive into answering this question as we look at using the new Stream Deck+ in DaVinci Resolve, Adobe Premiere Pro, Final Cut Pro and Avid Media Composer.
The new Stream Deck + from Elgato is the latest in their line up of shortcut and macro enabled controllers, originally built for streamers but that have become incredibly popular as video editing and colour grading peripherals.
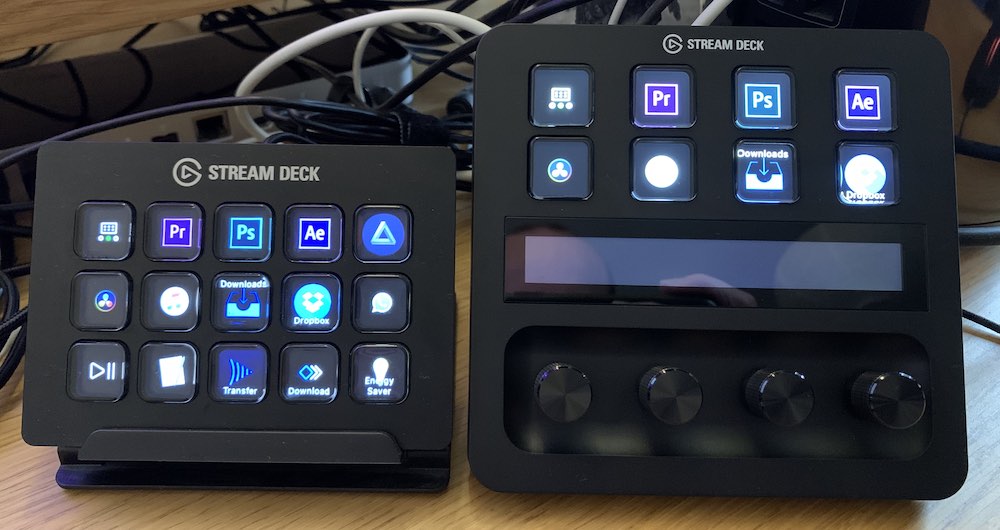
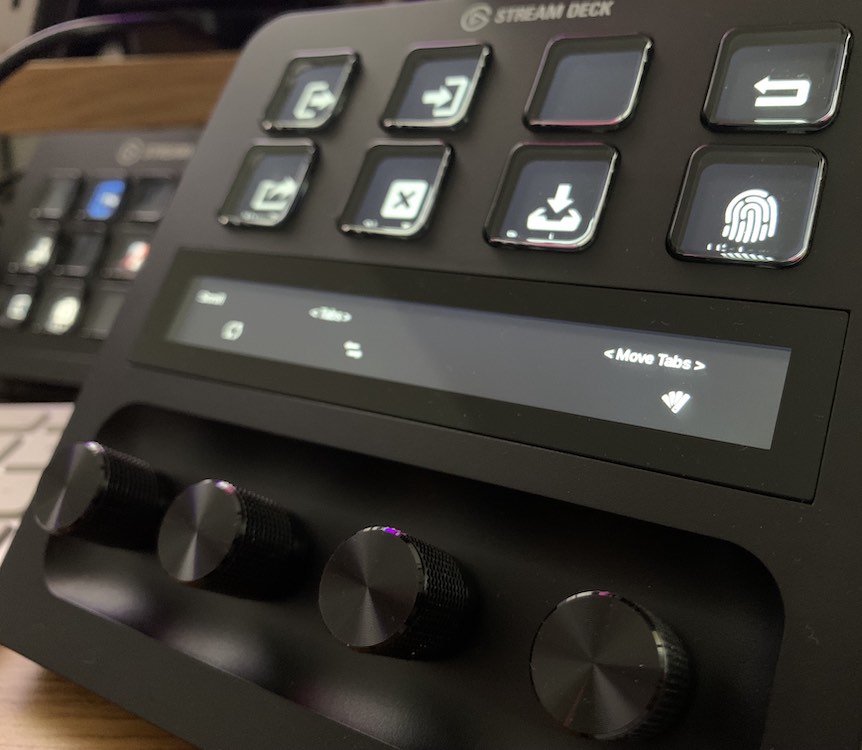
The Stream Deck Plus keeps 8 of the tactile LCD keys from the previous versions but adds two new elements: 4 x infinite dials and an LCD display strip that also acts as a touch sensitive control too.
Of all the controllers I’ve seen (and reviewed) over the years, the Stream Decks seem to have become the most ubiquitous and permanent additions to many an editing and colour grading suite. Other controllers seem to have had their moment, then fallen into disuse and then, eventually, tucked away in a draw, while the Stream Deck’s versatility and utility seems to have given them real staying power.
Will that be the case for the Stream Deck +?
And if you already own a Stream Deck is it worth the upgrade?
Thanks to Elgato for both sponsoring this article and providing me with the Stream Deck Plus.
This article got pretty long, so I wouldn’t want you to miss this video in which I demonstrate the trimming functionality using the Stream Deck + in Avid Media Composer, Adobe Premiere Pro, Apple Final Cut Pro and DaVinci Resolve, along with a few similar shortcuts.
Download these ‘starter’ profiles for free here.
Stream Deck + First Impressions
Available on Amazon Global Stores
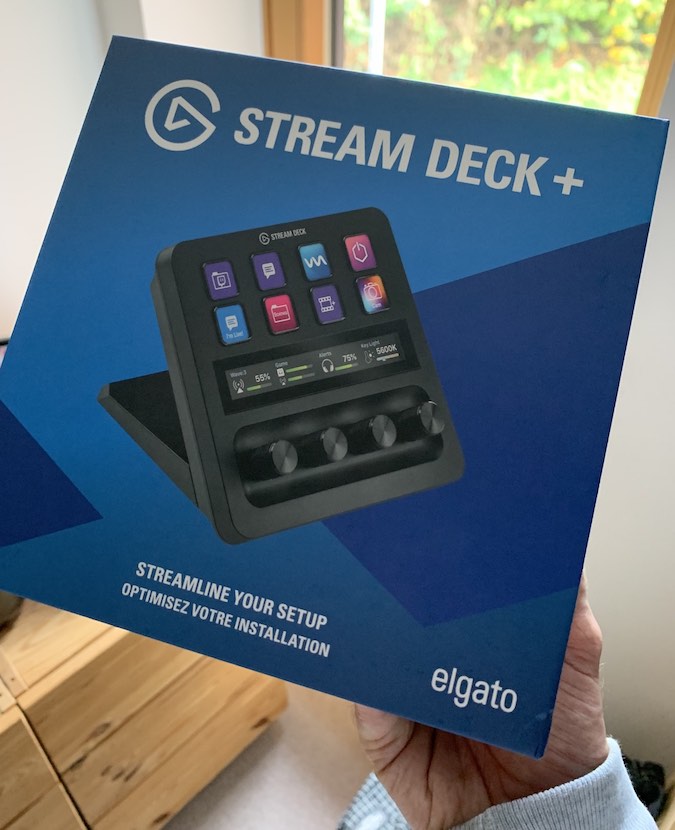
What’s in the box – Stream Deck +
The Stream Deck + comes nicely packaged in a sturdy cardboard box along with a detachable USB-C to USB-A braided cable.
The Stream Deck Plus is wider and taller than the original Stream Deck, with a built in stand that can be removed by taking out a couple of screws if you’re into building your own custom cradles.
It also features slightly bigger buttons than the original Stream Deck, for “improved glanceability”, according to Elgato. Which I’m currently undecided about.
There’s something nice about the compact nature of the original arrangement, but the increased spacing and size of the Stream Deck + buttons does makes it easier to hit the right key without looking over too much.
The dials are a good size to fit between a thumb and finger without feeling too fiddly. They have a clicky sound and feel, which does help with making specific adjustments as you can both hear and feel what you’re doing.
In some ways I wish the dials had a smooth action as it feels a bit more ‘premium’ and enjoyable to use, such as on the Tangent Element Kb, but the feedback from the clicks is probably more useful on reflection.
Overall the Stream Deck Plus looks great, the touch strip and dials have a nice feel to them and overall the whole device looks and feels well crafted. If you want to see some nicely lit macro close ups of everything, check out randomfrankp’s video review here.
An Upgraded Cable
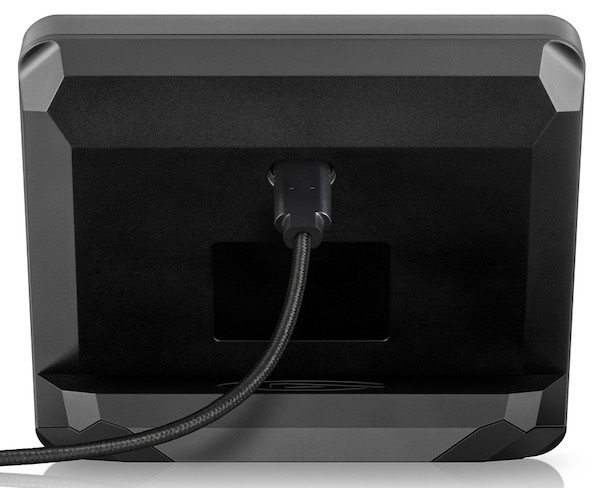
One improvement of the Stream Deck Mark 1 at least, is the detachable cable. This is a better design decision, compared to the permanent cable on the original Stream Deck, for a couple of reasons. Firstly, it makes it replaceable if it should break and secondly it makes it customisable – should you wish to run a longer, or much shorter cable.
The one in the box is about 1.5m long (60″), which is great if your computer is tucked away somewhere out of sight or below your desk, although if not, the long cable leads to a lot of cable cluttering the desk in a set up like mine. (As you can see from my images!) I’ll have to find a nice short cable to replace it with.
The braided cable that ships with the Stream Deck + feels nice and sturdy though, so it should last if you’re regularly transporting it around or using it in the rough and tumble of a production environment, say on a DIT cart.
System Requirements
You need to be running Windows 10 (64 bit) or Mac OS 10.15 or higher.
Setting up the Elgato Stream Deck +
In this article I’m going to focus on using the dials and touch strip as these are the new features on the Stream Deck Plus.
But if you’re totally new to setting up a Stream Deck, definitely check out my previous Stream Deck article and review here, which will guide you through setting up shortcut mappings and custom macros, managing profiles and includes some free custom profiles to download too.
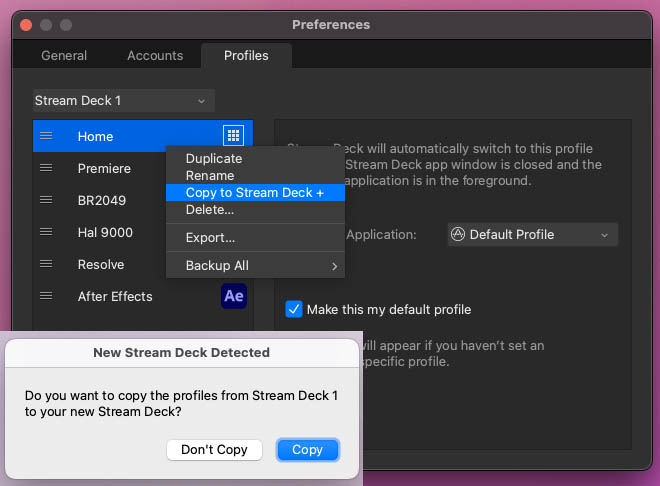
If you have an existing Stream Deck connected when you plug in the Stream Deck Plus it will ask you if you want to copy your existing profiles over. Or you can do this manually by right clicking on any profile and choosing ‘Copy to Stream Deck +’.
You can also copy and paste any existing button by selecting it in the mapper and using CMD+C / CMD+V to paste it wherever you like, even across devices.
The Touch Strip
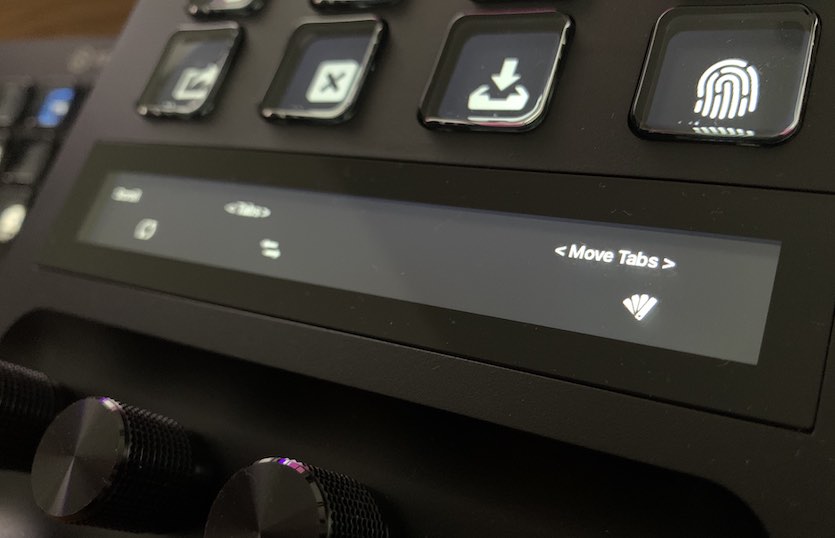
The new LCD touch strip looks great and both small text and icons are sharply displayed. It acts as both a label for the dials below but also a touch sensitive set of ‘buttons’ with one above each dial.
You can also swipe left and right on the entire display to navigate through different pages, so there’s no need to use up one of the 8 physical buttons above for navigation. This is a huge benefit compared to the Stream Deck which needs at least one or two buttons dedicated to moving through profiles and pages.
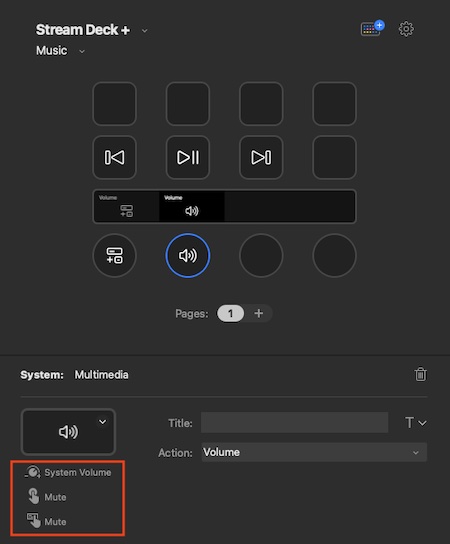
You can both touch the strip to activate a function related to the dial below or touch and hold for further functionality. For example, with a dial set to controlling volume, pressing the touch strip might toggle a mute action, while pressing and holding might reset the value of the dial.
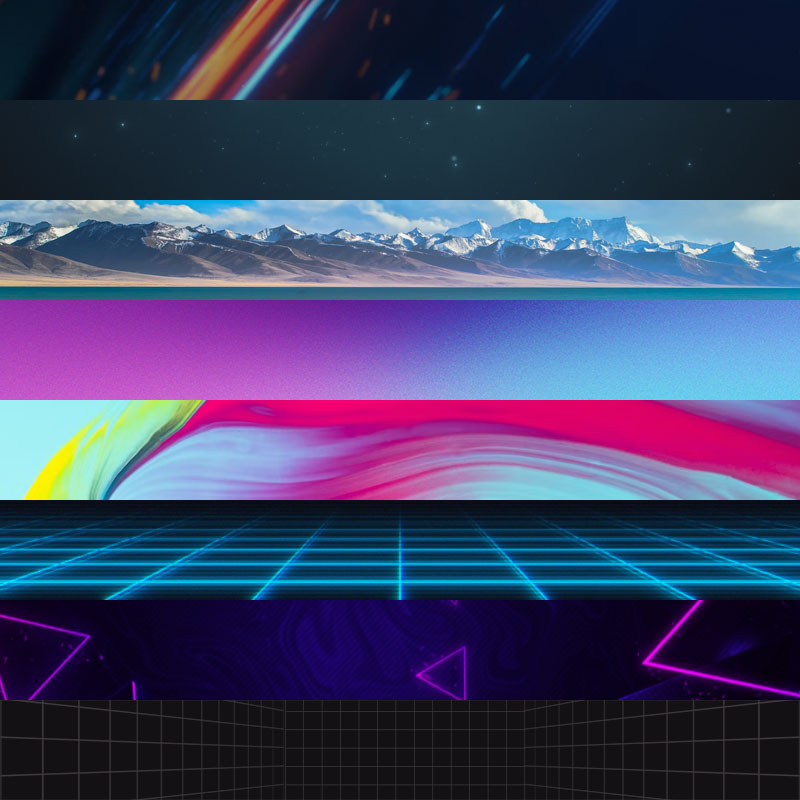
You can also customise the background of the entire strip or the individual button areas within it. The background library files are stored in:
- ~/Library/Application Support/com.elgato.StreamDeck/ (Mac)
- %appdata%\Elgato\StreamDeck\Plugins\com.elgato.StreamDeck\ (Windows)
These are 800 x 100 pixels, although you can use a selection of any larger image via the Stream Deck app.
You also have control over the brightness of the entire display by assigning the Stream Deck Brightness control to a dial. Somewhere between 60-80% worked well for my daylight edit suite set up.
But having discrete control over this would be a nice benefit to colourists or editors working in darker environments who might not want to be distracted by the brightness of the display and keys. You can however also control the brightness of the original Stream Deck via assigning two keys to ‘brighter’ or ‘darker’.
The Dials

The four dials all operate in the same way, with an infinite scroll and button push action.
Each can be assigned three different custom hot-key controls:
- Counter Clock Wise – E.g Zoom Out (CMD+–)
- Clock Wise – E.g. Zoom In (CMD+=)
- Push – E.g. Zoom to full timeline (Shift+z)
Where a built-in action exists, such as the Stream Deck Brightness control or Multimedia function these come with predefined actions that you can’t customise.
The SDK is soon to be publicly released to third party developers and I’m sure we’ll see a lot more actions and uses cases integrated into the dials in the coming months.
Dial Stacks – These are ‘folders’ for dials, and allow you to stack multiple commands onto a single dial. You then use the dial’s press function to circulate through the available options.
Tip – Just make all your dial’s dial stacks from the start! You’ll almost certainly end up wanting to add layers of controls and it saves you having to remove anything you’ve already mapped to a single control and then re-map it to the new dial stack.
Although, you can easily do this by pressing CMD+C on your existing shortcut, swap the dial to a dial stack and then press CMD+V to paste your preivous mapping into the new dial stack.
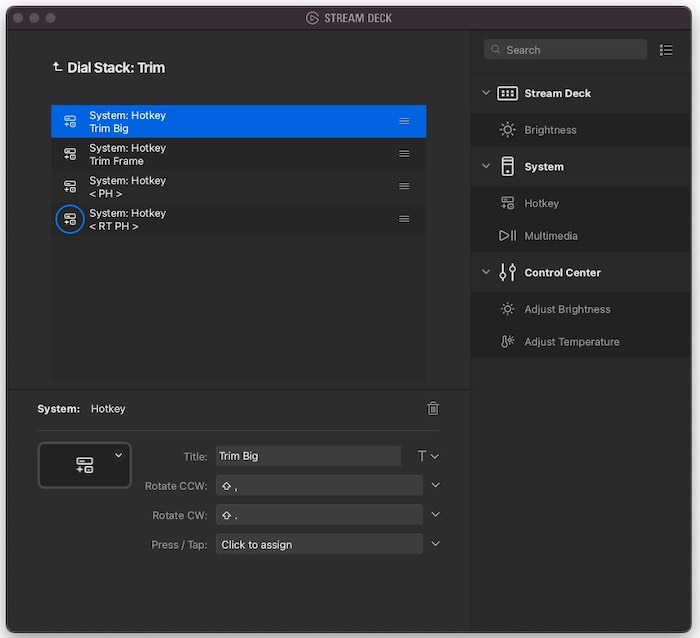
Here’s an example of a Dial Stack for my Premiere Pro trimming functions:
- Trim Big < start of clip | end of clip >
- Trim Frame by Frame < start of clip | end of clip >
- Trim to Playhead < start of clip | end of clip >
- Ripple Trim to Playhead < start of clip | end of clip >
I had toyed with assigning Undo to the button push function, but I also have an Undo/Redo dial assigned right now to blast backwards and forwards through my undo/redo queue.
The beauty of dial stacks combined with an updating LCD display enables you to create as many controls as you like, stack them into logical folders and not be restricted to only four actions on the four physical dials or having to memorise what you’ve set up.
The Best Icon Packs and Plugins for The Stream Deck+
It’s been a while since I’ve delved into the Stream Deck library itself and things have definitely improved since I last visited while setting up my original Stream Deck.
You can still create individual icons with Stream Deck’s online key creator, which works pretty well, but they now have an extensive library of both free and paid icon packs in a myriad of different styles and wide range of of applications.

To get to the Stream Deck Store, open the Configure Stream Deck app and then click on the little colourful mini-stream-deck-with-the-blue-plus icon, next to the Settings cog. It’s in the top right corner.
From here you can download collections of official and third-party plugins, icon packs, music cues and sound effects.
The reason to download the icon packs is to save yourself the trouble of creating your own bespoke ones and the plugins add direct functionality into a variety of different apps, for example OBS screen capture
The Best Stream Deck Plus Free Icon Packs and Plugins
Here are some of the free icon packs and plugins I’ve downloaded and enjoyed using:
- Icon Pack – Elgato – Entypo
- Icon Pack – Google – Material Icons
- Icon Pack – SideshowFX – Premiere Pro
- Icon Pack – SideshowFX – Final Cut Pro
- Icon Pack – SideshowFX – DaVinci Resolve
- Icon Pack – SideshowFX – After Effects
- Plugin – Elgato – CPU Usage
- Plugin – Elgato – Analog Clock
- Plugin – Fred Emmott – Audio Mute
- Plugin – Jarno Le Conte – App Switcher
- Plugin – Jarno Le Conte – Finder Tags
Plugins – Add programmed functionality, such as the ability to add Finder Tags in Mac OS or have a read out of your current CPU usage as a percentage.
Why it’s worth paying for Profiles – The free icon packs from SideShowFX feature around 70 individual icons that you can use when building your own Profiles from scratch, but when you buy an icon pack and profile set up from SideshowFX’s site, you get hundreds of pre-programmed keys and icons already set up and ready to go.
For example, their DaVinci Resolve Pack contains 1500 icons for 960+ pre-programmed keys across 9 unique profiles, each holding multiple pages. They have specific packs for each of the Stream Decks (15, 32 and Plus) and other devices as well.
Save yourself hours of time and effort all for $34.99!
The Best Stream Deck Plus Paid Icon Packs
I’m a big fan of SideshowFX’s paid packs because I’ve spent way too much time trying to build my own Profiles, with some success, but if you just want to get the most out of your device and save a ton of time organising a logical layout, creating comprehensible icons and mapping all of the keys (that’s a lot of work!) then just pay the small fee.
For example, if you want to be able to control the Lumetri colour grading controls inside of Adobe Premiere Pro, then you will need to purchase and install SideshowFX’s Adobe Premiere Pro Profiles v1.5 to do this.
SideshowFX’s documentation, customer support, and YouTube tutorials are all excellent, and I know from personal experience that Todd and the team are passionate about making creative professionals’ lives easier and more efficient. They really care a lot about what they offer!
Their packs often use default keyboard shortcuts, plus a ton of extra mappings or their own custom settings. Hence, you need to use their keyboard shortcut mapping in the installation process, which is just something to consider if you’re already running a deep bespoke set up.
- SideshowFX – Avid Media Composer Icons and Profile
- SideshowFX – Adobe Premiere Pro Icons and Profile
- SideshowFX – Final Cut Pro Icons and Profile
- SideshowFX – DaVinci Resolve Icon and Profile
- SideshowFX – Adobe After Effects Icon and Profile
In terms of paid plugins, I’ve not yet seen any on the Stream Deck Store, as everything that’s currently listed is free to install and use.
How does the Stream Deck + Compare to…
Stream Deck + Vs Original Stream Deck
Now that I own both an original Stream Deck and the new Stream Deck Plus, how do they compare?
As I mentioned before, I’m torn between appreciating the compact size of the original and valuing the new features of the Plus. I feel like I’m going to make use of both anyway, as my muscle memory is already fairly ingrained with the Stream Deck.
For the purposes of this article I had started by copying my existing profiles over to the Plus but I will slowly re-set the Plus to a different toolset and use them both for different things, across the same app.
The dials on the Stream Deck Plus do open up more useful actions that can be less satisfying to operate smoothly with buttons on the Stream Deck and I am hopeful that through the SDK and Elgato’s own developments they’ll work to deliver tighter integrations with my most used creative applications.
But that might be a waiting game worth playing, if you’d rather see what they deliver in reality rather than in hope, before you layout any cold hard cash.
If you could only choose one, which would I recommend?
Probably the Plus for the versatility, although if you’re using it to augment an existing control surface, say a Blackmagic or Tangent grading panel, then the 15 buttons of the Stream Deck might be more valuable.
Should you upgrade?
If you don’t have any Stream Decks just yet, then the Plus is a great place to start. Not only will you have 8 shortcut buttons but you’ll also have four dials to work with, which just adds a whole different dimension of tactile control.
The Touch Strip also makes navigation more intuitive and more efficient as you’re not using up keys to move through your Profile pages and is really appealing to look at!
Given that the Stream Deck Plus is only $50 more than the Stream Deck (£/$149 vs £/$199) there’s not a huge amount to sway you one way or the other on price.
But I feel like me trying to advice you whether or not it’s worth upgrading is a futile endeavour. If you already own a Stream Deck and are an enthusiastic user, you’ve probably already considered adding a second (or already have!) and are salivating at the idea of adding yet another device, this time with dials to your set up.
So do as you wish!
Stream Deck Plus + Vs Loupedeck CT
Given that I’ve owned a Loupedeck CT for a long time, you’d have thought I would be able to offer more insight into which one is better, but in all honesty while I originally set the Loupedeck CT up with some custom controls and started to explore what it can do, it has mostly sat on my desk unused, in comparison to my Stream Deck.
Somehow jabbing at the tactile and robust LCD keys of the Stream Deck, especially in Adobe Premiere Pro – where I spent most of my working day – just got programmed into my muscle memory in a way that I didn’t get to with the Loupedeck.
That said the Loupedeck CT is a beautifully crafted device and in some ways offers more than the Stream Deck Plus does. For example, it has 6 dials instead of 4, has the larger and smooth turning shuttle wheel in the centre, while it also has touch sensitive LCD buttons as well as the physical button arrays.
Through its API integrations it can also control some creative software more directly, such as sliders and colour grading controls in Adobe Premiere, which is something Elgato could build into the Stream Deck, but until now they’ve not really gone down this road.
You should also really put the Loupedeck CT on a stand to make it easier to use. And in comparison to the Stream Deck configuration software, Loupedeck’s wasn’t as easy to use when I first set mine up.
That said, the Loupedeck CT is twice the price of the Stream Deck Plus!
At £499 vs £199 I’m not sure you’re getting double the value from the Loupedeck CT, unless the API integrations make all the difference for you. Both are really nicely made and either will be able to speed up your workflow when customised to your specific needs and massaged into your muscle memory.
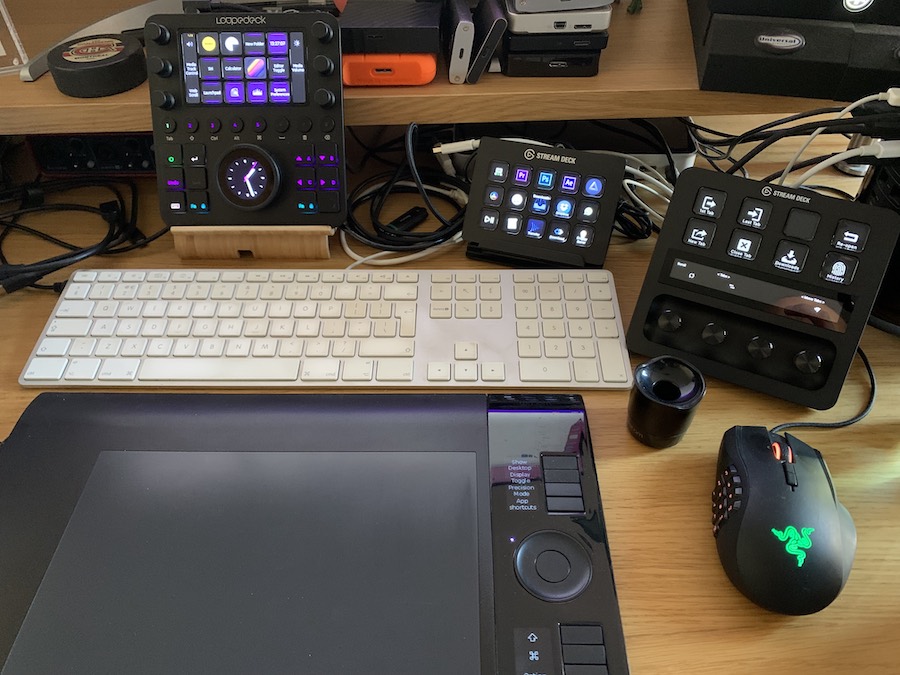
Placement Matters
Funnily enough, now that I’m writing this and looking at all three devices, as a left-handed Wacom user, I wonder if putting the Stream Decks to my right and the Loupedeck CT in front of me, also made a slight unconscious difference to how much I used them?
In that, it’s much easier for me to move my right-hand from the keyboard slightly over to the right and hit the Stream Deck than up and to the left to hit the Loupedeck CT. Maybe positioning on your desk matters more than I gave previous thought to it!
SideshowFX DaVinci Resolve Pro Pack for Stream Deck +
Todd from SideshowFX was kind enough to send me their DaVinci Resolve Stream Deck + pack to help me up and running with the device for this review.
It’s a huge pack illustrated by 1500 icons and containing 9 different profiles that connect together to give you a comprehensive 272 programmed keys and 47 rotary dial controls.
At only $34.99 it’s an absolute steal. Whatever your hourly rate is this is surely a huge saving compared to doing all this work yourself!
Everything is laid out logically and systematically making it easy to get going instantly with the control set – the learning curve is very gentle and Sideshow’s accompanying documentation is probably the best I’ve seen from a ‘third-party’ developer!
The 9 profiles in the pack include:
- Main home page
- Media Management – 4 pages
- Multicam – 3 pages
- Printer Lights – 3 pages
- Speed Editor – 3 pages (Emulating Speed Editor)
- Editing – 6 pages
- Grading – 7 pages (inc 8 preset node trees)
- Fairlight – 3 pages
- Fusion – 6 pages
It’s worth swiping through all of the pages to see what controls are mapped to the dials as sometimes the same set of controls are mapped to the dials for the first few pages and then change for the last page.
You have to do a small amount of profile ‘plumbing’ to connect the profiles together into a single navigable set, but this is very easy to do, takes about 2 minutes and again the documentation walks you through it clearly.
Build Preset Node Trees
One of the cool things about the pack are the 8 preset node trees, which you can watch build out in front of your eyes – this 18 node structure
As a quick aside, respected feature film colorist Walter Volpatto shares his rationale for working with a fixed node tree structure in this popular tutorial.
When you examine this inside of the Configure Stream Deck app you’ll see it’s constructed through 102 separate actions, which should give you plenty of inspiration as to how to build your own node tree presets.
Printer Lights
The printer light page delivers an accessible way of engaging with this historic way of grading. For some context there’s a helpful article over on LowePost.com which explains how and why to grade with Printer Lights in DaVinci Resolve.
One of the reasons for its popularity is that printer points move the signal in its entirety and alter the entire tonal range in the image. This way, we stay true to the way the original image was shot, and the result can be very clean and cinematic.
Being able to work with the dials to adjust the different Printer Light controls in specific increments and with multiple dials in tandem, is a really nice way to control your image and the profile set up in the pack makes this very quick to do.
A Quibble and a Quirk
My only quibble with the set up for the Stream Deck Plus is that there are no text labels on the icons for the dials, where as the button’s are all labelled for clarity, this means you’re left to decipher the dial’s likely function from the icon itself, which isn’t always successful.

But when you dig into the mapping, the title’s are there but the ‘show title’ options have been turned off for the dials, presumably due to a current limitation with the mapping software which doesn’t recognise spaces at the start of a title label or have a way to centre the text so that it doesn’t overlay on the icons Sideshow have included on the top left of each button and therefore look messy.
If you add a full stop and then some spaces you can get the titles to be displayed in the centre, look OK and make it much easier to use!
Final Thought – At just $34.99 for all of this, the Profile packs from Sideshow for DaVinci Resolve, or any other app, are an absolute bargain.
Coming Soon from SideshowFX – Use your Stream Deck + as a Grading Panel…
The team at SideshowFX are working on a way to make the Stream Deck + work in a way that mimics the way the Blackmagic Design panels do, by controlling the values of the parameters and not just activating shortcuts and macros in the way that the Profile pack does.
Exciting stuff!
Using the Stream Deck + with video editing software
In the video above I’ve tried to give you a quick sense of what it looks like to use all of these starter profiles that I created in Avid Media Composer, Final Cut Pro X and Adobe Premiere Pro. I left out DaVinci Resolve because you can easily see from SideshowFX’s extensive walk through everything the Stream Deck Plus can do in that regard.
Avid was the least responsive of all the apps on my system* and I’m not sure why that would be. Sometimes it would work perfectly and others there would be a large delay and then a bunch of actions would catch up.
Other shortcuts that it would make sense to add to the dials are nudging, slipping, increasing and decreasing clip volume, adjusting keyframe positions etc. The list is pretty much endless!
With some of these dial actions you might want to switch the clockwise vs counter-clockwise mappings depending on whether in your mind turning a dial to the left means you trim the left, or keep the left side of the clip.
Also every app does things differently, so rather than replicate all of the same controls across every app, I’ve also chosen a few shortcuts where the default mapping requires a multi-key tap dance to make it work.
*MC 21.6 on OSX Monterey 12.6.1
The most important thing to realise is that setting up your own Stream Deck plus to fit your preferred workflow takes a little bit of trial and error, as well as adjusting things to your own personal shortcut mappings.
And as you build your own over time, it is worth noting those moments when you’re doing the same repetitive task over and over (can you build a macro) or you’re having to hit a multi-key combination to activate a shortcut – can a finger stab a Stream Deck key quicker and with less disruption to your flow?
Final Cut Pro
- Add Color Board Effect and Switch to Color Inspector
- Frame Hold
- Break Apart Clip Items
- Global Effects Toggle On/Off
- Show Big Waveforms
- Insert gap
- Compound Clip
- 2 x Speed
- Dial Stack 1: JKL | < Next Edit > | < Frame > |
- Dial Stack 2: Zoom In/Out – Tap LCD: Zoom To Fit | Clip Height
- Dial Stack 3: Trim 10 frames | Trim Frame | Trim to Playhead
- Dial Stack 4: Undo/Redo
Add these to the default FCP Shortcuts as they’re unmapped
- Global effects toggle on /off = SHIFT+CMD+E
- Add Color Board Effect = CTRL+SHIFT+C
Adobe Premiere Pro
- New Sequence from Clip
- Close Gap
- Open Favourite Effects Folder
- Export Still
- Audio Gain
- Frame Hold
- Nest
- 2 x Speed
- Dial Stack 1: JKL | < Next Edit > | < Frame > |
- Dial Stack 2: Zoom In/Out – Tap LCD: Zoom To Fit | Audio Height
- Dial Stack 3: Trim 10 frames | Trim Frame | Trim to Playhead | Ripple Trim to PH (Tap LCD to Toggle Trim Mode)
- Dial Stack 4: Undo/Redo
Avid Media Composer
- Group Clips
- Last Active Bin Container
- Full Screen Playback
- Add Video Track
- Copy to Source Monitor
- Extend (to either In or Out point)
- Collapse Tracks
- Add Audio Track
- Dial Stack 1: JKL | < Next Edit > | < Frame > |
- Dial Stack 2: Zoom In/Out – Tap LCD: To Fit | Track Height (select track first)
- Dial Stack 3: Trim 10 frames | Trim Frame | Ripple Trim to PH
- Dial Stack 4: Undo/Redo
You need to set up top and tail editing in order to trim to playhead. I’ve set it up on the Shift+[ ] keys.
You’ll also need to map Collapse to a shortcut too. I chose SHIFT+C
I set Extend to SHIFT+X
Final Thoughts on Stream Deck +
Hopefully if you’ve read this far, you’ve read the whole article, which had some of my ‘review’ thoughts sprinkled throughout.
But if not here are some concluding and summarising thoughts on the Stream Deck Plus.
I love my original Stream Deck and it’s use has stood the test of time over the years. It’s simple, effective and useful. I have no doubt the Stream Deck Plus will be the same.
At $/£199 it’s half the price of the Loupedeck and only $50 more than the 15 key Stream Deck, so it feels ‘affordable’ – all things considered.
The addition of the rotary dials adds a lot of functionality, especially as direct controls and clever integrations are (hopefully) developed over the coming months, and also just through the smart use of keyboard shortcuts.
Whether the Stream Deck + is your first Stream Deck or your fourth, it’s a worth while addition to your edit or colour grading suite thanks to the addition of the dials which are ideal for controlling faders, colour grading controls, keyframe positions and more, in a way that a mouse/Wacom tablet isn’t necessarily as suited for.
The ability to adjust multiple dials at once is also an improvement over keyboard shortcuts or using a pointer, and again is very handy for anyone working with multiple faders or colour grading controls, as obvious examples.
Simple design choices like the detachable cable are a noticeable improvement both from a longevity stand point and from the point of view of cable management – something from my photos you can see I need to work on!
All in all, I’m a fan and I think you will be too.
I just hope Elgato double down on software integrations and improvements in the months ahead to really make this device sing.
Order yours on Amazon Global Stores
Download Free Stream Deck + Profiles
If you want to you can download the Stream Deck + profiles that I created for:
- Adobe Premiere Pro
- Avid Media Composer
- Apple Final Cut Pro
- Apple music
- Chrome browser
In this zipped bundle for free.
They’re only basic profiles created to test out the device and create the video in this post, but maybe they’ll help get you started!
If you already have a Stream Deck you can download my custom profiles for that here and read more about them in this extensive post too.
Hit the Comments
Got a thought, comment, suggestion or question – hit the comments and let me know.
Got a great Stream Deck Plus profile you’d like to share? – Hit the comments too!


Also in streamdeck app use the f13 to f24 (plus modifiers) Keys to add a bunch of new shortcuts
Get the Excalibur extension for Premiere, new level of interaction and shortcuts