If you want to learn how to become a professional colorist or are looking for ways to improve your already advanced colour grading capabilities, then these are the professional tools and training I would highly recommend you consider adding to your arsenal.
Lots of these are free, and some of the best ones on this list are paid.
It always astounds me how quickly people will spend money on new gear, shiny desk baubles and faster computers, but hesitate to spend the same kind of money on upgrading their wetware; improving their technical competence, artistic sensibilities, and software knowledge.
So don’t miss out on investing your money in tools or training that will actually bring a return on that investment!
That said, this post gets pretty very long, but stick with it – there’s some excellent stuff towards the end too!
If you enjoy this post you’ll love the original instalment too: Tools and Training for Professional Colorists.
Table of Contents
- New Features in DaVinci Resolve 18.6
- Mononodes DCTL Tools and Training
- Mixing Light – Every Free Insight Listed
- Colour Grading in Resolve with Stream Deck Plus
- Pre-order Ravengrade.com Training
- The Latest Lowepost Courses
- PixelTools Exposure Collection Pro
- Tangent Element Warp Engine
- Filmbox Film Emulation Update
- How to Use Film Grain Correctly in Resolve
- Make the Most of the New Features in DaVinci Resolve 18.5
- Updates to Free Official Training for DaVinci Resolve 18+
- Free Scripts and Codes for Film Colorists
New Features in DaVinci Resolve 18.6
DaVinci Resolve continues to deliver outstanding new features on a (very) regular basis. The release of DaVinci Resolve 18.6 saw two new major features:
- Blackmagic Camera App (Free on iPhone)
- Blackmagic Cloud Storage Workflow
YouTube colorist Waqas Qazi has put together a soup-to-nuts walkthrough of using Blackmagic Cloud Storage for the first time , in the video above.
Quick Start
Head over to cloud.blackmagicdesign.com to get a free 2G cloud storage account.
You can download a 19-page 18.6 New Features Guide here.
BMD CEO Grant Petty demos the Camera app here.
Blackmagic Cloud has been around for a while, which allowed you to sync your Cloud Projects, leveraging external storage such as Dropbox, but now it’s all built into BMD Cloud Storage for a minimum price of $15/month.
MrAlexTech does great job of demonstrating the (bigger) new features in Resolve 18.6, including Keyword Favourites (a bit like FCP) in the first 6 minutes of this video.
DaVinci Studio is (as ever) increasingly worth paying for
While both of these features are available in the free version of Resolve, the Studio version provides insane value at just $295 for a single payment that delivers a lifetime of updates.
Some of the Studio features worth paying for include: “multiple GPUs, 4K output, motion blur effects, temporal and spatial noise reduction, multiple AI-based tools, HDR tools, camera tracker, voice isolation, multiple Resolve FX, 3D stereoscopic tools and remote rendering.“
FYI: You can still get a bundle deal with DaVinci Resolve Studio and the Speed Editor console for just $100 more.
Mononodes – Color Shift, RGB Cross Talk & Hue Twist DCTL Review
I always love to see the tools that professional colorists create for themselves and their comrades in arms and Stefan Ringelschwandtner from Mononodes.com is creating some really valuable contributions to this world.
His store is a veritable sweet shop for colorists with DCTL plugins, Film Emulation Powergrades, Image enhancements such as film damage, light leaks, mattes and more. There are also numerous LUT packs including a trio of free downloads!
Color Shift DCTL V2
Stefan recently updated his Color Shift DCTL plugin, based on similar hue shift concepts from Baselight and other colour grading programs.
It delivers a much more filmic way to control saturation in your images compared to the native DaVinci Resolve tools. You can increase the density of each of the six colour ranges with the individual sliders, or globally with the Global Sat slider.
Conversely, you can use the ‘Deep’ control to only add saturation to the shadows and mid-tones, leaving the highlights mostly out of this process. The new Hue Range slider gives you greater control over how much of the neighbouring colours to each hue are included or excluded from your adjustment.
In the video above Stefan walks through how the plugin works and each of the controls in turn with numerous examples, but you can also download a free watermarked demo to try for yourself here.
Color Shift DCTL costs €199 and includes a lifetime of free updates.
The RGB Cross Talk DCTL is another of Stefan’s re-envisioning of DaVinci Resolve’s native tools, this time focusing on the RGB Mixer. The RGB Cross Talk plugin does some of the manual work required when balancing out adjustments in the RGB Mixer itself.
The RGB Crosstalk DCTL maintains the total colour value in each channel, meaning the sum of the colour contributions to each output channel always equals 1, regardless of how you adjust the sliders.
This feature provides precise control over the colour grading process, allowing modification of colour tones without disrupting the image’s overall colour balance.
Stefan Ringelschwandtner, Colorist
In the demo video above Stefan walks through creating a few different looks with the tool.
Stefan has also just released a really unique Hue Twist tool that allows you to literally add a twist to the hue value range, shifting, for example your blue shadows towards magenta while pushing your highlights in the opposite direction towards cyan.
Stefan also demonstrates using the Hue Twist tool to match the nuanced characteristics of certain film print stocks in the video above.
It’s a really interesting tool that can create some arresting results in just a few clicks. Again, there’s a free demo you can try here.
To install a DCTL
- Open Project Settings > Color Management > Lookup Tables > Open LUT Folder
- Drag the DCTL folder into the DaVinci Resolve LUT folder
- In DaVinci Resolve, click on “Update Lists”
- If the DCTL doesn’t appear in the DCTL node dropdown menu, restart Resolve
Mixing Light – Every Free Insight Listed
Mixing Light is a long-running colorist subscription community that has a huge archive of over 1000 unique insights into the art, craft, business and technique of colour grading and post production.
If you’re serious about improving your colour grading skills over the long-haul and connecting with a global community of like-minded professionals who are keen to share their wisdom then the annual subscription is well worth it.
While most of the content is behind the pay-wall there is a 7 day all-access free trial that you can sign up for to test-drive what Mixing Light has to offer, and I for one, really appreciate that no credit card is required, so there’s no fear of forgetting to cancel.
But I’ve also been curating and updating a list of every single free insight available on Mixing Light, which you can’t actually find anywhere else on the internet, so you can also rummage through this is you want a plethora of freebies.
I’ve recently started contributing to Mixing Light myself, focusing on editorial post production rather than colour grading – I’ll leave that to the real experts!
You can check out my initial insights here:
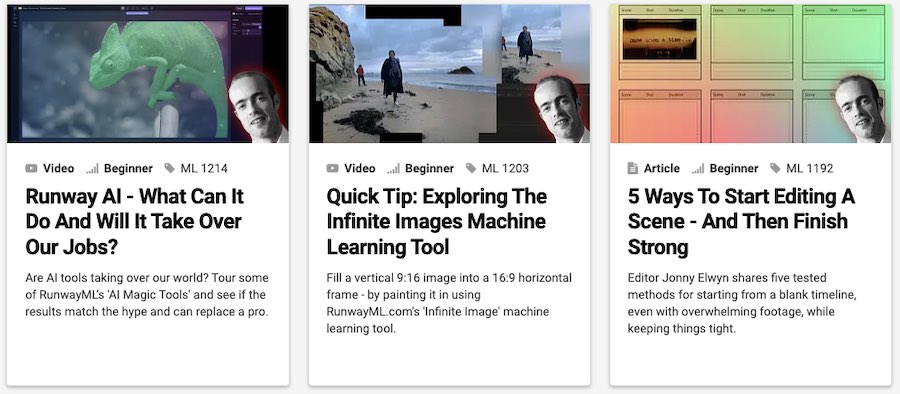
- (FREE) How to Edit Successfully with a Client in the Room
- Freelance Editing Tips – Setting up Premiere Pro from Scratch
- 5 Ways to Start Editing a Scene – And Then Finish Strong
- Quick Tip – Exploring the Infinite Images Machine Learning Tool
- Runway AI – What Can It Do and Will It Take Over Our Jobs?
I’ll be adding more over the next few months so do check in or let me know if there’s something you’d like to see covered!
Colour Grading in Resolve with the Stream Deck Plus
Can you use the new Stream Deck Plus as a colour grading control surface for DaVinci Resolve?
Yes and no.
If you want to have complete control within DaVinci Resolve with the Stream Deck Plus then you’ll need to invest in an affordable plugin to unlock that functionality.
Is that investment worth it?
Absolutely.
Without the plugin, you can set up the buttons and dials on your Stream Deck + to activate keyboard shortcuts inside DaVinci Resolve, which does let you use a good number of Resolve’s features but you’re limited to only those controls that have a keyboard shortcut mapping.
However, with Sideshowfx’s DaVinci Resolve Color Panel for Mac and Windows, you can turn your Stream Deck Plus into a fully fledged colour grading control panel for DaVinci Resolve!
This makes it a very affordable, portable and efficient colour grading control panel that editors, DITs and junior colorists will appreciate, whilst also enabling professional colorists with existing control panels and surfaces to expand their set up and add extra functionality.
That’s just the opening to my in-depth review, read the whole thing here.
Ravengrade and LowePost
Sister sites, Ravengrade.com and LowePost.com, have a wealth of tools and training that both beginner and veteran Post-production professionals can put to good use.
On LowePost.com, there is training on everything from compositing and VFX to sound design, motion graphics and a treasure trove of colour grading learning.
Ravengrade.com is solely focused on colour grading and the team behind it has built a suite of bespoke colour grading tools that highly experienced colorists will definitely appreciate.
Ravengrade’s tools include:
- Cinelook
- GradeLab (subtractive grading)
- Master Tone
- Khara Print Film Emulation LUTS
- Mira Powergrades (for Cinelook plugin)
- Cinema Looks (for Cinelook plugin)
- Studio Looks (Resolve Powergrades)
There are also two Davinci Resolve colour grading training series available for pre-order on Ravengrade, both aimed at anyone looking to become a colour grading professional:
- The Color Apprentice
- DaVinci Resolve Master Tips (from Feature Film grading)
LUTS – The Easy Way Into Professional Looks
While the three main tools, Cinelook, Gradelab and Master Tone, do have a learning curve to them, the Kharma and Studio Looks LUTs couldn’t be easier to use (just drag and drop) and offer an easy on-ramp to everything Ravengrade has to offer.
The 9-LUT Kharma film print emulation collection includes looks for emulating the following specific film stocks:
- Kodak Vision3 5203
- Kodachrome 5268
- Fuji Eterna
- Ektachrome 7294
- Fuji Eterna SR12
- Kodak Vision3 2383
- Eastman EXT Color Print Film 2386
- Fuji 3510
While the 15 LUT Studio Looks ($89) collection works out to just $6 a Look, these have been used on numerous Hollywood feature films and TV projects, including Annabelle Creation, and The Conjuring, as well as the documentary series Dear Mama, The Saga of 2Pac.
Built from the ground up for an ACES colour pipeline, you also get some instructions on best practices to get the most out of them from the collection’s professional colourist creators.
LowePost Latest Training
LowePost is one of my favourite places to improve my post-production skills because their short courses offer me a quick hit of concise, focused and practical insight.
They also have some amazing contributing colorists, visual effects artists and instructors.
For a much deeper dive into LowePost and everything it has to offer check out this previous post, Learn High End Finishing Techniques in DaVinci Resolve Fusion
When it comes to LowePost’s most recent additions these include:
- Grading Hollywood Trailers with Lynnette Duensing
- The Complexities of Color Grading with Cullen Kelly
- Creating dailies in Resolve and Avid round-tripping
A year’s membership to LowePost.com costs $85.
PixelTools Exposure Collection Pro
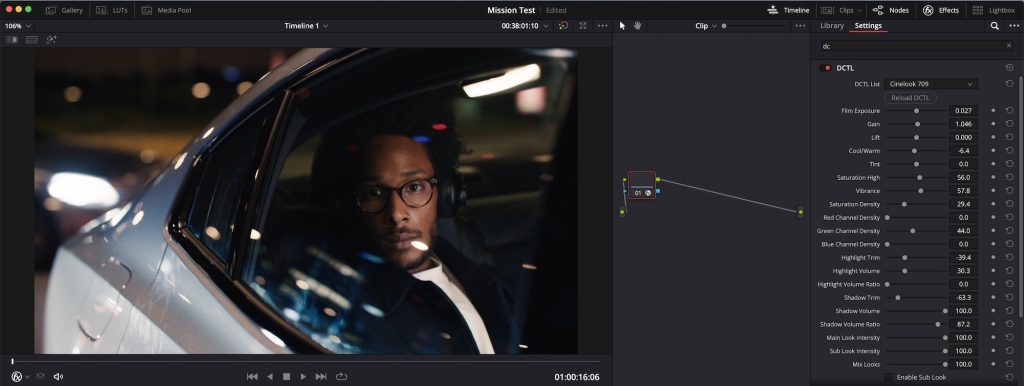
Professional colorist Jason Bowdach has created another highly-reviewed tool with his recent PixelTools Exposure Collection Pro.
This unique tool provides accurate exposure adjustment and works with both colour-managed and non-colour-managed workflows for most modern cameras, including ARRI, Canon, Panasonic, RED, Sony, Blackmagic Design.
This means it mimics an in-camera linear exposure to create very pleasing exposure adjustments on your footage.
The “fill” exposure lets you add additional exposure up to mid-grey, although one of the nicest features is the inclusion of the visual roll-off curve UI, which helps you adjust the fill exposure and see the exact curve it’s producing, simultaneously. You can also adjust how opaque this overlay is, which is another nice touch.
It’s worth noting that DCTLs do not work outside of the Studio version, so you’ll need to upgrade to be able to use these tools.
The Pro version of the Collection includes 17 PowerGrades (-4 Stops to +4 Stops in 1/2 stop increments) for each of the 13 supported Tone Curves, which you can also use as a starting point for working with the DCTL.
Having played with the Exposure Tool as an editor who grades (rather than as a professional colorist!), it feels like a ‘cheat’ to getting much nicer-looking exposure adjustments, than I would normally get from mashing the Lift Gamma Gain controls.
If you’re a professional colourist, I can only imagine that adding a custom tool like this to your workflow will speed things up immeasurably and make all those exposure adjustments a more pleasurable experience!
At the time of writing, the PixelsTools Exposure Collection was on sale, so maybe you will get lucky, and it still will be!
Check out PixelTools other DCTL tools and PowerGrade collections here.
Tangent Element Warp Engine
If you own a Tangent Element colour grading control panel you will definitely want to check out their new Warp Engine, which allows you to extend the functionality of their panels with DaVinci Resolve, namely through custom button assignments!
In fact, it allows you to “map any control, on any of their Tangent panels, to any application. This is done by building scripts which control mouse movements, clicks, scrolls and keypresses. Those scripts can then be assigned to knobs, trackerballs and buttons on the panels.“
This is a huge update that any existing Element owner would do well to take the time to create their own custom-designed mapping, given how massively it increases the custom functionality.
The Warp Engine is built into the updated Tangent Element Mapper software, and you can download some supporting documentation from the Tangent site here:
VideoVillage FilmBox – Film Emulation for Grown-Ups
Video Village are the makers of some excellent post-production tools including the highly respected colour science and LUT lab, Lattice, professional video player Screen (with some excellent metadata views) and ‘really good film emulation’ plugin Filmbox.
Filmbox is designed to replicate the entire photochemical system from film acquisition to negative development and film print production. The intention being that some aspects aren’t customisable to the nth degree but that you treat Filmbox as a largely fixed “format”, rather than a standard post plugin to simply tinker with endlessly.
The ultimate goal being that Filmbox “faithfully embodies the subtle and complex spatial, temporal, and photometric characteristics of photochemical imaging.”
At $999 for a perpetual license for budgets under $2.6 million, and $4,999 for anything with ‘Studio infrastructure’, this is your daddy’s film emulation plugin.
Built for DaVinci Resolve you can be as simplistic as defining the source camera format and the display colorspace and letting Filmbox do its thing. Or you can adjust one of (by my count) 40+ individual controls to really define the specifics of the overall film emulation.
These include:
- Halation
- Dust
- Grain
- Gate Weave
- Lab Push/pull process
- Split Tone
to name just six, but, for example, you also have individual control over the Cyan, Magenta and Yellow threshold and distance elements in the Gamut compression advanced settings section.
Your download also comes with a 21-page user manual that will readily answer common workflow questions, such as why you should work with Filmbox as you would a Show LUT, with “major grading operations taking place before the Filmbox node.“
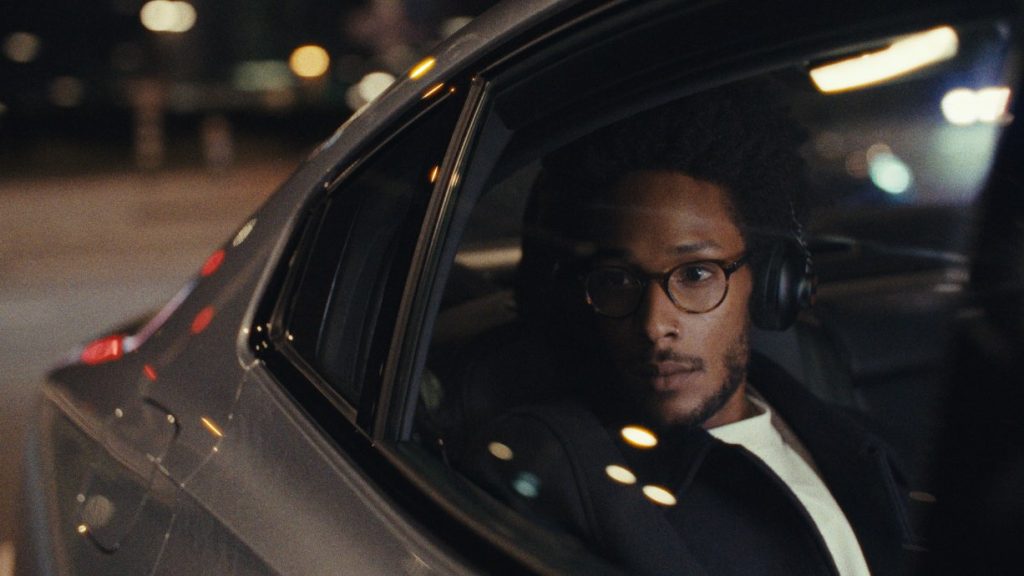
Playing with Filmbox for even just a few minutes, you can see how easy it is to craft lovely looking ‘cinematic’ (as-you-really-think-of-it) images in just a few clicks, with real ease. If I was a professional colorist with a deep understanding of film’s technical and aesthetic qualities, I’m confident I’d be in love.
You don’t even have to take my word for it, as you can download a free version of Filmbox for non-commercial use that doesn’t have a watermark or a time limit, but is limited in its feature set. Just scroll to the very bottom of this page to download it.
Filmbox Updates
If you’re a long-time Filmbox user, hopefully you will be aware that version 2.0 came out last month, with some important improvements and including support for Apple Log footage.
Earlier in 2023, another more major update (1.8) adjusted the print colour science in the Extended style option to “function more like a telecine-style transform that mimics the tonal and color characteristics of popular digital cinema display transforms more closely.
Compared to the previous version, it retains a neutral grey axis while exhibiting less warped hues, more neutral skin tones, less constrained gamut, and a has a black point that approaches zero.”
Thanks to Andrew Finch at Video Village for letting me have a play with Filmbox!
New Features in DaVinci Resolve 18.5
DaVinci Resolve 18.5 was a much bigger update than 18.6 and so I thought I’d briefly cover some of the major new features here too. These include AI-powered automatic transcription and subtitle creation, AI-powered audio classification and organisation (useful for large sound libraries) ResolveFX Relight and a lot more.
Again, many of these new tools and features are available in the Studio version, although you can test everything – with a watermark – in the free version.
DaVinci Resolve 18.5 New Features In-Depth
Kaur Hendrikson shares his perspective on the new features in Resolve 18.5 including DCTLs in LUTs, timeline level RCM, remote monitoring updates, Blackmagic Resolve Cloud Presentations and much more.
Resolve Transcription Tips and Tricks
Chadwick from the always excellent, Creative Video Tips, shares some tricks for his preferred transcriptive workflow in DaVinci Resolve 18.5. Well worth a watch if you want to edit faster with text.
Relight = Convincing day-for-night
Casey Faris does a great job of demonstrating how useful the new Relight effect is for creating convincing day-for-night transformations in DaVinci Resolve 18.5.
I’ve written more about creating convincing day-for-night looks in issue #348 of my free weekly newsletter Cut/daily. You can sign up right now in the box below!
Free Official Training for DaVinci Resolve
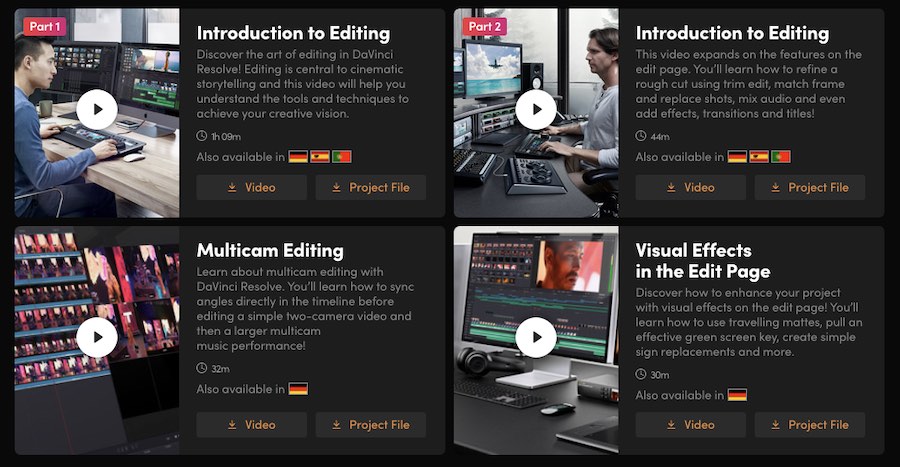
The official Blackmagic Design DaVinci Resolve training page has a ton of excellent resources to help you get started with, and ultimately master, this intensely sophisticated software.
Notably, BMD are working hard to provide multiple local translations of their core training materials, including six languages for their free, 430 page, Beginners Guide to DaVinci Resolve 18 ebook. Each book is also accompanied by free follow-along projects and media assets.
Here are some direct download links:
- The Beginner’s Guide to DaVinci Resolve 18
- The Editor’s Guide to DaVinci Resolve 18
- The Fairlight Audio Guide to DaVinci Resolve 18
- The Colorist Guide to DaVinci Resolve 18
- The Visual Effects Guide to DaVinci Resolve 18
17 Hours of Free Video Training
The official video training that’s on the Blackmagic Design site is still the same as the 17 hours of free training they released for version 17 of the software, which I delved into here.
Jump over to that article for a full breakdown of everything they have to offer.
How to Use Film Grain Correctly in DaVinci Resolve
Cullen Kelly shares his perspective on judiciously applying film grain to your grades in DaVinci Resolve in this 15 minute tutorial. If you’re not already subscribed to Cullen’s YouTube channel you’re missing a massive opportunity to learn from an expert instructor!
Adding film grain to your project not only has aesthetic benefits but it can also help you achieve a better-looking final image when you’re uploading to YouTube or other streaming sites, as the moving grain should make their compression algorithms work harder.
For more resources and information on working with film grain, including some excellent free downloads, check out these previous posts:
- Download Free Film Grain and Light Leaks
- Ravengrade – Professional Film Emulations & Tools
- Understanding Film Emulation with FilmConvert Nitrate
- Using LUTS to Match a Real Film Look
- Better Colour Grading in Black and White
- How to Make Two Different Cameras Match
- Tools and Training for Professional Film Colorists
Free Scripts and Codes for Film Colorists
Check out these tweets to download some free scripts and codes created by professional colorists.
If you want to learn to code your own DCTLs in DaVinci Resolve Stefan Ringelschwandtner has a course for that, which you can watch the intro video for below:
More Resources for Professional Colorists
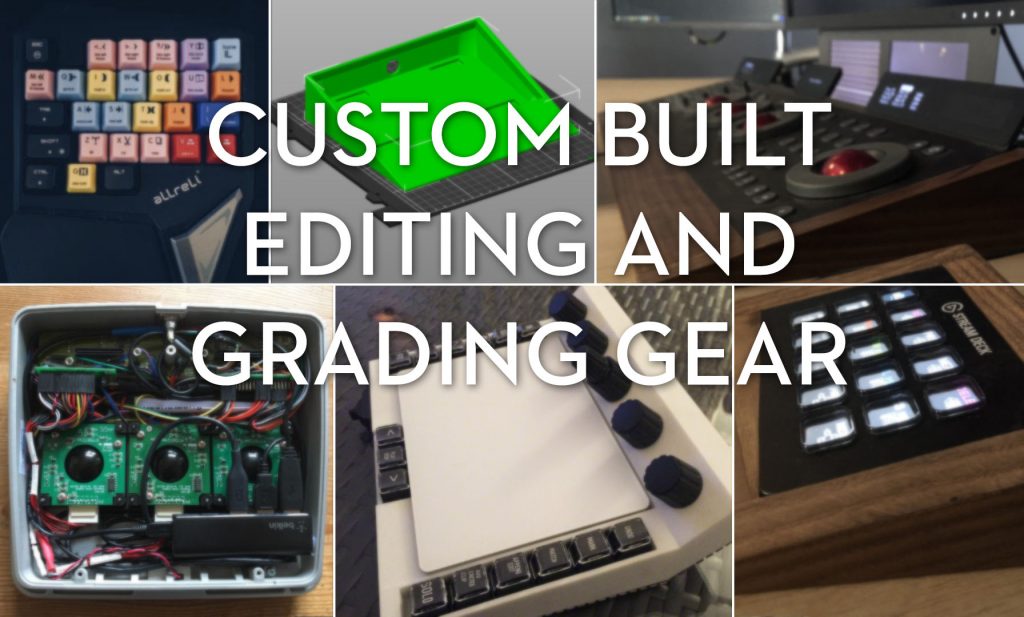
Check out these other articles for a huge range of further resources for professional colorists and editors who grade. There are tons of free and paid tools, plugings, PowerGrades, LUTs, expert training, and informative resources.
There’s even some cool hardware to help spruce up your suite.