
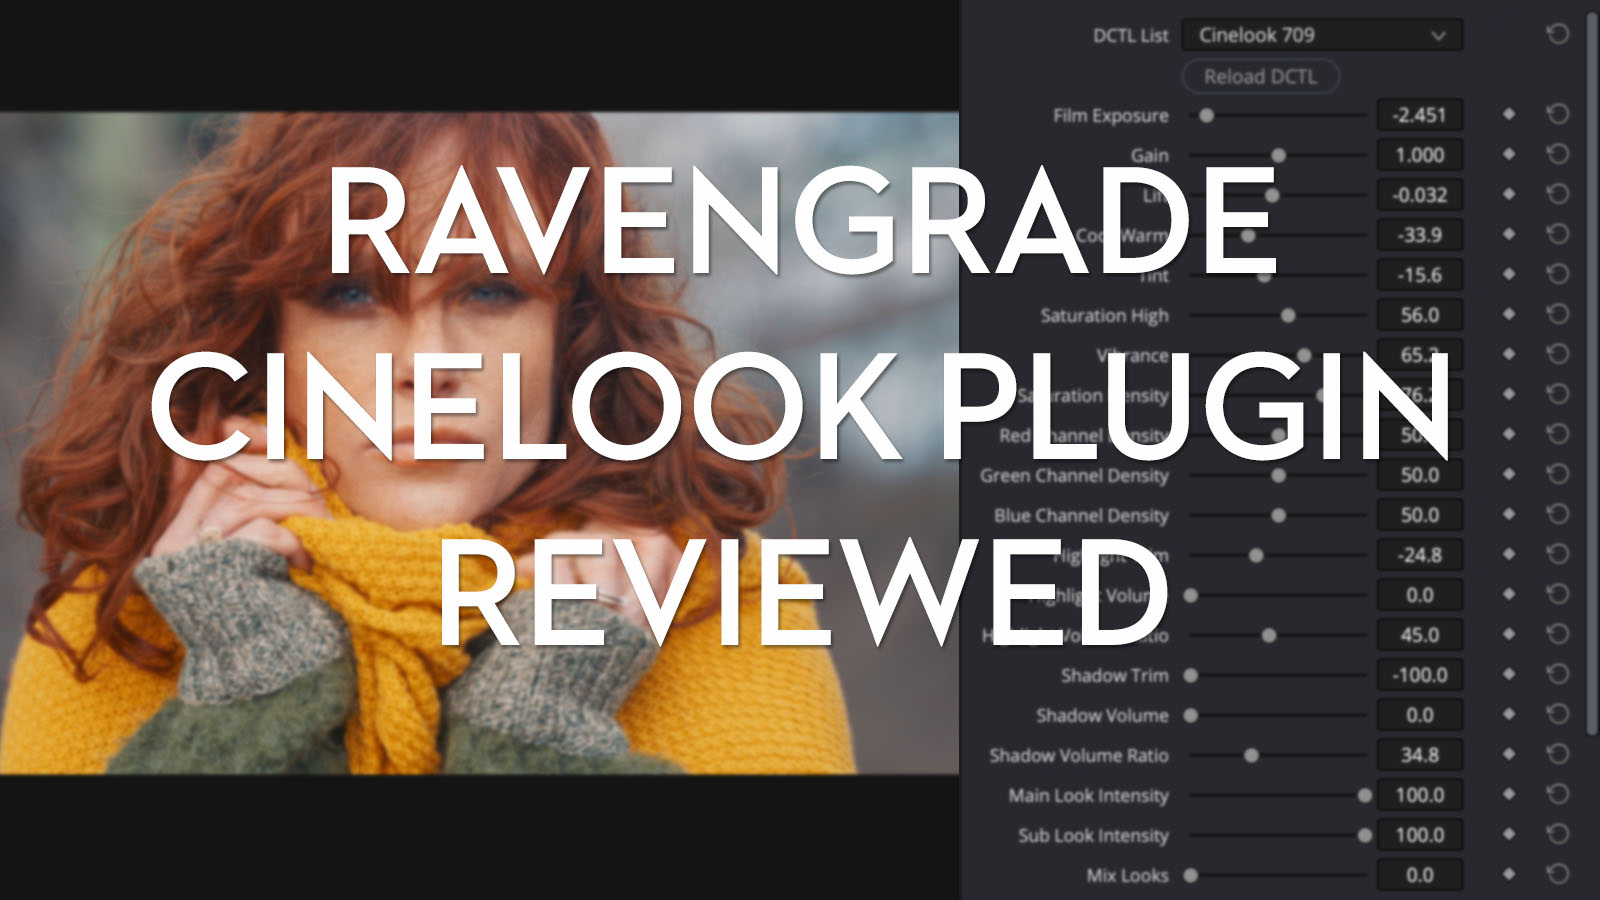
Ravengrade Reviewed – Pro Grading Tools for Resolve
They say in business you should always scratch your own itch. Create products and services that solve the problems you have.
That’s what a group of professional colorists and colour scientists have done by creating Ravegrade.com and the plugins and tools that have emerged from their collaboration.
What they’ve created is aimed at squarely at other professional colorists, DITs and editors who care about fine-tuning their grade with exacting precision and having access to a technically rich feature set of parameters to precisely adjust every aspect of their image.
Latest Update – December 2022

Since Ravengrade’s latest addition, a set of 9 meticulously crafted film emulation Kharma LUTS, launched they have apparently become instantly popular.
The 9 Kharma LUTs are generated with true film spectral and colorimetry data from specific film stocks and emulates:
Ravengrade.com
Kodak Vision3 5203
Kodachrome 5268
Fuji Eterna
Ektachrome 7294
Fuji Eterna SR12
Kodak Vision3 2383
Eastman EXT Color Print Film 2386
and Fuji 3510.
Created in close interaction with the industry and renowned image scientists.
Check them out for yourself at Ravengrade.com
Update – October 2022 – Ravengrade and LowePost have restructured to bring all of the colour grading masterclasses and pro training over to Ravengrade. While LowePost will continue to develop training on other aspects of Post Production.
Ravengrade’s pricing has also been simplified with two new subscription tiers, with Ravengrade complete offering even better value than before!
Here is a TLDR version of everything Ravengrade has to offer, before I dive into the details and share my thoughts on working with the CineLook plugin.
After that Cullen Kelly will walk you through how to set up the CineLook plugin and what each of the 20 individual controls does, plus I also interviewed Stig Olsen from LowePost.com, the ringleader behind Ravengrade, for some insider insights!
What is Ravengrade.com?
It is a development house for professional grade colour grading tools and training for DaVinci Resolve created by some of the hardest working and smartest colour science minds in the business, including…
- Mitch Bogdanowicz – Oscar winning Colour Scientist
- Juan I. Cabrera – Senior Colorist, Lightbender
- John Daro – Senior Colorist Warner Bros.
- Douglas Delaney – Senior Colorist, Picture Shop LA
- Florian Utsi Martin – Color Scientist & Colorist, ARRI
- Mark Todd Osborne – Senior Colorist, MTO Hollywood
- Bianca Rudolph – Senior Colorist, ARRI
What do you get?
In this review I will be focusing on the main CineLook plugin but Ravengrade currently offers the following tools, training and masterclasses:
Tools
- CineLook – Plugin with 18 looks with 20 adjustable grading tools, for Rec.709/ACES&RCM
- Daro Cinema Looks – Plugin with 14 looks for Rec.709/ACES& RCM
- MIRA – 20 PowerGrades for Resolve built on the CineLook Plugin (required)
- Master Tone – Plugin with specific tone curve adjustments
Masterclasses
- Feature Film Grading – Mark Todd Osbourne
- Grading the TV show Suits – Chris Jacobsen
- Grading Hollywood Trailers – Lynette Duensing
- Basic Look Creation – John Daro
- Commercial Look Development – Derek Hansen
- Fixed Node Structures – Walter Volpatto
- The Art and Craft of Grading – Douglas Delaney
Training
- Pro Grading in DaVinci Resolve – Kevin P. McAuliffe
- Look Development in DaVinci Resolve – Jason Bowdach
- Color Management in DaVinci Resolve – Lee Lanier
- RED Colour Science in DaVinci Resolve – Kevin P. McAuliffe
How much does it cost?
Ravengrade now offers an annual subscription for just the training (including footage and project files) at $79/year or access to everything, all the tools and all training for just $199/year.
This includes upcoming tools such as the Gradelab subtractive colour plugin.
This is actually really great value, as it is much cheaper than when the site first launched and includes the expert masterclass series from some of the best colorists around!
Is it worth it?
YES. If you want to control your images with a level of complexity, nuance and artistic freedom that the CineLook plugin makes far more easily accessible for mere grading mortals like myself, than it otherwise would be.
It’s also worth it if you want to support the development of this level of toolset, designed by professional colorists with other professional colorists in mind. When you sign up to Ravengrade Complete you’ll also have access to upcoming tools added during the course of your subscription.
If you’re not spending a lot of your time colour grading, or don’t care about exerting total dominion over every detail of your images then CineLook might not be for you.
At $199 for access to everything, it is still an affordable option for regular ol’ editors like me, but for anyone who is colour grading day in and day out, Ravengrade’s tools seems like an easy win that will rapidly repay the price of admission by impressing your clients with your visual dexterity and finesse.
FYI – You’ll need DaVinci Resolve Studio to run the CineLook and MIRA plugins.
Why I used Stock Footage From ArtGrid.io

I downloaded some royalty free stock footage to use while testing and reviewing the tools.
Artgrid.io is my go-to stock footage site and, in this case, one of the really useful things is that you can download a LOG version of most of the shots and see what camera it was shot on, which makes setting up your grade correctly far easier than endlessly guessing!
Here’s my review of The Best High-End Royalty Free Stock Footage Sites which includes a link to get two extra months free with Artlist Max and discount codes for other sites too!
Update 2023 – Artlist Max now bundles royalty-free production music, stock footage, sound effects, motion graphics templates and plugins into one affordable mega bundle. You can get 2 months free (worth $80+) with this unique link and save another $100/year compared to the individual Artgrid.io, Artlist.io and MotionArray subscriptions.
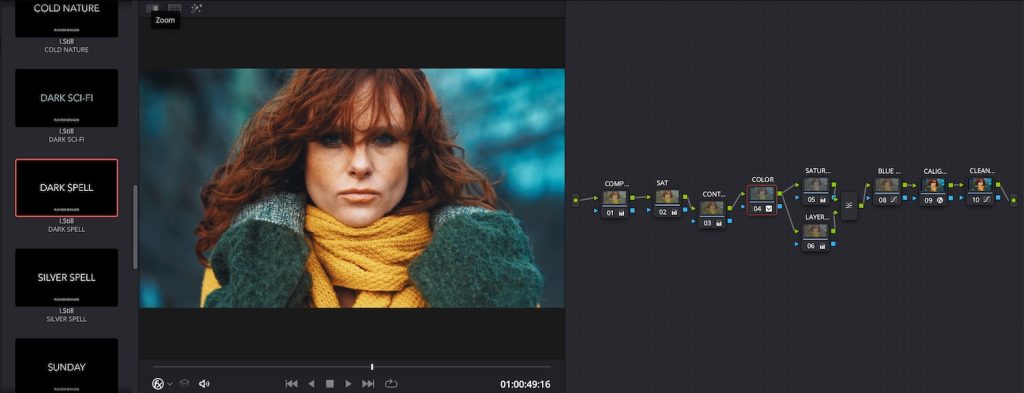
Ravengrade CineLook Plugin Reviewed
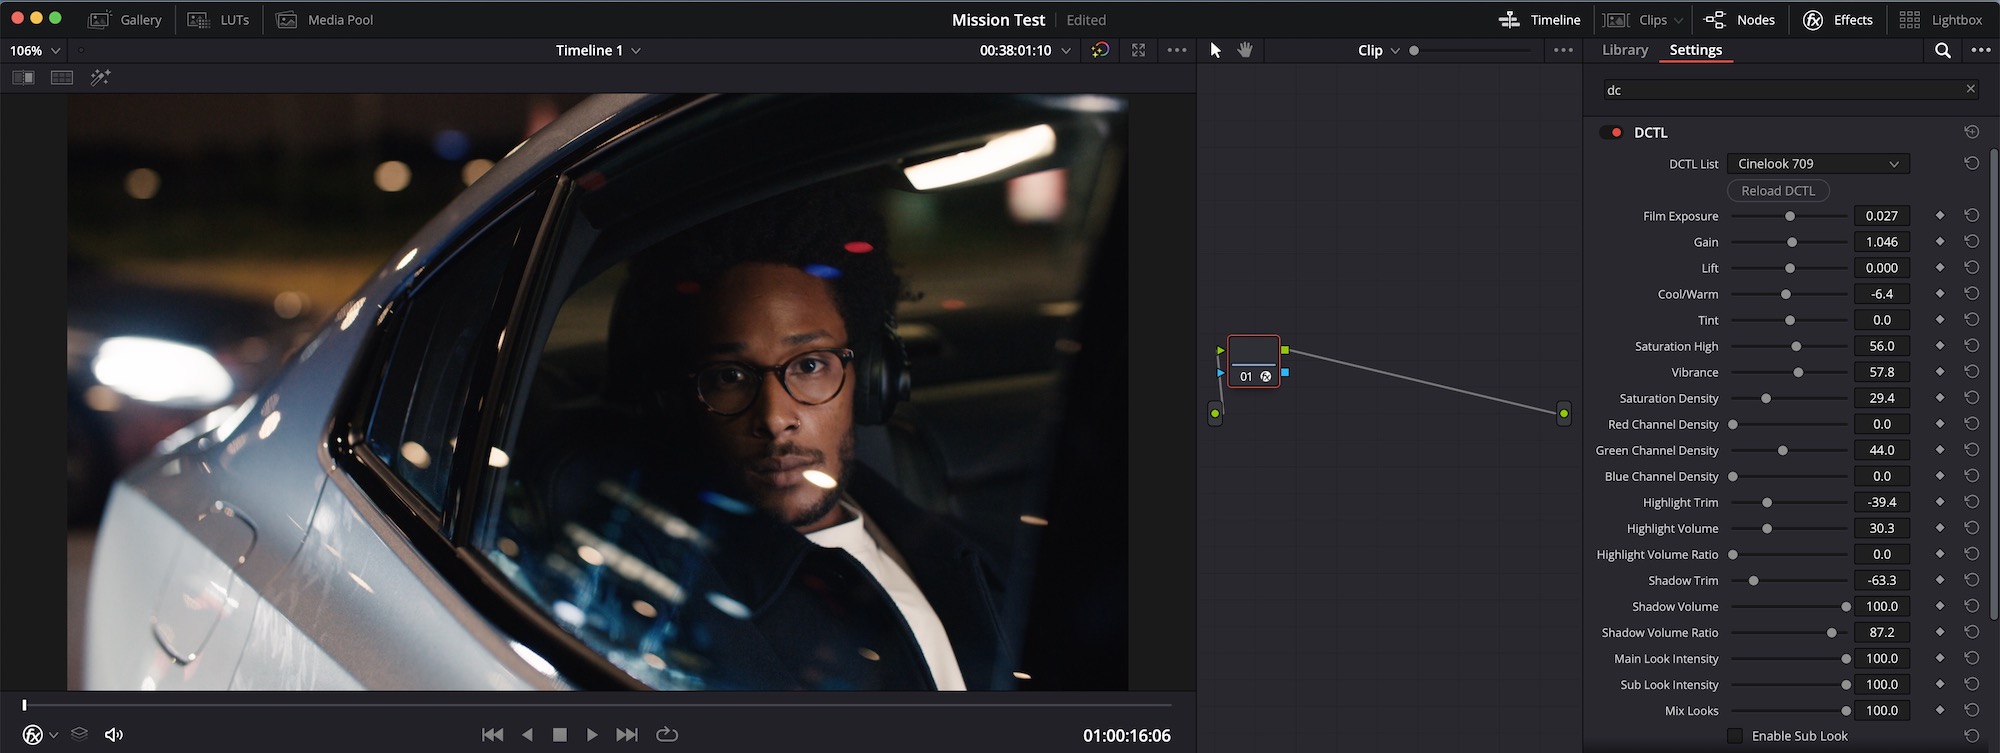
The CineLook plugin from Ravengrade.com runs through the DCTL architecture in Resolve. DCTL stands for DaVinci Custom Transform Language, which allows you to effectively create custom tools by allowing you to adjust your image in any way you choose to code.
Either way, the CineLook plugin is easy to install in a couple of clicks.
It’s also really easy to use. After adding the DCTL Effect to a node, you can just throw it on and start adjusting things to see what they do.
And because you have 18 interesting looks to start working with, the majority of the heavy lifting has been done for you, in terms of delivering instant results.
But, given the depth and interoperability of the sliders, it is well worth watching the tutorial below from Cullen Kelly on how everything works and what it’s designed to do.
CineLook is a Swiss watch of colour grading plugins for Resolve, as it is designed for a higher level of technical competence and with a more nuanced professional feature set compared to other plugins I’ve tested over the years.
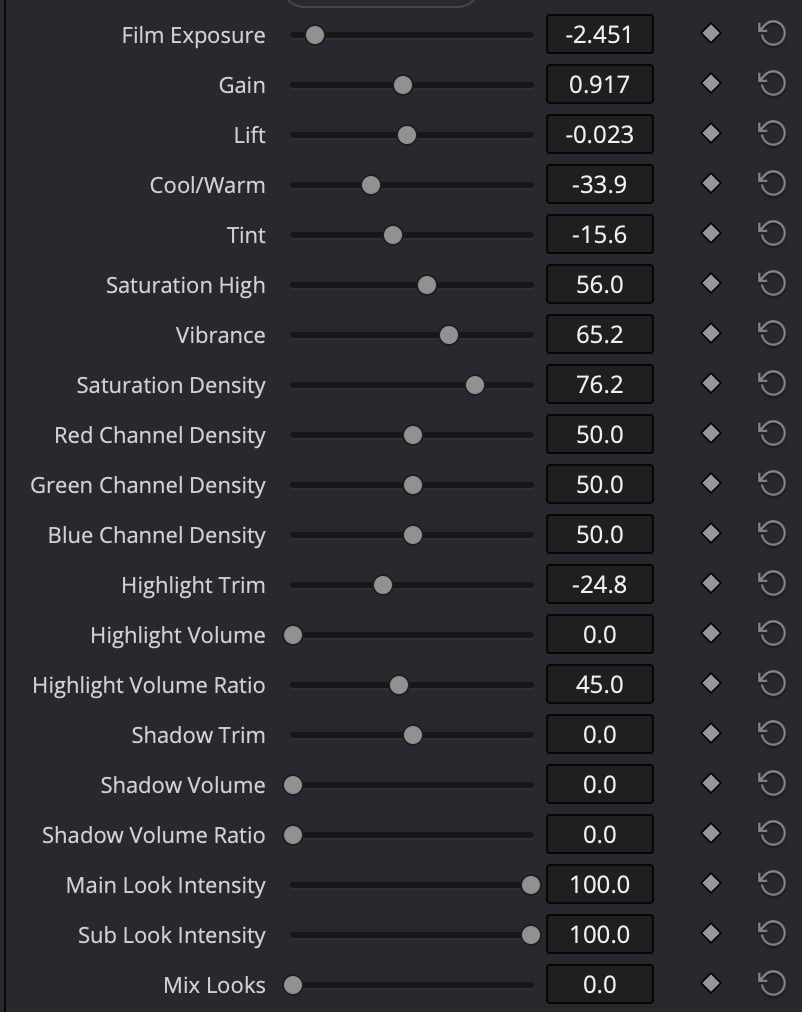
For example, the Exposure slider works photometrically and is thus measured in camera stops.
There are six separate sliders for shaping the saturation in your image alone.
You have the option to include a sub look in your grade with the option to mix between the two looks and individually control the intensity of each look in that blend.
The level of control and finesse that the CineLook plugin empowers you with, and how easy it is to use, feels above and beyond other similar tools that I’ve encountered.
How does it handle?
Even on my 2017 15″ MacBook Pro, running the DaVinci Resolve Studio 18 beta, the controls were extremely responsive and very fluid.
Some of the tools are very targeted by design, so if you’re not clued up on what they’re designed to do (again watch the tutorial below!) then you might not notice the subtly of their adjustments at first.
Having not graded with channel separation much before, the RGB channel density sliders are well worth playing with to make various parts of your image really stand out. Check out the CineLook in Action section below for a good demo of this.
Cheap LUTs can break your images
One of the concerns with buying random LUTs and Look packs from the internet is that you don’t really know what they are doing under the hood, or whether they’ve been designed in such a way as to not break your images.
Ravengrade’s FAQ page addresses this problem head on:
Will I see artifacting or clipping with these looks?
No. Every technical component of the looks are shaped by colour scientists to ensure the image does not quantise, clip or clamp, and the looks are tested against every valid possible input colour. As long as the colour space characteristics of your image align with the colour space you select within the tool, you’ll never see any breakage.
Final Thoughts on CineLook
If I were a professional colorist looking to appear more competent than I am, I would snap up CineLook a heartbeat.
The 18 pre-built looks are easily customisable and give you a solid launchpad from which to dial in the details of how your image looks; from the subtle roll off of your highlights to adding some volume to your shadows and crafting the density of your colours in between – all with the simple drag of a slider.
I would also want to be getting in on the ground floor of the development of exciting new tools like this because this is surely just the beginning of what Ravengrade has to offer.
Check out CineLook for yourself at Ravengrade.com.
How to use the CineLook Plugin
This excellent 10 minute tutorial from freelance colorist and colour scientist Cullen Kelly will guide you through how to use the CineLook plugin and explore some of the technical nuances designed into it.
You can also read through the official installation guide here and the official explanation of each slider here too.
But here are the basic steps and a short overview of what each slider does:
#1 – Set your Project Settings to DaVinci YRGB as CineLook will handle the colour management.
- Cog at bottom Right > Colour Management > DaVinci YRGB
#2 – Add the DCTL Effect to a node. Select the Colour Management version you need.
- Resolve Color FX > DCTL > Cinelook 709|Cinelook ACES|Cinelook RCM
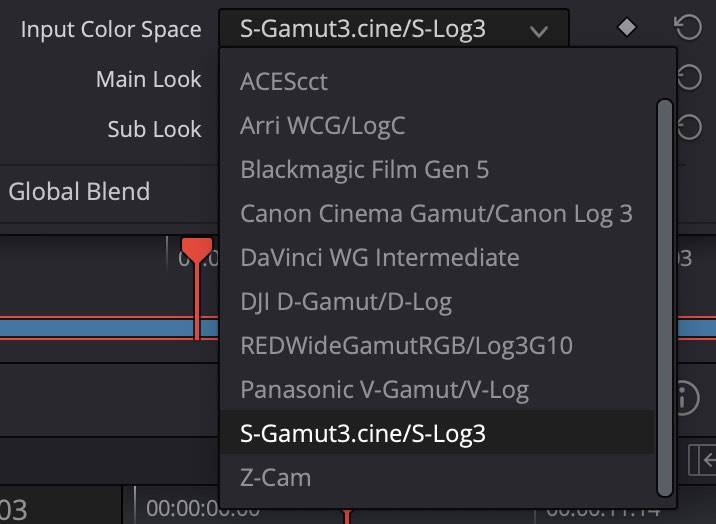
#3 – Jump down to the bottom settings of the plugin list and set your Input Colour Space:
#4 – Set your Main Look
- 18 to choose from with exotic sounding names.
#5 – Set and enable a Sub look if you wish
- The same 18 to choose from to endlessly combine looks
#6 – Tailor the blend between the two looks using the Mix Looks slider.
- At 0 (Left) only the main look will show through. At 100 (Right) only the sub look will be seen and at 50 there will be a 50% blend of the two.
#7 – You can control the Intensity of each look individually with the Main Look Intensity and Sub Look Intensity sliders.
Now for what each slider does…
Exposure
- Film Exposure – “Works Photometrically” measured in Stops
- Gain – Same as Resolve, control top end contrast in broad way
- Lift – Broadly manipulate the bottom of the image
Colour Temperature
- Cool/Warm – “Preferential colour temperature, sweetened to prioritise skin tones“
- Tint – Companion to Cool/Warm slider “Adjusting our green channel inside of a linear tone curve.“
Saturation
- Saturation High – “How much saturation introduced into the upper luminance ranges.“
- Vibrance – “How much saturation in the bottom portion of our tone scale.“
- Saturation Density – “How dark or bright colours are as we saturate them. Allowing me to give my higher saturations a more subtractive or filmic quality as i move from left to right.”
- Red Channel Density – Same as Saturation Density but per colour channel.
- Green Channel Density – Same as Saturation Density but per colour channel.
- Blue Channel Density – Same as Saturation Density but per colour channel.
Shadow and Highlight Controls
- Highlight Trim – Pull in or stretch out just the peak highlights
- Highlight Volume – Decrease contrast in highlights. “Create a feeling of volume or thickness in that area.“
- Highlight Volume Ratio – How much of that contrast comes from Lift (Left) vs Gain (Right).
- Shadow Trim – Black point comes up in targeted way.
- Shadow Volume – Mirror of the same Highlight settings above.
- Shadow Volume Ratio – Mirror of the same Highlight settings above.
See CineLook in Action
Filmic Colours with Channel Density – This one minute promo video demonstrates quite nicely how the channel density sliders can be used to manipulate your image to “bring whatever you want to prioritise to the forefront.“
Highlight Trim and Volume Controls
Cullen describes some of the benefits of these fine grain controls:
Combining these controls can reduce sharp edges in the highlight region and give the image a more painterly feel, in this example we use the highlight trim to reduce the dynamic range and bend the highlights. This instantly decreases the sharpness and gives a softer transition from the mid-tones to the highlights.
Cullen Kelly, Colorist
Inside Ravengrade.com – Pro Colorists Creating for Pro Colorists
Stig Olsen, co-founder of LowePost.com and mastermind behind Ravengrade.com was kind enough to answer a few of my questions over email.
What was your goal with Ravengrade?
Our goal with Ravengrade was not to create a single tool. Ravengrade is the home of several plugins and tools that brings advanced colour science technology, accurately emulated film print stocks and unique grading tools to the global colorist community.
Why are the looks in Ravengrades’ Cinelook Plugin and Daro Cinema Looks technically better than LUTs?
Every component of the looks are shaped by colour scientists to ensure the image does not clip, clamp or quantise.
The looks support floating point values which includes negatives and values over zero, and is tested against every valid possible input colour. Additionally, the Ravengrade plugins have built-in colour management that aligns the space characteristics of your image with each of the looks.
Have these tools been used on any big budget productions?
Kchrome is a non-empirical Kodachrome emulation that John Daro created for a Netflix show at Warner Bros.
Niran has been used by Mark Todd Osborne on several feature films and lately as a Show LUT on a Hollywood production starring Mel Gibson.
Onyx is a Kodak print emulation created by Mitch Bogdanowicz that has been used on countless high-end productions the last few years, and we have an empirical 80’s Fuji emulation, printed to Vision 3 that is the base of a large production starting later this month.
There is pretty much a look for every type of project included in the collection, and each look works as a starting point that can be adjusted to taste.

Is it possible to dial in these looks manually in Resolve?
Most of the looks are based on true film colorimetry data with complex color distortions that can’t be matched manually with simple color manipulation in a color grading software such as DaVinci Resolve.
Additionally, the built-in color management makes the looks work properly with all industry standard cameras, working spaces and display spaces.
What is MIRA from Ravengrade?
MIRA PowerGrades is a collection of PowerGrades for DaVinci Resolve users, designed to make images feel more cinematic.
They include node trees with custom corrections created by a variety of renowned colorists and everything is built under colour space transforms and film prints from Ravengrade’s Cinelook Plugin, which is applied at the end of each node tree.
Normally, a colorist have an output transform at the end of the node stack. It could be one of Resolve’s film emulation LUTs, the Arri LUT, Sony LUT, a pure film print emulation or a different output transform.
So, you work on the first nodes, and run everything through the CineLook transform on the last node.


[…] I’ve reviewed some of Ravengrade’s colour grading tools in detail here. […]
Thanks for the article.
Re
… CineLook is a Swiss watch of colour grading plugins for Resolve …
Do you mean – Swiss Army Knife?
No, a Swiss watch – precisely and perfectly made!