Vital Post Production Tools for Post Pros
- Essential tools for film editors, colorists and DITs
- Useful timesaving plugins for Adobe Premiere and FCPX
- Inside Assimilate’s newest tool
As a film editor having access to all of the best tools to make your post production life easier can be a daunting task. Not only do you have to stay up to date with at least one video editing software’s core capabilities you also need to keep a mental Swiss army knife of applications to hand, to tackle various parts of your post production workflow.
In this post I’ve brought together a collection of tools that I think will be of real benefit to editors, colorists and DITs working on all kinds of projects. Some of these I’ve tried and tested myself, others I’ve come across online and tucked away for the future, others have gotten in touch through the blog.
This article includes the following apps:
- Assimilate SCRATCH Play Pro
- Hedge for Mac & Windows
- Gpanel & PDF Viewer
- Closed Caption Tools
- Building a Hackintosh for Editing
- Filestage Review and Approval
- Plugins for FCPX Editors
- Kollaborate Workflows
Regardless of their origin, these tools might help you get your work done with much less hassle, time and headaches and hopefully get you home sooner!
Assimilate SCRATCH Play Pro
SCRATCH Play Pro is essentially a stripped down version of the hugely featured Assimilate SCRATCH 9 (check out my beginner’s guide to that, here) which means if you’re familiar with SCRATCH you’ll be right at home, or if not by using Play Pro you’ve got a foothold in the other direction.
Check out the short video above to get a succinct overview of how powerful this Player really is.
Key features include:
- Play almost any camera file format, including raw files
- Render out true Apple licensed Pro Res files on Windows PC
- Encode high quality, low file-size H.264 renders in up to 8K resolution and 10-bit
- Encode H.265 with a licensed encoder from BeamR, in up to 12-bit
- Play files via SDI-Output
- Export HDR-report, DIT-report, ALE, LUTs (in all sizes and depths) and CDLs
Of all of these features the Pro Res on Windows encoding seems to be getting the most attention.
Here’s how colorist and Mixing Light Founder, Patrick Inhofer described it in his most recent newsletter (which you should sign up for – it’s free!)
Brilliant. A powerful, inexpensive professional media player that serves as an introduction to the Scratch universe. AND – ProRes encoding on Windows. Grab it before Apple decides to pull the Windows licensing when they figure out Resolve and Premiere Users are using it to replace ageing MacPros serving this transcoding duty.
At $20/month SCRATCH Play Pro is an additional expense if you’re just using it to view your files, but if you think of it more like SCRATCH Encoder Pro then it’s pretty much a bargain, especially given the quality of the outputs Assimilate say they can deliver for Pro Res, H.264 and H.265 files.
How to use Assimilate SCRATCH Pro Play for the first time
Like all Assimilate SCRATCH products you can download a free trial to give it a go for yourself, before you lay out any cash. (Click here to do that.)
There’s one thing to note when installing it, which confused me at first. When you download the installer it looks like it’s installing SCRATCH. The installer is called SCRATCH, the icon is called SCRATCH but when you open it, you are greeted with the message that you’ve opened SCRATCH Play Pro.
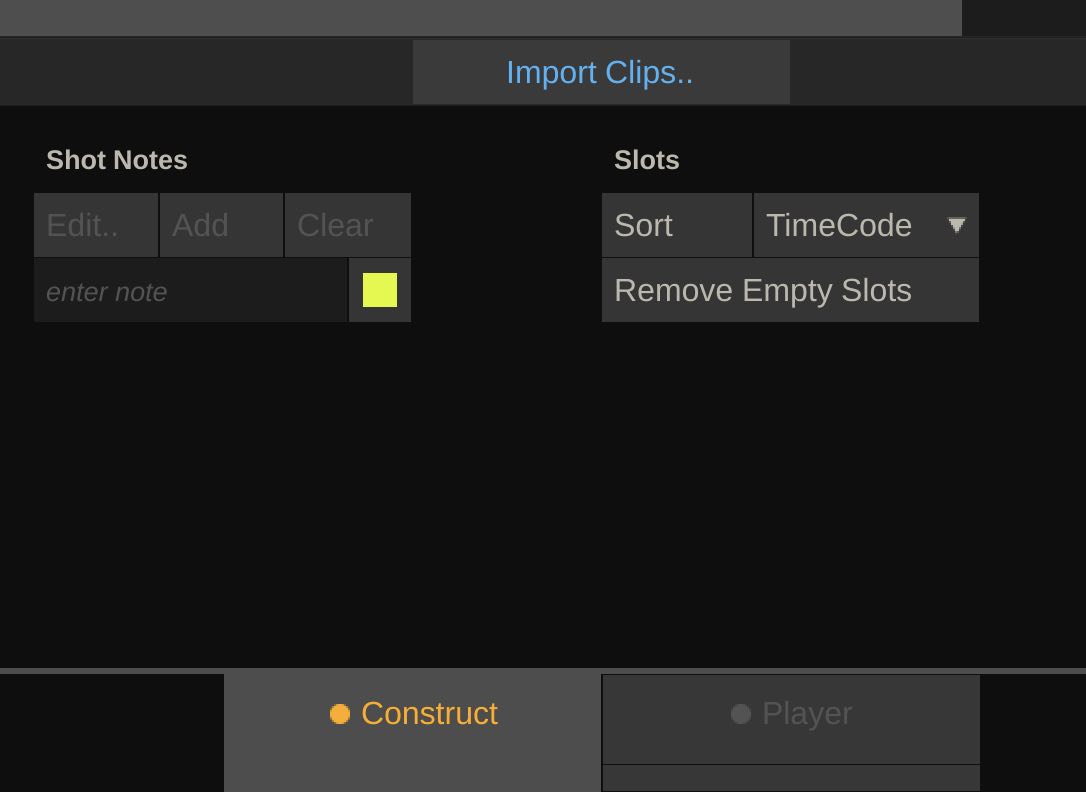
Following the structure of the tabbed workflow in SCRATCH, there are two tabs in SCRATCH Play Pro. One for importing and managing timelines of clips (Construct) and one for playing and adjusting those clips (Player).
You can export clips out of Pro Player from either tab with the Render and Publish functions.
It seems obvious now but to import a clip you need to click on the lightly pulsating blue ‘import clips’ in the centre of the screen. In looking around at the other controls I had initially missed this!
As with most modern post tools, when you bring in your first clip it will warn you if the properties of your clips don’t match the current timeline settings. Drop your clips onto one of the Construct slots and the Player tab, now has something to work with.
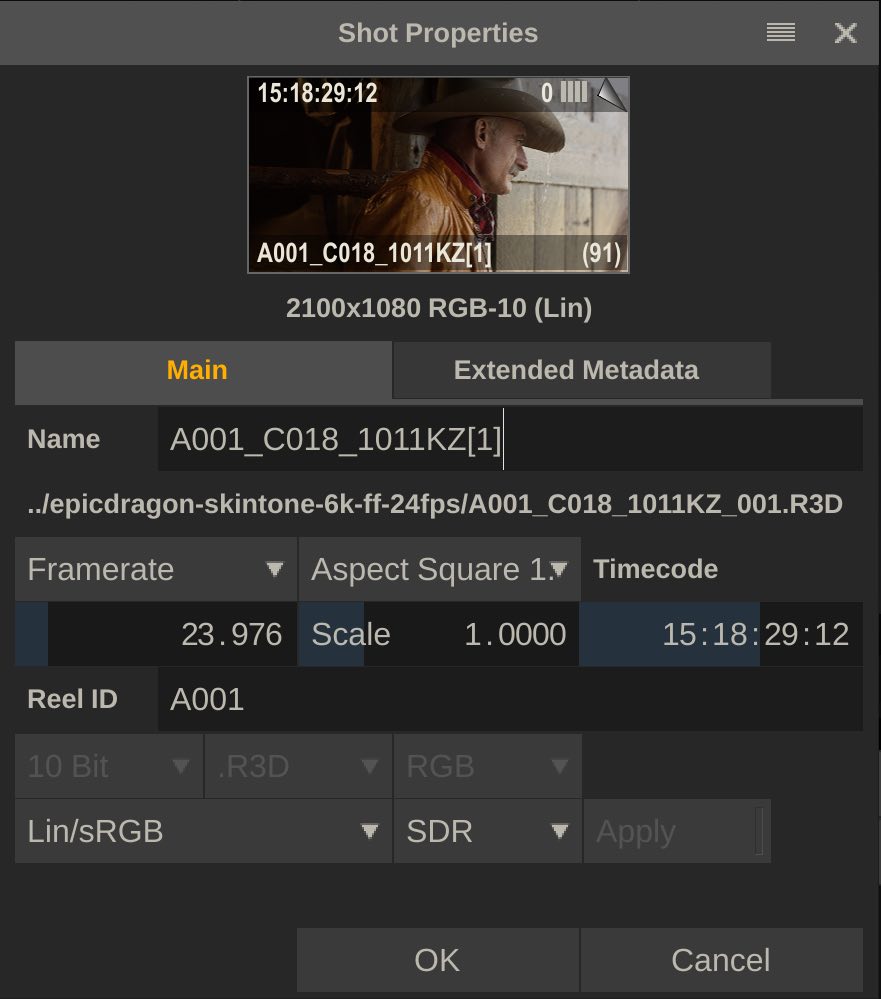
Within the Construct if you click on file name of a clip in the timeline, a pop-out window will appear giving you all of the properties and metadata for that clip.
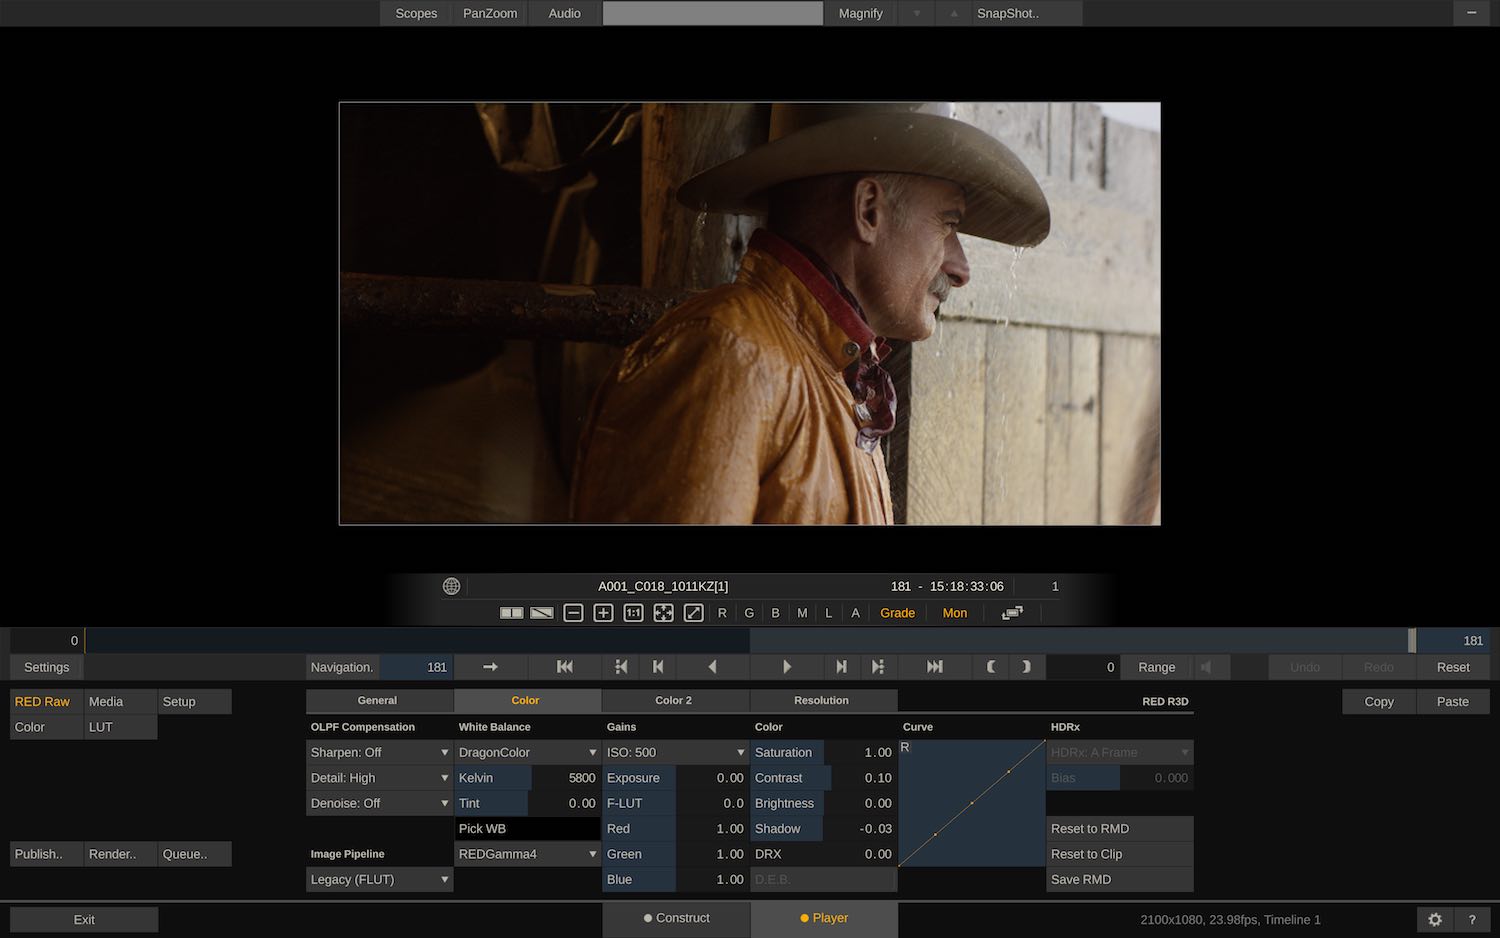
One thing I noticed immediately in the Player tab was how responsive the playback of the 6K RED raw clip I imported was. It was silky smooth and looked great.
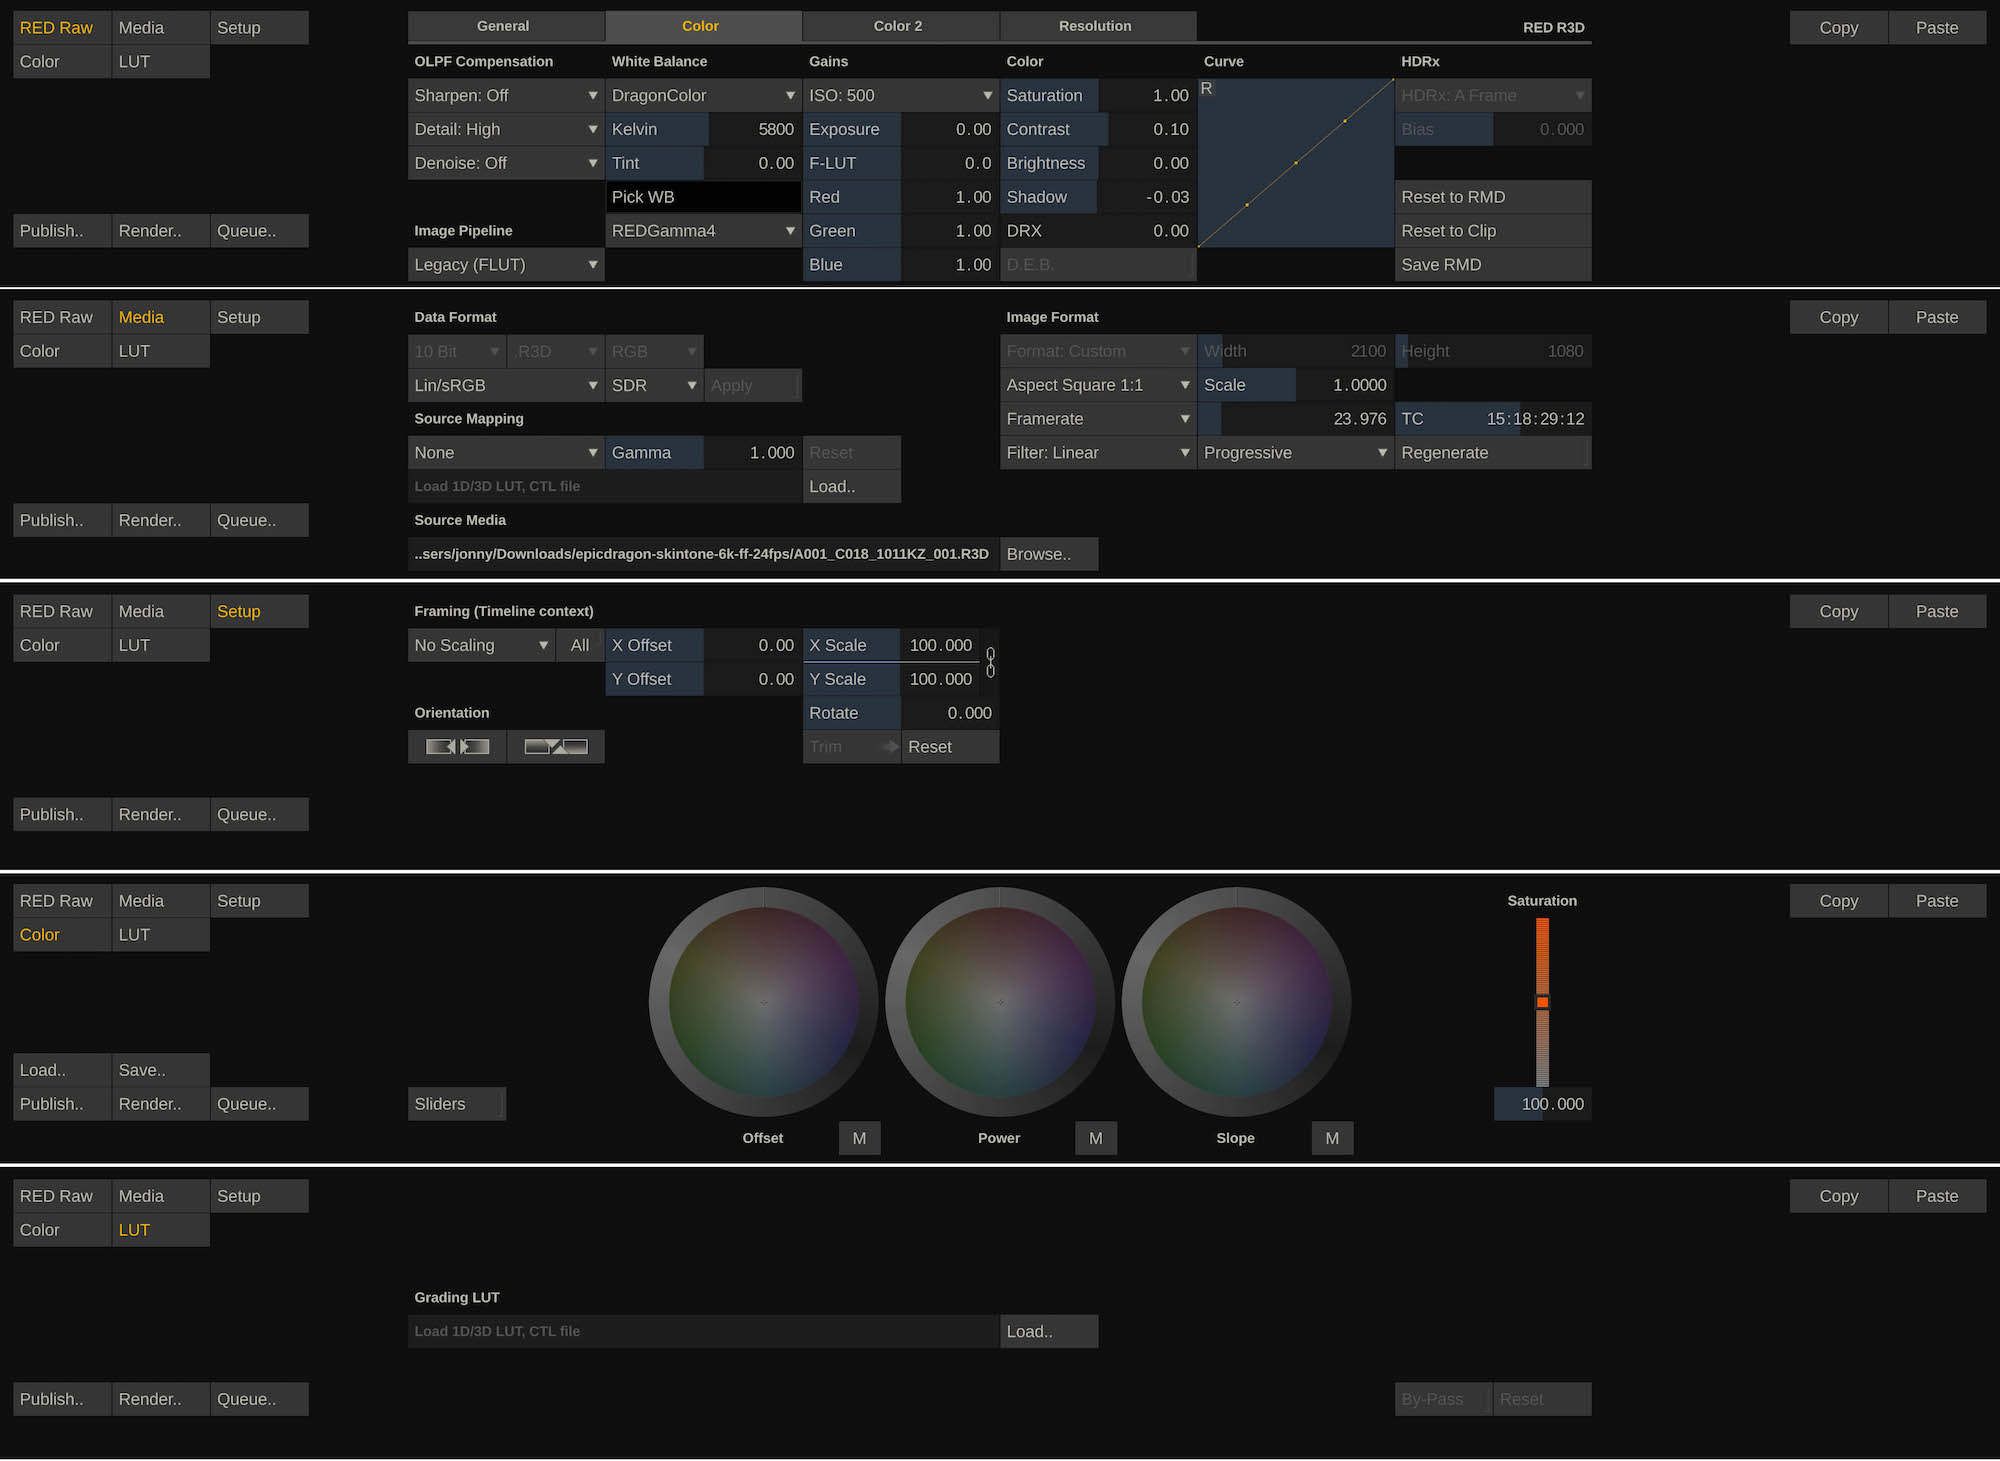
The first image (above) in this section shows you what the full Player tab looks like, but here is a composite of the 5 different toolsets that you can use within the app.
You have the ability to do simple colour grading through three usual wheels, apply a LUT or interact with all of the camera RAW settings.
At the top of the app there are a further 5 tools; Scopes, PanZoom, Audio (meters), Magnify and SnapShot…
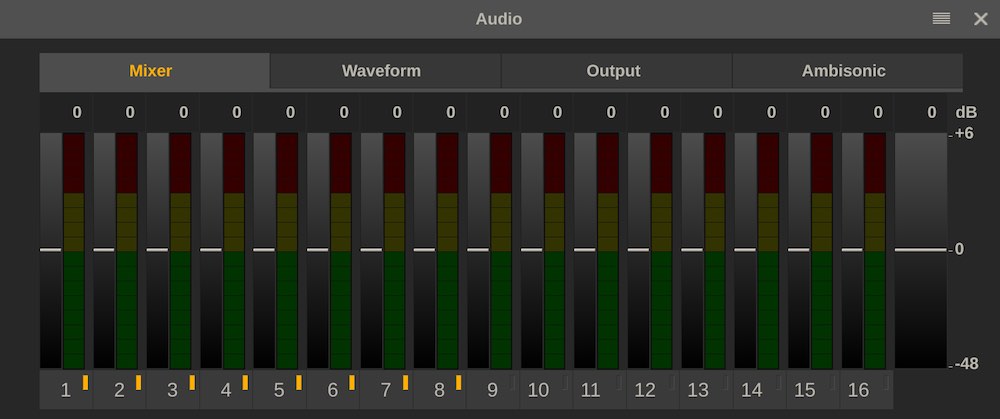
For a better look at the Scopes, check out the video at the top of this section. I really liked that the Audio meters will display up to 16 channels and come in a large pop out window, rather than being stuck in a corner.
It’s possible that I was ‘doing it wrong’ but I couldn’t find a way to scale the Scopes tool to any size I wanted (say, by clicking on the corner and dragging), although you can control the scale within the scopes to 2x.
The Magnify tool gives you a digital photographer’s loupe and the SnapShot a way to save out a still, say if you want to check the look of a file with a DP or client.
When it comes to getting your files out of SCRATCH Play Pro you have a host of options, including ALE, CDL, HDR reports and DIT reports with comments.
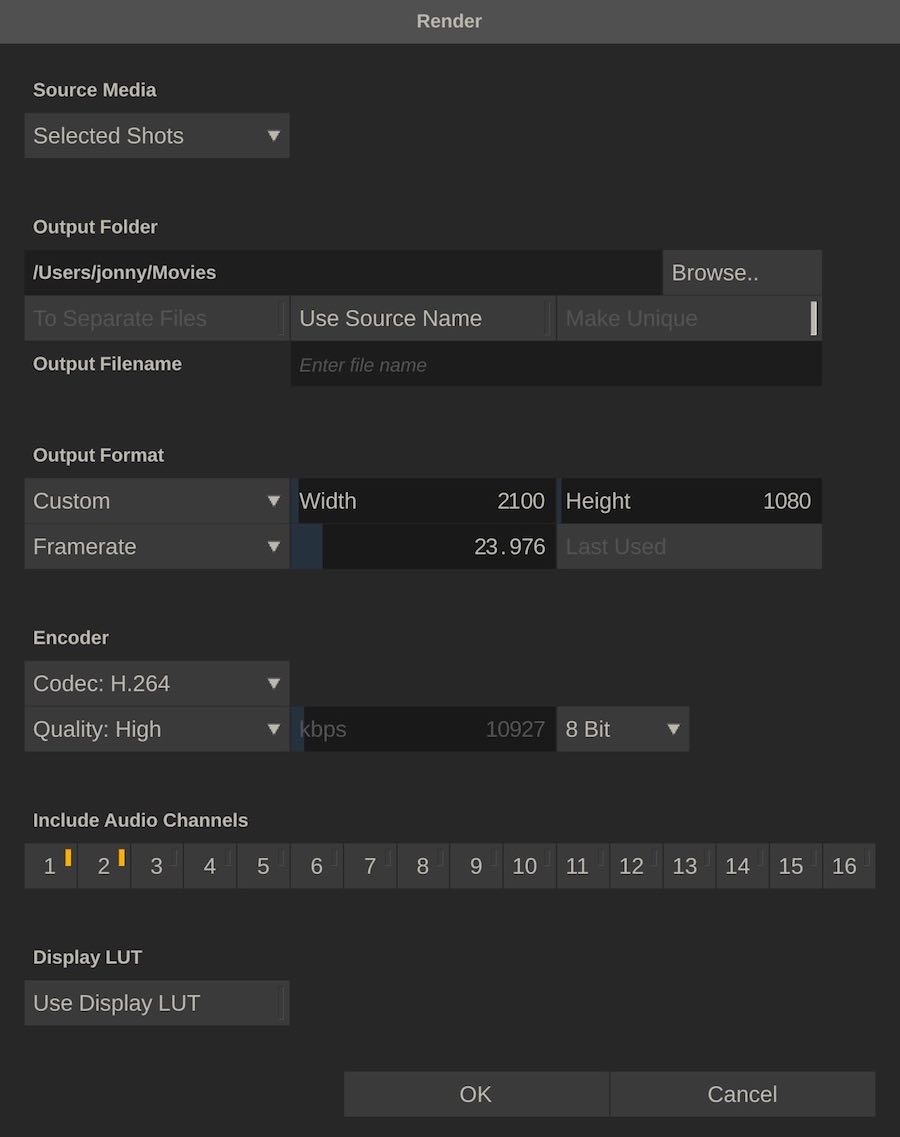
Unlike the full SCRATCH app there is no dedicated render page, but instead you access the settings through a pop up window from either tab.
You can also publish direct to SCRATCH Web, Vimeo, YouTube and Facebook, if you input all your login details etc.
When I get more time I’m hoping I can compare the output of the H.264 files SCRATCH Play Pro produces in comparison to DaVinci Resolve and Adobe Premiere Pro with regards to the file size, visual quality and speed of export.
Although I don’t have a Windows machine, it would be interesting to see how good the Pro Res files look as I know previous ‘unofficial’ solutions haven’t always held up.
Check out SCRATCH Play Pro for yourself here.
Hedge – Intuitive Back Up Tool for Editors and DITs
When it comes to simple, easy to use, intuitive design Hedge has most apps beat. This is one of the reasons it’s my favourite app to use when duplicating drives, archiving files or copying source camera cards.
If you are building that Windows post machine, you can also use Hedge with it, as it’s supported on Mac and Windows (and even runs 11% faster on a PC!)
I included Hedge in my round up of DIT Tools for 2018, back in January, which will give you a deeper rundown of some of the integrations and supporting apps that you can use with it.
As Hedge is on a cycle of continuous development, new features and improvements come on a regular basis. In 2017 they updated the app 12 times (by my count) and the latest version is 18.3 (the third update of 2018).
Here are some quick headlines on the most recent updates that Hedge has shipped:
Hedge 18.3 – Checkpoint for weeding out source errors due to dodgy hardware or cables
Hedge 18.2 – Copy just new files into existing folders with duplicate detection
Hedge 18.1 – New workflow possibilities with multiple destinations plus faster transfers on Windows than Mac!
Hedge also has a nice hybrid licensing model, which they are very open about:
Every Hedge license comes with a guaranteed year of free, continuous updates, new features, and of course support. After a year, Hedge continues to work just fine. You then decide if you want to receive any new updates and features, or at a later time. Or not at all.
Also, paying again in full for an update doesn’t make sense to us. That’s why renewing an expired license costs $69. Renew before the year is over, and you get an early bird rate of just $49?—?a 30% discount.
This means you’re neither paying to gain every new feature, nor are you locked out of the app if your subscription lapses.
Hopefully they’ll prompt you a month before the end of your year, to remind you to snap up that discount.
To try Hedge for yourself, you can download a free trial, or thanks to Paul and the team’s generosity over at Hedge, you can save 10% on the cost of your first purchase with this link:
Click here to claim your 10% discount on Hedge
For a list of (hopefully) all discounts and promo codes on the blog, check here.
Useful Tools for Premiere Pro Editors
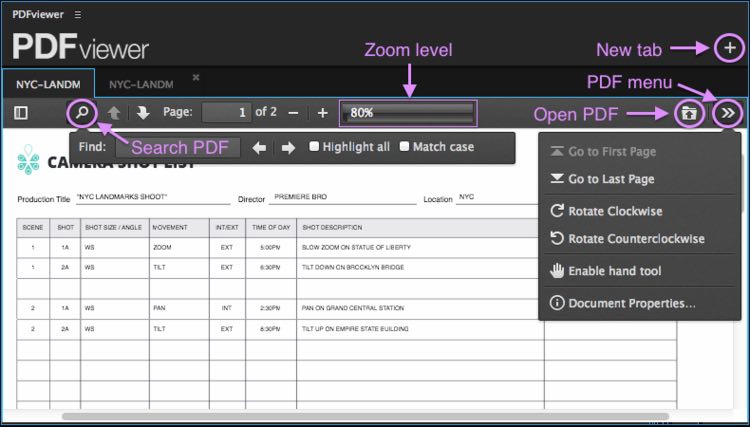
PDF Viewer from PrimalCuts.com is one of my favourite plugins when it comes to editing in Adobe Premiere Pro.
It’s incredibly simple but highly effective, in that it enables you to open PDFs inside of Premiere and work with them without having to switch back and forth out of the app to check something, nor to resize the video editing software to accommodate two apps side by side on your screen.
This may not sound like a lot, but every time I have to check against client notes, a script or any other document, I use PDF Viewer and anytime I’m editing somewhere without it, I’m instantly reminded of just how much time it saves!
For an in-depth guide to using PDF Viewer, check out this previous post and the links it points to, especially ThePremiereBro.com’s review.
PDFViewer costs $20 from PrimalCuts.com
For their second release they have built a similar plugin called Gpanel which integrates Google Docs and Google Sheets right into your Premiere Pro interface.
This time however rather than a static PDF, you can interact with these documents live and as they’re stored in the cloud, working with collaborators in the same room or around the world.
Gpanel costs $39.99 from PrimalCuts.com
In this 1 minute video you can get a tip on how to simultaneously collaborate with a producer to find selects in your transcriptions whilst working on the same document, live in the edit.
HMMMMM, very interesting, but I already have a far simpler solution. A single-button application switching script. No need to sacrifice a panel in Premeire, or have to switch them in Premiere.https://t.co/NreFPU06Mu
— Taran Quarantino (@TaranVH) February 5, 2018
If for some reason you still want to switch back and forth you could try this hack from Linus Tech Tips editor Taran Van Hemert.
SpeedScriber Premiere Pro Panel
If you need speedy automated transcription service then SpeedScriber from Digital Heaven is a great option. I’ve used it a few times for transcribing Skype interviews that I’ve done for this blog, including this one with Sven Pape – This Guy Edits.
The accuracy of SpeedScriber is pretty astounding.
Not only does it do a magical job of turning all of your dialogue into text, it also does a remarkable job of correctly sorting grammar, identifying speakers and even correctly capitalising the title of a film mid-sentence!
It also deftly left out umms, errs, ahhs and other unwanted vocal stutters.
Now you will need to have decently recorded audio to stand the best chance of getting word-for-word accuracy. But, from my experience, sound of the level of quality that any semi-professional filmmaker normally achieves in their audio recordings, will be more than sufficient.
Whilst normally a standalone app, SpeedScriber have also developed a plugin for Adobe Premiere Pro, bringing the transcription interface into the video editing software.
This has the added benefit of bringing in markers to your timeline and finding portions of a transcription in single source clips etc. which you can then edit into your timeline.
There are a few hoops to jump through to make these integrations work correctly, but the impact of having word-accurate transcriptions at your finger tips more than makes up for it.
SpeedScriber also has workflow integrations for Avid Media Composer and FCPX.
You pay per minute of uploaded material, so make sure you do a ‘pre-edit’ of your source file if you know you’re not going to need it all transcribed.
The official site has a handy price calculator, in several currencies, which will give you an idea of the costs involved.
Building a Hackintosh for Film Editing
I switched from MAC to DELL PC workstations 3 years ago.
A lot of filmmakers asked for the specs on the system
I edited the first feature film using only the native RED 6K files.
No off-lining. No transcoding. No waiting.
Here you go: https://t.co/cV8rLFSxSK#filmmaking pic.twitter.com/J3hqlx1Sxp— Vashi Nedomansky, ACE (@vashikoo) July 8, 2018
One crucial tool for any editor is the actual hardware they are cutting on. Now I’m not going to wade into the Mac vs PC debate (I started on Windows, now all on Mac), nor whether Apple is really servicing professional users now or in the future, but I thought I’d share these resources that profile some systems used by post professionals.
The first system in the tweet above, is what editor Vashi Nedomansky used to edit the technologically challenging 6 Below, which I’ve covered in depth here. While his follow up tweet (below) outlines his current spec, which is pretty outrageous.
I've since upgraded to:
DELL 7920 Dual Intel Xeon Gold 3.0GHz (24-cores)
192GB RAM 2666MHz DDR4
1TB PCIe NVMe SSD x3
Nvidia P6000 24GB video card
I think I'm future-proofed for a while…
?— Vashi Nedomansky, ACE (@vashikoo) July 8, 2018
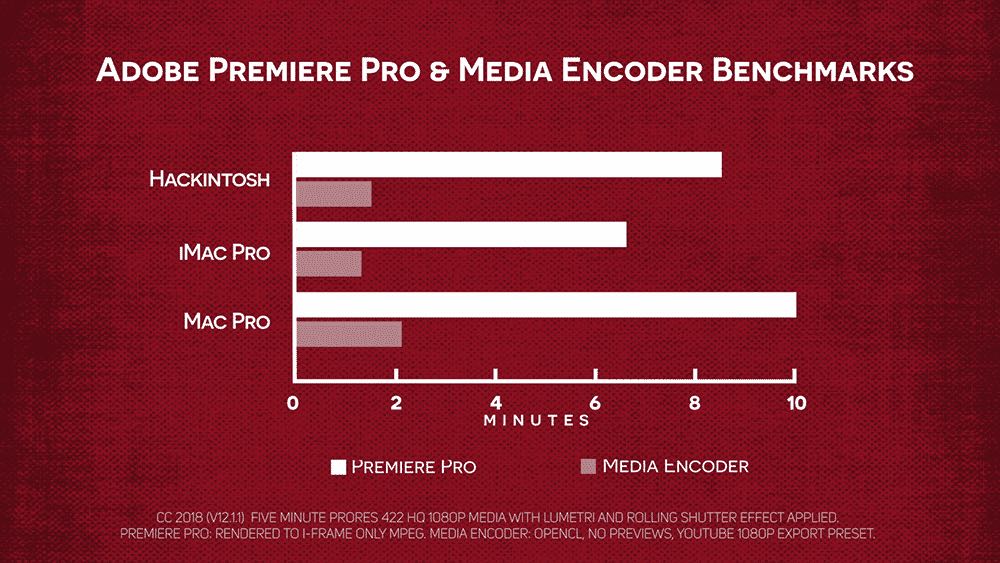
In this excellent (as usual) episode of Michael Kammes’ 5 Things, he builds his very own Hackintosh, designed to deliver professional performance whilst only costing about $2,500.
You can read all about Michael’s efforts, investigations and conclusions in this supporting blog post, which includes performance comparisons to some of Apple’s top hardware.
At the end of it all, the conclusion that Michael comes to is an interesting one, and a useful word of caution to those planning their own foray into dabbling with building their own (self-supported) hardware. Especially if you’re planning on it being your main machine for professional work.
So, “was it worth it?”
As a full-time tech nerd and part-time creative – yes. It’s the first time I’ve built a computer from scratch in over a decade, and I learned more about the underpinnings of the Mac OS than I otherwise would have.
But does this cost savings outweigh the peace of mind of a fully supported, warrantied and sexy looking piece of Apple gear?
For someone who is a full-time creative professional – I’m gonna say no.
You need a system that works, one that you can apply updates when needed, and easily add additional hardware and software. Time is money, and the less time you can spend troubleshooting the better.
Understanding Remote Editing
Speaking of Michael Kammes and tech geekery, I thought I would include his presentation from LumaForge’s Faster Together suite at NAB 2018, on editing remotely.
He defines editing remotely as “being able to do offline creative editorial from home” (or anywhere). He walks through three current options for tackling a task like this:
- Cloud Based Editing (editing in a browser)
- Remote Editing (Proxies streamed via the Cloud)
- PCoIP
Michael covers the pros and cons of each and the technology required in each. Well worth a watch if you want to have some clever solutions up your sleeve.
Tools for Creating Closed Captions
https://www.youtube.com/watch?v=XJvQQVLwAt0&list=PL59_kWpr191zIZuwPkC9S1-YBIdel_6_B
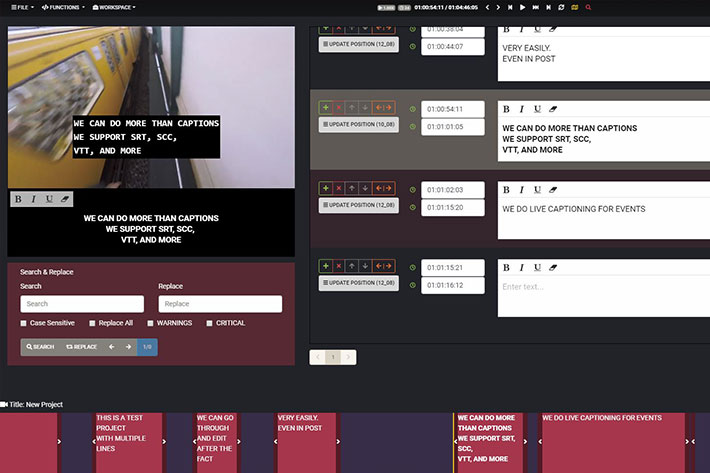
If you’re looking for a free and reliable way to create Closed Captions, in a variety of output formats, then the new free tool Closed Caption Creator, could be your best option.
The web-based application allows you to import source files (including plain text) and then edit them to ensure the captions and timing are correct. You can also then export these to variety of formats including:
- SCC (US Broadcast format)
- SRT SubRip (Popular online format for HTML video players)
- STL (European Broadcast format)
- FCP XML
- SUB/SBV (Legacy format)
- TTML
- WebVTT (Web Video Text Tracks format)
You can learn more about Closed Caption Creator and the formats it supports here, as when you land on the homepage of the official site, you land ‘in the app.’
The YouTube playlist above, also includes all of their introductory videos and tutorials for creating captions in Premiere Pro, YouTube and live events.
Jose Antunes has a very detailed post on the app and it’s creator Nathaniel Deshpand which you can read here. Interestingly he ends the article with some hints as to the future of the endeavour;
[Nathaniel’s company has since] signed a deal to develop the above mentioned command line application to help automate closed caption processes for third party applications.It is a development, continues Nathaniel Deshpande, ”which we are really excited about. The tool will be ready for other companies commercially in September of this year.”
Caption Converter is another tool you could use, as a $199 paid app from FXFactory, if you need to import, convert, edit, translate and export Closed Caption files from one version to another.
So for example you can import an SRT subtitle file and export it as an iTunesTimedText file.
I’ve not dived into these two apps in much detail, so I’m not sure what Caption Converter offers for $199 extra dollars that Closed Caption Creator doesn’t – although there seem to be differences around formatting, side-by-side translations and more.
Creating Closed Captions in FCPX
It’s worth mentioning that FCPX 10.4.1 comes with Closed Captioning functionality built-in. In this short tutorial Mark Spencer from Ripple Training guides you through the entire process.
For more FCPX Training from Mark check out Ripple Training’s excellent FCPX tutorials here.
Filestage Review and Approval
The team behind Filestage got in touch to chat about their review and approval service for post production professionals who are working in teams at larger companies (rather than freelancers).
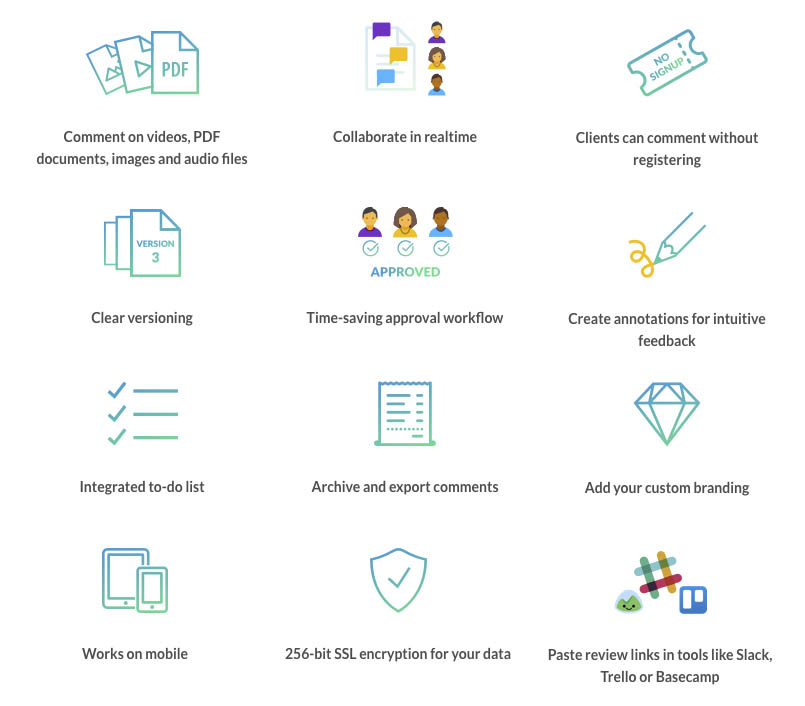
Looking at their features list (above) they can do all the things you’d expect from this kind of service. One of the best features looks to be that client’s can comment without registering, which is always a sticking point with getting the person who actually has to use the service to get the most benefit from it, to use it.
They say rather than focusing on managing masses of files, they’re focusing on improving the review and approval processes that companies and teams all have to go through as a project moves from conception to delivery.
At the minute they are slightly more expensive than similar offerings from companies like Frame.io and Wipster, but are aiming to bring out a freelancer grade tier in the future.
That said, they have some impressive brands on their customer list so they must be doing something right for larger agencies and production companies.
I’ve previously written about the various options when it comes to video review and approval in these previous posts too:
- Updates to Video Review Services in 2018
- Motion Array’s Portfolio and Review Platform
- Comparing Online Video Review Tools
Useful Tools for FCPX Editors
The FCPX third party app eco-system is a vibrant one and this list is by no means intended to be an exhaustive one, more like some useful tools I don’t think I’ve mentioned before.
If you want more third party apps, check out Steve Martin’s 40 minute presentation in this previous post on FCPX workflows for TV and feature films.
Command Post is a brilliant example of an open source tool that a community has created and developed and generously given away for free. For FCPX editors it’s a ‘must-have’ addition to your video editing software which fills in some important gaps and superchargers your workflow possibilities.
For example, through Command Post you can add support for Tangent colour grading panels (see my recent review of the new Wave2 here), Elgato Stream Deck controllers, or even the Mac Touch Bar;
If you’re running macOS Sierra 10.12.1 or above, you can make use of CommandPost’s awesome Touch Bar features.
There’s both a Virtual Touch Bar, which displays a Touch Bar on your computer screen, and the ability to add custom items to both the virtual and physical Touch Bar.
But much more than that, Command Post is focused on improving FCPX with features like:
- Timecode Overlays in Viewer
- Batch Exporting from Browser & Timeline
- Scrolling & Locked Timeline
- Movable Markers
- Watch Folders
- Color Board controls on the MacBook Pro Touch Bar (or using Duet)
- Shared Clipboard & Clipboard History
- Mobile Notifications (Prowl, Pushover & iMessage)
- Enable Rendering During Playback
Artic Whiteness – Better FCPX Library Management
https://vimeo.com/233737857
In the FCPX eco-system Artic Whiteness is a central player for anyone looking to improve their personal or collaborative workflows. Their newest tool is Final Cut Library Opener, which enables functional library sharing between multiple FCPX editors.
This collaborative approach was first suggested by FCPX editor Mike Matzdorff who worked on build this app with Arctic Whiteness. In this short explainer video Mike walks you through how to use it in detail.
Mike has also written the book on setting yourself up for success when editing Hollywood feature films in FCPX (check it out here). Jump here for a lot more professional level info on FCPX workflows from Mike.
A single workstation license costs about $23/€19.90.
Artic Whiteness’s core app, Final Cut Library Manager comes in two versions. A lite free version as well as a paid version with more advanced features and functionality.
Library Manager let’s you manage all aspects of your FCPX Libraries including seeing at a glance where it’s files are located, disk space used, whether media is internally or externally referenced and much more.
The paid for features included advanced search into Libraries allowing you to find event names, project names, notes, comments, media keywords, media file names and more. You can also duplicate, delete and move libraries or reclaim vital hard drive space by clearing out render files, proxies and optimised media (among other things).
To have access to all of the features Final Cut Library Manager has to offer, will set you back about $35 or €29.70 (with a 10% discount)
360 Plugin Pack for FCPX
FCPX editor and pundit Alex Golner has a useful pack of 360°/VR effects plugins which you can try and buy through FxFactory.com.
The 20 plugins include effects such as:
- Highlight an area
- Blur and stylise effects
- Repeat images and titles around 360 sphere
- Tiny Planet effect
- 4-up display for ‘flat’ video editing
There are also some free effects included, such as 360° Reorient, Tilt and Direction and a 360° Adjustment layer.
If 360° video is your bread and butter then this will be a handy addition to your tool kit. You can read a lot more about working with VR and 360 video in this previous post.
Alex’s second paid for pack is for 120 FCPX Animation Transitions to add “instant character to logos, text, graphic elements and even video clips by springing, bouncing, sliding and skidding them onto and off the screen.” Which if you want to be able to quickly make your graphics move without constantly key-framing, could come in very handy.
At just $49 for 120 plugins that’s 40 cents an effect, and is also available through FxFactory.com.
Given that Alex has been giving away tons of useful plugins for years, maybe we should all buy a copy of one of these to say thank you!
To download loads of Alex’s free plugins and effects visit Alex4d.com
More Freebies for FCPX
New free tool that imports multiple subtitle formats into Final Cut Pro 10.4.1 – as ITT closed captions or titles you can burn into video at export. Direct download: https://t.co/787VtlvGPd Donations welcome, thanks Spherico! More tools: https://t.co/YKHlJbgZOh #fcpx
— Alex Gollner ? (@Alex4D) April 22, 2018
If you’re after a couple more freebies for FCPX then these free animated titles are for you.
The (long awaited?) Off The Tracks documentary chronicling the release and development of Final Cut Pro X is now available to stream via iTunes et al. and to celebrate that fact, you can also download the 3 free title effects used in the film from MotionVFX.com.
FCP.co has a promo code to help you save a few bucks off the cost of buying the movie, which you can find here.
You can also get 6 free animated title reveals from idustrialrevolution.com here.
Improved Kollaborate Workflows
Kollaborate is a long-standing video review and approval platform, which I included in my post from 2016 comparing the main contenders, who have recently added some great new automated workflow features to their platform.
Just as a quick recap, Kollaborate offers all the things you’d expect including
- Video review and approval annotations
- Real-time synced viewing sessions
- File colour coding based on status
- Automated file management based on approval status
- Video editing software integrations for FCPX and Adobe Premiere Pro
- Self-hosting options
Digital Rebellion also have a ton of really useful post production apps including things like Post Haste, Cine Play and their suite of Pro Maintenance Tools.
In this detailed walk-through you can see how to use the new File Workflows features in Kollaborate. These allow you to do things like colour-code and move a file to a specific folder when it hits a specific approval status.
An example of this might be setting up a chain of kollaborate workflows so that an edit moves through a specific team for approval, and then once all the tagged team members have approved it, it can be automatically sent to the client (or next layer of management/department) for their approval.
If you are repeating the same series of steps on a regular basis (which you most likely are) then taking the time to set up these workflow-chains will end up incrementally saving you a huge amount of time.
Similarly you can set up specific workflows that trigger the minute that a file is uploaded to your Kollaborate account, saving you even more time overall.

