
DaVinci Resolve 14 Grading Tips and Tricks

In this post I’ve brought together some helpful tips and tricks for colorists working in DaVinci Resolve 14, plus I take a look back at some previous Resolve posts from 2017!
DaVinci Resolve Studio 14.1.1 is now out with 28 different crash fixes addressed in the update, so if you’re having problems it’s probably worth bringing your installation up to date.
Update – 14.2 Released and New Multi User Collaboration Tutorial
New DaVinci Resolve 14.2 Update! Get new 8K monitoring support with DeckLink 8K Pro capture and playback cards, dynamic trimming with audio, support for Final Cut Pro 10.4 XML, the ability to import audio only AAF clips and more! Download now! pic.twitter.com/9OJWnBkXPl
— Blackmagic Design (@Blackmagic_News) December 15, 2017
In this recently released tutorial, you can watch a 7 minute walk through on using Resolve’s powerful new multi-user collaboration tools inside of DaVinci Resolve Studio, the $299 version of the software.
Resolve has first come first served automatic locking protocols, to keep your work locked and the project in sync, as you go.
If you want even more Resolve resources here is a list of every DaVinci Resolve post on the blog from 2017, in chronological order:
- DaVinci Resolve Tools and Tutorials
- New Blackmagic Design Colour Grading Panels Review
- Free Video Editing Software for Beginners
- All the New Features in DaVinci Resolve 14
- LUT Gallery for FCPX and DaVinci Resolve Review
- How To Make a DCP For Film Festival Projection
- Proxy Workflows for Your NLE
- Mixing Light 2.0 and Free Training Videos
- DaVinci Resolve 14 Training Courses Reviewed
- DaVinci Resolve 14 Colour Grading Tutorials
The Definitive Guide to DaVinci Resolve 14
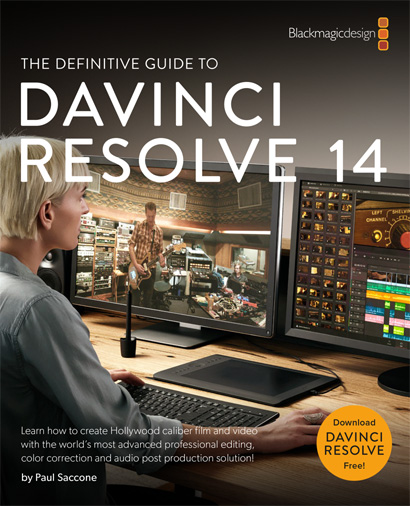
In other official Blackmagic Design news they’ve also released their updated book, The Definitive Guide to DaVinci Resolve 14.
It’s not cheap at [amazon_link asins=’0999391305′ template=’PriceLink’ store=’jonelwfiledi-20′ marketplace=’US’ link_id=’4c533a81-d9cf-11e7-a7fb-398081cf8680′] but at nearly 370 pages it should hopefully deliver a decent bang for it’s buck.
That said, the only verified purchase review on Amazon complains at the poor print quality of the book, which doesn’t bode well. It would also be interesting to know how much the book has been re-written since the 12.5 release under the same title.
It’s also worth mentioning, once again, how unbelievably amazing the free DaVinci Resolve 14.1 manual is, written by colorist and author Alexis Van Hurkman. It also weighs in at a whopping 1,329 pages, which is a much bigger bang to buck ratio!
So maybe just print the manual, if you really want to hold some paper in your hands!
If I get my hands on a physical copy of the book I’ll give it a proper review.
Take a look for yourself on Amazon Global Stores
Update – Reader Brian Williams commented to below to say he’s got a copy of the book and the print quality is fine. Always good to get a second opinion.
Dongle, easy to switch among mult machines quickly. Code, don't need a USB port in sensitive environments, can't forget it when traveling.
— Alexis Van Hurkman (@hurkman) November 7, 2017
In my last DaVinci Resolve post I spoke a little bit about the switch from licenses to dongles, but if you click on the date stamp on this Tweet from colorist Jamie Dickinson you can see what various colorists consider to be the pros and cons of either licensing method.
You can use the licensing code in two machines (although not simultaneously), whilst a dongle will activate any machine you plug it into.
In this interesting talk from Christian Ellis of Light Iron Post, you can learn about the history of Digital Intermediates and why they’re a dying breed.
It’s a valuable watch for any junior colorists who might not know the history of the industry, how we’re arrived at a DPX workflow and how editing and grading camera original files is the new normal.
Resolve sits at the heart of this new workflow, which Christian gets into at about 11.46 mins.
DaVinci Resolve Insider Knowledge
My prayers have been answered*. Colorist Juan Melara is back in the tutorial making game!
*I recently highlighted three colorists who have previously been making excellent colour grading tutorials but haven’t in a while. Now I just need David Torcivia and Chris Hall to post some new training!
Anyway, back to Juan who has started a new series called Insider Knowledge, which so far have tackled some of the more ‘technical’ elements of colour grading. Namely, colour space transforms and a better way of grading BMD Ursa Mini CinemaDNGS.
In the first tutorial above you can learn how to ‘sandwich’ your nodes with color space transforms so that you can access all of your footage’s inherent LOG details, whilst using controls that ‘feel’ normal.
There’s also a bit of discussion over on the Lift Gamma Gain forum about Juan’s workflow in comparison to working in ACES.
If you want to learn more about color space transforms, how Resolve handles your footage and a whole lot more around this check out chapters 4 and 6 in Part 1 of the Resolve 14.1 manual.
Or jump to page 1006 for details on the Resolve OFX Plugin Color Space Transform, which is in both the Studio and free versions of the software.
It’s worth checking out the accompanying blog post for this tutorial as Juan presents some corrections to some of the details he gives in this tutorial.
First of all the BMD 4.6k Film curve is actually able to hold all of the dynamic range of the sensor. It just stores the brightest highlights beyond the standard range.
DaVinci Resolve 14 Tips and Tricks
Casey Faris shares his favourite time-saving keyboard shortcuts in Resolve. If you’re a new editor or colorist and you’re not using these then you’ll soon save yourself a lot of time if you do.
T: trim tool
T then click and drag bottom half of clip: slide tool (slide clip on top of neighbouring clips without damaging neighbouring clips)
T then click and drag top half of clip: slip tool (slip clip underneath neighbouring clips without changing cut points (only works if source clip is longer than cut clip)
Speaking of keyboard shortcuts in Resolve I came across this link (somewhere!) which is an online Resolve keyboard shortcut mapping modifier.
This allows you to edit the shortcuts in one place and bring them into Resolve.
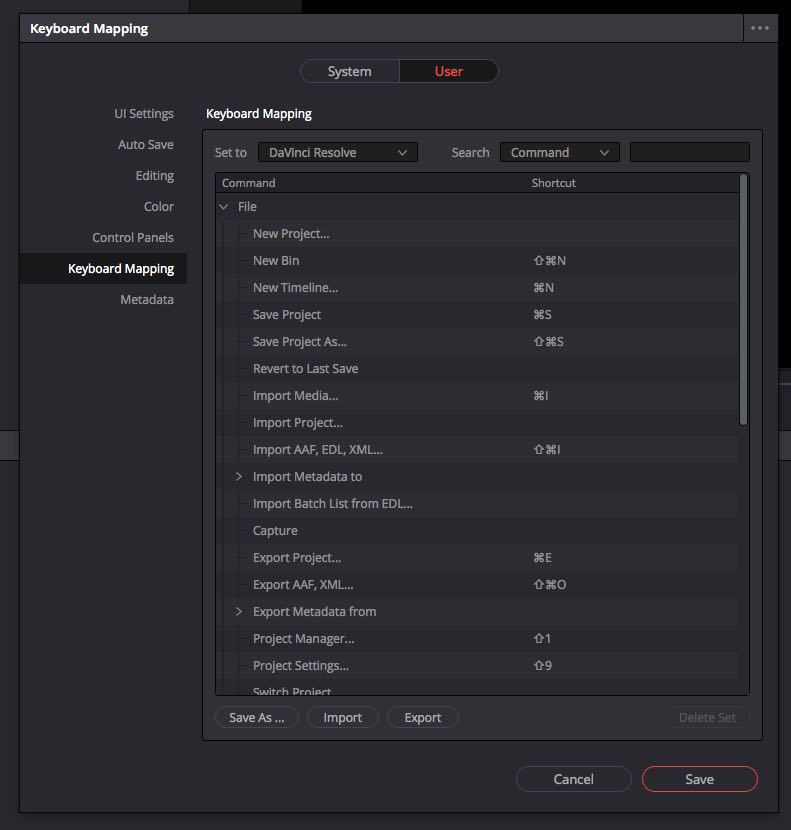
If you’re looking for where to customise your keyboard shortcuts within Resolve, as of 14, it’s now under DaVinci Resolve > Preferences > User (click the right hand button) > Keyboard Mapping
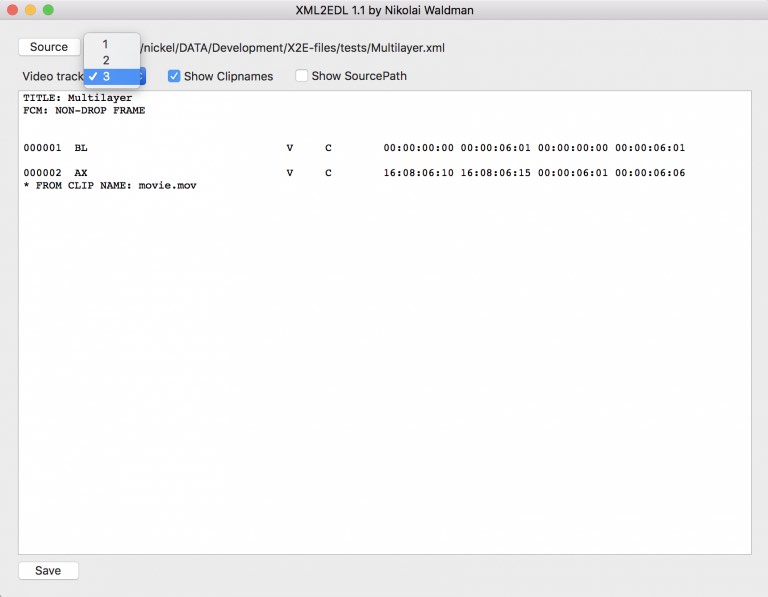
Nikolai Waldman has created a free app that will allow you to convert an XML into an EDL, which you can download here.
Why would you want to be able to do that?
As Nikolai explains in this blog post, you might need to do that if you want to add just the files in your timeline into the Resolve Media Pool, which apparently is something that can’t be done from an XML.
ICA Colorist Warren Eagles shares this 60 second tip on how to use Resolve’s inbuilt media management functionality to easily copy the timelines you need from a client drive, to you own drives for better playback performance and back up safety.
Warren also has an excellent training course, available on FXPHD, which I’ve previously reviewed here.
Hat Tip to the ‘must subscribe’ colorist newsletter from Tao of Color.com, for finding this first tip. Tao of Color is the sister site from MixingLight.com founder, Patrick Inhofer.
In this second 60 second tip, Warren demonstrates how to display several preset grades at once, using Resolve’s Gallery Grades function, so that you can quickly compare and contrast looks and grade variations.
In this Resolve in a Rush quick tip, from Ripple Training’s newest trainer – Spencer. In under 5 minutes you can learn how to create titles with video inside the text to create some fairly funky effects.
For more Resolve in a Rush episodes check out this previous post.
In the latest episode of Resolve in a Rush Spencer demonstrates two different ways of organising your LUT collection. One is painfully slow and manually intensive, especially if you have a lot of LUTS, but free.
The other uses Color Grading Central’s LUT Gallery plugin, which I’ve previously reviewed in detail here, which does cost $69, but will save you countless hours of frustrated clicking.

Lewis McGregor writing for Premiumbeat shares a few handy tips on some of the UI updates in Resolve 14’s Media Page, which you might not know about.
In previous versions, when you hovered over the thumbnail in the media page, you could scrub through a mini-preview of the clip within the thumbnail itself. In Resolve 14, this is slightly different. When you hover over the thumbnail, the thumbnail preview now jumps to the preview monitor.
Lewis covers Resolve’s version of ‘hoverscrub’ footage preview, how to close the source monitor window, how to create a new bin automatically filled with the selected clips and how to view to different bins simultaneously. Easy when you know how.
Editor and YouTuber Dave Dugdale shares a few thoughts on what it’s like to switch from Premiere Pro to DaVinci Resolve for editing and grading.
It’s interesting to hear his thoughts on what it’s like to work in Resolve day to day, including the things that are great and the things that drive him crazy.
There are somethings in Resolve that drive me a little nuts because it does not behave like Premiere did but also there are some feature and tools in Resolve that Premiere will probably never have.
I would call the Face Refinement tool a game changer for someone like me that does not own a color panel and can generate windows around faces, eyes, quickly, it does it all for you and on my new computer it can analyze it so fast.
On the flip side I would say PPro can handle more video and audio codecs seamlessly than Resolve, but like I said Resolve is updating quickly.
Speaking of Dave, I found this little tutorial on creating a match move to stick text to a shot in his ‘other’ YouTube channel.
Working with Curves in DaVinci Resolve
In these tutorials from LearnColorGrading.com you can pick up a few tips on using curves effectively in DaVinci Resolve. What’s nice about Alex’s tutorials is he often takes the trouble to explain what’s going on within the image, whilst making specific changes.
This tip really reminded me of a similar tip from Warren Eagles in his excellent DaVinci Resolve Creative Looks training series, which I’ve reviewed in detail here.
In this short tutorial Alex takes a look at the Hue Vs Luminance curve, which Blackmagic Design has made it easier to make use of, in DaVinci Resolve 14. This curve changes the luminance of certain hues in your image, which allows you to selectively brighten or darken certain colours.
In this final tutorial Alex demonstrates how to use the RGB mixer to ‘relight’ your shots, by selectively adjusting the exposure of the different channels.
Alex has a free crash course on Resolve here.
Alex also shared this tip on getting smooth playback in Resolve when working with a lot of effects and plugins, by leveraging the Resolve Render Cache and the Pro Res LT format.
Useful Quick Tips for DaVinci Resolve
#Resolve tip – Alt+scroll wheel over the scope will zoom in! Who knew!
— Jamie Dickinson (@dickij10) November 15, 2017
Once again I continue the tradition of rounding out this post with tips from colorists who tweet. Be sure to click on each Tweet’s date stamp to see the full thread of discussion.
If you’re a DaVinci #Resolve user who’s wondering if there’s a way to improve performance, Chapter 5 of the manual is dedicated to this.
— Alexis Van Hurkman (@hurkman) December 3, 2017
Resolve tip : got a show with baked in greenscreen composites that aren't the greatest, and you need to handle green spill? add a node with just a 3D keyer qualifying the green, and use the 3D keyer's despill.
— Joey D'Anna (@joeydanna) December 4, 2017
Resolve onling editing tip : matching conforms or doing slip trims using the keyboard? need to always see the frame under the playhead (not a 4 way trim view)? turn off "view->enable preview during editing"
— Joey D'Anna (@joeydanna) December 1, 2017
Resolve tip: It sounds basic, but clicking the Clips drop down and showing “Ungraded” before rendering can save some embarrassment later on.#PostChat#ProTip
— Matt Christensen (@_mchristensen) December 4, 2017
#Resolve Great to have these new option when copying from Node Graph but was hoping to see Curves get its own selection. Mustn't grumble, it's incredible how they keep adding nice stuff! pic.twitter.com/4gbXky6nLb
— Jamie Dickinson (@dickij10) November 13, 2017


I received the book this week from Amazon (I also saw the one review complaining about the quality) and it looks completely fine, I don’t know what they are talking about. I’m going to write a review now.
Thanks for the update Brian! Sounds like adding your review to Amazon would be handy.