Tools and Training for Film Colorists
Today there are more tools and training available for film colorists than ever before.
And in this post we’re going to take a look at a lot of them, including:
- LowePost – Over 3 hours of Free DaVinci Resolve Training
- LowePost – Ravengrade, a new look tool for Resolve
- Mononodes.com – Reverse Engineered PowerGrades and free downloads
- PixelTools Film Emulation PowerGrades Review (10% off)
- CineMatch 10% Discount Code + 20% off sale = $84 in savings!
- Colorist Kevin Shaw’s Introduction to HDR Training Course
- Introducing fylm.ai – web-based look creation empowered by AI
- Understanding ColourLab AI – the future of colour grading?
- Reverator Texture Tools
As you can see there’s a lot in here, so let’s get cracking.
PowerGrades Vs LUTS
I mention PowerGrades quite a bit in the post, so one quick note if you’re wondering what the difference is between a PowerGrade and a LUT.
A LUT is a ‘baked in’ mathematical transform. You apply it and you get what you get.
A PowerGrade is an editable group of nodes and effects and settings for DaVinci Resolve that allow you to get the same ‘drag and drop’ effect of using a LUT but with complete control over what’s happening under the hood.
LowePost.com – Free Colour Grading Training & Upcoming Tools
I’ve written about LowePost.com a fair few times over the years, partly because their colour grading, VFX and other post-production training courses are so good and feature some impressively experienced professionals, but mostly because their annual subscription represents such good value for money!
At just $79/year it is one of the most affordable post-production subscriptions around.
One of their most recent colour grading courses is Look Development and Workflow in DaVinci Resolve 17 from colorist Jason Bowdach, but they have also added courses on understanding a RED workflow in Redcine-X and DaVinci Resolve and two detailed DaVinci Resolve Fairlight training titles too.
They also write handy ‘insider’ articles like this one about the new ARRI Rec.709 LUT.
Ravengrade

UPDATE May 2022 – Check out my detailed review and exclusive discount code here.
LowePost are also working on some drag and drop ‘professional looks’ in the form of a unique ‘Look Tool’ for DaVinci Resolve, created in partnership with some really talented Hollywood colorists, in a new standalone product called Ravengrade.
Ravengrade will be available early next year and from what I’ve heard (I’m not allowed to say more!) it will be a far more unique product than initial appearances would suggest – so keep an eye on developments!
You can briefly check out some more details at Ravengrade.com and pre-order it at a heavy discount, if you’re one of those early adopter types!
Pre-order today and reserve your Looks to the heavily discounted price of $129.
Customers who pre-order will also get exclusive access to an extra set of unique power grades that will not be possible to buy after official release in Q1 2022.
LowePost – Ravensgrade site
2 1/2+ Hours of DaVinci Resolve Fusion Training for Free
LowePost.com recently shared this excellent 10-part training DaVinci Resolve Fusion tutorial series, which is well worth watching for anyone who wants to get essential tasks done right and presented by highly experienced editor and instructor Kevin P. McAuliffe.
The video playlist above contains all 10 parts, but here’s what’s in store:
- Getting Started
- Working with Media
- Keyframing
- Merge Node
- Masking
- Introduction to Text
- Fusion Titles
- Creating Presets and Macros
- Creating 3D
- Putting It All Together
Each lesson is about 15-20 minutes in length, totalling over 2 and a half hours of free in-depth training.
Every tutorial starts with a ‘mini-lesson’ about a related part of the UI or a specific technique that will prove handy later on, before diving into the meat of that videos topic.
For example, in Lesson 7 you can learn how to adjust the kerning of individual letters within Fusion titles, which I didn’t even know was possible.
What I love about Kevin’s teaching style, is that you’ll learn a huge amount of little extra tips and tricks along the way, as well as develop a strong confidence that you actually understand how and why things work, not just what to click.
There is currently a small problem with lesson 2, in that only the first two minutes have uploaded, but I’ve been in touch with the team behind LowePost to fix it, so hopefully they will soon!
You can get more details on many of LowePost’s Fusion, After Effects and VFX related training courses in this previous post, as well as a ton of other useful resources for learning Fusion.
Free 10-Part HDR Introductory Training
Lee Lanier delivers a solid introduction to working with HDR in DaVinci Resolve Fusion in this 10-part free training course, which includes a free download of follow along footage and project files.
The 10 lessons last just under an hour and include:
- Introduction to HDR
- Importing HDR clips
- HDR and the Color page
- Using HDR scopes
- Grading HDR
- Grading Log in HDR
- Grading HDR and SDR
- ACES and HDR
- Working with HLG
- Working with HDR10
If you’ve only ever graded in SDR and are trying to understand the fundamental differences you need to be aware of in DaVinci Resolve when working with HDR footage, then this is a great place to start.
Check out these previous posts from even more insights from LowePost.com
- Learn Colour Grading from Professional Colorists
- Feature Film Colour Grading with Colorist Walter Volpatto
- Learn High End Finishing Techniques in Fusion
- How to Become a Better Colorist
Look Recreation – Reverse Engineering the Grade
I’m not sure how long colorist Stefan Ringelschwandtner has been running mononodes.com for, but it’s already a wealthy source of colour grading knowledge, tools and reverse engineered PowerGrades based on popular films such as TENET, Her and Joker.
What’s great about Stefan’s look re-creation process is that he’s actually applying the look of his PowerGrade to ‘ungraded’ behind the scenes photos and matching them to the final scene in the film. This makes it much easier to see how close he gets, and he gets impressively close!
He’s also not over complicating things with a million nodes rather keeping things simple and effective with (usually) four or five such as Offset, Contrast, Saturation, LGG, Trims.
Stefan is offering these PowerGrades for sale in his online store, at not unreasonable prices.
The TENET pack features 12 different DaVinci Resolve PowerGrades for €20, which is around £17/$23, so about $2 a PowerGrade.
You can download his four emulated grades from Children of Men and five black and white PowerGrades inspired by Lighthouse for free!
Download Free Photochemical Film Look PowerGrade
Stefan is generously offering a sophisticated photochemical film look PowerGrade for free in this detailed blog post about the process of creating it.
The PowerGrade is based on the Rec709 LUT Kodask 2383 D55 LUT and emulates seven aspects of a photochemical film look including halation, gate weave, grain and film damage artefacts.

It is worth reading all the way to the bottom, as Stefan concludes with this warning:
Keep in mind that this is NOT a “complete” Node Tree. You have to add additional Nodes for balancing your shots and color grade. I would suggest doing it between the CST (Color Space Transformation) and the Print Film Emulation LUT.
Furthermore, you might want to add a node after the LUT to bring down the blacks closer to zero, using the LOG wheels. You also might want to place the “glow” node between CST and PFE, instead of behind the LUT.
This “Node tree” here is just a starting point! This blog post is more about the single elements that creates a photochemical film look, and is less about the node tree itself.
Stefan Ringelschwandtner, Colorist
Lastly, Stefan’s blog also has some excellent posts you should check out including:
PixelTools New Film Emulation PowerGrades
Update 2025: Save 10% on any PixelTools product with the discount code: jonny10
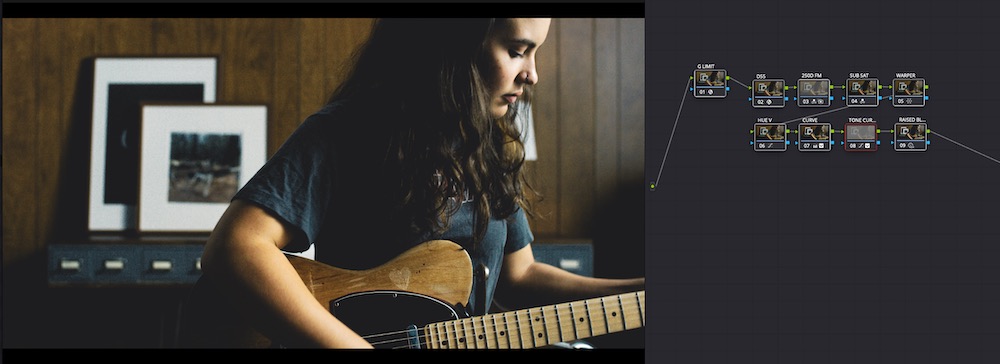
PixelTools, founded by colorist Jason Bowdach, recently launched a new collection of over 35 film emulation PowerGrades which are an easy way to get a stunning filmic look in a jiffy.
Although you can apply these PowerGrades with drag and drop simplicity, don’t let that fool you into thinking that these PowerGrades aren’t aimed at professional users. They were designed from the ground up with intimate feedback from a who’s who of industry professionals and it shows in the quality of the final product.
Expanding the compound nodes that make up some of the 35 ‘Film Elements’ presets such as Gate Weave, Projection Flicker, Halation and Grain, reveals all of the secret sauce, and colour grading complexity that goes into delivering a believable film look.
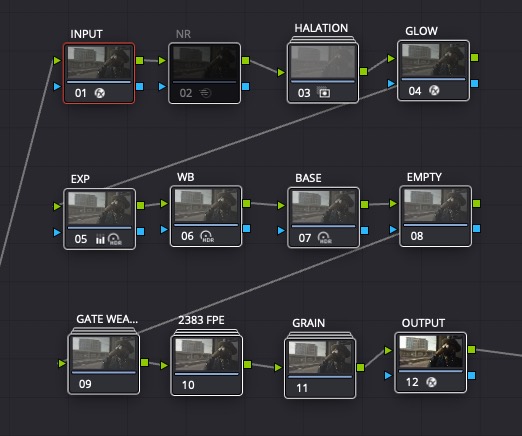
Even to my untrained eyes, Jason has done a fantastic job on the underlying Kodak Vision 2383 print stock look which is the base layer for everything else.
The PixelTools Film Lab PowerGades are easy to install and provide you with the flexibility to build your own film looks based on combining the various ‘Film elements’ at several different preset strengths, or to craft a completely bespoke look by adjusting every individual parameter to your heart’s content.
Or you can use one of the ‘Full Node Trees’ to apply the combined effect of ‘everything’ to a host of popular camera formats from Sony, ARRI, BMD, Panasonic and more.
It’s worth reading the supplied user manual to understand what each node in the structure above is doing, and how best to adjust them.
For example, it is crucial to set up your project’s Color Management settings (Project Settings > Color Management) in the following way:
- Color science: DaVinci YRGB
- Timeline color space: Rec.709 (scene)
Based on the response of a wide poll of professional colorists and finishing artists, many still prefer working with manual “node-based” color management – so this is our response.
Our film emulations are designed without ANY project-level color management enabled, so the tools respond the way you’re used to.
Our entire color pipeline has been built at the node-level, enabling us to take advantage of DaVinci Resolve 17’s new color space-aware toolset when we need it and disable it when it gets in our way.
Make sure to set your project settings to our recommendations, which disables all project level color management. We’ll handle that in the Film Lab.
Film Lab User Guide
Knowing that a professional colorist has created these PowerGrades with other professionals in mind means that you’re getting a high calibre product that will stand up to discerning eyes, whilst also getting a first hand look at how to leverage an organised node tree.
The only thing a ‘beginner’ needs to know to get started is how to set up their camera’s source colour space and gamma in the INPUT node and final display colour space and gamma in the OUTPUT node. (Most likely to be Rec709+ Gamma 2.4 for ‘traditional SDR outputs’.)
It will be interesting to see what further film stock Jason updates the collection with over the course of the next year, which will also add extra value to your investment.
All in all I thought the PixelTools Film Lab PowerGrade Collection delivered excellent looking results and I’m confident many professional colorists will appreciate having these are their disposal given how good they will look in front of their clients when show them a tasty looking film grade they just ‘threw together…’
For $139 you get:
- Over 35+ Unique PowerGrade Presets designed exclusively for DaVinci Resolve 17
- Built around the popular Kodak 2383 Print Stock (with more coming soon!)
- Wide Camera Support – RED, ARRI, Sony, BMD, Panasonic, DJI and Rec709
- Manual “Node-Based” Color Managed Log-C Workflow supports SDR, HDR and DCI P3
- Includes 3x Halation, Film Grain, Gate Weave, and Diffusion (Pro-Mist) Presets
- Free Updates for One Year
Check them out the PixelTools Film Lab collection yourself at PixelTools.com
I’ve previously reviewed PixelTools’ first PowerGrade collection as part of this post on DaVinci Resolve tools and Productivity Hacks.
CineMatch from FilmConvert

CineMatch is a really useful tool for anyone who is regularly colour grading projects that are shot on multiple different cameras, yet needs to get them to look the same across the whole edit.
It does this by drawing on over 50 camera sensor profiles and then compensating for the differences between them when adding in a colour science transformation on top.
According to FilmConvert “The sensor match step plus the colour science transform is what makes CineMatch the most accurate camera matching workflow available.“
One way to test this claim for yourself is to download the free trial and compare the CineMatch results to DaVinci Resolve’s own Color Space Transformation math and see how they look.
The team are close to finishing the Final Cut Pro version of the plugin and also earlier this year added the ability to export LUTS with your match settings baked in, so that you can make your cameras more consistently on set.
There are also some other exciting new features coming soon that I can’t talk about yet.
Cinematch is already supported in DaVinci Resolve and Adobe Premiere Pro and you can read through a handy workflow guide for both hosts here.
CineMatch Discount code
The folk at FilmConvert, the team behind CineMatch, were kind enough to apply the same 10% off discount code with sales stacking offer for my readers.
Right now that means you can save 30% on CineMatch, that’s up to $84 on the bundle, because they’re also running a 20% off sale.
Just use the discount code “ELWYN” at the check out.
New FilmConvert Nitrate Tutorials
In the summer of 2021 FilmConvert released a series of ultra short tutorials for getting the best results from their excellent Film Emulation plugin, FilmConvert Nitrate, which features 19 different film stocks to choose from.
There are tutorials for using Nitrate in DaVinci Resolve and Adobe Premiere Pro although the plugin is also supported in Apple’s Final Cut Pro and Motion software as well as Adobe After Effects.
FilmConvert Discount Code
Get 10% off the price of FilmConvert’s full range of plugins with the discount code “ELWYN” which can also be stacked with other sales that might be happening (except Black Friday).
Buying the plugin for one host app costs $149 (you’ll save around $15) or you can grab the full bundle for every supported app for just $219 (you’d save around $21).
I’ve previously reviewed FilmConvert Nitrate here.
Colorist Kevin Shaw’s Introductory HDR Professional Training
If you’ve never colour graded HDR before but you know you need to seriously get to grips with it, then this FXPhd training course, An Introduction to HDR, from UK colorist Kevin Shaw is what you need.
The course consists of 13 lessons with three DaVinci Resolve projects and practice media to grade along with. It was filmed at the Dolby colour suite in London which feature a Dolby Pulsar monitor which costs about $40,000.
It’s important to note that you don’t need an HDR monitor to benefit from taking the course and in fact, if you watch the course before you run out to buy one, then you’ll be much better equipped to make the right choice.
While the bulk of the course focuses on HDR workflows such as converting SDR masters to HDR, delivering HDR from an SDR grade and vice versa, there are also lessons on choosing HDR Displays, understanding HDR formats and delivery specifications and more.
You can read through a detailed description of what each lesson covers here.
This is an introductory level course ideal for colorists, engineers, cinematographers, DITs, VFX artists, and editors involved in HDR pre-production, production and post-production.
It’s also useful for producers, directors and designers as they encounter demand for HDR, Dolby vision, UHD Premium, Rec 2020, and wide colour gamut.
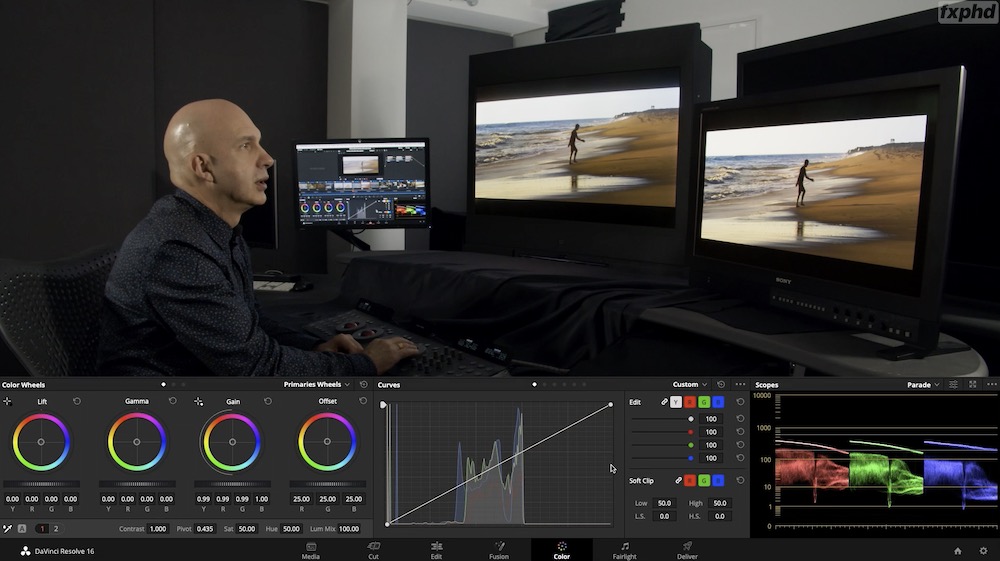
Kevin was kind enough to share the course with me for the purposes of this post and I have to say he makes for a very clear and concise instructor with an approachable tone.
This is an intensely technical topic but Kevin makes it easy to follow and when he is sharing clever tips and techniques during the more hands on lessons, it is obvious that you’re benefiting from the 35+ years of industry experience he’s drawing on.
The lessons are quite varied in length, anywhere from 20 – 70 minutes each, so you’ll likely want to take them one at a time, and follow along with the practice files when you can, but if you invest the time in absorbing Kevin’s training you’ll feel far more confident about handling your first HDR job.
If you stay around in the industry long enough HDR will be in your future, so you may as well be prepared for it!
An Introduction to HDR delivers over 8 hours of training for only $149
Introducing fylm.ai
fylm.ai is a brand new in-browser colour grading tool equipped with a very rich feature set and powered by some smart AI algorithms.
Our deep learning neural networks model, trained exclusively on millions of cinematic frames creates a 3D LUT from any supplied image.
fylm.ai
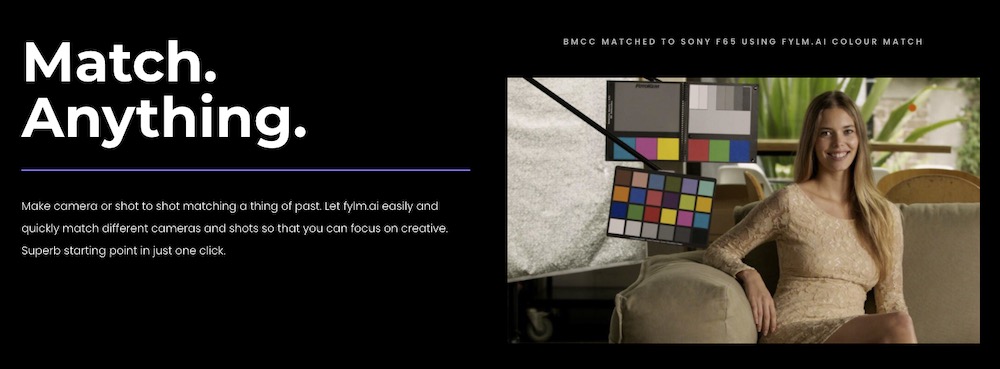
This ‘deep learning neural network’ allows you to replicate the look of any reference image and have it applied to your footage in a couple of clicks, match the sensor characteristics of any two cameras to each other or re-create what a LUT is doing based on matching a before and after image.
This automatic shot matching capability will also allow you to ensure consistent grades across your project as you match the look of your hero shot to all your other shots in a scene.
What is fylm.ai?
- Use AI to extract any colour grade from any image
- Use AI to seamlessly match different cameras or shots
- Work in an ACEScct colour managed app which allows effortless look creation
- Use the best colour grading and film-like tools to create brilliant colour grades easily
- Manage all your colour grading feedback in-app for super quick turnaround
Or at least that’s the concise summary from one of their marketing emails, but having taken a long look around the site, there’s definitely a lot more to it.
How does it work?
As of this launch edition, my understanding of how you will use fylm.ai is as a look creation tool rather than a replacement for something like DaVinci Resolve, so, for example you are more likely to upload a still image of each shot you want to create a look for/grade in your project rather than uploading all of the raw rushes.
Right now, you can only upload a video file as an MP4, for compatibility reasons, but this will change in future versions.
You’ll then use fylm.ai toolset to create a LUT for those shots, batch export and apply them to your offline edit.
fylm.ai operates in a ‘scene referred’ ACES colour managed workflow so you will need to know the camera and profile that your footage originated in (your input transform to get into ACES correctly) and what your delivery colour space will be (your output transform to get back out of ACES correctly).
This sounds more complicated than it is, it’s essentially just ticking a couple of boxes and forgetting all about it.
Understand all the Features
You can watch an 80 minute ‘Getting Started’ video here, if you want to take a granular deep dive on everything it can do, including a step by step guided tour, understanding the organisational structure, using collaborative workflows and a lot more.
Fylm.ai has a deep set of professional colour grading tools to work with including:
- Magic Mode
- 15 Preset cine looks
- 16 ACES Film Print Emulations
- 10 pre-made filmic curve responses
- Curves controls (4096 points calculated)
- Primary wheels and bars and Log Primaries
- Scopes – RGB Parades, Waveform, Vectorscope, Histogram
- Printer Lights
- Subtractive CMY colour model (vs additive RGB colour model)
- 26 Blending modes
- Secondaries – Hue, Saturation, Luminance, Lum vs Sat and Sat vs Sat.
- Batch Export LUTS
How easy is fylm.ai to use?
Anyone with even the briefest experience of colour grading a photo in any other professional app, or even just on Instagram, will find it easy and intuitive enough to get started with fylm.ai.
That said, you’ll want to spend some time experimenting with the different looks, tools and options to see what they each do and what you like the look of. The interface is split into three areas with tools on the left, main canvas in the middle and previews on the right.
Although you can see a thumbnail list of the different options that will be applied on the right hand side of the screen, I found it easier to flick through the drop-down list that is in most tools, and see the result instantly update on the central main image.
For fun I uploaded a 6K 116mb TIFF still image from an R3D file from FilmSupply.com, which uploaded speedily and worked flawlessly in the system. Each of the tools was responsive and fluid, although I was working on my 2013 Trashcan and a 32″ screen.
The keyboard shortcut F will put your main image/canvas into fullscreen mode, which is handy to see how well you’re doing and will be doubly helpful on a smaller screen.
The ‘Magic mode’ guides you through 12 colour grading steps (Exposure, white balance, contrast etc.) and offers you previews of a range of possible choices on the right hand side. You can see a walk through of Magic Mode at about 42 minutes into the Getting Started video.
It was an interesting way to work through an order of operations in a logical way, but I personally preferred the manual control of choosing which tools to add as I went about adjusting my image.
Overall I was really impressed with what the team behind fylm.ai have created and it will be interesting to see where things go and what people make with it!
Pricing
Fylm.ai has a free trial account which offers you 1GB of cloud storage, 3 concurrent projects and zero guests. Both the Pro and Team tiers feature unlimited projects and guests, while the Pro account starts with 50GB of cloud storage and 100GB provisioned for a Team.
fylm.ai are offering 50% off to the first 500 early adopters. With a Pro subscription starting at $16/month or $41 for a Team subscription you could stand to save quite a bit!
If you want to be one of those 500 early adopters just use coupon EARLYADOPTER50OFF at the checkout.
Understanding ColourLab AI
Colourlab AI is aiming to be the ‘future of colour grading’, so if you’re interested in that, then this hour with colorist and Colorlab AI co-founder Dado Valentic will walk you through everything they have to offer.
So far this includes three DaVinci Resolve plugins, although Colourlab is a standalone Mac app that connects with Resolve:
- Colourlab AI – A virtual colorist assistant
- Look Designer 2.0 – Film Emulation and Processing
- Grainlab – Grain ”generated by the content of the frame”.
You can download a free fully functional trial of all of their plugins (although you can’t export or render) from the colourlab.ai site. A single plugin costs $249/year while you can get every plugin and Colourlab.ai for $490/year, although they do have monthly subscriptions too.
In the hour long introduction above you can jump to What is Different About ColourLab AI if you want to hit the fundamental essence of ColourLab AI’s secret sauce.
One of the reasons I’m extra interested in ColourLab AI is that one of my favourite post-production companies, Hedge, is the lead investor in their seed round. If they are backing the team, then that is a good indicator they are one to watch.
The final frontier is colour. Within a few years, a non-destructive colour workflow will become the most important cornerstone for any production.
Colourlab is a great step forward towards enabling that and it’s the main reason why we are investing in their seed round.
They are doing amazing things, and we see this as just the beginning of an amazing industry evolution and partner collaboration.
Paul Matthijs, CEO of Hedge
I’ve written more about ColourAI in this previous post on How to Become a Better Colorist.
ColourLab AI also has its own set of custom Stream Deck icons and profiles you can download here.
For a guide to editing and grading with a Stream Deck check out this previous post.
Reverator Texture Tools
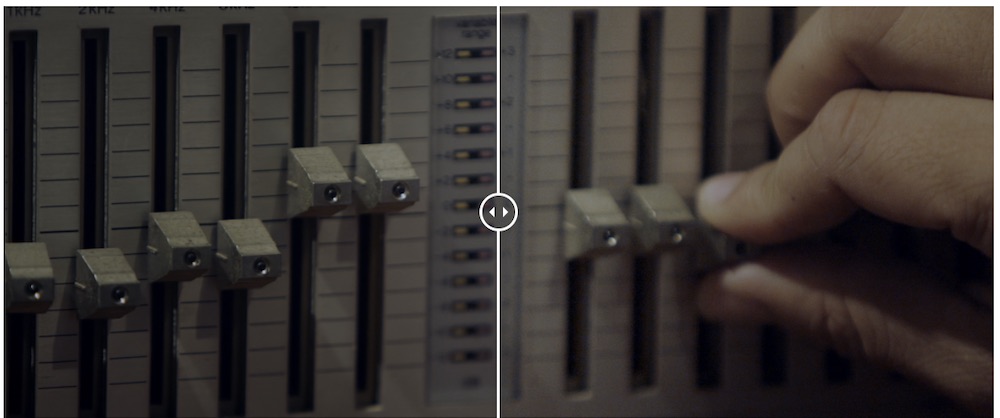
Reverator is a new suite of OFX plugins that will help you add some analogue love to your digital images.
Still in active development, Reverator’s plugins are currently supported in DaVinci Resolve, Nuke, Scratch, HitFilm and Natron and include the following tools;
- Texture Pitch
- Details enhancer
- Textures enhancer
- Aperture corrector
- Resizer
- Film grain generator
These allow you to do a whole host of things, including:
- Add (or remove) texture and details from resized analogue footage
- Add or remove texture within six ‘automatically derived’ texture bands across an image
- Create cinematic looks by adding realistic film grain to your images
- Use them in your HDR workflows due to their “intelligent gamut-extents suppression”
Unlike blended overlays of Film scans and simulated grain textures that float on top of footage, Reverator – just like real Film – flips the script whereby footage is ingrained.
As your film grains define the image sensor, your S-curve tonalities are transformed into natural grain expressions of silver halide’s undulating sensitivity to light, yielding film-like Dmin and Dmax with options for pure blacks and whites without grains.
Reverator website

