DaVinci Resolve 15 Free Training
DaVinci Resolve 15 is still rolling through its extensive beta process, which at the time of writing is currently ‘Public Beta 6’, which you can download here for free.
The headline new additions include:
- Editing audio automation data in the Fairlight page
- Simultaneous monitoring of HDR and SDR for Dolby Vision and HDR10+
- New native French and Portuguese language support to the user interface
- The ability to copy Fusion compositions
- Use the clip name for data burn-in
- Replace existing frame based files during renders
- Support for audio clip levels from AAF imports
- More audio file formats supported in the sound library
- Subframe audio fades on the timeline
- More robust metadata support for QuickTime files
- More scripting APIs and documentation
If you’re not caught up with some of the previous improvements, Public Beta 5 included the following:
- Initial support for OpenFX plugins on the Fusion page
- Tint, temperature and exposure controls for Canon RAW clips
- Add filters to clips with Fusion effects
- New Python scripting APIs
It also addressed issues with:
- Automatic audio synchronization
- Dynamic trimming reliability
- Video output from the Fusion page
- LUT browser refreshes
New DaVinci Resolve 14.3.1 Update! Get improved scope performance when using Blackmagic Design playback devices and improved 4:2:2 output via HDMI. This update also improves gallery still previews when using shared gallery paths and during collaboration sessions. Download now!
— Blackmagic Design (@Blackmagic_News) July 9, 2018
I don't know when this got added – but I LOVE that you can middle click scroll the inspector pane in fusion in resolve. PLEASE can that get added to the edit page and color page inspectors/ofx properties as well….
— Joey D'Anna (@joeydanna) June 29, 2018
If you want to learn a huge amount more about the new features in DaVinci Resolve 15 check out these previous posts:
- What’s new in DaVinci Resolve 15 (and other NLEs)
- Learn DaVinci Resolve 15’s New Features
- Getting Started with Fusion in Resolve 15
How to Grade Like a Hollywood Colorist
In this free 20 minute crash course on DaVinci Resolve 15, colorist Denver Riddle gives you a pacy introduction to colour grading in Resolve.
If you’re fairly new to colour grading, this will be 20 minutes well spent as Denver covers key terminology, how to use video scopes (which is often a sizeable hurdle for new colorists) as well as his preferred colour correction workflow, or order of operations to match all of your shots within a sequence.
In the meat of the tutorial Denver also demonstrates how to create a specific look (which you can download as free LUT), create isolated secondary corrections using tracked Power Windows, addressing client requests across multiple shots using shared nodes and much more.
If you found the crash course useful and enjoyed Denver’s style of presentation then you should definitely check out his free 1 hour online workshop called How To Grade Like a Hollywood Colorist, in which you can also grab a download link to some unique free LUTS, ask him questions and a whole lot more.
Space is limited each time Denver runs the class so you’ll need to sign up for the next one here.
Denver has some great free and paid for LUTs and colour grading tools which I’ve previously written about here:
- Using LUTS to match a real film Look (Review of paid LUTS)
- Free Film LUTS for Colorists, Editors and DITs
- LUT Gallery for FCPX and DaVinci Resolve (Review)
Download Five hours of Free DaVinci Resolve Training
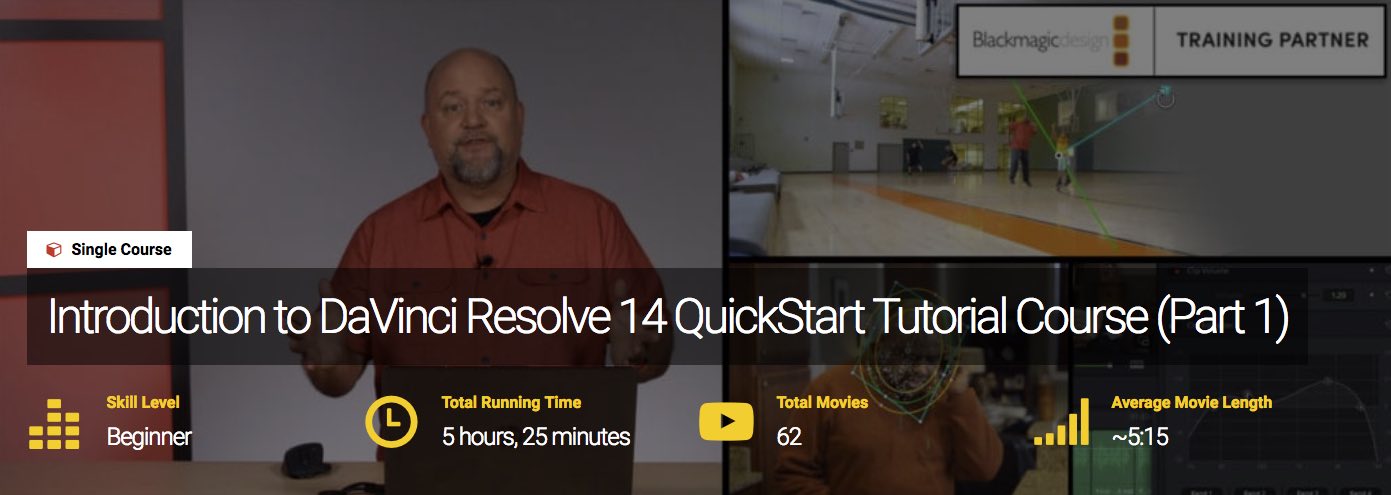
MixingLight.com, probably the premiere colour grading training site online today, has recently released a free 5 and a half hour course called DaVinci Resolve 14 QuickStart.
Before I get into what it offers, the obvious question arises; isn’t this already out of date if Resolve 15 is out?
Yes and no.
Yes in that the new features obviously won’t be in the training, but no in that the fundamental concepts, workflows and techniques will be the same as version 15 simply builds on version 14.
Spread across 62 individual lessons, with an average runtime of about 5 minutes each, the course is accessible to absolute beginners with the only requirement be that you are working with DaVinci Resolve 14.3 (the last stable release), which you can download for free here.
The course is split in two, with the first part (95 minutes) taking you through an entire spec project from start to finish. This helps you to get a sense of the overall picture before diving into the detail in part 2.
The second half gives you a ‘101’ of each of the four pages; Media, Edit, FairLight and Color with more depth and detail on each.
By the end you’ll have learned how to:
- Set up a Project and key preferences
- Import and organize your media
- Edit video and audio into a timeline (and then make revisions)
- Color correct to fix problems, build visual continuity and add effects
- Set levels, EQ, and balance dialog and music
- Render for final delivery to a client or the internet
There are a few little things that I always appreciate with a Mixing Light training course (I reviewed their last one here) which include things like having follow along exercise files so you can learn by doing as well as smaller, multi-part downloads, incase you’re not sitting on a fibre line.
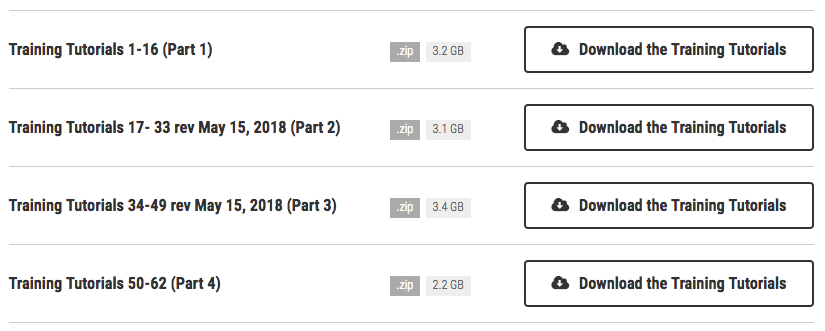
In this case the five hour free QuickStart course is delivered as four 3GB zip files.
To find out more read this detailed 12 page PDF to see what each lesson covers, or sign up for free here.
Lastly just to mention, a new feature that the Mixing Light team have recently added to the full subscription site is that of ‘Flight Paths’.
With nearly 700 tutorials on the site they needed a way to guide new users through that archive in a logical and sensible way.
These include things like: Building Your Edit or Colour Grading Suite, What is ACES and how do you work with it?, Using LUTS in DaVinci Resolve and many more.
You can grab a 7-day free trial to have access to everything MixingLight.com has to offer, here.
Advanced DaVinci Resolve 15 Tutorials
Colorist Juan Melara demonstrates how to reveal the StatusM film mode hidden inside FilmConvert’s colour grading plugin. Even though Juan does a great job of explaining what he’s doing step-by-step, the actual colour science is pretty complicated.
StatusM features in FilmConvert as it seems the matching between the cameras and motion picture film stocks is carried out in Status M density. It does however have a different spectral response compared to images that we normally work with, so we have to convert them.
You need to download the RED One Camera Profile to start this journey with Juan, which isn’t for beginners, although Juan does provide a free Powergrade of the whole process in Resolve. He also includes some stills of comparisons between the real film negative and his own emulation.
The reason you might want to use StatusM over the standard FilmConvert emulations is that StatusM is emulating a negative film scan as if it just came off the scanner.
The standard FilmConvert emulations are emulating the same film scans but then applying a print LUT on top.
This is fine if you’re after the contrasty look the print LUT imparts. But if you’re after a different look, say something a bit more subtle, you will need to battle the print LUT to get there. – Juan Melara.
By using the StatusM emulations you’re free to decide how the emulation converts from negative film scan to Rec709. You can apply you’re own print LUT, use a standard Rec709 conversion or even use a custom curve.
As you’ll need FilmConvert to make this work you can save 10% with the coupon code ‘Elwyn’ or click this link to activate it.
You can check out my own review of FilmConvert’s super useful colour grading plugin in this previous post.
Colorist Kevin Shaw shares some excellent tips on managing saturation in DaVinci Resolve in this short tutorial. Kevin walks through several options for working with saturation in ways that avoid using the ‘saturation’ control. Well worth a watch!
Colorist – A person of remarkable technical and aesthetic skills who advises on and manipulates colour and colour visual style. Colorists work in all industries from hair dressing and fashion to film and video…
Kevin also has a very detailed post production glossary which will give you easy to understand definitions of hundreds of technical terms.
His entire site is well worth rummaging through – lots of great articles and information on colour grading!
One of the exciting new features added to Resolve 15 is the ability to engage with Python and Lua scripting inside the app, which has come as a result of the incorporation of Fusion into Resolve.
In this tutorial Igor Ri?anovi? from HDHead.com, gives you a great taste of what’s possible when you know how including automating the creation of timelines from clips with a script. Presumably this would be a great way for DITs to speed up dailies creation.
You can keep track of Igor’s Resolve Python scripts, and download them for yourself, on his github page here.
In this follow up Igor shares some more details of his proof of concept app which allows you to control Resolve machines remotely.
In this excellent presentation from the LumaForge Faster Together suite at NAB 2018, Mixing Light founders Robbie Carman and Patrick Inhofer share how to use DaVinci Resolve to collaborate within a team of a senior and assistant colorist.
The guys discuss the benefits of Resolve Studio’s collaboration features which includes a chat box to communicate between collaborators, even without being on the internet, as long as you’re connected to the same shared database.
You’ll need to be running DaVinci Resolve Studio to create and use shared databases in this way. The bin locking functionality works on a ‘first-in, first-out’ method, so if you’re the first one into a bin you have control of it.
Well worth a watch if you are fortunate enough to be sharing your work load with others!
You can watch a lot more presentations from the LumaForge suite in this previous post, rounding up the best post production presentations from NAB 2018.
Spencer from RippleTraining.com shares this quick tip on how to work well during long distance collaborations with other DaVinci Resolve users.
Spencer effectively covers how to use markers and on-screen annotations to share comments with your team, exporting your project for sending to your team and then merging their work back into your project.
Tutorials on the New Features in Resolve 15
In this section of the post I’ve brought together some further tutorials which highlight some of the new features and functionality in DaVinci Resolve 15.
Paul Saccone is senior director of marketing for Blackmagic Design, and one of the interesting things that he said during this overview presentation of the app, was that in this release BMD has added over 100 new features that editors and colorists had specifically requested.
So be sure to get your feature requests in – you never know, maybe we’ll all benefit from your good ideas.
In this second presentation from the LACPUG event comes from Mary Plummer on how to make the most of the Fairlight page in DaVinci Resolve.
A quick look at Mary’s linkedIn page reveals just how experienced an editor she is – with over 25 years in the business, not to mention 12 years of experience as an instructor.
Of all the new features added to Resolve across the application, it’s dedicated audio capabilities are getting the least attention, although editors who do pay attention to them, will dramatically increase the production value of their projects because most things that sound better ‘look’ better too.
Editor Jeff Greenberg shares his experience of editing in Resolve in this presentation from the LumaForge Faster Together stage.
Jeff covers 8 cool things that make your editorial life easier whilst cutting in the app for (maybe) the first time, as well as 3 ‘speed bumps’ that might otherwise catch you out.
One of the big new features for colorists in Resolve 15 is Shared Nodes. Casey Faris quickly demonstrates how shared nodes work in comparison to ‘normal’ nodes and groups.
These will help you work faster if you maintain a mental map of what’s shared, what’s grouped and what’s just a regular node. Aided of course by the UI reminders.
If you’re new to Resolve or just re-installed the next beta update, then you’ll want to make sure you’ve got your Auto Save set up correctly, so you don’t lose any work! Justin Robinson (JayAre) walks you through the various options.
Find the settings under:
DaVinci Resolve > Preferences > User > Project Save and Load
In this video short video you can learn about a few hidden menus and options in Resolve 15, many of which were new to me, so well worth taking the 6 minutes to watch.
You can check out more of JayAre’s tutorials in these previous posts exploring Fusion in DaVinci Resolve 15:
Alex from LearnColourGrading.com share a quick tip on one of the new features in DaVinci Resolve 15 around keyboard shortcuts, which allows you to map the same keyboard shortcuts to different functions in different pages.
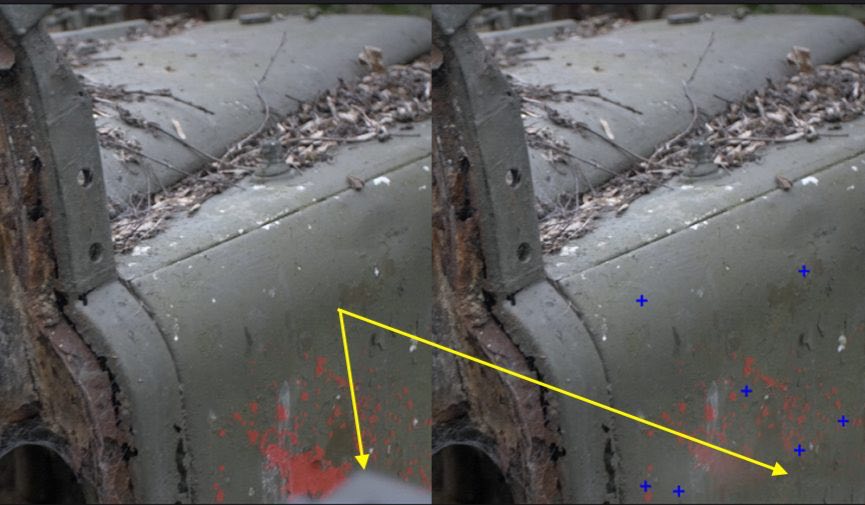
Lewis McGregor for Premiumbeat.com shares a really useful guide to using the Patch Replacer effect in Resolve to do some quick simple VFX fixes.
The before/after image above shows you how cleanly an errant object can be removed from a shot, whilst tracking it in. Knowing how to do this could make you a hero to your client!
When you first add the Patch Replacer onto a node, you’ll see these two ellipses: the source patch and the target patch.
If we relate back to Photoshop’s clone tool, this works in a very similar fashion.
You place the target ellipse (which can also be changed to a square or an alpha channel) over the area of the image that needs removal and the source patch over an appropriate space to clone.
Avery Peck walks through a Technical LUT workflow in performing LOG to Rec. 709 conversions. Presumably part 2 will cover Creative LUTs.
If you’ve ever wondered if you’re doing it right, this 8 minute tutorial will guide you through some solid best practices, all while avoiding some common pitfalls.
If you want to download more LUTs than you’ll know what to do with check out this popular post: Free Film LUTS for Colorist, Editors and DITs
Tips for DaVinci Resolve 15
#Resolve15 Tip – Preview Memory doesn't work if you adjust a Shared Node @rohit_bmd
— Jamie Dickinson (@dickij10) June 22, 2018
As always I like to end these posts with the best tips I’ve seen from editors and colorists shared on Twitter. Be sure to click the date/time stamps to read any replies and comments!
I’ve updated my @Blackmagic_News DaVinci Resolve editing keyboard cheatsheet for #Resolve15
Download a copy for free!https://t.co/Rr1umW7RWl pic.twitter.com/jfgPWCvZh6
— Scott Simmons (@editblog) June 22, 2018
I really do like this little trick pic.twitter.com/XVoAK0jEfg
— Joey D'Anna (@joeydanna) December 23, 2017
#Resolve tip for a nice clean selection; heavy Noise Reduce>Qualifier>feed key to Corrector, feed rgb from pre-NR.
— Jamie Dickinson (@dickij10) January 6, 2018
Great stuff from @joeydanna for #Resolve on @MixingLight 'Exclude Track from caching' and many more tips (Btw, you know you can Display Node Graph from the Clip thumbnail as well as a Still)
— Jamie Dickinson (@dickij10) December 19, 2017
The trimming key shortcuts are currently designed to work together to accomplish a variety of things, for example V to select the nearest edit, then T to enable ripple trim, and now you can nudge the selection or press W to trim dynamically.
— Alexis Van Hurkman (@hurkman) February 6, 2018
Lastly, for fast nudging, you can press V, then / to play around the selection, and use the , and . nudge keys to nudge. During play-around, nudging before the tail stops playing restarts play-around automatically, so it's easy to preview how your change plays.
— Alexis Van Hurkman (@hurkman) February 6, 2018
Alternately, you can just grab the mouse and click the trim tool to do whatever you want contextually based on which part of the clip you click on. Resolve isn't snobby.
— Alexis Van Hurkman (@hurkman) February 6, 2018
Another quick resolve tip – if you properly limit it with a qualifier/window – Resolve 14's new de-band ResolveFX plugin is actual honest to god black magic. What kind of evil sorcery is this? pic.twitter.com/N1UWWCrRmL
— Joey D'Anna (@joeydanna) January 30, 2018
Just to add to this – If your original source is log, you can also drop the lift on the layer mixer node to dial in the shadow level exactly where you want it
— Joey D'Anna (@joeydanna) January 30, 2018
Resolve 14 Movie grading tip. Tick "Show offline reference movie through timeline gaps and mis conformed clips" Make sure the ref movie has burned in supers, then easy to see when shots are missing or awaiting VFX pic.twitter.com/MZeVodmDVO
— icolorist (@icolorist) February 16, 2018
#Resolve Editing Tip—Using Take Selectors in the Edit page to manage multiple versions of key Motion Graphics clips you're receiving is pretty great. It's a manual operation, but gives an easy drag & drop target, and makes it quick to switch among versions to keep track. pic.twitter.com/qkdvkDeqNe
— Alexis Van Hurkman (@hurkman) February 11, 2018
Thanks to Oliver Peters for mentioning that switching DaVinci #Resolve to Metal for GPU processing (Preferences > Hardware Configuration) avoids crashes (it seems particularly in Sierra). I've not upgraded to High Sierra (I'm mid-project). His article: https://t.co/tGIHVmQ6vI
— Alexis Van Hurkman (@hurkman) February 11, 2018
I like this new FX icon below the Color Page thumbnail indicating that the editor has used an OFX effect. Very important when sharing Resolve projects #resolve14 pic.twitter.com/qQ0ftkqM1K
— Warren Eagles CSI (@warreneagles) February 6, 2018
#Resolve Grading Tip–If you want C-Mode thumbnail sorting to be useful when the project you're grading was Media Managed to eliminate unused media, set the "Assist using reel names from the" setting to "Source clip filename" in the General Options of the Project Settings. pic.twitter.com/3KWOWfonkW
— Alexis Van Hurkman (@hurkman) February 17, 2018
One of the nice things about the free version of DaVinci #Resolve is editors can download it to test how exported XML or AAF will import into Resolve before shipping a drive to the colorist, while there’s still time to deal w/issues. Talked 2 editors through this just this week.
— Alexis Van Hurkman (@hurkman) February 16, 2018
I am pleased to present DaVinci Resolve PostgreSQL Workflow Tools. This shell script will let you effortlessly set up automatic backups and automatic optimizations of DaVinci Resolve 14 Studio's PostgreSQL databases. https://t.co/8bG4tyUpt5
— Seth Goldin (@sethgoldin) March 23, 2018
Resolve tip – If you drop down the submenu in the render queue, you can show details and see lots more info for each job. Can be very useful when tracking/setting up lots of different outputs. pic.twitter.com/VvV1iC5dRt
— Joey D'Anna (@joeydanna) March 20, 2018
If you need to perfectly match the color of a product, request the RGB or hex values for the exact color, add a solid color swatch to the timeline with those values, and you now have a reference onscreen. #resolve #color @DanMoranColor pic.twitter.com/U1eyhnKiVm
— Jason Bowdach (@JBowdacious) April 10, 2018
I'm sure I've posted this before but it's worth repeating- Resolve tip: To batch render a pile of timelines, select them all->right click->new timeline from selected clips. Then render that as individual clips using source names. (I'm batch rendering 30 timelines right now).
— Joey D'Anna (@joeydanna) April 20, 2018


