
DaVinci Resolve Colour Grading Round Up
DaVinci Resolve has taken another leap forward with it’s 11.2 release, which includes several new features, listed below. You can download the updates today for both the Full and Lite versions of the software from the Blackmagic Design Support site. In the video above you can check out the first ‘Resolve in a Rush’ training video from Alexis Van Hurkman, who has written more than one must read book on colour correction and presented some excellent in-depth training on Resolve too. Here you can learn how to stabilise some shaky footage in under 5 minutes.
What’s new in Resolve 11.2
- CinemaDNG tone curve improvements
- CinemaDNG soft clip option
- DNxHR encode and decode support
- Media Composer 8.3 round-trip support
- AAF import now sets the timeline resolution
- Invalidate clip cache option in Edit and Color page
- Option to select RGB pixel order for DPX version 2.0
- Flags and markers now supported in ColorTrace
- Support for Red SDK 5.3
- General performance and stability improvements
Davinci Resolve 11.2 tip – Use DNxHR as your render cache format if you are on Windows and working on a higher than HD timeline! #resolve11
— Rohit Gupta (@rohit_bmd) February 4, 2015
If you’re an editor or cameraman wondering whether you should bother to learn DaVinci Resolve then it’s worth taking a look at this short tutorial from Mixing Light.com‘s Patrick Inhofer, which explains the essential differences between the Life (free) and full (paid) versions of Resolve. I previously posted this tutorial (along with 35 other minutes of free tutorials) in this post. Given that the software is free, there’s really no reason to download it and give it a try!
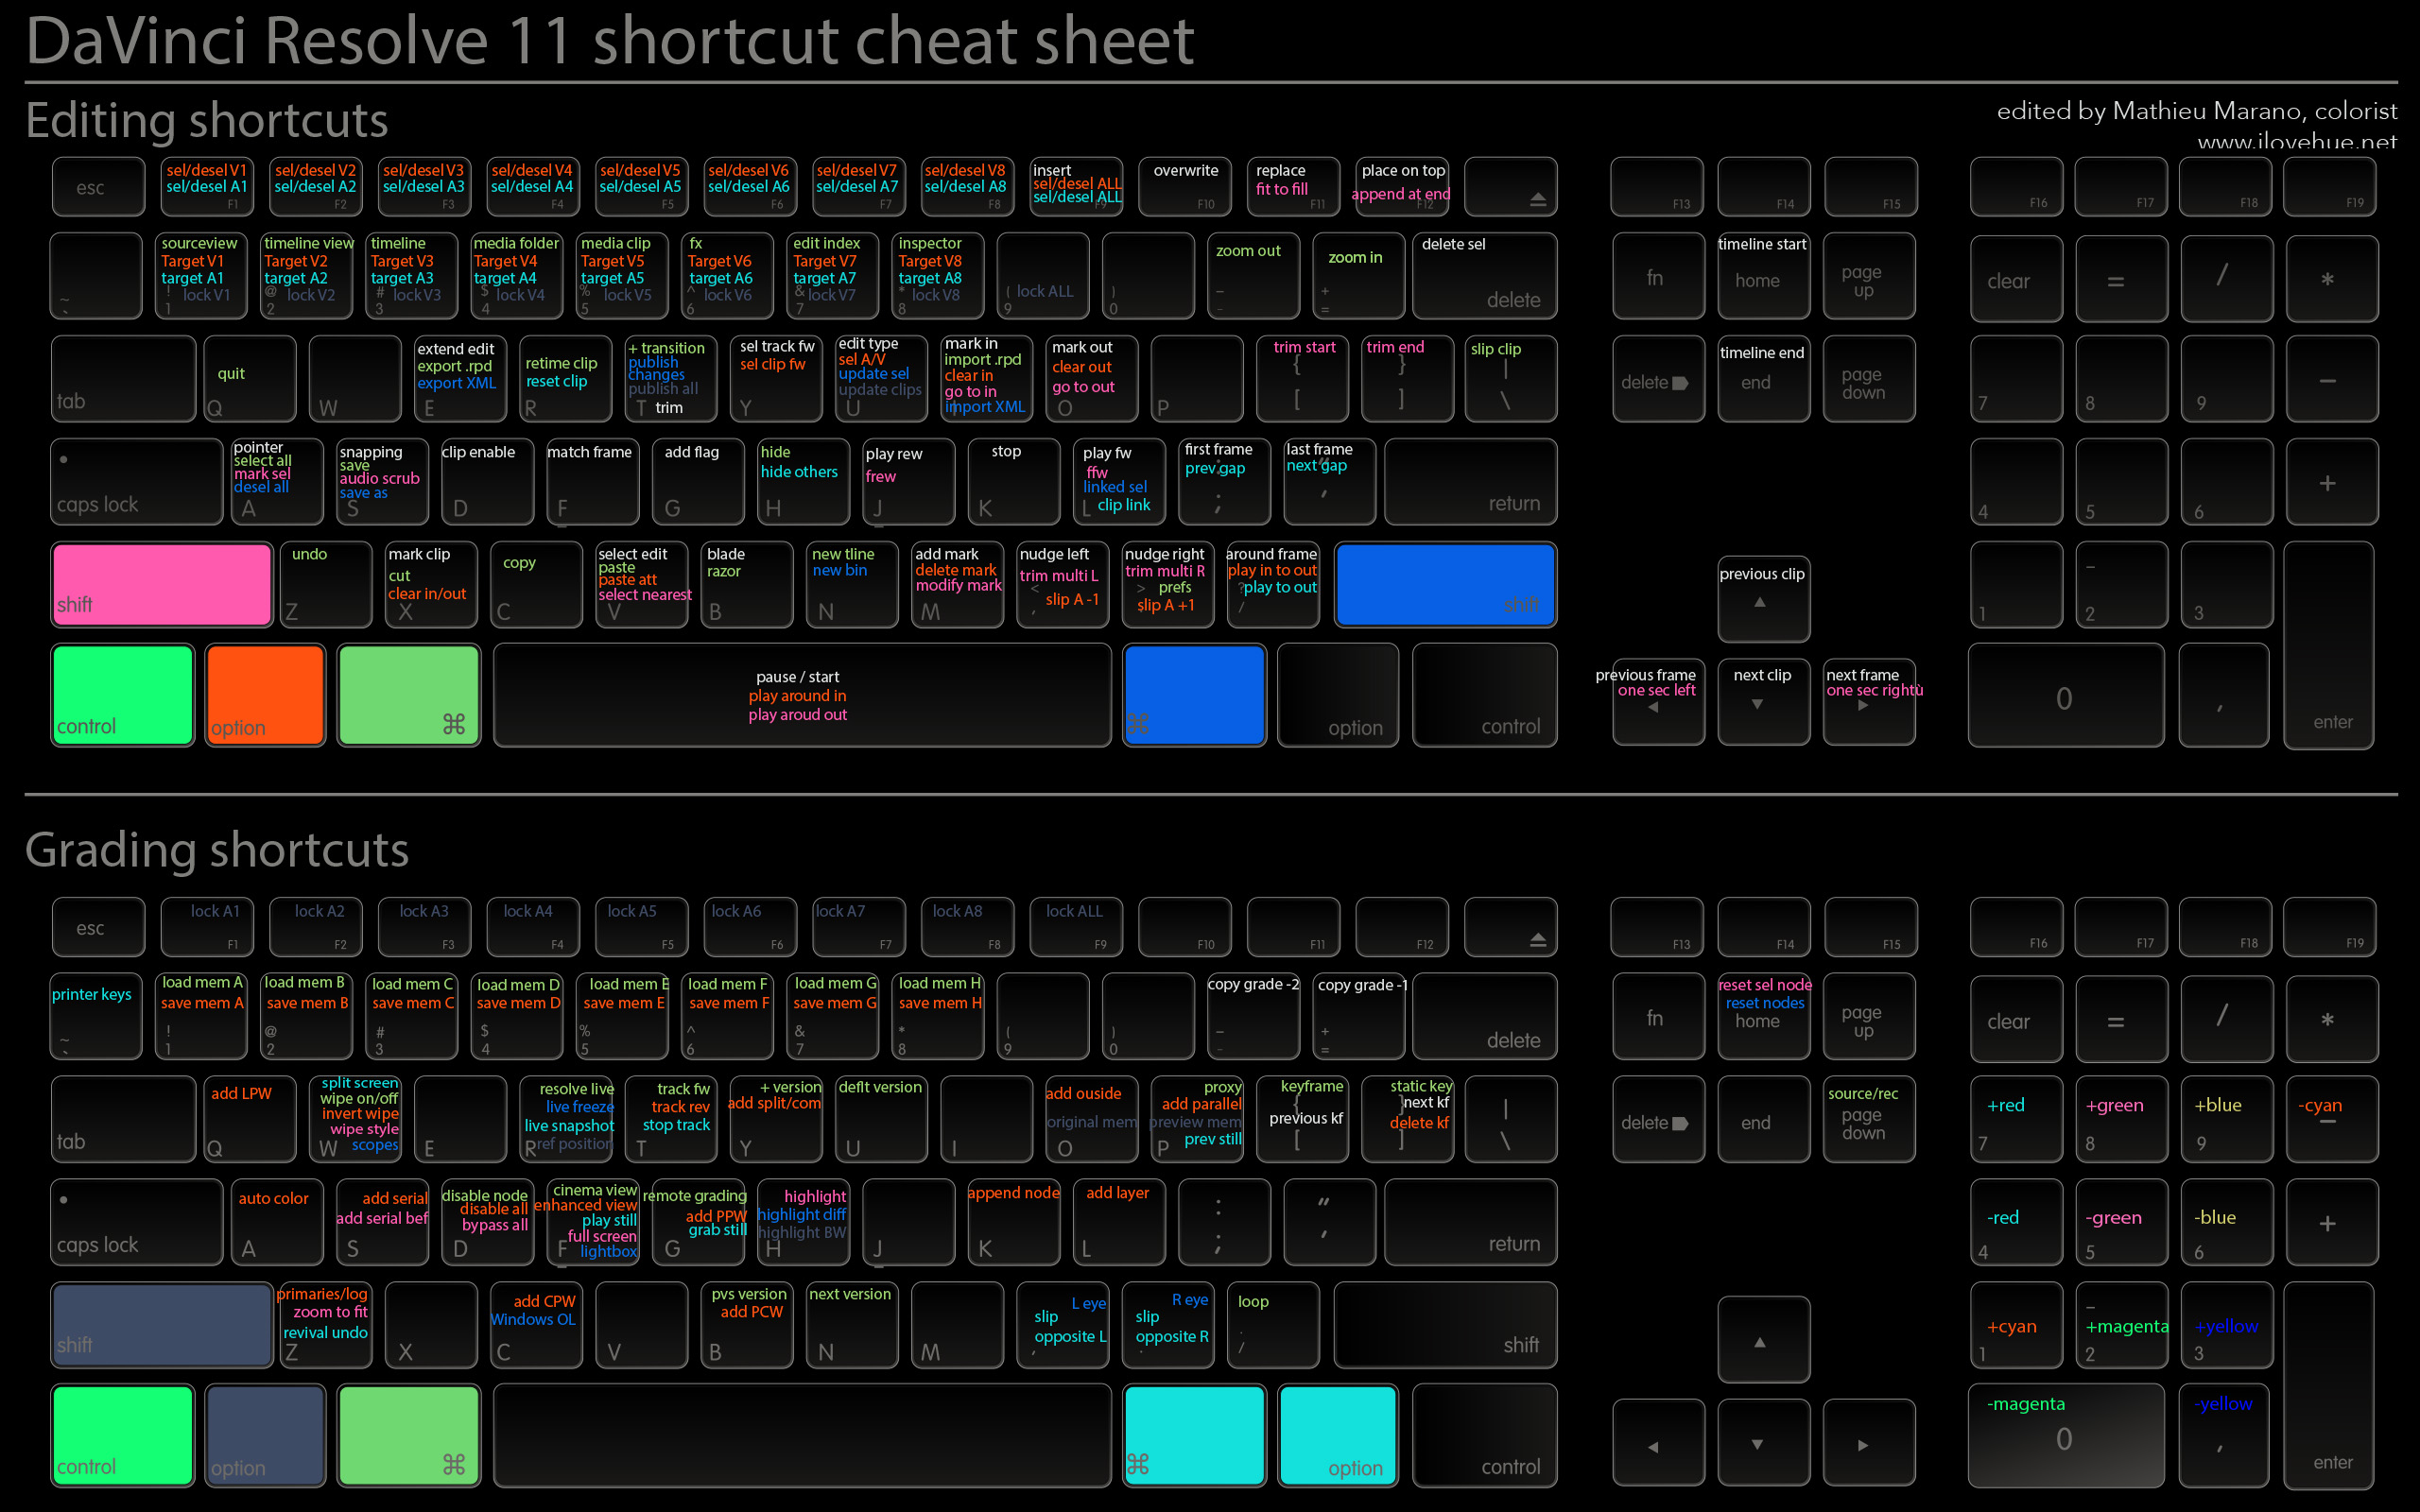
Another helpful thing to grab would be Canadian colorist Mathieu Marano’s DaVinci Resolve 11 Short Cut Cheat Sheet – a free download as a pdf of desktop sized jpg – and recently updated for version 11 of Resolve.
DaVinci Resolve 11 Tutorials
Theo from Meisner Media is a pretty prodigious creator of DaVinci Resolve tutorials, sometimes posting two or three a week! In these two tutorials you can learn how to work between both Resolve and After Effects with green-screen footage, as well as some of Theo’s favourite grading tricks in Resolve.
Colorist Nikolai Waldman has a handy tutorial on how to animate stills inside of DaVinci Resolve in a way that gets around their lack of timecode.
Say you have a still of a map and you want to do a zoom in on a particular part of it. You add the map to the timeline and you try to animate it using “Input Sizing”. You set a keyframe at the start and then move to forward to set another keyframe, but no luck. Why? Keyframes in the COLOR timeline are set by source timecode and since a still frame only has one timecode there is no way to animate it. But there are some solutions.
Filmmaker Noam Kroll has an in-depth explanation on the importance of the order of operations when colour grading, and the difference they can make to your work. Consider these the best practice guidelines to follow when grading your footage. Noam walks through Neutralising & Matching > Exposure Fixes > Colour Fixes > The Look > Final Tweaks & LUTS.
When I color grade any project, regardless of the style, look, genre, or format – I always adhere to the general strategy outlined below, and in fact just about every professional colorist working today follows a similar flow. I by no means created this approach, just like I didn’t create the notion of a three act structure – but I still find both immensely helpful in guiding my work in the right direction within each respective area of the craft.
Colorist Chris Hall demonstrates how to make a slightly overcast and uninteresting image and give it a little pep. If you like Chris’s way of doing things then you should check out the other instalments of his ‘anatomy of a grade’ tutorial series in these previous posts… Here and Here.
https://www.youtube.com/watch?v=4z8k5bJY6Ic
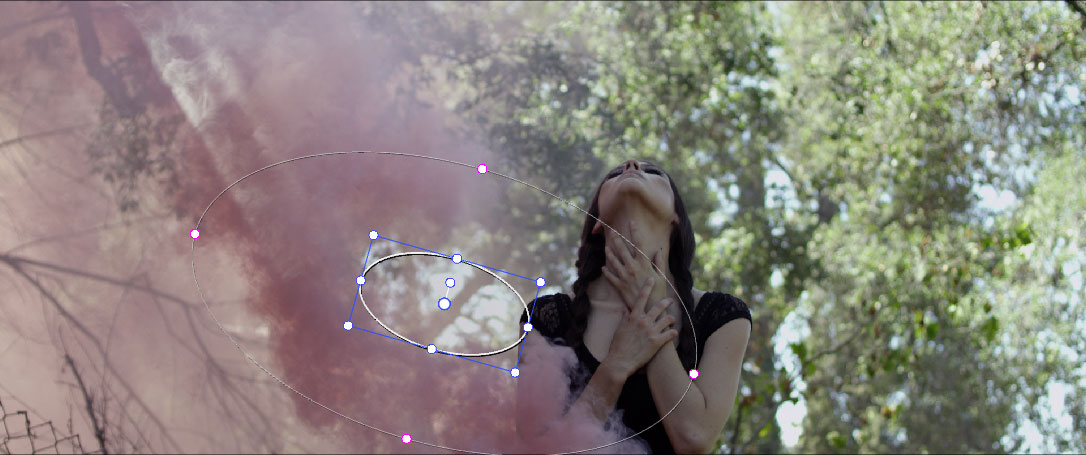
In the third and fourth parts of this grading tutorial Casey Faris walks through how he grades Blackmagic RAW files, including using secondaries and stabilisation and going through and “picking what you don’t like, and fixing it.” You can check out the first two parts of this series in these previous Resolve tutorial posts. Part 1 | Part 2.
https://www.youtube.com/watch?v=paRPgFoyc9M
Tristan Kneschke has some handy Resolve tutorials over on the Premiumbeat blog including a decent primer on how to use the Deliver page when fiddling with the settings in the Advanced tab. If you’re new to Resolve, this is worth a read. He also has another good tutorial on how to make use of multiple split-screens to improve your workflow.
 To round out this tutorial round up, I thought I’d include this tutorial from filmmaker Curtis Judd, as he shares his exploration of how to best match footage shot with different cameras. Curtis is keen to ensure that you don’t mistake him for a professional colorist, but someone who is sharing their learning process online, which I think is great. He get’s to a pretty decent place with the match and very helpfully explains his thinking as he goes along.
OFX Plugins in Resolve
Because DaVinci Resolve can work with Open FX Plugins, a whole slew of third party apps, widgets, effects and more are accessible inside of Resolve. In this hour long webinar replay from colorist Alexis Van Hurkman, you can learn how to use both Mocha and Boris FX inside of Resolve to finish up your shots to do “corner pinned match moving, motion-tracked lens flare addition, lens correction and dead pixel/wire removal, and other techniques that you either can’t do or that are otherwise difficult in Resolve by itself.” Alexis gives a little bit of detail of his recent Resolve work in this post.
Improving Performance in DaVinci Resolve

If you need to get a little more juice out of your Resolve system, to help increase your playback frame rate for example, there are a few things you can do. In this article from Premiumbeat.com author Tristan Kneschke you can learn how to take advantage of the improved render cache in Resolve 11.
We used to have Cache options for None, All, User, Dissolves, and User and Dissolves. Now, we have only three: None, User, and Smart. The Resolve team must have seen rendering dissolves as not very processor-intensive, and I’d seldom found a use for it in my work, usually opting to work in Unmix mode when on the Color page. I’ve found the Smart setting to be most useful when utilizing noise reduction, one of the most processor-intensive tasks in the grading process.
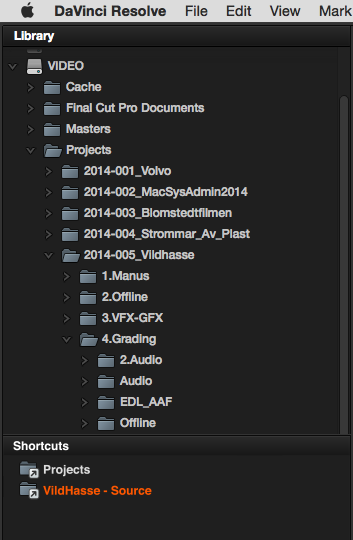 Nikolai Waldman shares a quick tip on speeding up a sluggish timeline when working in the Edit Page on his blog, essentially you simply turn off the thumbnails! It’s always the little things!
In another blog post Nikolai shares his ’12 wishes for Resolve 12′, which are the (mostly) simple things he’d like to see improved in the next version of Resolve. What’s extra nice about this post is that he’s photoshopped together some stills of how he’d like to see these improvements made.
11 – A cheaper version of the full panel
When I look at the prices for the hardware Blackmagic Design is selling they are often very cheap. There is one exception, which is the Resolve Panel. So my hopes are that a new panel will arrive with a cheaper price tag.
 Polish creative Tomasz Huczek has two articles well worth a read on his growing tutorials page. One covers four ways to improve performance in DaVinci Resolve and the other provides a very detailed look at how Caching works in Resolve, working through the source, node and output caches.
Output cache is the last caching point in the processing chain, and it happens just before the frame is sent to playback. Output cache is designed to improve the editing within Resolve for playback and trimming.
Remote Colour Grading in DaVinci Resolve
Colorist Tom Parish in Texas, USA and Colorist Warren Eagles in Brisbane, Australia, share how to perform a remote grading session in DaVinci Resolve 11. In order to be able to do this you need the full version of Resolve at the colorist’s end of the connection. It’s well worth checking out Tom’s blog post on this walk through as it explains in a little more detail how to set up the remote IP connection.


muy chevere
Hi Jonny,
Awesome collection of resources! So glad to be mentioned in the post.
Keep up the great work!
Thanks for sharing your knowledge!