
DaVinci Resolve 10 Color Grading Tutorials
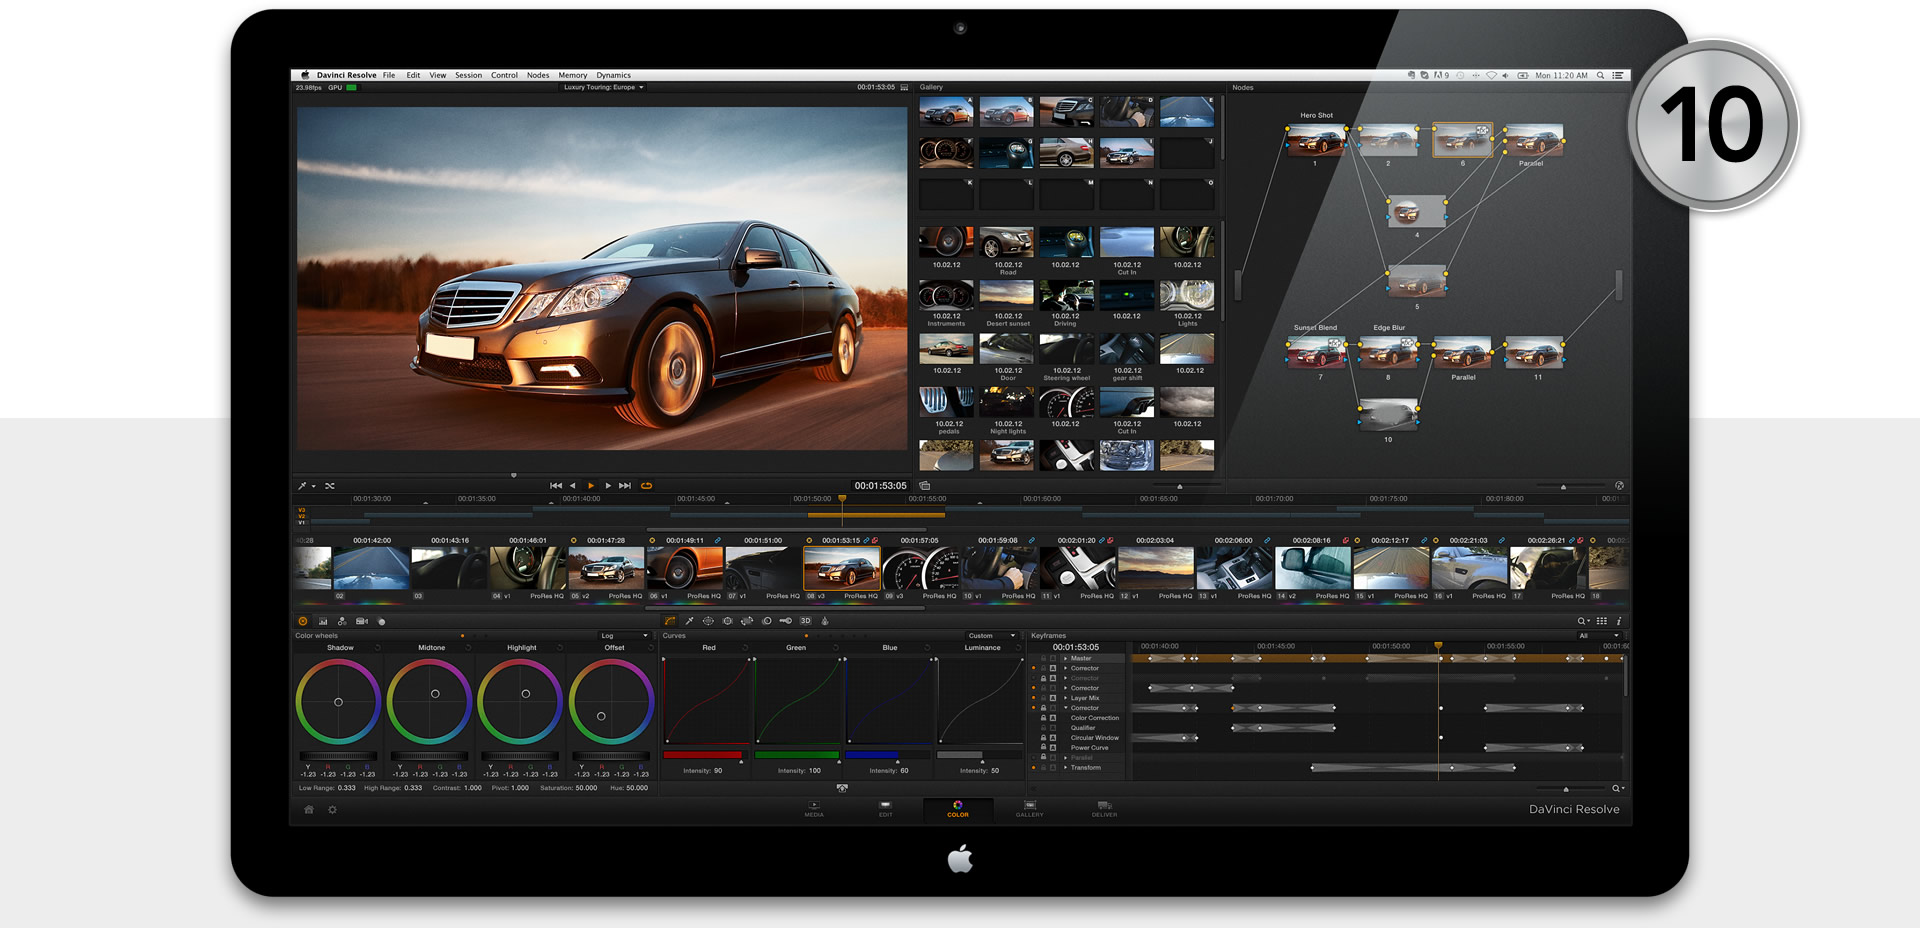
DaVinci Resolve 10 is now out of beta and available to download. The latest release from Blackmagic Design is a huge leap forward – adding in features such as live grading, greater editorial functionality and a whole lot more. And of course there is an updated manual. If you didn’t see this previous post on the Resolve 10 beta, it will give you more info on what’s in the update. Also check out the post NAB Resolve 10 post.
What are the differences between DaVinci Resolve Lite/Full?
DaVinci Resolve Lite is now no longer restricted to 2K outputs (now UHD), nor does it come with any GPU limitations. The main differences then between the free Lite version and the $999/£780 full software version is basically the inability to do anything to do with Stereoscopic 3D, apply noise reduction or motion blur, fully support a DaVinci Resolve control surface nor customise it, or do remote grading. But pretty much everything else is free! Amazing.
Free DaVinci Resolve Tutorials
DaVinci Resolve 10 has the ability to support OpenFX plugins, one of which is Film Convert. In this tutorial Splicenpost demonstrates how to use it inside of Resolve. For more on Film Convert check out these two previous posts: Matching Film Stocks. More Tutorials for Colorists.
 Colorist Nikolai Waldman suggests that the best way to add film grain in real time inside of Resolve is not to use a plugin at all but rather simply to add it in as an overlay layer and adjust the opacity for the whole track, a new feature in Resolve 10.
In this tweet, and the whole conversation, Juan Salvo points out the easier to see tracking indicator in Resolve 10.
Great Resolve 10 feature for the color-assist… indicator for when tracking is used. Now go track my handles! pic.twitter.com/cJ8I7gIzJk
— Juan Salvo (@j_salvo) October 11, 2013
Matt Fez shares how to transfer looks from programs such as After Effects, Photoshop or Apple Color into Resolve.

In this free Mixing Light taster Patrick Inhoffer talks through the basics of using a LUT in your grading workflow and how you really can’t apply it as a one-size fits all solution. There is a 7 minute embedded video tutorial that is definitely worth a watch, as Patrick explains why he creates a 3 node structure when working with LUTS. Check out more from Mixing Light here.
Editor and Colorist Aaron Williams demonstrates how to create 4 vintage looks, which you can also download to try on your own footage, in this series of posts over on his blog. Check out the detailed breakdown of each vintage look: Part 1 | Part 2 | Part 3 | Part 4
In this short tutorial from GeniusDV walks you through how to round trip from Avid Media Composer into DaVinci Resolve with MXF wrapped media. You can also read through an Avid to Resolve workflow here.
Quick Tips in DaVinci Resolve

Colorist Tom Parish recently posted some useful thoughts on working with Canon C300 Log-C footage for feature film The Historian.
For The Historian I used the C-Log LUT on 60% of the clips, and on 40% I built up my own node structure that essentially did the same thing but was easier to make color correction and then grade adjustments to fit the intent of the scene.
If you’re looking for a concise guide to working with Red or Alexa footage from shoot to delivery then this free pdf from Learnresolve.com (which doesn’t seem to exist?) talks you through it. Potentially a useful guide for producers.
In this short tip from Jae Solina you can learn how to white balance based on a grey card reference in your footage.
JR from GranolaTech demonstrates how to unlock your curve controls for channel by channel adjustments. In the next video JR also provides a great beginners guide to quick and simple colour correction in Resolve.
If you’re a beginner and looking for a super fast run down on how to get started with Resolve you can quickly read through this four part series from Wolfcrow. Part 1 | Part 2 Part 3 | Part 4.
RT @IAmColorist: ResolveTip> set your own shortcuts in system preferences http://t.co/Yg1RzJzo6P
— Marc Bach (@marcplanb) April 12, 2013
Paid DaVinci Resolve Tutorial Series
With the release of DaVinci Resolve 10 there are of course a whole bunch of updated tutorial series that you can purchase to get to grips with it quicker. Alexis Van Hurkman is working on an update to his excellent Resolve 9 series.
Colorist Warren Eagles has been quicker off the mark and updated his FXPhd Fast Forward Series already. You can see a short taster video of some of Warren’s favourite new Resolve 10 features above and a detailed run down of what you will learn on the course on the FXPhd site. I always enjoy Warren’s straight forward style, which you can see more of in the ‘What does a colorist do?’ video below.


Hi there,
Great website
I wondered if you know if…
Is there an easy way you know of to create a look in resolve then put it into live grade in order to create an xml of that look to use as mon out?
Reply
Sorry I should have said I’m using Alexa
Hi James,
Thanks for taking the time to ask, but I’m afraid I don’t know the answer. Best place to ask would be liftgammagain.com which is a very active colorist forum. Cheers Jonny
Hi there,
Great website
I wondered if you know if…
Is there an easy way you know of to create a look in resolve then put it into live grade in order to create an xml of that look to use as mon out?