
Which hard drive should I buy for video editing?
- What is the best hard drive for video editing?
- Calculate the correct speed you need
- Hard drive options for different editing scenarios
- A simple system for safely backing up all your data
What’s the best hard drive for video editing?
The answer depends on a few factors, but by the end of this article you’ll have all the knowledge you need to buy the right hard drive for your video editing needs.
If you buy the wrong hard drive, one that’s too slow, incorrectly formatted or just plain unreliable you could be destined for a whole heap of trouble including the total loss of your data.
That would be bad.
If you don’t want to read everything and just want to buy something decent for your next project you could probably just buy this fast USB-C connected SSD for under $100.
But you really should keep reading…
Short List of Recommended Hard Drives for Video Editors
If you just want to jump straight to some hard drives that I would personally recommend for video editing here are some solid favourites.
These drives will give you a range of options when it comes to performance, capacity and price.
- Edit small 4K projects affordably – Crucial X8 SSD, 1TB, USB 3.2 (1050 MB/s)
- High performance, high price – G-Tech Pro NVME SSD, 2TB, Thunderbolt 3 (2800 MB/s)
- Affordable SSD drive – Samsung T7 SSD, 2TB, USB 3.2 (1050MB/s)
- Large capacity SSD – G-drive NVME SSD, 4TB, USB 3.2 Gen 2 (1050MB/s)
- Large capacity disk drive – G-drive 7200rpm Ultrastar, 4TB, Thunderbolt 3 (260 MB/s)
- Affordable, big fat back up drive – Western Digital 12TB, USB 3.0, 5400rpm (200 MB/s)
- Professional RAID 5, Thunderbolt 3 Beast – Promise Pegasus32 R4 16TB
Check the latest prices on Amazon’s global stores in your part of the world just by clicking the links.
Note: G-Tech/G-Drive have been rebranded as SanDisk Professional as of 2021 so sometimes the listings and the imagery don’t match up!
Why you probably need a new hard drive, not a new computer
If your computer seems to be struggling to playback multiple streams of 4K video, one thing that’s worth checking, before you spend a ton of money upgrading your entire computer, is whether or not your hard drive is fast enough to serve up that data for real-time playback.
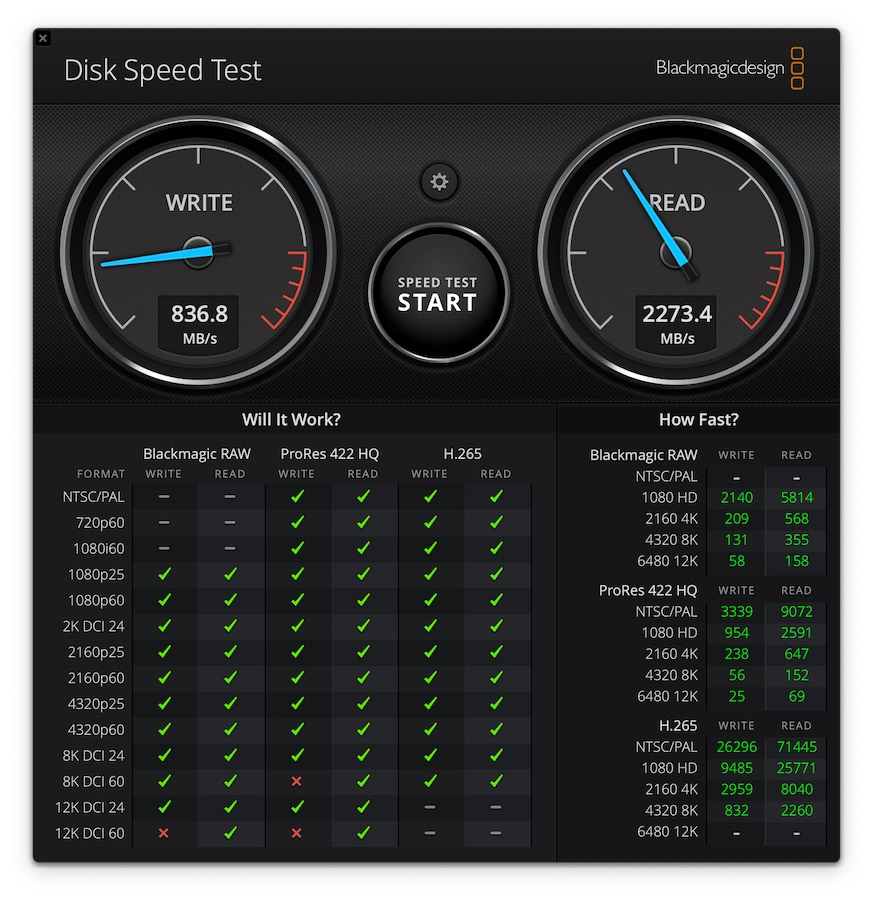
A quick way to check this is to download the free Blackmagic Design Speed Test app and see what kind of numbers your hard drive generates.
If it cant keep pace with the frame rate, resolution and codec of your footage then that could be the problem.
Test the same project on an affordable SSD and see if things improve.
The Blackmagic Design Speed Test is available as a standalone app for Mac and as part of the Blackmagic Design Desktop Video apps, which are PC compatible.
Alternatively, if you find out your hard drive is fine and your computer is getting a bit old, you could just switch to a proxy editing workflow instead, to lighten the load all round.
If you are going to buy a new Mac for video editing, here’s a post to help with that.
Further Reading:
Need an app that will scan your drives to find large files and folders, OmniSweeper is what you need.
Wondering what file format to format your hard drive in to be able to use it correctly on Mac, Windows or both? Read this.
Understanding hard drive speeds, connections & capacity
When you are video editing the three most important things you need from a hard drive are capacity, performance and connection speed.
That means having enough space to store all the files you have and will create, having a drive with enough performance to read/write data fast enough to keep up and a connection speed that has enough bandwidth to get you all that data quickly enough.
Depending on the kind of footage you’re editing, (resolution, codec, data rate, file type) and how many streams (layers) of that video you’re playing back at the same time, will dramatically alter the kind of drive you need.
I’ll explain each aspect but the simplest of these to understand is connection speed.
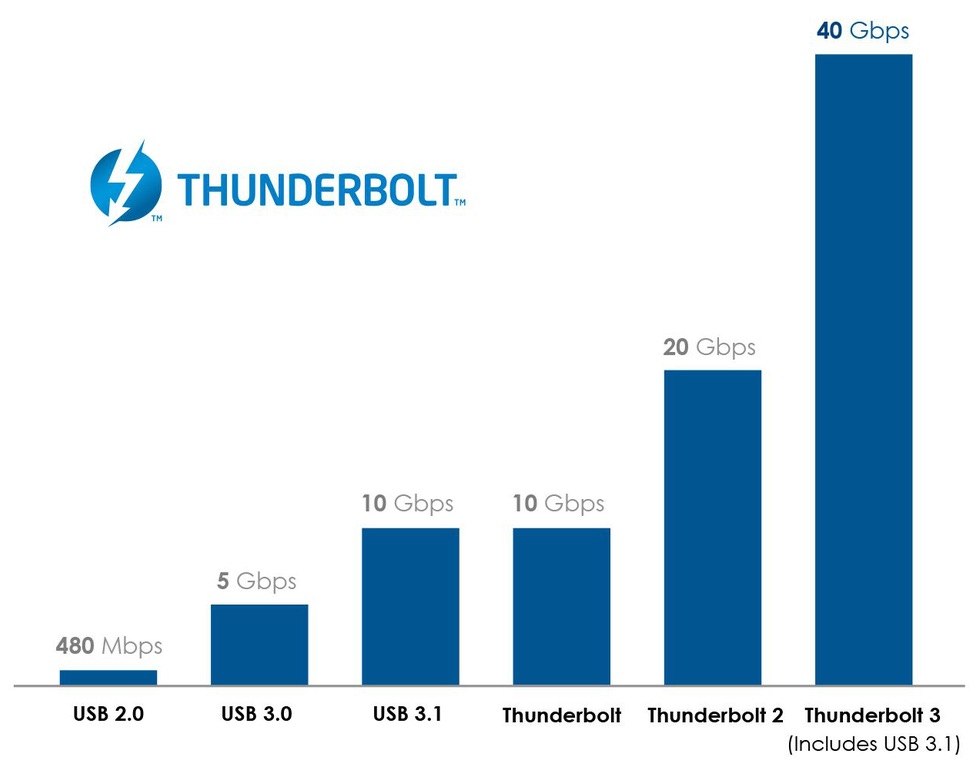
Video Editing Hard Drive Connection Speed
If you’re squeezing your data through a small pipe its going to take longer, if you push it through a big pipe it will get there quicker.
Here are some common connections from slowest to fastest:
- USB 2.0 = 60 MB/s
- USB 3.0 = 625 MB/s
- USB 3.1 (Gen 1) = 625 MB/s
- USB 3.1 (Gen 2) = 1250 MB/s
- USB 3.2 = 2500 MB/s
- Thunderbolt 2 = 2500 MB/s
- Thunderbolt 3 = 5000 MB/s
- Thunderbolt 4 = 5000 MB/s
While the cable connecting your computer to the hard drive might (theoretically) be capable of these max speeds, if the drive throwing data down the pipe, or sucking it up the other end, doesn’t have enough performance to keep up, you won’t reach these speeds!
That said, if you are editing on modern Apple hardware it is likely to have both USB 3.2 and Thunderbolt 3 or even Thunderbolt 4. Check Apple’s official list here to see what you have.
Wondering what’s the difference between Thunderbolt 3 and 4 and USB 3 and Thunderbolt 4? Read this.
This means you can connect a decent performance drive to your system and handily edit multiple layers of high quality 4K footage with ease.
Understand Hard Drive Connection Types
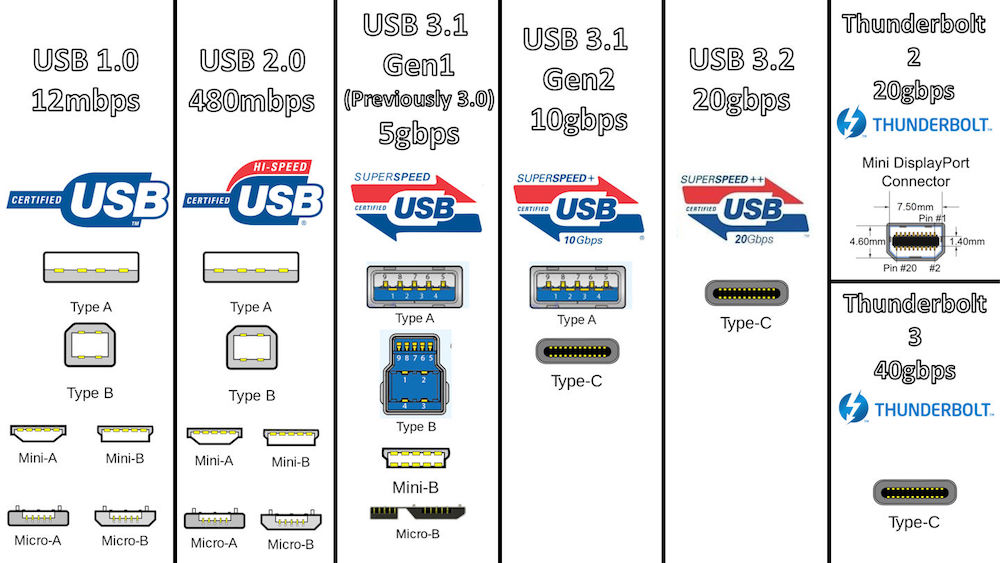
Even more confusing is the plethora of different port types that your cable might have.
While there is a form of unifying simplicity in the wide adoption of the Type-C connector – it is used on USB 3+, Thunderbolt 3, USB 4 and Thunderbolt 4 cables. It can lead to problems:
Using a USB 3.1 Type-C cable to connect a Thunderbolt 3 capable SSD into a Thunderbolt 3 Type-C port will mean you’re not getting the speeds you should.
Your drive, cable and port all need to match up!
Video Editing Hard Drive Performance

The second factor in choosing a hard drive for video editing is the speed of the internal workings on the drive itself.
Large capacity drives are still using spinning platters and these can spin at 5400rpm or 7200rpm. The faster the drive spins the faster the computer can read from it and the quicker the data gets to you. For editing video you really need a 7200rpm drive to stand a chance at any kind of reliable performance in a 4K world.
Most RAID arrays, like the Promise Pegasus, use multiple 7200rpm drives working together (a bit like a team of horses) to deliver better performance and protection than a single drive.
There are two benefits to using a RAID. One is that it offers RAID 5 protection (so one of the drives in the array can die and the others can rebuild the missing data onto a fresh drive).
The second is Read performance of 567 MB/s and Write speeds of 643 MB/s. (Real world numbers.)
However, if you just need a big fat affordable hard drive to back up tons of data, you could settle for 5400rpm as it will be cheaper! It will just be slower to transfer.
NVME SSD Vs SSD Vs 7200 rpm
That said, you really want to be buying an SSD or NVME SSD hard drive to keep up with the larger resolution, data rate and file sizes of modern video editing projects.
These SSD’s don’t have any moving parts (so they’re less likely to break if you drop them!) and can also read/write much quicker than a spinning disk. But they are still more expensive.
When it comes to performance an NVME SSDs, like the Sandisk Extreme Pro 2TB (2000MB/s, USB 3.2. Gen 2×2) are marginally faster than a traditional SSD like the Crucial X8 2TB (1050Mbs/ USB 3.2) so get one if you can.
Thunderbolt 3 Hard Drives
These drives are incredibly quick and incredibly expensive in comparison.
The G-Tech Thunderbolt 3 (40Gb/s) 2TB drive boasts up to 2800MB/s but currently costs about three times as much as the SSD drives mentioned above.
But if you need to move large amounts of data, or high bandwidth files around then at least you know what you need to buy!
Now that you know a bit about the relative performance speeds of different drives, you now need to calculate the performance requirements for your particular project, to make sure you pick up a drive that is fast enough.
Warning: There’s a tiny bit of math.
How to Calculate Hard Drive Performance for your Footage
This will involve a little bit of research and a little bit of math, but I’ll try to make both easy for you!
All you need to do is find out the data rate of the main footage format you’ll be working with and convert that to MB/s (megabytes) rather than Mb/s (megabits) by dividing by 8 – as there are 8 bits in a byte.
Then times that figure by the number of simultaneous video streams you’ll want to be viewing (e.g. if you’re working on a multi-cam project) at any one time.
This is the data rate that your new hard drive needs to be capable of.
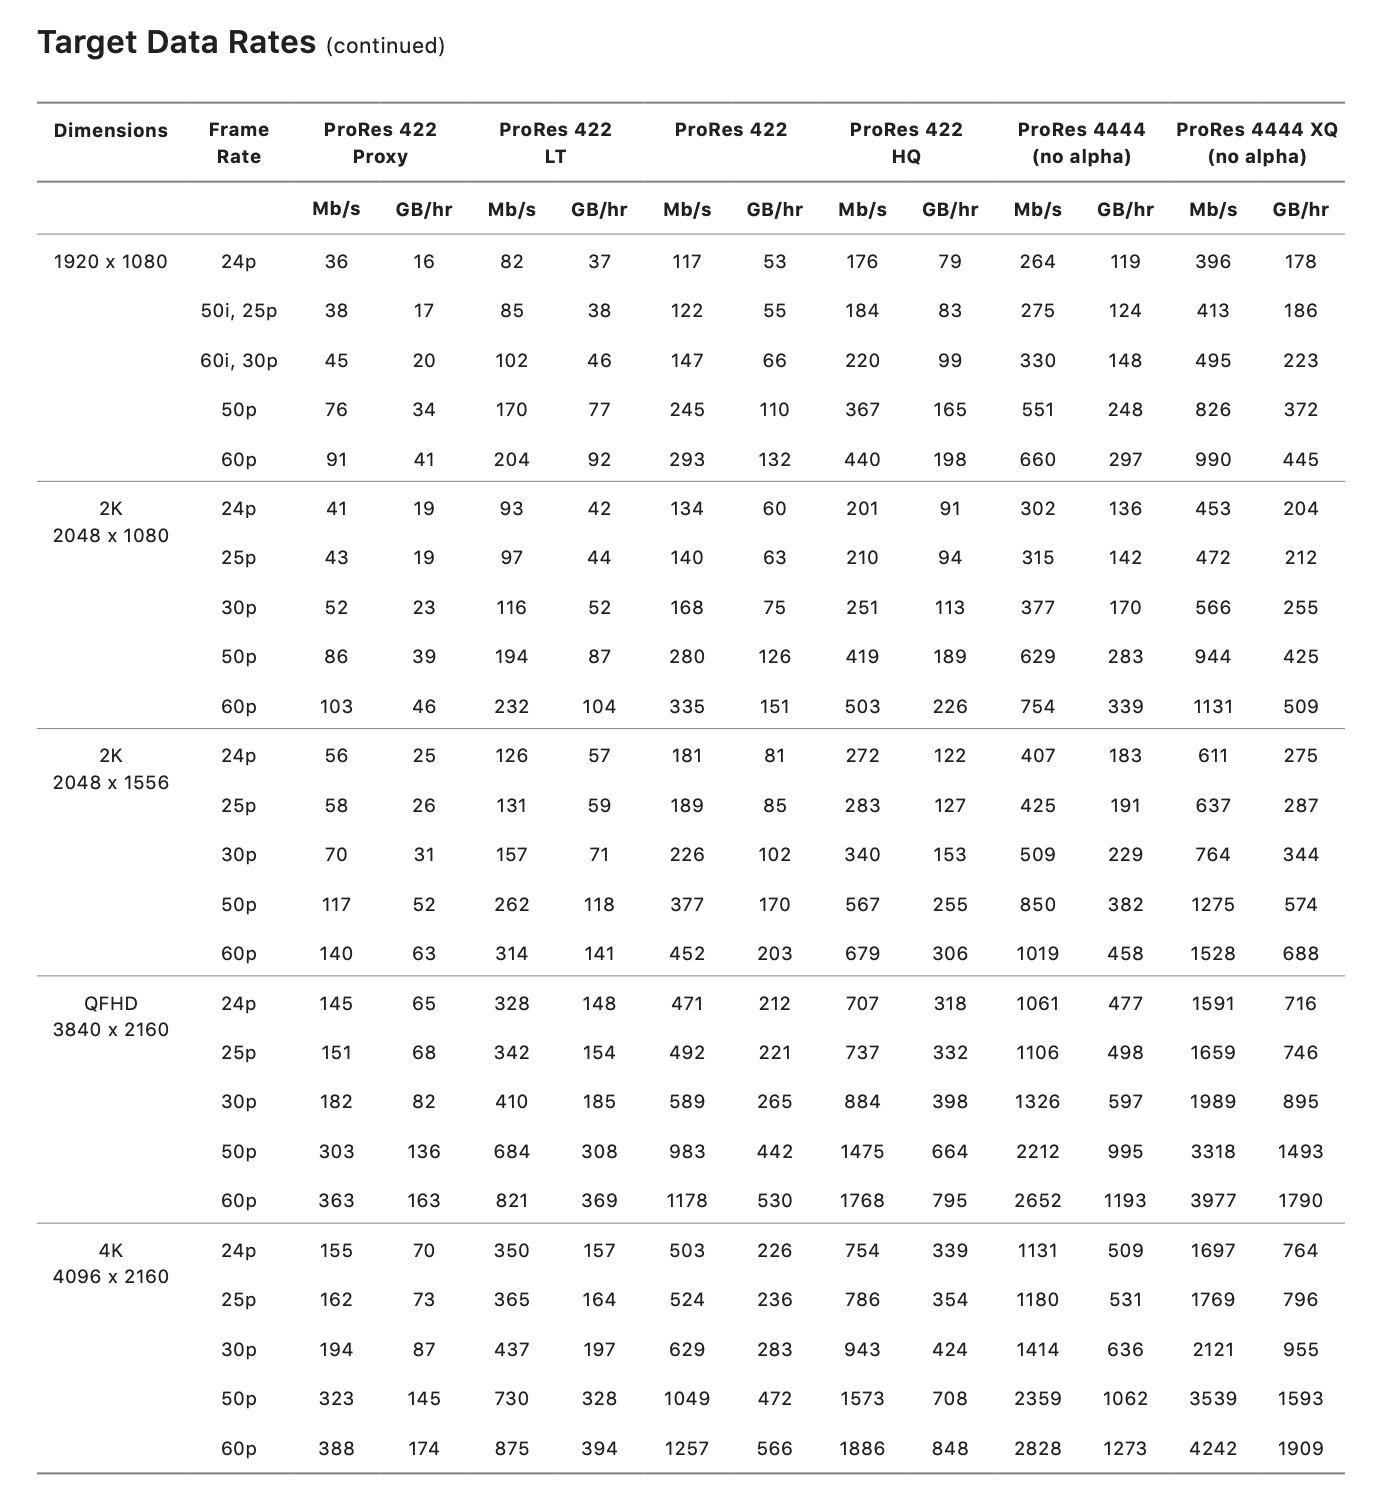
Let’s work through a quick example; 4K ProRes 422 HQ from an Alexa 35 at 24p.
The data rate for that is 799 Mb/s (megabits) according to ARRI, as the clip resolution is slightly larger (4096 x 2304) than the 754 Mb/s listed in the Apple Pro Res sheet above (4096 x 2160).
799 Mb/s divided by 8 = 99.8 MB/s for one stream of our footage.
As an SSD like the Samsung T7 will easily give you close to 1000MB/s you’ll be fine with one of those on a multi-camera project, but for single camera gigs, even a 4TB USB 3.0 Lacie Rugged should work too as it can deliver about 130MB/s.
Obviously if you’re working with multiple streams then you’ll need a faster drive than the Lacie Rugged, but the SSD should be good for at least a handful of cameras at once!
As there are hundreds of permutations of cameras, codecs, frame rates, bit depths and resolutions, you’ll need to find the official data rates yourself, hopefully at the end of a quick google.
What Size Hard Drive Do You Need?
The next thing to figure out is what capacity you will need.
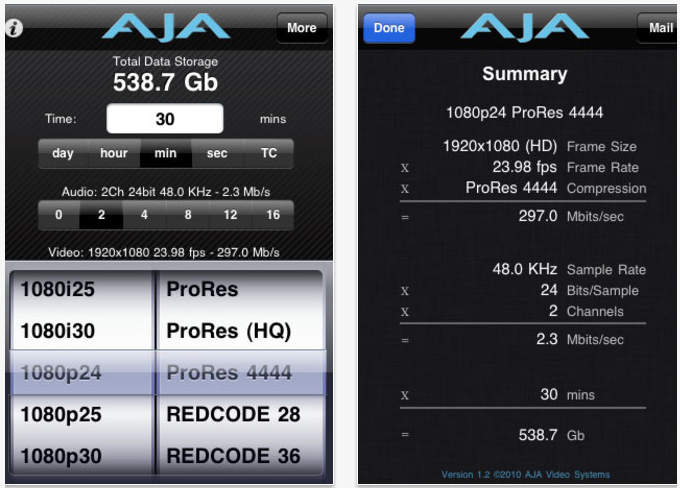
The easiest way to work this out is to use a free online app like Digital Rebellion’s Video Space Calculator or download a free iPhone app like AJA Data Calc to do the math for you.
Basically you estimate how many hours of footage you will have and times that by the data rate of whatever format, frame rate and codec that footage is in.
If you are shooting multiple cameras factor that in too, as an hour long performance shot by 4 cameras is obviously, 4 hours of footage.
If you are transcoding the footage from one format to another, say to create proxies, then a safe bet is to add in at least 30-50% further capacity too.
You’ll also need to throw in some space for all the exports, renders, music, graphics etc that are created during the edit.
Once you have worked out the total capacity in GB (gigabytes) or TB (terabytes) then really you want to buy twice as many drives so that you can have a mirrored back up of your work.
That way, if one drive goes down, you can keep on editing straight away and still meet critical deadlines.
I’ll describe a workable system for backing up your drives a bit later.
How to Transfer Data Safely and Accurately
Save 10% on Hedge with this special link
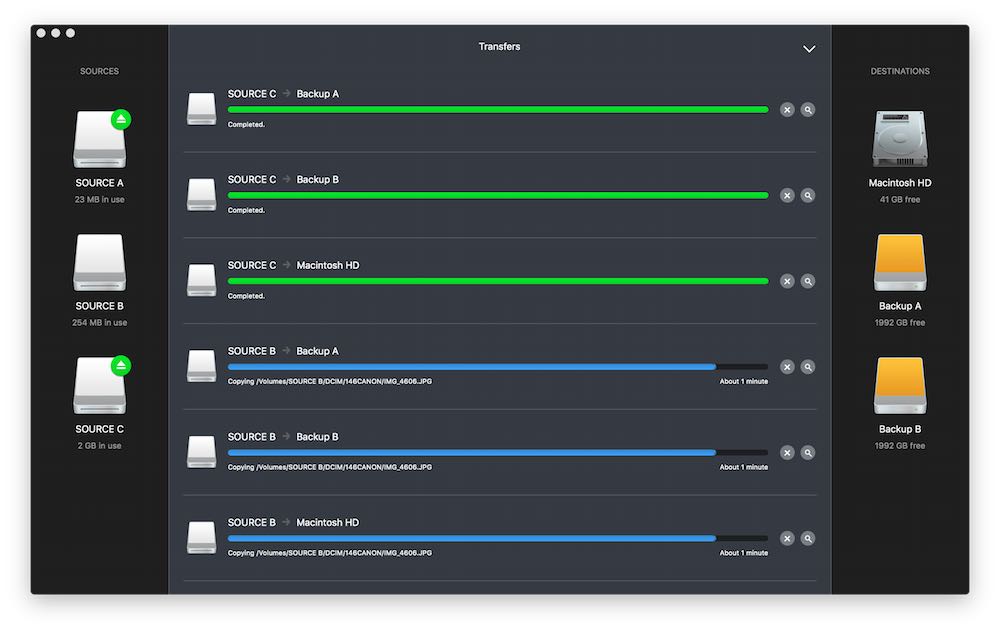
When moving data from one drive to another, you really want to know if it has copied everything correctly and that nothing has gone wrong in the process.
Dragging and dropping won’t tell you this.
That’s where file transfer checksum apps like Hedge (my favourite) come in.
These apps will ensure that every bit was copied and delivered correctly. Plus you can set up multiple destinations, create logs, automate transfers and get notified on your phone when thing have finished.
Plus a bunch of other cool stuff.
Badly written apps can add some serious drag to doing this, but in all my testing and real-world experience Hedge is lightning fast and the assurance of a job well done is worth a bit of extra time.
The Best Video Editing Hard Drives for Different Editorial Tasks
Here are a few quick thoughts on which drive to pick for different editing scenarios.
These days I almost always prefer a portable external drive, even at larger capacities, compared to a bulky, desktop powered drive.
This way, you don’t have to faff with wall-plugs or clear desktop space, plus they can easily fit in your pocket. That said sometimes you just need terabytes of affordable hard drive space and it is unavoidable.
Here’s my shortlist of current drive suggestions:
- Edit small 4K projects affordably – Crucial X8 SSD, 1TB, USB 3.2 (1050 MB/s)
- High performance, high price – G-Tech Pro NVME SSD, 2TB, Thunderbolt 3 (2800 MB/s)
- Affordable SSD drive – Samsung T7 SSD, 2TB, USB 3.2 (1050MB/s)
- Large capacity SSD – G-drive NVME SSD, 4TB, USB 3.2 Gen 2 (1050MB/s)
- Large capacity spinning disk – G-drive 7200rpm Ultrastar, 4TB, Thunderbolt 3 (260 MB/s)
- Affordable, big fat back up drive – Western Digital 12TB, USB 3.0, 5400rpm (200 MB/s)
- Professional RAID 5, Thunderbolt 3 Beast – Promise Pegasus32 R4 16TB
- Cheap Client Delivery Drive – Western Digital Passport, 1TB, USB 3.0
Check the latest prices on Amazon’s global stores in your part of the world just by clicking the links.
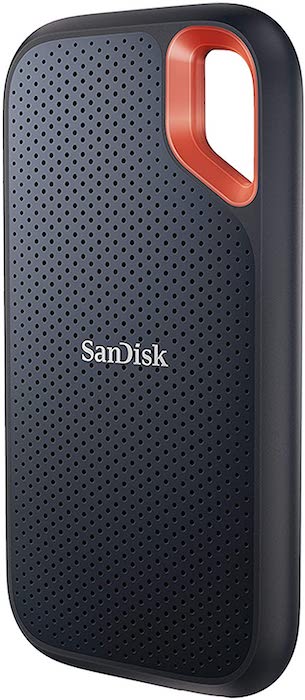
Editing in the field – If I’m expecting to travel with a hard drive then I’ll ask for a small SSD drive like a Samsung T7 or a Lacie Rugged. They’re small, lightweight, rugged and you can easily take on plane, train or automobile.
I have used a lot of Lacie Rugged’s in my time and once received one with a large dent in the top and it still worked perfectly!
My only concern today with their thick rubberised shell is the heat dissipation but I’ve also not had any problems, so maybe I shouldn’t worry.
One major benefit to their bright orange shells is that they are much harder to misplace or leave behind!
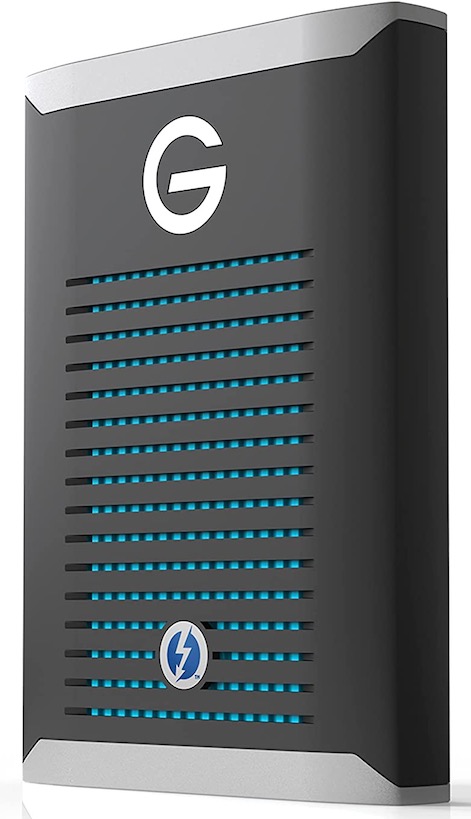
Similarly, the G-Tech Pro Thunderbolt 3 drives are excellent if you need to transfer a lot of data in a hurry, or work with higher bandwidth files like top end Pro Res flavours or R3D files, thanks to their superior speeds.
They’ve got a tough rubberised coating which means they aren’t slippery in the same way the sleek Samsung T7s are, but they’re still plenty compact enough to travel with easily.
G-Tech products (now SanDisk Professional) always seemed to be more expensive than the competition, sometimes reassuringly so, sometimes just a bit more expensive.
Editing in the suite – These days most of my editing work is from home, but I’m still using the same small ‘travel’ SSD’s to edit most of these projects – partly because they’re easy for clients to pop in the post.
If I’m in need of something with a larger capacity and a higher performance then I’d often just plump for a bigger SSD, or see if there is the potential to upgrade the whole situation to a RAID…
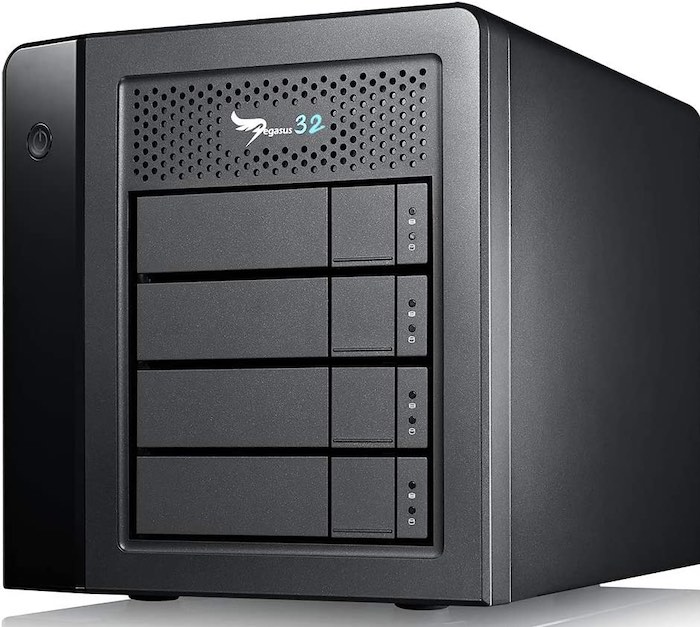
If you want something a lot bigger and as a much more long term solution, then I recently suggested a Promise Pegasus 32 R16 RAID to a producer on job that ended up with 120 hours of footage (coming from 8-9 different USB drives) that had been filmed over the course of a year.
Having the space to store all of the media in one place and re-transcode much of the footage was vital to getting the project done efficiently. They come in a range of capacities with 4, 6 or 8 drive bays, which you can fill with matching capacity disks, e.g. 8 x 10TB = 80TB!
The internal speed of the RAID itself was also a huge help. RAID’s are essentially a group of hard drives that act as one big hard drive, giving you increased transfer speeds as well as an internal back up.
In a RAID 5 configuration if one of the disks fails you can still rebuild all your data, when you plug in a replacement disk, from the other surviving drives. It is important to know that with a RAID 5 set up you lose about 20% of the capacity, or one of the disks, to achieve the redundancy. Thus a 4 x 4TB = 16TB RAID gives you 12TB of editing space.
The RAID is about the size of 2 toasters on top of each other (?) and quite heavy so its not the kind of thing you want to be lugging around frequently.
Ideally, you want to keep it out of harms way from a knock or a spill while sitting on your desk too. But check you can still reach your computer if you plan on tucking it away as the length of the supplied Thunderbolt cable is often quite short!
I’ve worked from many different Promise Pegasus RAIDs over the years, at various establishments, and never had a problem at any point.
Client Delivery Drive
The last thing you need to think about is how will you deliver the finished project?
Does the client want a copy of all the footage, the project files and final exports?
Depending on the final size of your project sending them a small USB 3 drive is usually fine. But, as always, check with them if they plan to do more with it than stick it on a shelf.
I’ve used a lot of Western Digital Passport drives to send clients a digital copy of the final project assets. They are about the size of a passport, light, very affordable and durable enough to be sent by mail, if nicely wrapped.
Something big and cheap
Check the latest price on Amazon Global Stores
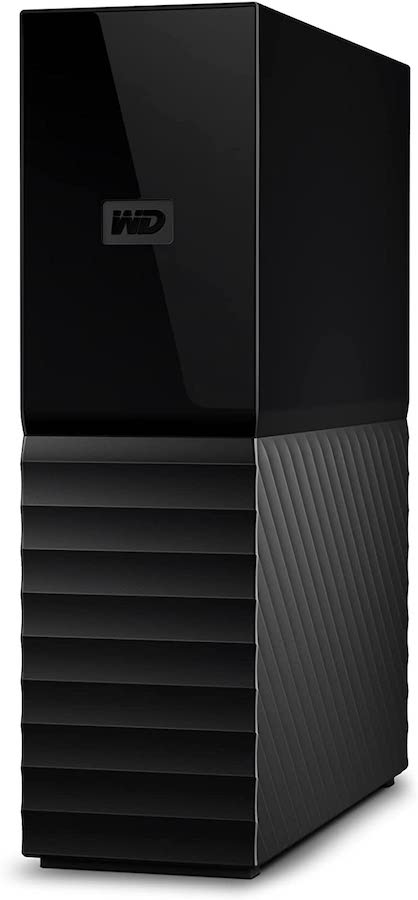
If after all that you just want a big cheap hard drive to back up onto, store tons of data on and you just generally don’t care much at all what it looks like, then I’d suggest something like a Western Digital My Book.
This is a large amount of storage for a really affordable price and you’ll likely be able to edit HD H.264 and Pro Res projects from it too. I have a 12TB version sitting on my desk right now, backing up data from faster editing drives.
The only caution to buying big drives like this is that it is just one big disk, so if it fails you lose everything. Unless, of course, you back it up to the Cloud – which you can do with my preferred automatic, incremental unlimited backup system! (See the final section, below.)
*A Couple of Caveats
There are a couple more things you should know about hard drives. The more drives you connect to a computer the slower it will go.
The fuller a hard drive is, the slower it will go. Stick to about 80% full for reliable performance.
The slowest drive also becomes the lowest common denominator on a bus or a daisy chain.
Finally, if you’re a client reading this and still not sure which drive you should get for this project, definitely check with your editor first.
Your Milage May Vary
Every editor seems to have a ‘gut feel’ about which drives they prefer to use, often sticking with the same brands that have worked out for them and trashing brands that happened to have failed them in the past.
I’ve heard recommendations for and against the same brands from different editors so take their (and my own!) advice with a pinch of salt.
Although I’ve recommended a lot of different brands in this post I have used almost all of them personally for video editing, in some cases, for years and never had any problems (thank God.)
I too tend to stick to re-purchasing the same drives from Lacie, G-Tech, Western Digital, Samsung and Seagate – but there are probably lots of other good options out there.
A quick note of caution on SSD drives
1) They can get hot, as they don’t have fans to cool them and rather rely on the metal casing to work as a heat sink. This will depend on how much reading/writing you’re doing.
2) They’re not all made the same way. Some of the cheaper SSDs, especially Crucial’s, use QLC memory with a pseudo SLC write cache.
This can cause two problems:
- Large files (AFAIK > 13GB) can write slowly as they fill up the fast cache before being written to the slower QLC storage.
- When the drive gets really full there is less cache space available so speeds drop even more.
That said, depending on the relative file size of your footage and your total storage requirements your milage may vary, quite a lot!
SSD Data Transfers Compared
Here is a link to one example of these data rate graphs from Tom’s Hardware, who do meticulous testing.
Build Your Own Custom SSD
One way to potentially avoid these SSD short comings is to build your own. That way you can choose the type of flash memory that you’re relying on and the type of enclosure (USB 3.2 or Thunderbolt 3) that it connects through.
In this video from Ryan Kao, he demonstrates how to build a high performance 4TB SSD drive using the following parts from Sabrent, with Read speeds of 2737 MB/s and write of 2372 MB/s.
- Sabrent Rocket 4TB Gen 4 NVME Storage
- Sabrent USB 3.2 Enclosure
- Acasis USB 4.0 / Thunderbolt 3/4 Enclosure
At the time of writing the Sabrent Rocket 2TB storage is 50% off!
A Reliable System for Backing Up All Your Data
When it comes to looking after the data on your hard drives you don’t want to have all your eggs in one basket.
You want to have a copy of your eggs in another basket.
Historically, the 3-2-1 back up rule is the guiding principle for a reasonable back up plan;
3 copies, stored on 2 different media types, with 1 off-site copy.
With large production assets, such as original camera footage, that general principle is still a solid plan.
You definitely want to make sure you have an off-site back up system in place, in some fashion, even though it’s usually the most cumbersome to orchestrate.
As an editor who is often sent a copy of the media on a small drive, a back up has already occurred with one copy off-site by default.
However, I also need to think about backing up my system drives on my laptop and my desktop and any essential hard drives that I personally own. From my own research, BackBlaze seems to be the simplest, most affordable and laziest solution around.
Automatic, Incremental, Unlimited Cloud Back Up
Other than the downside of hogging internet bandwidth, the benefits of an automatic, incremental unlimited cloud back up are numerous:
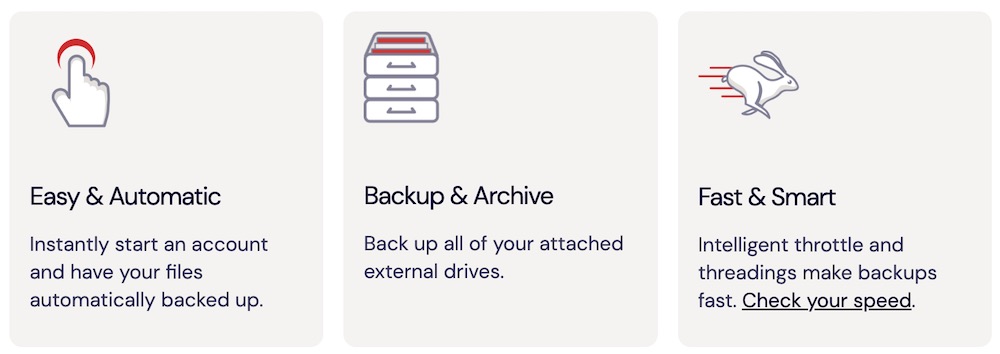
- It’s automatic – set it and forget it
- It’s incremental – BackBlaze gives you 30-day’s look back (or more for a fee)
- It’s off-site and in the cloud – so no worrying about hardware failure
For just $70 a year for unlimited files and unlimited storage BackBlaze seems to be the simplest, cost-effective solution around.
Not only will it back up your system drive but it will also back up any attached storage drives too. I have personally seen this work with a Promise Pegasus 12 TB RAID!
When it comes to restoring everything, you can download it from BackBlaze’s servers for free, or have them ship you a physical drive – the cost of which is refunded when you send it back.


