
Working with Avid Media Composer 6.5.2
First of all thanks to all those who have been commenting and tweeting and helping me out while I’m trying to get to grips with working with Avid Media Composer. Every comment is really helpful. In this second instalment of my Avid Diary I’ve got a few learnings to post, some more questions to ask and some other great resources to share.
Check out my Avid Diary Part 1 here and my first Solutions for Avid for FCP editors here.
The feeling for this instalment of the diary is pretty much summed up by this gif:

First off a really quick answer to a question from previous post:
What Avid AMA plugins installed on my system? – Use the Console to generate a list with the command: AMA_ListPlugins
You can download the Avid AMA plugins here. Thanks to Ben Hershleder’s site for this answer. Read more about Ben’s great Avid Media Composer Cookbook in this Essential Avid books post.
Avid Tips for FCP Switchers

One thing I have enjoyed whilst editing in Media Composer is the audio waveforms, which although you can see in FCP, I feel like I pay far more attention to them in AMC and they really help with speedy accuracy when trimming. Apparently they’ve been made more robust in 6.5.2 which is nice. Use cmd+L to make your tracks (and waveforms) larger or cmd+K to make them smaller.
Whilst I’m on the subject of audio here is a quick tip from editor Steve Cohen (author of Avid Agility which I mention in my 3 Essential Books for Avid) on setting your default audio cross fade to constant power -3 db instead the linear -6db. This should smooth things out quite a bit.
Shortcuts for Adding Cross fades/transitions
I think I got these from the Class on Demand training but I don’t 100% remember. One thing I haven’t figured out is how to add a default transition to just the audio or just the video without having to click about setting which tracks are active. (a la FCP – cmd+T, alt+cmd+T) I’ve mapped the keys below to let me fairly quickly add a cross dissolve (quick transition) to audio tracks to smooth out cuts on interviews.
Y – Enter Source mode. Shift+Y – Enter Effect mode.
\ add quick transition. Shift+\ – remove effect or quick transition.

Understanding Codecs in Avid
I was trying to understand what the different DNxHD codecs are and how they correlate to Pro Res so that I could choose roughly the correct codec/file size trade off.
DNxHD 120 is broadly comparable to Apple ProRes 422 in picture quality, and, like ProRes 422, is a little low in bit-rate for demanding online work or for broadcast.
For more on this check out this fantastically detailed post from Sound on Sound. At the same time I also found this post with an informal ‘re-compression’ test where different codecs are re-compressed 5 times to see which holds up best at the end. Interestingly Pro Res came out on top.
A H.264 Avid Workflow – Almost.

So my first attempts to get media into Avid has not been a totally smooth ride. I’ve been trying to bring in DSLR H.264 files (quite a lot of them) to serve as cutaways.
Question: How do I import FOLDERS of files in one go? (In FCP7 you can ‘Import Folder’ and select as many folders as you like and they import as ‘bins/folders’ into the browser.)
I tried following Jason Myres Avid DSLR workflow using Mpeg StreamClip to create DNxHD .mov files which will then ‘Fast Import’ into Avid. This is good in that you can do a batch convert on any computer using Mpeg Stream clip (although you should use QT change to add TC and reel names as Mpeg stream clip doesn’t add these) and then they will import more quickly into Avid and it keeps Media Composer free for editing while you wait.
This is also a pain as you essentially end up with 3 copies of your media. The original camera files, the DNxHD .movs and the MXF re-wrapped files now in Avid Media Files. Check out the comments section from Michael Kammes great post which was part of Jason’s inspiration for this workflow. Michael suggestion that while 3 copies is a storage pain it provides a more robust workflow and you can delete the DNxHD movs once you’ve Fast Imported anyway. If you want even more on this workflow here is a free webinar on Jason’s full workflow for editing DSLR based web episodics.
Question: Is there a way to batch import folders of H.264 files into Avid? When I tried it seemed to only let me import a folder’s worth (select all inside a finder folder) at a time. I assume I am doing something wrong! I would rather leave Avid chugging away over night and have 1 step rather than 2-3 if I can…?
Media Management inside and outside of Avid
 I found these links whilst trying to get my head around what Avid is doing with the Avid Media Files folder because whilst importing my DNxHD transcoded H.264’s Avid crashed (see below) and then I had to try to sift out the files that had re-wrapped and were taking up space, but were not showing up in Avid itself.
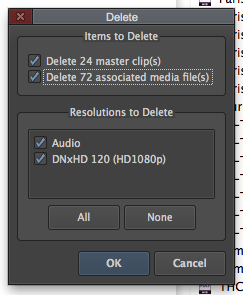
1. It seems like if Avid gets flakey just delete your .MDB and .PMR files and Avid will rebuild those two databases the next time it loads. This helped find some of my ‘missing’ H.264s which I could then delete via the Media Tool. (I hope the 72 is the files and the duplicates?).
2. Understanding Avid Media Files at a Finder level. Richard Sanchez offers some great insights on understanding what Avid is doing at a Finder level to another FCP switcher in this very useful Creative Cow thread as well as offering some good tips on a similar vibe to Shane Ross’s media management tip below.
If you want to separate media, you can import or capture and immediately create a “2” folder and or any numbered folder to move media into. Keep in mind, the 1 folder will always be where the newest media will be transcoded to… every time you move media between numbered folders, you should delete the MDB and PMR files and allow Avid to rebuilt those database files. – Richard Sanchez
For moving media around, Richard and several others recommend Automatic Duck’s Media Copy (now free) or MDV which is PC only.
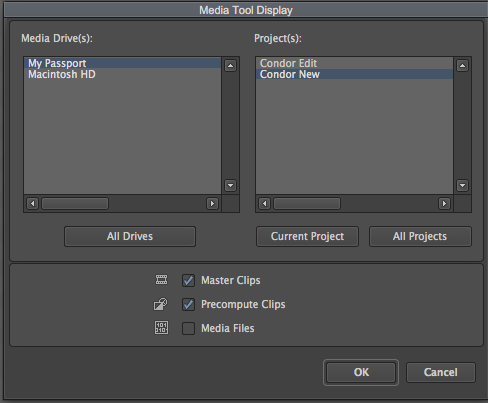
Tip: In the Media Tool options window don’t check the ‘media files’ tick box – You only need to check Master Clips (and Precomputes) because if you delete those Master Clips it will delete their associated media files to that clip. This makes it a little less confusing to find what you’re looking for.
3. Keeping project media separate anyway
Editor Shane Ross has a great tip, and then an even better tip suggested in the comments section, on how to get Avid to keep each projects media in a separate folder, whilst remaining inside the Avid Media Files folder and thus ‘online’. Its worth reading through the comments for some of the finer points of doing this and the CC thread above.
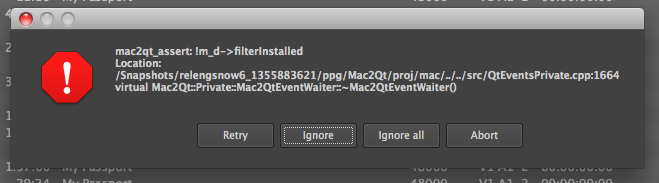
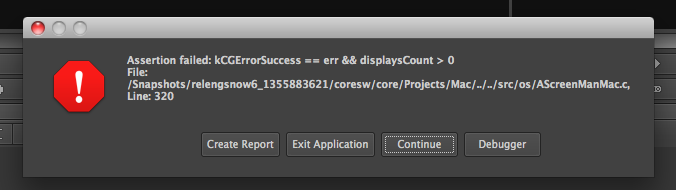
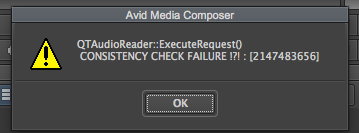
Avid Error Gallery
So my H.264 import workflow was going swimmingly but the I had a whole bunch of errors. What do these even mean?? Is there a difference between red and yellow signs?
Thoughts on Avid’s Mentality as Company
 As I’ve been using Avid on and off over the past couple of months and paying more attention to the goings on in the community and their press, the feeling I am living with is that because Avid has been dominant in the market place for so long it has become very complacent.
I really don’t mind learning a new program – in fact I love learning new things! But where are the envelope pushing fresh ideas? Where is the zeal to update as frequently as possible to match industry changes? Where is the ‘come-as-you-are’ attitude to new users to allow for a frictionless transition? If your established, embedded user base are having to come up with work arounds (eg the media management above) wouldn’t it be smarter just to build that option into the program?
In my googling I came across this Creative Cow post from editor Tom Laughlin which describes all my thoughts in better detail than I could provide here so I thought I’d just link to that rather than repeating it here. The post itself generated a lot of debate. My question is – What would happen in Blackmagic Design bought Avid and did to Media Composer what they did for Resolve?
Click through to read the next part in the series – Part 3 – Things I Should Have Done


And Jonny
72 is not duplicates, its 3 times 24…thats 1 video and 2 Audio Media Files for very Master clip. Avid Edit Apps always create separate MXF [or OMFi] files for Audio and Video so that its easier for Media Management. And Why easier ? Cos there was a time….[still seen in quite a few post houses] when Editors used to capture Media in Offline Rez, edit and mix…delete just the Video alone and Batch Capture back.
And Yes, every New tool is a challenge as there is some unlearning to do…besides learning. I have been using the Avid since the PowerPC days [lets say around 15 years or so] and i have not hit the wall even once. Everything is possible on the Avid. And once you know how its done, you’ll go gaga over the logic and simplicity behind it.
Btw, as others mentioned an Audio/ Video Quick Transition must be the last thing to worry about. If u are happy with a 25 frame mid point transition [the application remembers if u change the value] all you need to do is park your cursor near the cut and hit a ‘\’ ‘Enter’
One thing i have noticed is that some features in an MC are so ridiculously easy, sometimes Editors may just miss it right under their nose. From your Queries, i feel getting a Book will really really help. Or ofcourse, book a ticket to Matias.
Cheers
And since i mentioned Everything is Possible on an Avid, i’ll take the opportunity to invite you to an animation i made with Avid’s Marquee title tool a while ago. BTW, i am not a 3D artist and do no have any animating experience whatsoever.
http://www.youtube.com/watch?v=8N5wQU4vKeg
😀
Buy me a ticket to London and I’ll teach you every MediaComposer tip and trick for free 😀
BTW, the “option” key from your keyboard plays an important role in Mediacomposer. Many actions response in a similar or alternative action just by pressing “option”.
I’m just the opposite (or in worst position) as you are, I worked with Avid for the last 10 years then I changed jobs and have to learn FCP7 (yes 7) from scratch in 2012! It was already tagged as an EOL product and I started to learn it. I miss Avid every single day for the last 17 months 🙁
No one likes to change but we all must.
Sad to hear you’ve been feeling that pain for so long – I’m hoping it won’t take me that long to feel at home in Avid!
I’m also hoping knowing both will put me in a stronger position but this journey is certainly helping me build ‘patience muscles’ ….
17 months? That’s quite long! Head over to the LAFCPUG with any issues you’re having, and we should get you sorted out.
Thanks for the invitation Strypes, but I’m living in Colombia (temporarily, I’m from Argentina) so the LAFCPUG is a little far for me.
But maybe I was not clear enough, I learned FCP7 and I use it every day and for the kind of work I’m doing since I started in this new company (where I had to learn FCP7) it gets the job done (I do mostly 30 second TV commercials, movie conforming and deliveries). If I had to do the kind of work I did in Argentina (mostly 43 minutes TV Shows/Documentaries) I’ll have a serious talk with my boss to rent/buy an Avid.
I miss the trimming tool, zoom in the waveform, real playback (now sometimes is in sync, sometimes is not), the animate tool, the timewarp, the render-on-the-fly, the real waveforms that match the sound in my speakers, the audio mixer, and so many little things that I really love. *cof*cof*FCP7 has some great things too*cof*cof* but I love Avid.
BTW, I’m learning FCPx now because I find it interesting. And I’m even trying to use it at work (http://www.fcp.co/forum/13-made-with-final-cut-pro/16365-anyting-big-done-on-fcpx) but it’s not ready for us yet.
Thanks for taking the time to comment Scott.
I didn’t know about the transition manipulate button – which is probably what I’m most looking for so thanks for that I shall give it a go. I just want to be able to apply and preview the transition in the fastest possible way but I’m still very much all thumbs and no fingers at the minute when finding my way around Avid!
Also discovered the dragging in the quick transition box today so thanks too for pointing that out… I shall prevail in the end. (I hope!)
Thanks for your comments Matias!
My problem with the adding of transitions is that it takes so many clicks and keyboard keys to achieve. In FCP7 its 3 steps: Select the join. Press CMD+T or Alt+CMD+T (audio only) and you’ve got a default transition added. Grab the end and stretch or compress for length.
In Avid its more involved just to achieve a simple thing. Select the join. Press quick transition keyboard short cut. Select or deselect tracks to apply to. Type in the length you think you want. Apply the effect. Try it. Re-open the window. Re-type the length to change it to what might work better. Close the window. Repeat.
But maybe the dragging of saved presets is the ‘fast’ solution, especially for adding audio only dissolves which I do a lot to smooth out dialogue joins.
Man, you’re taking the long way around. Avid has track toggle keys mapped to the keyboard so all you have to do is hit v1, a1,a2 whatever tracks you need to apply a transition so they are purple. Then as long as the playhead is near the edit you want hit \ and the quick transition box is up. Type a duration, done. If you want to be more precise type or tab through the starting on, ending on options.
If you REALLY just want to do it with the mouse turn on the transition manipulate button in the Smart Tool and then you’ll have the option to drag the transition handles in the timeline. Or you can drag the transition in the quick transition box just like it’s in the timeline. But the fact you never have to touch the mouse at all means I can add transitions much fast in MC than I can in FCP.
And there’s the 3rd (and 4th) way of doing it.
1. Opt lasso the joint, hit shortcut for quick transition, hit enter again to apply. With this you don’t need to choose tracks, because opt lasso will automatically select only the tracks that you lassoed on.
2. Opt lasso the joint, hit tab once, and enter duration of transition. With this, you will be adding a transition via the trim window. The button to the immediate left of the number field lets you select the transition alignment after you add the transition. Hit spacebar to preview transition in trim mode and adjust to taste. This is another reason why the trim mode is so highly regarded by Avid editors.
I didn’t understand your problem with adding transitions. Add an In Point where you want to start the transitions, add the out point, activate only the track you want the transitions to be applied and press the transitions button. At the bottom you have the option to apply transitions to all your cuts from IN > OUT and to skip already made transitions.
Quick tip to newbies!!
I hope you know that you can save transition presets by dragging the icon from the effect editor to a bin. BUT! If you create a bin called “Quick Transitions” and you save the presets there, those transitions presets will show up in the Quick transitions window.
When trying to get DSLR media into MC ….is there a reason you didn’t just AMA link the folders and then transcode? That’s be far the easiest method.
I guess because I don’t know my way around MC well enough to sort a batch transcode (I’m sure it’s not hard) or to know to do it in the first place. I shall give it a go! Thanks for commenting.