
More Free DaVinci Resolve 12 Training
Since my last DaVinci Resolve training post, Blackmagic Design have updated the app (as is their want) to version 12.3.1, with a bunch of small but useful additions.
What’s new in DaVinci Resolve 12.3.1
- Decode support for HEVC/H.265 QuickTime video in DaVinci Resolve Studio on Windows
- Added Media Storage context menu option to directly add storage locations without opening Preferences on Mac and Windows
- Ability to add Media Storage locations without restarting Resolve on Mac and Windows
- Added support for reading Reel Names in OpenEXR media
- Added decode support for Sony MPEG2 video files
- Added support for ARRI RAW sharpness when using the ARRI Full Res Debayer
- Added support for smaller font sizes on burn-ins
- Added support for keyboard shortcut for loop on the Edit Page
- Improved HEVC/H.265 decode performance on Mac in DaVinci Resolve Studio
- Improved H.264 decode performance on Windows
- Improved Varicam, MPEG4, AVC and AVC-Intra MXF decode performance on Mac and Windows
- Improved compressed OpenEXR decode performance
- Added support for RED SDK v6.1
If you need a super high-level reminder of what you’re getting for that $995, when you buy the full Studio version, here’s a handy recap from the support notes.
The free DaVinci Resolve 12 includes all of the same high quality processing as DaVinci Resolve 12 Studio and can handle unlimited resolution media files. However it does limit project mastering and output to Ultra HD resolutions or lower. DaVinci Resolve 12 only supports a single processing GPU on Windows and 2 GPUs on the latest Mac Pro.
If you need features such as support for multiple GPUs, 4K output, motion blur effects, temporal and spatial noise reduction, 3D stereoscopic tools, remote rendering, an external database server and collaboration tools that let multiple users work on the same project at the same time, please upgrade to DaVinci Resolve 12 Studio.
As you’ll see in the tutorials from My Canadian Studio, those paid for features could be worth their weight in gold, in terms of time saved and client value added.
DaVinci Resolve App Store Version
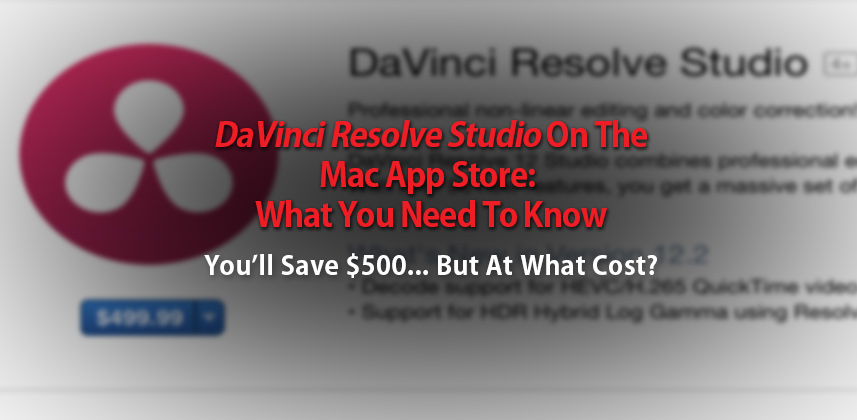
One of the biggest things to happen to Resolve since my last post is the release of a version that is downloadable via the Apple App Store, for only $499. This version is somewhat different to both the Studio and (what was Lite) normal Resolve versions, due to Apple’s App Store sandboxing restrictions.
For a tremendously detailed comparison and insights straight from Blackmagic Design, you must head over to this excellent post from Patrick Inhofer on MixingLight.com. Patrick’s article will also help you decide which is the right version for you, so read it before you buy anything!
Now that we know affirmatively that Resolve Studio Mac App Store supports SQL databases (if you know the undocumented secret to installing it), supports the Collaborative workflow and will follow the same pricing model for future updates as owners of the dongled version – I’ve changed my opinion from the Mac App Store version being a bad deal to being neutral on the whole topic.
Collaborative Workflows in Resolve 12
My Canadian Studio is the new english-language version of the long running french Canadian filmmaking video series.
In this episode colorist Mathieu Marano and guest Louis Fortin, demonstrate how to perform a collaborative workflow between an editor and a colorist so they can work separately yet simultaneously, to edit and grade a project at the same time. You will need the full ‘Studio’ version of Resolve to do this.
In the 5th episode, Mathieu walks you through how to set up remote rendering on a second Resolve system to allow you to render your project on another networked system, whilst you carry on grading on your main system. You will need to have a mirror of your systems to make this work effectively, as in the same LUTS, plugins and media need to be accessible by the render system. If you have two systems, a cool time saver!
DaVinci Resolve 12 Free Tutorials
Colorist Chris Hall is back with another Anatomy of a Grade, after a two year hiatus. In this short tutorial he breaks down how to create the ‘California’ look, in which he effectively works with colour contrast. You can check out more of Chris’s breakdowns here and here and it’s nice to have him back!
Colorist David Torcivia has been producing some really great colour correction tutorials, and this one on Advanced Color Correction in Resolve, is no different. In this tutorial he walks through how he added little extra touches to several shots from a music video for Purity Ring – Begin Again, to fix problems in the shot, as well as to add creative enhancements. A good opportunity to look over the shoulder and get inside the head of a professional colorist. Check out some of David’s previous tutorials here.
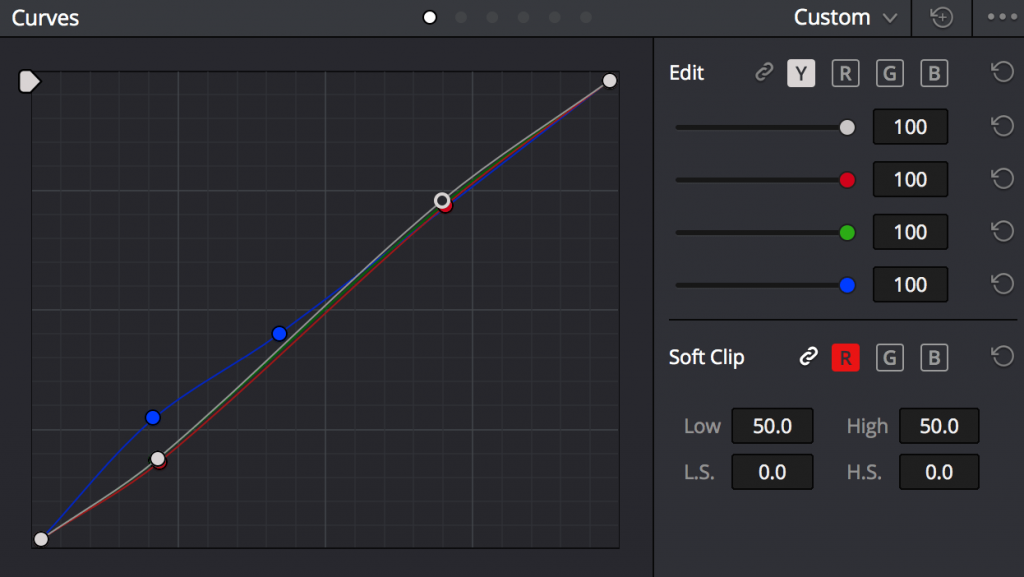
In this recent blog post colorist Rob Bessette shares some helpful advice on how to create better looking grades by properly handling the relationship between the shadows and midtones in an image. This post is actually a bit of a gem, so make sure you read it! If you like what Rob has to say then you might want to check out his paid-for training over on Pluralsight.com, which used to be Digital Tutors.
The lower end of an image can really help determine the overall look and feel of a piece with some detailed finessing. But it’s not just about the shadows. How the midtones roll into the shadows are an integral part of creating unique, memorable looks…. Try moving the midtones way down to give you a nice, dense feel and then finish the rest of the image off with some shadow treatment. You’ll see that the image bulks up around the shadows and is more condensed on the lower end. You can also play with this relationship by manipulating the low range controls in Resolve’s log grading tools.
In this 10 minute demo from the Amsterdam Supermeet (September 2015), colorist Giles Livesky gives you a decent overview of some of the new editing features that were released in the original version 12 of Resolve. If you’re new to editing in Resolve, a decent way to get a sense of what’s possible.
In this excerpt from colorist and ICA trainer Warren Eagles , R101 Resolve 12 Class, you can pick up some useful wisdom on why skin tones are so difficult to get right in your grade.
Colorist, author, filmmaker and trainer Alexis Van Hurkman shares three useful tips in these Ripple Training, Resolve in a Rush episodes. In the first 5 minute tutorial Alexis shows you how to use Remote Grades, which isn’t the same as remote (i.e. separate location) grading. Local Grades are unique to a single clip in a timeline, Remote Grades can be applied to any clip that shares the same source media, meaning their grade is always matched.
You can check out some of the other 20 tutorials in this Resolve training round up.
Nodes, Noise Reduction and more in Resolve 12

Richard Lackey, over on Cinema5D.com has put together a really helpful post for anyone looking to full understand what each and every node variant is useful for inside Resolve, and given that there are five different types; serial, parallel, layer mixer, outside, splitter/combiner, it’s well worth a read. Check out Richard’s own site here.
All nodes have two types of input and output. An RGB input / output is used for image RGB channels. A key input / output is used for a key channel. The RGB node input and outputs are marked by small green circles, the key input and outputs are marked by small grey triangles. From this point on, you can assume that both RGB and key are being referred to as one input or one output. Both connection points will always be present, but both will not always be in use.
Jason from Cinetic Studios furnishes you with 5 very good tips to keep in mind when applying noise reduction inside of Resolve, in this recent blog post. A quick, yet informative read.
Focus on reducing “chroma \ color” noise before “luminance” noise to maintain detail. Our eyes are much more sensitive to luminance detail than chroma or color detail, so overdoing noise reduction on the luminance channel tends to result in a overly smooth “plastic” looking image.

Filmmaker Noam Kroll has been posting a decent collection of how-to articles over on Premiumbeat.com, which are well worth checking out in full. Here are some quick links.
Removing Black Sun Spots in Resolve | Using a Color Chart to Match Shots | Using Compound Clips in Resolve | Using an EDL and Scene Cut Detection | Pulling a Green Screen Key in Resolve | Avoid Sepia Looks When Warming Up Footage |
Footage Specific Workflows in DaVinci Resolve
In this Convergent Design tutorial from Antler Post, you can learn how to work with RAW FS700 DNG files from the Odyssey7Q+/Odyssey7Q in DaVinci Resolve. Nick covers importing, processing, setting color space, applying LUTs, and exporting.

Digital Rebellion have posted this useful guide to creating feature film dailies in DaVinci Resolve 12 when working with ARRI Alexa footage, including best practices for file transfer, syncing and rendering and round-tripping back into Resolve for the final grade.
In theory this is all you should need to do to get perfect sync, but in practice timecode can drift or it may be set incorrectly (or not at all) in the camera or sound recorder.
An additional reason for splitting things into bins is because if you are shooting time-of-day timecode, you may have multiple clips with the same timecode that could confuse Resolve and cause it to sync clips up to audio from a different scene.
DaVinci Resolve Editing – Crash Course
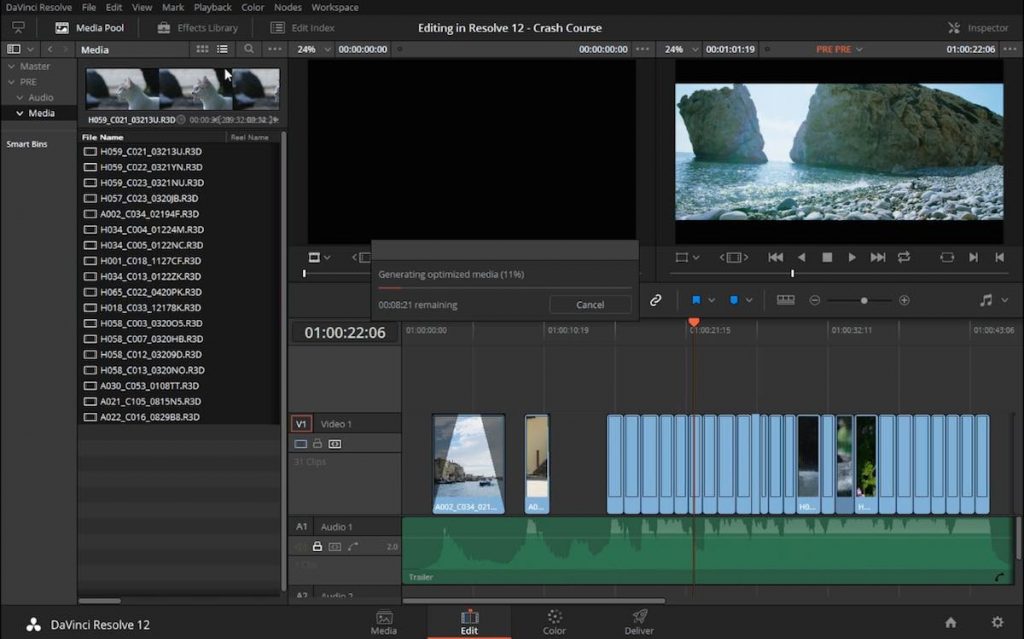
Filmmaker and photographer Will Tejeda has put together an hour long crash course on editing in Resolve 12. Will’s aim is to walk you through the entire process of editing in Resolve, without getting bogged down in each and every function that’s available in Resolve’s massive feature-set. This makes it ideal for anyone thinking of giving it a go for the first time.
Throughout the course you will get a clear grasp of starting your project, bringing in your footage, organising your footage, editing, optimising media, working with audio plugins and effects and much more. One of the things that I really liked about the course were the little tips and tricks that Will dropped in along the way, that emanate from his personal experience of working in the software.
There is something that’s reassuringly accessible about Will’s delivery of the training, which makes it feel like a friend is talking you through working in Resolve in a lunch break, rather than you’ve signed up to some intimidating lecture on working in the software and that if you don’t follow these steps precisely, you’re a dunce. So if you take the course, you’ll definitely leave feeling empowered to get started with editing in Resolve, with real confidence.
UPDATE: Will has been generous enough to offer my readers a special deal on his Resolve training course, and so you can get 40% off the cost of the course with the coupon code: jonnyelwyn
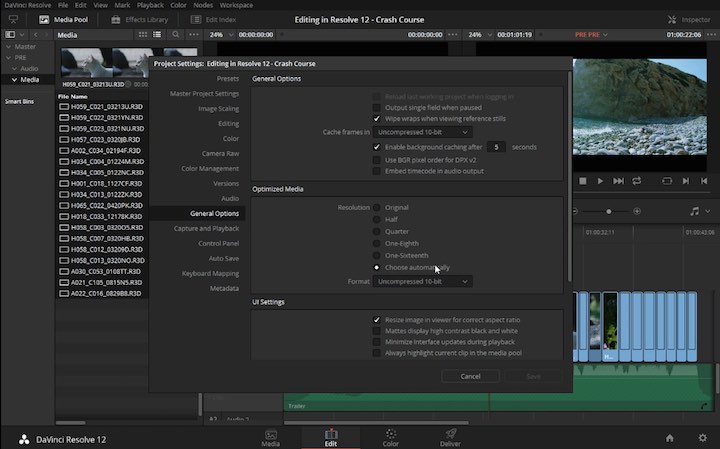
All I have to do to speed things up is, select all my clips, right click and hit Generate Optimised Media. Now again this is going to go by the settings we set in General Options under Optimised Media. You can set it to ‘Choose Automatically’ and it will make sure to say ‘hey I know what you need to get going.’ Or you can set it to something specific. So I’m going to select Quarter here, hit save. And then right click and press Generate Optimised Media. And then it will go through the motions of converting all your media, in this case all our R3D’s into whatever codec you specified. And all this is going to be saved into that Cache folder we set in the User Preferences.
During the course, Will also provides a good overview of working with VST audio plugins and other OpenFX plugins, with some useful tips on managing your workspace when editing on a one-screen system, which can get a little cramped at times.
An added benefit to the tutorial is that Will provides some links to some free stock footage that you can download in R3D format, so you can experiment with footage that you might have to put through an offline/online workflow. This also gives you something to follow along with, which is handy and at no extra cost.
Will is using the free version of Resolve in the course, which you can download from BlackmagicDesign.com.
The Crash Course – Editing in Resolve 12 costs $29.99 and you can download it now from GumRoad.
DaVinci Resolve Quick Twitter Tips
Quick Tip #1::Importing films into Resolve and lining up the waveform monitor under the video can help study them pic.twitter.com/xRtJKAvShL
— Will T. (@thewilltejeda) February 28, 2016
As is my habit, here are some handy tips for Resolve colorists, from post production pro’s who tweet. These first four from Will Tejeda are particularly good!
QuickTip #2: Scene Cut Detection helps study Light and Color by separating all your favorite shots. #HugoBoss pic.twitter.com/5PAKfqM3bq
— Will T. (@thewilltejeda) February 28, 2016
Quick Tip 3 – Use power windows in highlight mode to analyze specific parts of the image on the waveforms pic.twitter.com/dneTCckxMt
— Will T. (@thewilltejeda) February 28, 2016
QuickTip #4 – Use Resolve's Monochrome feature to set your base exposure/contrast to avoid being distracted by color
— Will T. (@thewilltejeda) February 29, 2016
Resolve tip #423. Double click a PowerGrade to append it to your current node tree. How long has that been there v7!!
— icolorist (@icolorist) March 1, 2016
#Resolve tip: have a black sun spot? Right click on clip and select "black sun highlight correction"
— Jason Bowdach (@JBowdacious) March 7, 2016
@jonnyelwyn /Library/Application Support/Blackmagic Design/DaVinci Resolve/DaVinci Resolve http://t.co/5PMb7ghmTD@hurkman @rohit_bmd
— Matt Christensen (@_mchristensen) September 23, 2015


