Tutorials for DaVinci Resolve 12 Colorists
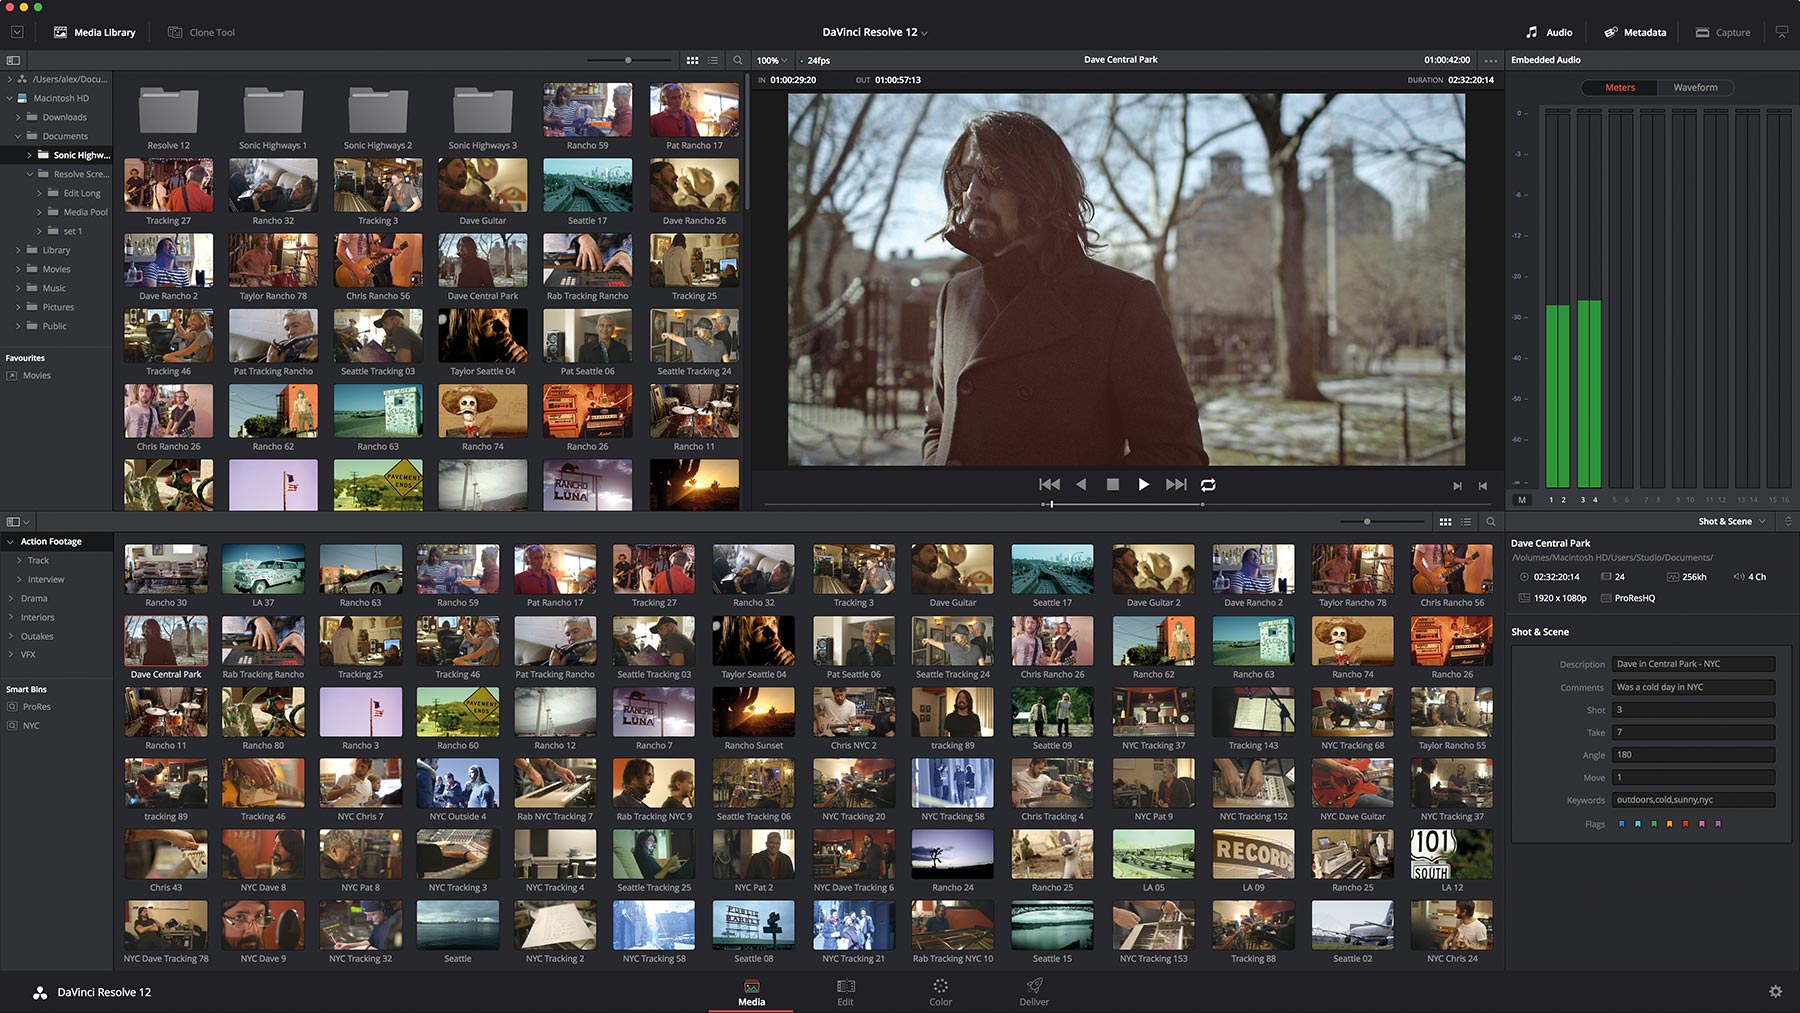
Davinci Resolve 12 and Studio editions are now out of public beta and jam packed with features, fixes and more. You can download them for free for Windows, OSX and Linux on the Blackmagic Design site.
So what’s new in the ‘out of beta’ release?
Well, if you’ve been following along with the public beta releases then you’ll know there’s been new things added each time. I’ve looked around for an exhaustive list, but as of yet I’ve not been able to get my hands on one. If you know of one – let me know! Some things like ‘Timeline Bins’ have been taken out and added back in between builds – check out the Mixing Light tutorial below for more on this.
Oliver Peters has written up a good overview of the progress of Resolve during the public beta, and shared some of his experiences testing the software. The whole post is well worth a quick read but he also points out a helpful (although it should be obvious) recommendation in terms of workflow…
One common mistake that I see users make, when I read some of the internet forum posts, is that they load up the timeline clips with color correction nodes and still expect real-time editing performance. Physics hasn’t changed. Adding effects and color correction to clips is going to negatively impact playback. As a general rule, get all of your editing done first and then save your color correction until last. You’ll be a lot happier.
Following on in this vein, Rich Lackey from dcinema.me has posted a ‘DaVinci Resolve System Requirements Reality Check‘ in which he breaks down the kind of hardware you’ll need to successfully run Resolve on some real world projects, concluding that:
Generally speaking, your GPU and storage are the primary key factors you have to address with any system you expect to run DaVinci Resolve. Secondary to that, your CPU and system RAM are also important, you should be on 16GB of system RAM at least, 8GB is an absolute bare minimum.
These are the basic facts if you expect to get any real work done with DaVinci Resolve.
He also points out that it’s well worth downloading and reading the official configuration guide, which it absolutely is.
Colorist Rob Bessette has written up a review of the latest release from his working colorist’s perspective over on Digital Tutors, largely focusing on the new colour tools (as you would expect from a colorist!) and has some interesting things to say about the update features.
The curves in Resolve have always been a powerful tool that’s gone through several iterations since version 9, but in version 12 Blackmagic has finally nailed it. By having the YRGB curves placed on top of each other and the ability to add bezier handles, there is unprecedented precision when fine tuning your curves. They’re the largest curves ever offered by Resolve and you shouldn’t have a problem seeing all the details that you need to see in order to draw the perfect curve. I was a little dubious about them at first, but after using them a little bit, there’s no way I’d go back.
New gray background option for Resolve in Beta 4: pic.twitter.com/o1h8ObmrgM
— Mathieu Marano (@ilovehue) September 2, 2015
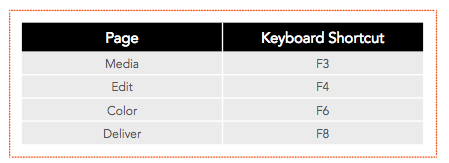
One of the new additions that was added during the beta is the ability to set the background UI in Resolve to be full grey, rather than the bluish tinge that it has by default. You can set this globally under System Settings > Use grey background interface. As a tiny tip from me, here are the keyboard shortcuts for moving between the 4 pages in Resolve, as per the excellent user manual.
Resolve 12 Tutorials
In this tutorial colorist David Torcivia talks about methods for effective noise reduction in DaVinci Resolve, using the capabilities in the full ‘Studio’ version of Resolve, as well as work arounds in Resolve ‘Lite’ and open OFX plugins like Neat Video. If you like David’s tutorial you should definitely check out his other great tutorials in these previous posts.
David also shares a quick tip on using optimised media to make Resolve run faster, which is especially useful when working with large data rate files like Pro Res 4444 4K, which weighs in at over 1GB a second, as David was for the music video featured in this tutorial.
One of my favourite tools in my edit suite is my Logitech G-13 programmable keyboard, which allows you to completely customise your keyboard experience of all your favourite applications.
In this post from Tomas over on TimeinPixels, you can check out his settings for ingesting, editing and grading in Resolve using the Logitech G-13, and download his presets to try out for yourself if you wish. The image above displays his ‘experimental’ grading mappings with the following explanation.
The top-left keys disable the current node or all nodes at once. Next I have a new node shortcut – new node after and new node before. Then the full-screen toggle for quick access. G9 will toggle between primaries and log with my pinky and G13 will toggle loop playback of the clip. G16 & G17 will copy the grade from the previous clip or from the 2 clips prior.
Colorist Jamie Dickinson shares a couple of really useful tips in these short tutorials on tweaking a round trip render (below) and using the RGB mixer to quickly rebalance a difficult shot to provide you with a decent starting point for a grade. Well worth 5 minutes of your time!
In a very detailed article Scott Freeman, over on the Avid blog, shares how to round trip between Avid Media Composer and DaVinci Resolve in just 28 steps. That might sound like a lot but, like I said, it’s a pretty detailed article, and he’s going click by click! If you want a bullet-proof walk through, this is it.
Three pieces of metadata from each master clip are important for roundtripping from Blackmagic Design DaVinci Resolve to Avid Media Composer. Just three. Learn where they are, manage them consistently, and you will be able to use this metadata to manage ‘essence’ (the actual media) in your Media Composer-Resolve roundtrips with perfect, painless control:
- Frames Per Second Metadata (FPS)
- Timecode Metadata – assigned to each frame (Auxiliary TC2)
- Identifier Name Metadata (LINK)
Colorist, trainer and author Alexis Van Hurkman shares how to append a node to multiple clips, without creating a group first, in this episode of Ripple Training’s Resolve in a Rush. You can also grab Alexis’ latest training series – DaVinci Resolve 12 Quickstart – on sale at the time of writing, and a breeze to digest at under 4 hours.
Alexis also has a handy write up on how he performed the keying and effects work inside Resolve, to create his fun little ‘why you need a colorist’ commercial. Another edifying read!
In a rare free insight from Patrick Inhofer, one of the colorist’s behind Mixing Light.com – a subscription site for colorists hungry to learn from the pros, shares how to keep your project organised in Resolve 12 using the new Smart Bin and Timeline Bin tools. As per the rest of the site, it’s a great insight, well delivered.
You can find out more about Mixing Light in my review from when the site first launched.
Twitter Tips For Resolve Colorists
Colorists: Can anyone please tell me where the “Midtone Detail” option on the color match tab has been moved to in 12?
— Phil Strahl ??? (@PhilStrahl) August 26, 2015
As always here are a few tips gleaned from the Twittersphere, and as always it’s often worth clicking on the date stamp in each tweet to jump into a larger conversation that sometimes occurs around these tweets. As a good example of this, the answer to Phil’s question can be found in this way!
“@MichaelSandness: #Resolve12 on a LG 34" GUI ? pic.twitter.com/JaTm7d3IL2” — Love how the Custom Curve expands to use the extra space.
— Alexis Van Hurkman (@hurkman) August 17, 2015
#Resolve 12 Tip (1 of 2)—Pressing the Shift key while slipping, sliding, or rippling a clip using the trim tool suspends the 2 & 4-up HUDs…
— Alexis Van Hurkman (@hurkman) August 18, 2015
#Resolve 12 Tip (2 of 2)—This lets you use the Timeline Viewer to watch which frame passes the playhead's position while you're dragging.
— Alexis Van Hurkman (@hurkman) August 18, 2015
#Resolve 12 Tip—Solo Auto Select for any track by option-clicking any empty area of that track, to prep for pasting clips frm another track.
— Alexis Van Hurkman (@hurkman) August 19, 2015
#resolve12 tip : you can now connect alpha output from a node to RGB input on w new node, and even back to alpha. So many uses!
— Jason Bowdach (@JBowdacious) August 22, 2015
You could use this to clean a matte from a rough key if matte finesse isn't enough #resolve12
— Jason Bowdach (@JBowdacious) August 22, 2015
To paste clip attributes the Edit page of #Resolve12 you select a clip, hit cmd+C and hit option+V on a second clip pic.twitter.com/fDqUZALiF2
— Mathieu Marano (@ilovehue) September 4, 2015
#Resolve tip: the new media management is amazing for organizing & trimming media, but be careful with that "delete" & "relink" button.
— Jason Bowdach (@JBowdacious) September 19, 2015
#timelinetuesday#comingsoon pic.twitter.com/Lu0izWdIlr
— Weston Woodbury (@westonWoodbury) July 28, 2015
#Resolve 12 Tip—Edit page position animation motion paths in the Viewer have Bezier controls w/small sub-handles to adjust keyframe easing.
— Alexis Van Hurkman (@hurkman) August 14, 2015
50+ free OpenFX plugins updated for Resolve https://t.co/LheIrwXo4p
— Alex Gollner ? (@Alex4D) July 21, 2015


Hi john,
Do u think it will run smooth in MacBook pro 15″ 2.2ghz i7 16GB RAM with 256SSD, only with Intel iris pro graphics.
Thanks in advanced.
Hi Win
Best bet is to give the configuration guide a thorough read as it will walk you through all the considerations you need to factor in. For example working with 4K RAW footage will be quite different to working with plain ol’ HD Pro Res.
Page 14 covers Mac laptops.