Is the new OWC Thunderbolt 5 Hub the best connectivity hub for film editors who need to add more ports to their edit suite setup?
It’s definitely a strong contender. It delivers an additional three super-fast Thunderbolt 5 ports, plus a USB-A 3.2 port (10 Gb/s), and comes with an 80cm Thunderbolt 5 cable in the box.
I recently deeply researched all of the new M4 Macs as potential computer options for video editors looking to upgrade their setup, including the latest Thunderbolt 5 peripherals.
Should you choose portability in the new M4 MacBook Pros or save a lot of money for the same performance with an M4 MacStudio or even a Mac Mini?

You can digest all of my conclusions and discover the best specifications for Macbook Pros and Mac Studios in this detailed post. Plus, you’ll actually learn why you should (as a video editor) pay more for certain things and not worry about others.
What is the Best M4 Mac for Video Editing
In the end, I needed to have instant portability with serious video editing performance, so I opted for an M4 MacBook Pro with this spec:
- 16-inch Liquid Retina XDR display (Standard display)
- Apple M4 Max chip with 16-core CPU, 40-core GPU and 16-core Neural Engine
- 64GB unified memory
- 2 x sets of media encoders
- 1TB SSD storage
- 140W USB-C Power Adapter
- Three Thunderbolt 5 ports, HDMI port, SDXC card slot, headphone jack, MagSafe 3 port
- Cost $4,199.
So far I’ve been amazed at the performance jump from my trusty 2017 i7 Intel Macbook Pro, the laptop I was chugging along with before upgrading.
Things that didn’t used to work now do, and the time to export has dropped dramatically. Those extra media encoders are worth their weight in gold.
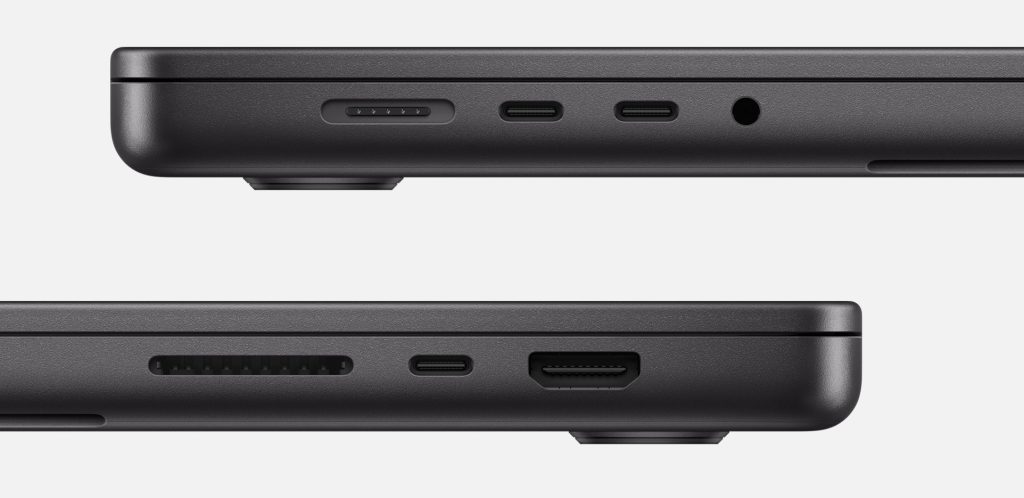
One problem is the limited number of USB-C/Thunderbolt 5 ports on the new M4 Macbook Pro.
There are only 3!
Personally, I preferred the USB-C charging option on my 2017 Macbook Pro, which meant it could be powered from either side of the machine and the mag-safe charger didn’t take up so much room.
Plus I don’t really see the wisdom in putting an SD card and HDMI port on it, if we could have had the same 5 Thunderbolt ports, as supported on the M4 Max Mac Studio, I would have been happier.
But this is where the OWC Thunderbolt 5 hub saves the day.
Best Thunderbolt 5 Dock for Video Editing
As a video editor time is money. Time waiting is money wasted.
Thunderbolt 5 drives allow you to transfer hundreds of gigabytes of media faster than ever and work smoothly with higher-resolution files and formats.
Everything is better with a faster connection.
I’ve long been a fan of OWC (Other World Computing) products, so I was grateful to them for agreeing to partner on this review by sending me a Thunderbolt 5 hub to test out.
My other Thunderbolt 2 dock is an older version of their current Thunderbolt 3, 14-Port dock.
If you’re an editor with a lot of peripherals setting up a home edit suite, it’s also worth considering buying one of these as well.
Why?
All those USB-A ports for connecting keyboards, tablets, Stream Decks, USB-connected audio devices and everything else that goes into a modern edit suite. Plus an ethernet connection for dedicated upload and download speeds.
Check out this list for all the gear I’ve ever tried, tested, and reviewed.
Specs
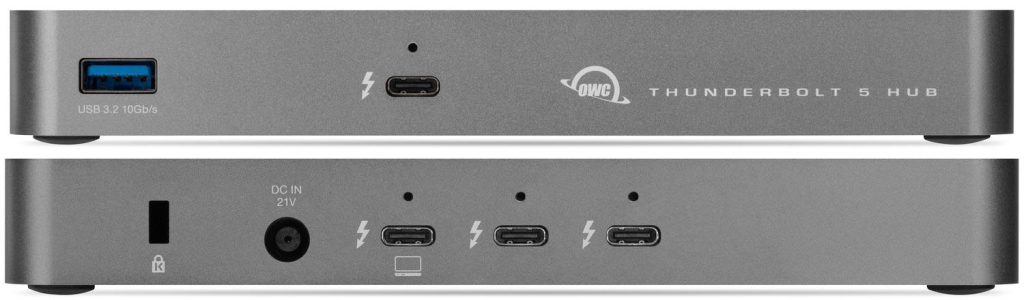
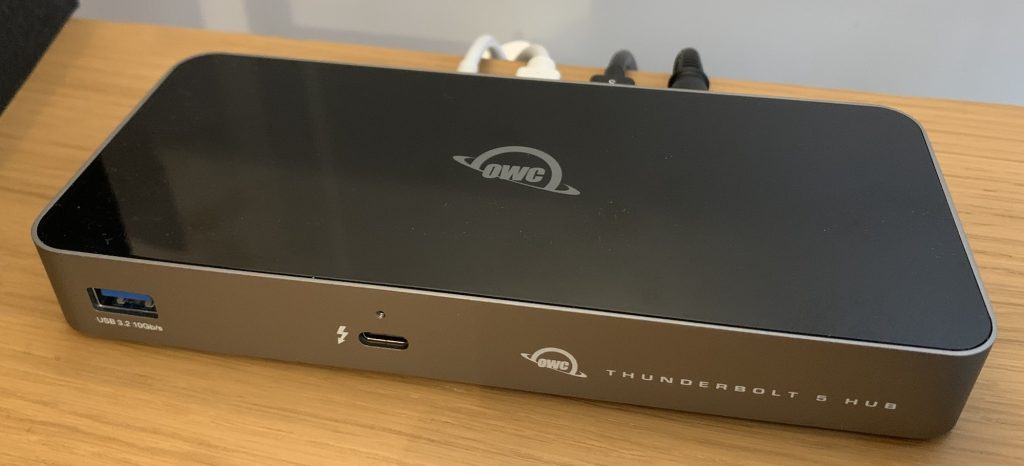
The OWC Thunderbolt 5 hub comes with:
- 1 x Host Thunderbolt 5 (USB-C) port
- 3 x Thunderbolt 5
- 1 x USB 3.2 Gen 2 Type-A, up to 10Gb/s (1250MB/s)
The Thunderbolt 5 ports deliver up to 80Gb/s bi-directional data (sending and receiving) and up to 120Gb/s display bandwidth — which allows you to connect up to 3x 8K displays.
You can also send up to 140W of power to the host computer. This is perfect for charging a laptop without connecting the Magsafe and having another cable trailing around.
Meanwhile, the Thunderbolt 5 device ports (for external drives and other devices) provide 15W of power.
Price: Currently $189.99, although OWC often runs flash sales.
The hub also comes with OWC’s 2 year warranty.
Pros – Speed, Compatibility, Tidiness
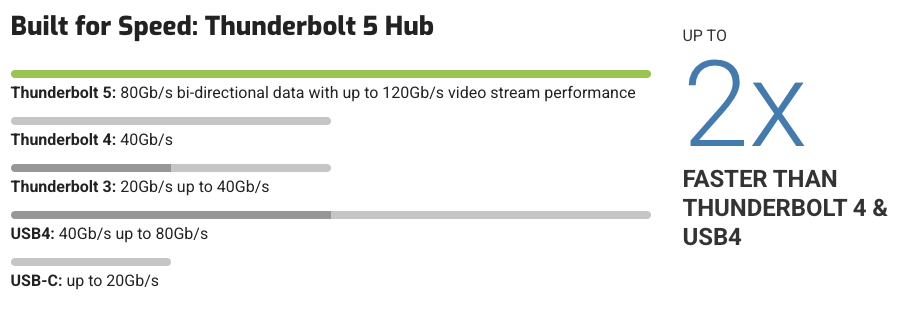
Huge speeds – At 80 Gb/s, Thunderbolt 5 provides twice the speeds of Thunderbolt 4, whilst being able to stretch up to 120GB/s with ‘bandwidth boost’. This is a process that borrows 40 Gb of bandwidth from one of the directions to maximise throughput.
E.g. 80 Gb/s + 40 Gb/s = 120 Gb/s send, with 40 Gb/s receive left over.
Small size – The hub is small and compact so it doesn’t take up a lot of desk space.
Even with everything connected to it and charging the laptop through the Thunderbolt 5 host port I’ve never noticed it running hot to the touch either.
One of my favourite things about using the OWC Thunderbolt 5 hub is that I only have to connect and disconnect one cable to the laptop, which makes things faster, simpler and neater.
Daisy chain
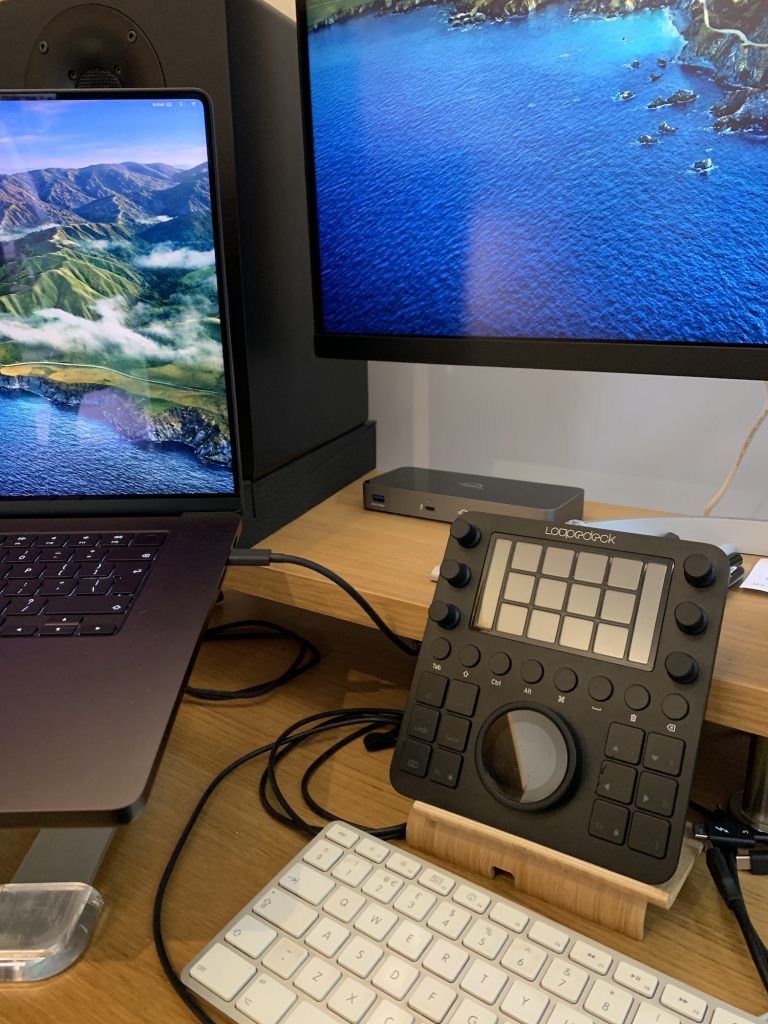
In my edit suite, I’ve got the Thunderbolt 5 hub connected by a single Thunderbolt 5 cable to my M4 Max MacBook Pro. The T5 hub then connects to my 4K LG editing and grading monitor, and my Thunderbolt 2 dock via an Apple Thunderbolt 3-2 adaptor.
This dock then hosts
- Ethernet connection
- USB-A ports for my
- Full-size Apple keyboard
- XenceLabs pen tablet
- Stream Deck
- Scarlett 2i4 audio device (which connects via XLR to my studio monitors)
Backward compatibility
Thunderbolt 5 is directly backward compatible with Thunderbolt 4 and Thunderbolt 3 cables and devices (docks and drives), although if you use a Thunderbolt 4 cable (or older) you’ll be limited to that generation’s speeds.
This is great as you can continue to use all of your existing hardware without skipping a beat!
But you’ll also need a Thunderbolt 5 cable for your new Thunderbolt 5 docks and drives.
Thunderbolt 1 & 2 connectivity – You can use a Thunderbolt 3 to 2 Adaptor, like this one from Apple, to connect older devices and drives to your Thunderbolt 5 Mac.
Dock Ejector – OWC provides a free Dock Ejector app for Mac and PC that allows you to safely eject every drive that’s connected to your dock in one go, rather than clicking through them one by one. Handy!
Cons
The Thunderbolt 5 hub’s power pack is actually larger and heavier than the hub itself. This isn’t a big deal in a static edit suite setup where everything stays put, but if you’re travelling with your hub, it’s a bit of a pain to lug around.
But presumably, this is the only way to deliver all of the power that Thunderbolt 5 can support.
Drop out — I have been experiencing a strange quirk since using the T5 dock, which is that all of a sudden the drives and peripherals connected down-chain to my T2 dock will suddenly disconnect. It seems to happen at random and without any consistent cause that I can identify.
I had thought the T5 dock was maybe overheating, or there was some iOS quirk, but whilst writing this review, I just bumped the Thunderbolt 3-to-2 adaptor that daisy chains in my Thunderbolt 2 dock and this made everything disconnect.
So perhaps this is the source of the problem. One way to check this would be for OWC to send me a 14-port Thunderbolt 3 dock and see if the problem goes away…
UPDATE: It turns out you shouldn’t daisy-chain the docks. When I connected the T3-T2 adaptor (and hence the other dock) to the laptop directly, all of the disconnecting issues went away.
Is the OWC Thunderbolt 5 hub worth it?
Absolutely. The OWC Thunderbolt 5 hub is an indispensable part of my edit suite setup.
Being able to plop my laptop down, connect a single cable, and have everything ready to go is a huge timesaver.
It also makes it easier to manage mounting and unmounting drives without pulling out the ‘wrong’ cable, as I can use the Dock Ejector to unmount all drives at once.
I also couldn’t live without my secondary OWC 14-port Thunderbolt hub, as all of my USB-A peripherals are connected through it. But I don’t have to think about that as it, too, is daisy-chained through my single Thunderbolt 5 cable – that came included in the box.
If you end up choosing an OWC dock let me know how you get on!
Reuse Your Old Tech
A few years ago, my beloved 2013 Mac Pro died. I tried to repair it, but alas, it was time to say goodbye. But thanks to the good folks at OWC, I’ve been able to rescue a little bit of dead tech.
Watch the video above, where I used an OWC Envoy Pro 1A external enclosure to give the internal PCIe SSD from my 2013 MacPro (trashcan) new life as an external edit drive.
The speeds are pretty good for such an old device, beating my Samsung T7 SSD in a speed test. This means I’ll easily be able to edit simple projects on it.
It was easy to do with only two screwdrivers and about 3 minutes of spare time.
You’ll need a Torx T5 screwdriver for the enclosure and a Torx T8 for the Mac Pro. You can get a simple set on Amazon for $10.
The OWC Envoy Pro 1A is the ideal enclosure for this as it’s specified to work with internal Apple factory-installed PCIe SSD from most 2013 to 2019 Mac models including:
- Macbook Pro 2013 – 2015 (13″ and 15″)
- Macbook Air 2013 – 2017 (11″ and 13″)
- iMac Late 2013 – Early 2019 (21.5″ and 27″)*
- MacPro 2013
- Mac Mini Late 2014
*Excluding the iMac (Retina 5K, 27-inch, Late 2015)
Pick one up and put some new life into your old tech!