
After Effects for Editors Part 8 – New Plugins
- Inside Red Giant’s New VFX Suite plugins
- The Best After Effects Presentations from NAB 2019
- Nodes 3, Video CoPilot Orb and Trapcode Suite 15 plugins
In this edition of After Effects for Film Editors I take a look at some really handy plugins, that, if you’re doing regular work in After Effects, might well be worth the money, given how much time they’ll save you.
These include Red Giant’s new VFX Suite, Universe 3.0 and updated Trapcode plugins, as well as a free plugin from Video CoPilot and the popular Nodes 3 plugin from Yanobox.
I’ve also rounded up some of the best After Effects focused presentations from NAB 2019, so you can add to your learning, even if you don’t need to add to your plugins budget.
If you’re new to After Effects, then it’s worth pointing out that making use of third-party plugins is one of the major benefits of learning the application. After Effects has such a long and rich history of plugin development that there really is ‘an app for that’ for most things. Compared to other motion graphics packages, the eco-system is thriving.
If you’re not here to spend but would rather pick up some freebies or discover some new tutorials, these previous After Effects for Editors posts have got you covered!
- Creating Using and Selling Premiere Pro Motion Graphic Templates (MOGRT) – Including tons of great freebies!
- After Effects for Editors Part 7 – Free downloads, Tips on Lower Thirds, Training on Expressions
- After Effects for Editors Part 6 – Free Tools and Templates, Essential Tutorials,
- After Effects for Editors Part 4 – Free plugins, 101 useful tricks, dedicated After Effects keyboard review
The Best After Effects Presentations from NAB 2019
Get up to speed with all the new features in the April 2019 (16.1) release of After Effects, including the much heralded content aware fill for video, in this presentation from Adobe’s Karl Soule.
If you want to read through what’s new then click here to browse Adobe’s official site. Version 16.2 was released in June 2019 with a host of bug fixes.
Karl covers many new features while focusing on creating MOGRTS and using expressions.
Sergei from Ukramedia is an excellent trainer and in this 23 minute presentation on creating motion graphics for Fox Sports, he demonstrates the power of using MOGRTs to save time and make editor’s lives easier.
At about 19 minutes in Sergei walks through how to create MOGRTs for yourself and the kind of parameters an editor can control in Premiere Pro. If nothing else you can send this talk to your in-house motion graphics team and say “This please…”
If you want a step-by-step guide to creating your own MOGRTs then check out this previous post on doing just that.
You can get more tips from Sergei in this previous post on After Effects for Editors Part 7 – Simple Tips.
Andrew Kramer, founder of VideoCopilot.net and the ‘granddaddy’ of all After Effects tutorials on YouTube shares some behind the scenes insights on his collaboration with YouTube filmmaker Peter McKinnon.
As always Andrew shares a lot of great tips, and some bad jokes, along the way including hints on getting more from his free Orb plugin (see below).
I’ve also previously reviewed Video CoPilot’s superb Optical Flares plugin, for adding bespoke, animated lens flares to your edit or grade.
Check out Andrew’s NAB presentation from last year here and also his highly personal and inspiring 2014 After Effects World keynote speech here.
Adobe Max is another huge conference hosted by Adobe and you can check out all of the recorded sessions from 2018 in this YouTube playlist.
This hour long presentation Ian Robinson and Nick Harauz is well worth investing in as they share a wide ranging set of tips and tricks aimed at beginners and expert users alike.
They cover a lot of topics including:
- Project Organisation fundamentals
- Colour Correction techniques
- Sequencing layers
- Greenscreen presets for precise keying
- Camera scripts for navigating 3D space
If you want to know more about what it’s actually like to work in visual effects as a creative professional, then you might enjoy this panel discussion with Andrew Kramer of Video Copilot, freelancer Jayse Hansen, and Mary Poplin from Boris FX.
Red Giant VFX Suite
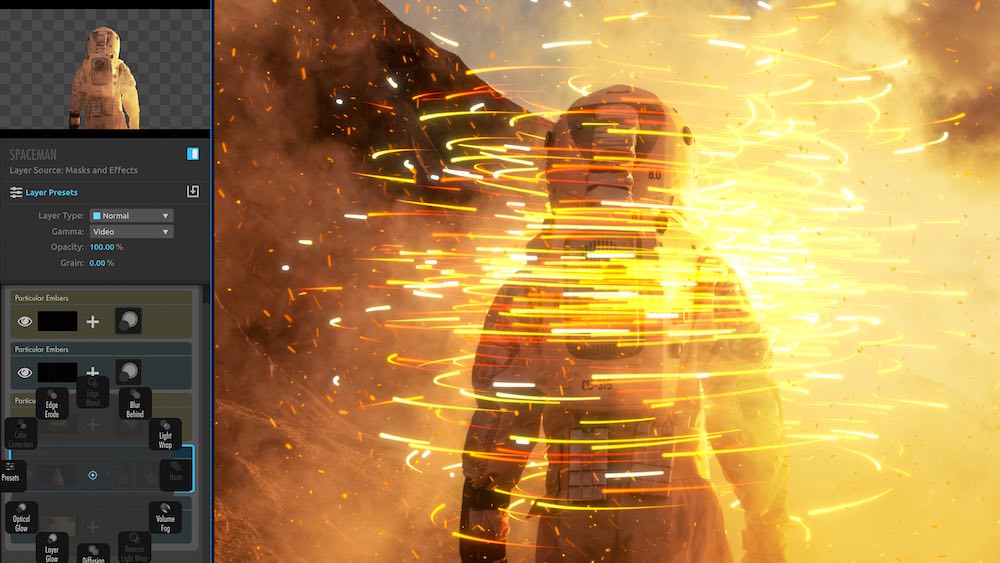
Red Giant SuperComp is the VFX Suite’s flagship product
Red Giant have just released a brand new collection of tools called the VFX Suite. So what exactly is it?
They are in effect discontinuing their Effects and Keying Suites of apps and largely rolling them into one integrated product offering called the VFX Suite.
This is the 9 apps listed below but it includes two of the most popular existing apps, Primatte Keyer and Knoll Light Factory.
The point of all this is to help you create “realistic VFX composites, automatic chroma-keying, lightning-fast and accurate planar tracking, photo-realistic glow effects, and beautiful prismatic displacement effects for VFX and motion graphics.” to quote the PR blurb.
If you’re an existing owner of the other older apps, fear not, these will continue to work for as long as you can run them (O.S., host app dependent etc.), but they won’t be maintained by Red Giant from this point forward.
In fact you can save 50% off the price of up/cross-grading to VFX Suite (normally $999) if you’re an existing Effects or Keying Suite owner. Just use the code VFX50 until 18/09/19.
So what is all the fuss about?
This quick trailer will guide you through what each of these things do, many of which are super-charged by GPU acceleration.
Here’s a headline for each:
Red Giant VFX Suite Apps
- SuperComp – A toolkit for realistic VFX composites in After Effects
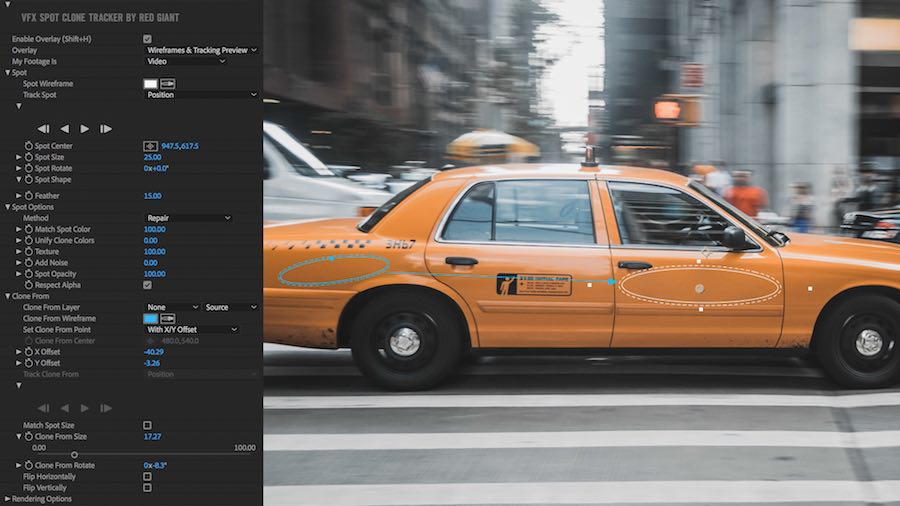
- Spot Clone Tracker – Simple object removal with a built in tracker
- Shadow – Create complex perspective shadows
- Reflection – Create realistic reflections
- Primatte Keyer – Automatic Chroma-keying
- Optical Glow – Photo-realistic glow effect
- Knoll Light Factory – 3D lens flares in After Effects and Premiere Pro
- King Pin Tracker – Accurate planar tracking
- Chromatic Displacement – Prismatic displacement effects
As an editor some of these tools like more appealing than others, but all of them will bring joy to the hearts of anyone doing regular VFX work in After Effects.
I may not have suffered the grind of managing multiple pre-composed sequences in After Effects just to achieve seamless composites, which is one of the pain-points that SuperComp solves for, but I do know that anything that makes After Effects easier to get better looking results in, is a win for me. In this regard SuperComp looks ideal as single toolkit to guide you through creating better composites.
Even though VFX Suite is squarely aimed at After Effects users it’s worth noting that Knoll LightFactory, Primatte Keyer, Optical Glow and Chromatic Displacement all work inside of Adobe Premiere Pro too, which is a great asset when you want instant results and don’t want to ‘render and replace’.
This 19 video playlist will take you through each of these tools in brief 2 minute trailers as well as in comprehensive getting started tutorial detail.
I didn’t think I would end up watching all 51 minutes of Stu Maschwitz’s tutorial for Supercomp, but his joy in demonstrating a tool he’s clearly delighted with (after 2 years of work!) was too infectious to ignore. So I ended up watching the whole thing.
Start watching and you’ll see what I mean.
For the rest of this review I’m going to hand things over to my animator brother who spends his days inside After Effects and other 3D apps, for a more knowledgeable opinion.
With nine tools to cover I wanted to give an overview of what’s here, what’s useful and why you could consider adding the suite to your workflow.
As with most things in After Effects, there are many different ways to achieve various effects, and what matters is really how you like to work and your own specific situation.
Here’s a quick look at some of the highlights from the new tools.
First up is Supercomp – which is just nuts. It’s a brand new plugin aiming to dramatically simplify and streamline realistic compositing in After Effects.
Historically to get realistic looking composites, where the layers interact correctly with each other, has required a lot of extra work to keep things ordered and functioning as they should – most often this workflow used a lot of precomps and that made things unwieldy.
Supercomp gives you real-time feedback for the layer you’re working with in the dedicated panel, as well as colour and gamma management, and it allows you to easily add custom effects such as light wrap and haze to the layer.
These are common compositing tricks used to bed separate elements together and something that would take a lot of effort to achieve in vanilla After Effects, especially when you consider that these effects automatically take into account what else is happening with the other layers in the Supercomp stack.
The plugin even comes with a slew of presets to quickly achieve looks that would otherwise require hours of work to do previously.
This is especially handy if your main focus is editing and not After Effects, and you just want to get something done with the minimum of fuss. I’m already seeing countless ways this single plugin is going to speed up my own workflow.
Primatte Keyer has a host of tools to pull clean keys quickly and easily; working in both After Effects and Premiere Pro. It includes a lot of intuitive controls with great feedback, including a handy split-screen slider to let you compare the matte with the final result. What’s more it now has GPU support for even faster results.
King Pin Tracker is a replacement to Red Giant’s previous Corner Pin effect, and comes with a built-in planar tracker that speeds up adding elements into your shots, as well as a bunch of controls for fine adjustment; giving you very speedy results.
This tool is great for common tasks such as road sign replacements, phone screen replacements, removing unwanted objects and all the usual corner pin jobs.
Spot Clone Tracker is another tool that gives you fast results for getting rid of unwanted elements that might have crept into your shot. It has a similar functionality and also comes with the built-in tracker.
Optical Glow, Shadow and Reflection are all more narrowly focused plugins that give you fast results for specific looks you’re trying to achieve.
Optical Glow in particular should mean never using the (rather ropey) default Glow effect within vanilla After Effects ever again. It does a far better job of blending the elements in the scene and creating much nicer looking results.
Shadow and Reflections do, well, shadows and reflections – for those motion graphic pieces both these plugins will give you nice options to add a bit more interest for your text and graphic elements, as well as of course their uses in compositing.
The last tool on this list is Chromatic Displacement – a displacement tool that uses a black and white map to deliver the height information for the distortion.
It also produces the kind of chromatic effects you would get if the light in the scene was being disrupted by a lens or a prism. There are a lot of options here to give you huge amount of control, and actually building your own displacement maps should give you much more predictable results.
At $999 VFX Suite costs the same as that Apple Display stand but it’s obviously much better value!
But seriously if you’re working day in and day out in After Effects doing visual effects work then SuperComp looks worth the price of admission alone.
All of these tools are also available as standalone versions priced between $99-$399 if you know you only want a tool or two. But how likely is it that you’ll be able to limit yourself to a few?
Especially given the calibre of these tools and Red Giant’s continued prominence within the After Effects eco-system.
If you are keen to snap it up, but don’t have the cash right now, it’s worth following Red Giant on Twitter to catch wind of their semi-frequent flash-sales – often with 50% off everything.
Or if you’re a student you can save 50% right now with their generous academic licensing.
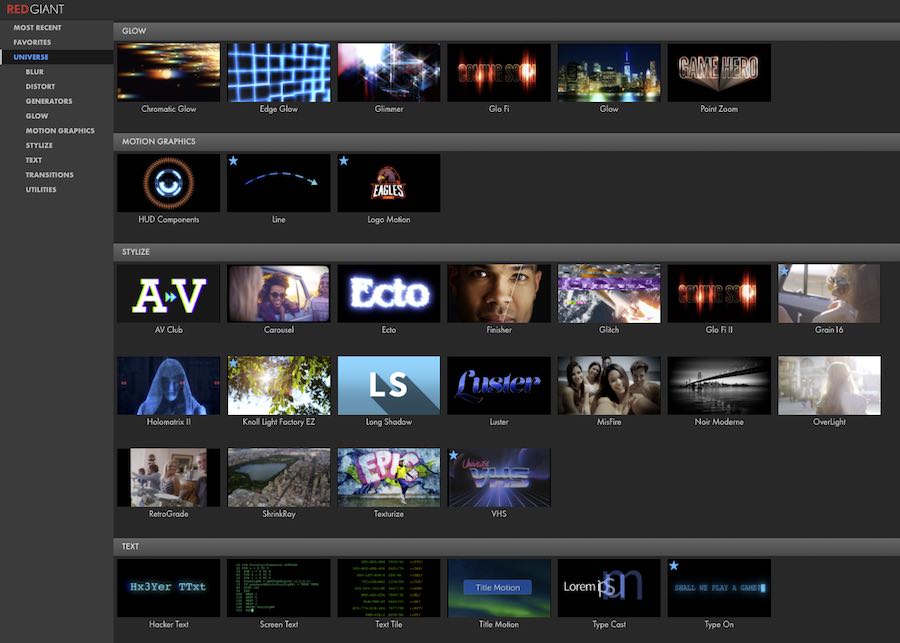
Red Giant Universe 3.0
Red Giant’s Universe 3.0 was updated earlier this year, and now features a visual dashboard which makes it much, much, much(!) quicker and easier to find what you’re looking for amongst the 75 different tools that make up it’s pick and mix toolset.
If you’re an editor who likes drag and drop simplicity then Red Giant’s Universe is for you, and you can actually make use of RGU in over 8 different host applications including Adobe Premiere Pro and After Effects, Apple Final Cut Pro and Motion, Avid Media Composer, DaVinci Resolve and HitFilm Pro.
To open up the dashboard in Premiere Pro go to Window > Extensions > RG Universe Dashboard.
You’ll be presented with a floating, resizable window you can dock anywhere with hover-scrub previews of each tool in well organised categories. There is no text based search box but within a couple of clicks you’ll find what you’re after.
A few of my favourite tools from Universe 3.0 would include:
- Spot blur – useful for masking out faces or brands
- RGB Separation – a quick and easy music video look, or handy for adding some polish to transitions
- Knoll Light Factory EZ – The same lens flares as the big brother product delivered in handy presets
- Logo Motion – why hand animated a logo appearing when you can use one of 19 presets?
- VHS Look – because old school
- Type on text animation
- Shape Wipe – because you really do need a star wipe every now and then!
Another great addition in Universe 3.0 is that every tool now ships with a set of presets to help you get started, although you still have full control in the Effects tab, of course.
There are also 5 new text effects all designed to help you create ‘hacker’ graphics with ease. If you check out the trailer above you’ll see all the references to everyone’s favourite 80’s hacker movie, WarGames.
I’m not totally sure how often you’ll need these, but with a little imagination and some elements from the impressive HUD Components tool you could easily make some nice looking motion graphics in a hurry.
One potential downside to relying on custom plugins for you effects work is that, if you’re sharing your project with other editors or archiving projects for future reference, you’ve got to make sure your collaborators, or future you, can still open the project and use the same plugins later on, or on another system. It would always frustrate me when I was passed a project graded in Colorista, when for years I didn’t own the plugin.
There’s also a new price for 2019, which is $199 for a year’s subscription.
This represents pretty good value for money if you calculate each tool costing you about $2.5 for year, but I’m sure the pain and question of renewal will come each year. How many subscriptions can you afford?
Hopefully Red Giant will keep adding useful tools to make that an easy answer, but also hopefully when you think back over the year and factor in the value of all your time-saved and happy clients made, it will be a no brainer too.
Red Giant often run flash sales and NAB discounts so it’s worth keeping tabs on those if you want to save some cash. It’s also worth checking on ToolFarm.com as they often have Red Giant related discounts too.
Update – August 2020
Red Giant Universe 3.3, another free update to the Universe selection of plugins brings new features, tons of new presets and basically more easy-to-use visual goodness to the subscription.
Nodes 3 – After Effects Plugin
Nodes 3 is a popular plugin created by YanoBox for solving complex motion graphics problems in smart ways and is especially handy when you need to create motion graphics from a lot of client data or text.
I’ve previously reviewed Nodes 2 in the first instalment of After Effects for Editors, so check that out for more details, but I just wanted to quickly cover some of the new features in version 3.
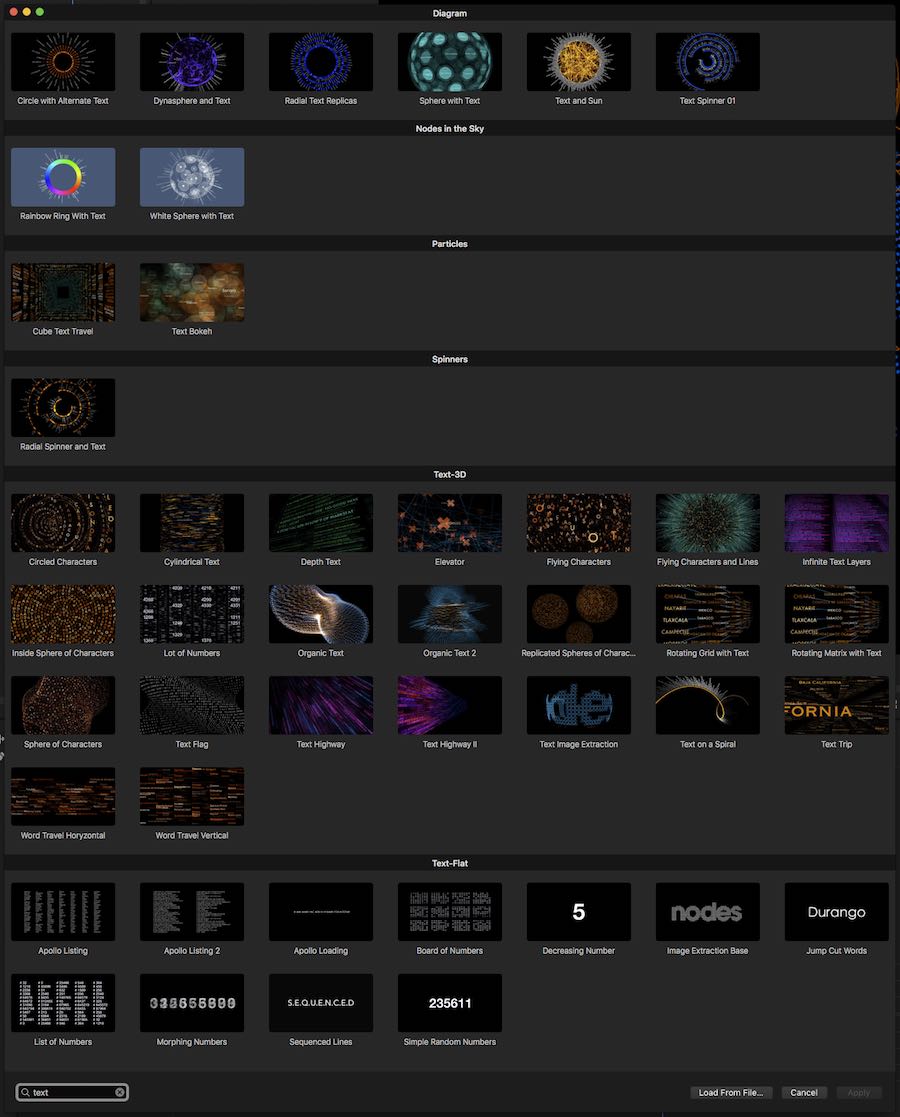
For editors looking for some drag and drop magic the updated visual presets browser is now available in all hosts applications. The plugin is available for Final Cut Pro, Premiere Pro, After Effects and Motion 5.
In Premiere Pro it was very slick and responsive and the range of animations and designs is seriously impressive. In the image above you can see all of the complex designs and animations Nodes 3 has to offer for the term ‘text’.
With 300 presets to choose from, and new text search and category filters, it doesn’t take long to find and create something that is far more impressive than you should get credit for. But hopefully you will anyway!
As an editor who doesn’t have a particularly strong design eye, starting with a well-designed preset that looks great out of the box is a huge benefit. From there it’s very easy to make a few simple tweaks to the inherent data, add client colours and a couple of keyframes and you’re close to done.
If you’re a motion designer looking to save a ton of time whilst still retaining a huge amount of complex individualisation, then Nodes 3 is a great solution. If you’re an editor who needs to create motion graphics but doesn’t really know how, then a few minutes browsing the presets and playing with a few parameters in this plugin will give you some amazing results with very little effort.
At $299 for a permanent license, this works out to a buck a preset! But given the depth of the plugin, it will readily sustain your creative demands as they mature beyond the starting presets.
Nodes 3 is available from FxFactory.com but you can learn more about it, and Yanobox’s other plugins on their official site. You can also read through the comprehensive online user guide there too.
Nick Harauz from Creative 111 (see the Adobe Max video up above for more from him) delivers a comprehensive review of Nodes 3 and offers numerous comparisons to improvements made since Nodes 2.
If you’re looking for a quick jump start on how and why to use Nodes 3, then these 15 minutes will be worth your time.
The Replicator is one of the major new features in Nodes 3 and in this official tutorial you can get a decent overview of how to use it effectively to create some nice looking motion graphics with ease, as long as you understand the impact of each parameter.
But if you don’t want to bother with all that bespoke creation effort, then just pull something from the 300 pre-built presets.
Check out Nodes 3 o FxFactory for yourself.
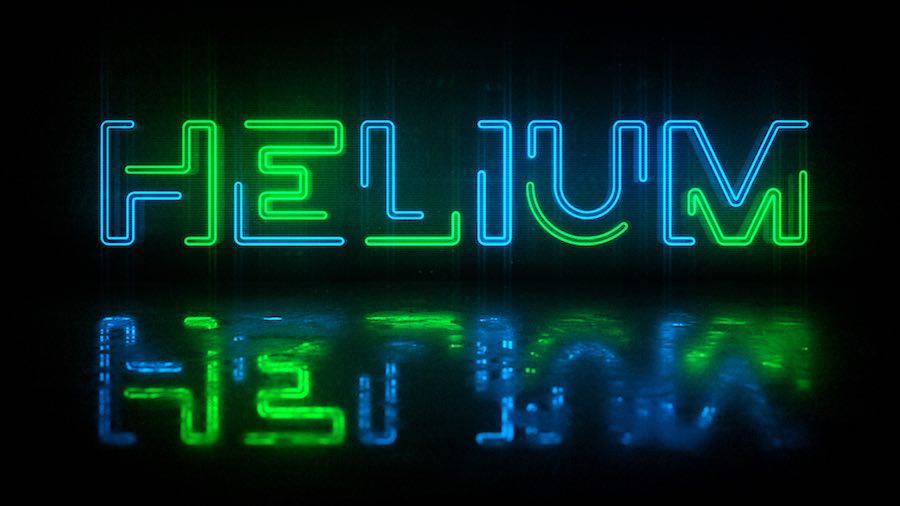
Free Earth Orb Plugin from Video Copilot
Andrew Kramer from Video CoPilot regularly gives away free plugins to the benefit of the entire After Effects community, and his latest offering is seriously impressive.
One can only assume this plugin was originally created to help produce the end titles for films that Andrew has worked on for director J.J. Abrams such as
Head over to the Orb mini-site to download the latest version of the plugin which features some important fixes for various GPU drivers.
You can also download free 6K earth textures to go along with it.
Andrew walks through the ins and outs of the plugin in this 30 minute tutorial, whilst also creating a complex earth animation with city lights, clouds, a star field and interactive sunlight animation.
Download the free Orb Plugin here.
Trapcode Suite 15 Update
Trapcode Suite 15 was released about 7 months ago with an update that incorporated dynamic fluid simulations. I’m a little late to the party, but at least I showed up.
The Trapcode suite of applications is a mainstay of experienced motion graphics artists and if you watch the trailer above, you’ll get an eye-full of what it’s capable of – in the right hands.
I’ve previously reviewed Trapcode Suite 14 here and also included links to 7 hours (!) of free official training on Trapcode Particular and Trapcode Form in my After Effects for Editors Part 7.
What’s even more impressive is that with the Particular Designer and over 335 presets, you don’t need a master’s degree to make impressive motion graphics.
While I love to work in After Effects, I don’t always have eight hours to make a fluidly dynamic particle system bounce off 3D text, or have two systems interact with each other for a text reveal.
This is where Particular 4 really pays for itself. With a little research and tutorial watching, you will be up and rendering within 30 minutes. – Brady Betzel
For another opinion on working with the Trapcode suite, check out Brady Betzel’s review here.
This tutorial from Harry Frank will guide you through Trapcode Particular and Trapcode Form 4.1’s new features when it comes to using text and masks as particle emitters within your animations.
Harry also details the new features in Trapcode Form 4.1 in a similar fashion.


