A Beginner’s Guide to AI Video Generators
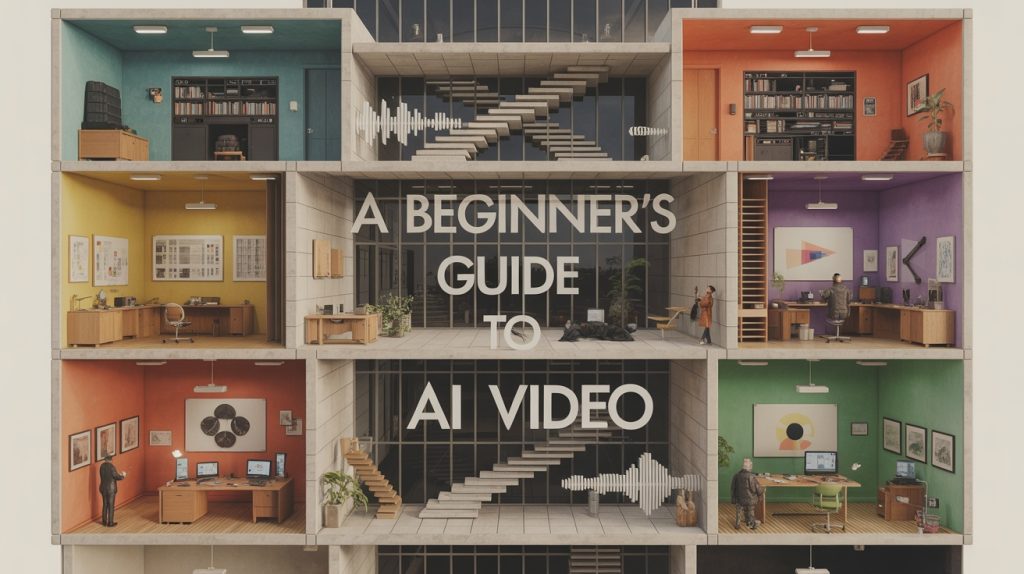
This beginner’s guide to AI Video Generators will teach you everything you need to know to get professional results from popular AI video models like Kling, OpenAI Sora, Google Veo, Seedance and many others.
I’ll share step-by-step instructions to get great results from the first generation, rather than wasting your credits trying the wrong things over and over.
I’ll also share useful video tutorials featuring examples of AI-generated videos to give you a sense of what’s possible.
Thanks to Artlist for sponsoring this article. Their generous support helps me dedicate the time and effort needed to write posts like these and maintain this entire site!
I use Artlist on almost every project for these reasons:
- Artlist has excellent stock music with unlimited downloads and no watermarks
- Artlist has excellent stock footage with access to camera original files for easy grading
- Artlist’s AI Toolkit has all of the major AI models in one place
- All of this for one affordable, manageable subscription.
Get 2 months extra for free on any Artlist subscription with this exclusive affiliate link.
For more insights on which AI video model to choose and why I prefer Artlist over all the other options, check out these previous posts:
- Which AI Video Model Should You Use on Artlist?
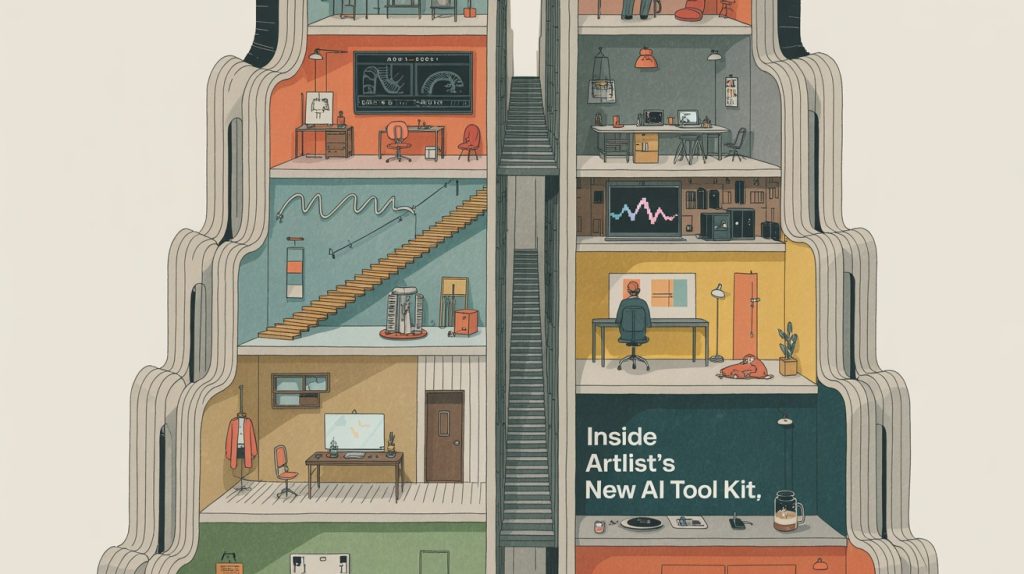
- Inside Artlist’s New AI Toolkit
- The Best High-End Stock Video Footage Sites
- The Best Royalty Free Production Music Sites
How to Use AI Video for Beginners
The inspiration for this article came from Artlist’s own Super Bowl Ad, which was made in 5 days and for ‘only a few thousand dollars’ (presumably not including the airtime ad-spend?) with the goal of referencing many of this year’s biggest and most expensive Big Game commercials.
There’s a fun behind the scenes video here, which highlights both their production process and how tired everyone involved was!
Given both the revolutionary breakthroughs in AI-generated video production and the noise of the relentless hype machine around it, I wanted to share some down-to-earth tips and tricks that will help you overcome AI’s limitations and steer your unbridled creativity in the right direction.
To get us started, here’s a quick overview of the entire process of generating videos with AI.
Follow a professional workflow:
- Storyboard your shots and transitions (doodle by hand for speed!)
- Generate still images of each of these to iron out the look and feel of every shot
- Use these as references when generating video clips
- Use start and end frames to tie together multiple shots in sequence
- Use AI to improve the quality of your initial text prompts
- If you also generated audio with your clips, consider replacing/augmenting with music and sound effects added in by hand
- Edit your shots for timing, pace, and maximum impact.
#1. Storyboards
Every great project starts with a decent plan. In this case, as we’re effectively creating an animation with AI generated shots, having a storyboard to guide you through the process is essential.
These can be the most basic doodles you can create, but drawing them out by hand will be the fastest way to get down on paper your visual ideas for
- framing
- composition
- basic camera movements
- lighting ideas
- character movements
- props
- and everything else
Try to think in sequences of shots, rather than in just single isolated moments, and in transitions between shots so that the entire sequence flows smoothly.
If you’re also working with narration or some kind of dialogue, try to estimate how long each shot will last (which will feed into your prompt and generation duration) to make sure it lasts the right amount of time.
Boards & Script > Prompt
If you’re working with a script or voice over, you could input that text, either with or without your storyboard sketches, into ChatGPT or Claude and get it to write out a prompt per shot to save you time and give you a consistent starting point on the next phase.
#2. References/Generated Storyboards
You want to start with a still image for your video generations for two reasons:
- It’s cheaper
- One Nano Banana Pro image costs 400 credits on Artlist vs (potentially) a few thousand credits for your video generation. Artlist 1.0 is only 80 credits!
- You can establish all of the key details, look, lighting, framing etc for the video to work from, which reduces how much interpretation that model needs to do.
Personally I prefer to use Nano Banana Pro for my initial image creation as I like the results I get from the prompts I use, but whatever image model you use (Artlist has a TON to choose from) stick with one for more consistent results across your project.
For a breakdown of the individual cost of each image model on Artlist click here.
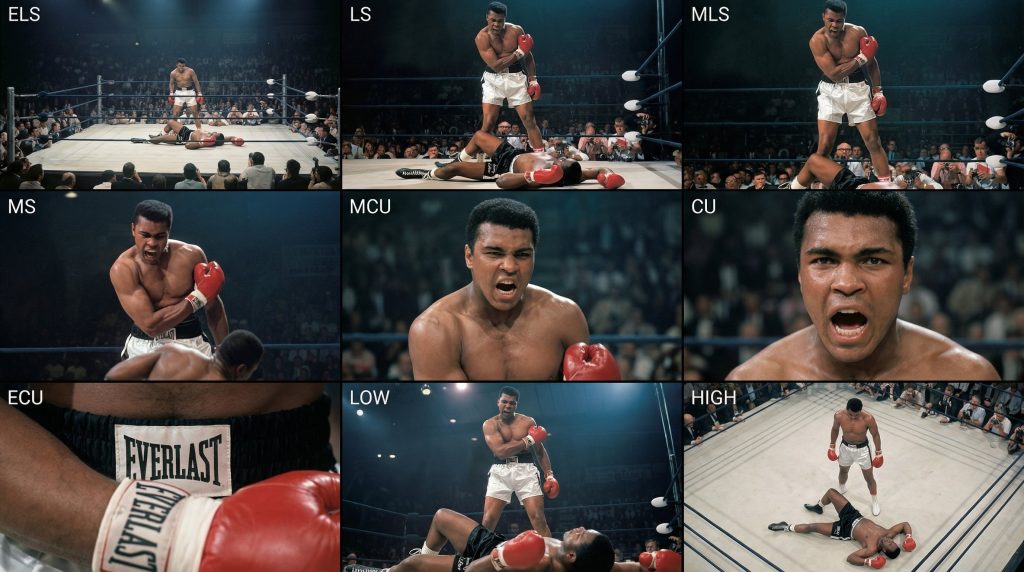
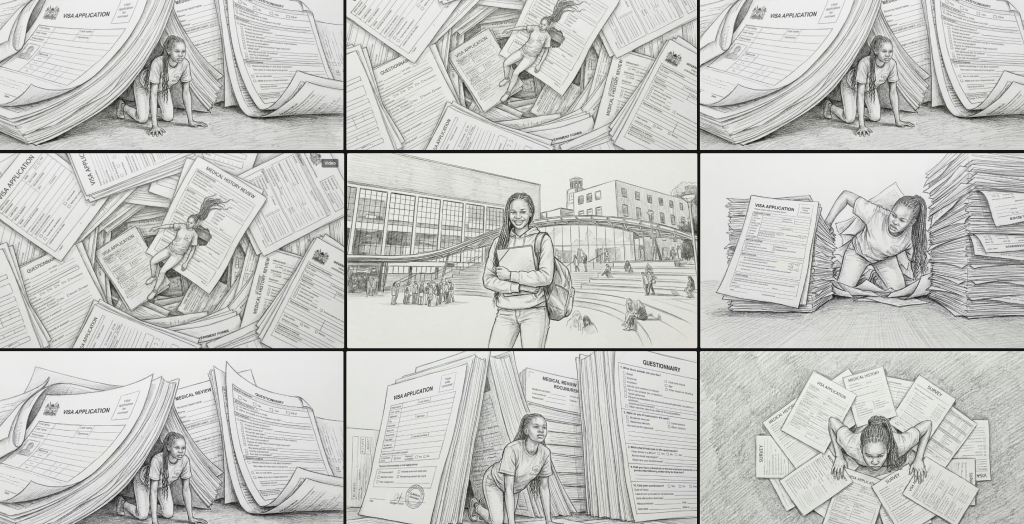
@techhalla shared this useful technique and prompt for generating a grid of various shot sizes and framing, which you can then chop up to use as individual reference frames when building a sequence of shots.
Doing this helps maintain consistency in the look of the environment, the characters, the lighting etc as they all came from the same generation.
<instruction>
Analyze the entire composition of the input image. Identify ALL key subjects present (whether it's a single person, a group/couple, a vehicle, or a specific object) and their spatial relationship/interaction.
Generate a cohesive 3x3 grid "Cinematic Contact Sheet" featuring 9 distinct camera shots of exactly these subjects in the same environment.
You must adapt the standard cinematic shot types to fit the content (e.g., if a group, keep the group together; if an object, frame the whole object):

**Row 1 (Establishing Context):**
1. **Extreme Long Shot (ELS):** The subject(s) are seen small within the vast environment.
2. **Long Shot (LS):** The complete subject(s) or group is visible from top to bottom (head to toe / wheels to roof).
3. **Medium Long Shot (American/3/4):** Framed from knees up (for people) or a 3/4 view (for objects).

**Row 2 (The Core Coverage):**
4. **Medium Shot (MS):** Framed from the waist up (or the central core of the object). Focus on interaction/action.
5. **Medium Close-Up (MCU):** Framed from chest up. Intimate framing of the main subject(s).
6. **Close-Up (CU):** Tight framing on the face(s) or the "front" of the object.

**Row 3 (Details & Angles):**
7. **Extreme Close-Up (ECU):** Macro detail focusing intensely on a key feature (eyes, hands, logo, texture).
8. **Low Angle Shot (Worm's Eye):** Looking up at the subject(s) from the ground (imposing/heroic).
9. **High Angle Shot (Bird's Eye):** Looking down on the subject(s) from above.

Ensure strict consistency: The same people/objects, same clothes, and same lighting across all 9 panels. The depth of field should shift realistically (bokeh in close-ups).
</instruction>

A professional 3x3 cinematic storyboard grid containing 9 panels.
The grid showcases the specific subjects/scene from the input image in a comprehensive range of focal lengths.
**Top Row:** Wide environmental shot, Full view, 3/4 cut.
**Middle Row:** Waist-up view, Chest-up view, Face/Front close-up.
**Bottom Row:** Macro detail, Low Angle, High Angle.
All frames feature photorealistic textures, consistent cinematic color grading, and correct framing for the specific number of subjects or objects analyzed.
Another important technique is to add multiple reference images into your initial image generation for important components. For example, including reference images of key props, characters, clothing, locations etc, and getting the image model to combine them into your final reference image for that shot.
So if you want a cowboy, in a supermarket, wearing a pink tracksuit, you can find references for all those elements and have a specific visual starting point for the AI image model to work from.
#3. Generate videos
Now that you have transformed your storyboard from sketches into accurate reference images, it’s time to start generating your actual video shots.
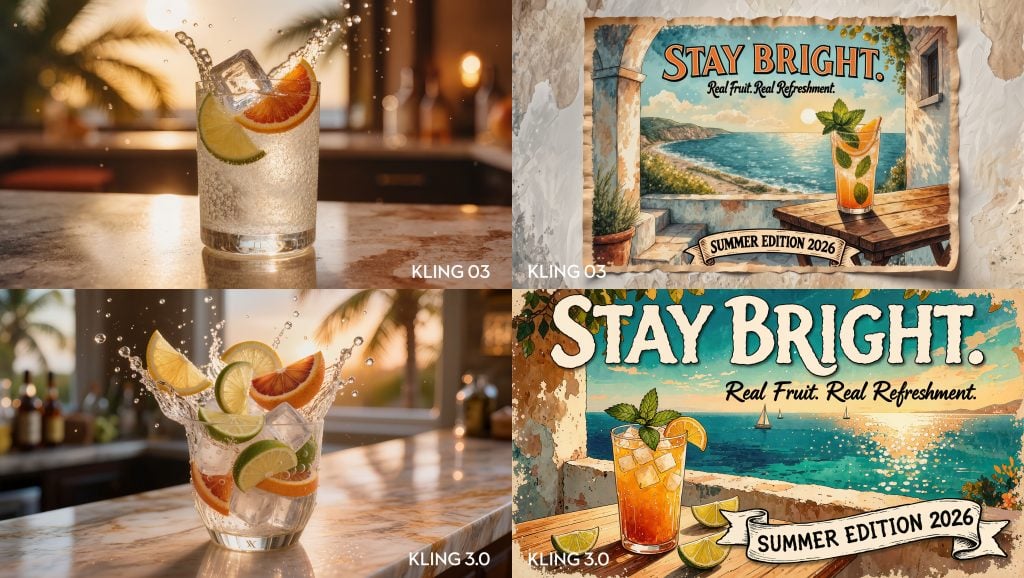
One key for consistency is to test a couple of your shots with the same prompt and the same reference image on a few different video models to see which one delivers the results you need one the budget you have.
For a breakdown of the cost of each video model on Artlist click here.
You can read through my thoughts on 10 of the top AI video generator models in this article I wrote for MASV.
Budget your credits
This now raises an important point that you should consider before you embark on your project. Can I afford it?
A simple formula for your credit budget is:
Image cost (x 2) + video generation cost (x duration + resolution) + upscale + audio? = One shot.
To explain.
It will cost you a few image generations to get to the correct starting frame for your video.
Then it will almost certainly take you more than 1 generation to get to a usable video output.
If your shot needs to be twice as long as the base price for a video shot then it will cost you twice as many credits.
While adding audio to your generation is a nice-to-have addition it doesn’t often generate usable sound – except in lip sync dialogue situations in which you want to prompt for this to be clean of music or background sounds – so it is best just to switch audio off and save on credits.
One other budgetary consideration is whether it is better to output to a lower resolution and use AI upscaling (or a tool like Topaz) to bump it back up, or to just generate your initial videos in a higher resolution and accept the added credit cost.
One iron clad rule is that you will need to do more generations that you anticipate!
Budget for them, otherwise you’ll run out of credits befoe you finish your project.
#4. Stitch shots together
One way to make your shots longer without extending the initial duration of your generation (which to be honest just gives the model more room to mess things up!), is to seamlessly stitch shots together.
To do this, export the final frame of your first shot and use it as the starting frame of your next shot. This will allow you to keep extending the shot in a seamless ‘oner’ if you want to, or at least make it last as long as you need to.
Watch the video above to see this technique in action and pick up some useful tips for beginner AI video creators.
This start and end-frame relay race technique is also a handy way to generate interesting transitions between radically different scenes, all with a simple prompt such as:
Morph seamlessly between these two images.

OR

Animate between these two images.
Watch the video above for some examples.
Edit as you go
This brings up an important workflow prompt, that it is often easier to be compiling your edit as you go, rather than trying to generate all of your shots and then edit them together afterwards.
Editing as you generate will help you to solve problems and adjust your plans as the AI model delivers unexpected surprises – sometimes good, sometimes bad – along the way.
#5. Prompts matter
So now that you have a reference image that looks right and your trying to get the video generation to behave properly, we come to the part of the process that you just have to learn through repetition.
Effective prompting.
The content, format and technical details of your prompts matter a great deal, as these (and your reference images) are giving the model all of the context it has to work with – other than the generalised mash up of its source training data.
Be sure to include details on the camera movement, emotion, lighting changes, general atmosphere etc. The more context and detail the better.
If you want specific actions to take place during your shot you can also include timestamps to itemise what should happen when. For example, in a 5 second shot: At 02 seconds in the man walks into frame. At 04 seconds in he sits down, etc.
Turbo charge your prompting process
So, while you can and should try writing your own prompts and learning as you go, there are some easy ways to turbo charge that learning.
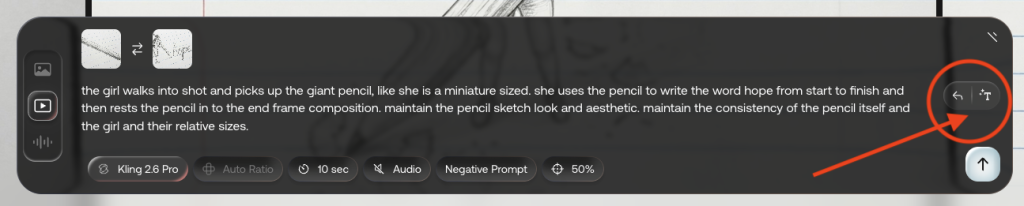
The first is to type in your prompt and then use the ‘Auto prompt’ button in Artlist to convert your initial attempt into something a little more robust and detailed.
Reading and comparing your prompt with the auto version will help you quickly improve your own prompting skills. But it’s also important to proof-read its version as it can add in elements you don’t want.
Another technique is to paste your prompts into ChatGPT or Claude and say:
Improve this prompt for AI video generation for (this video model).and include the video model of your choice and see what it outputs.
Another way to improve your outputs is to paste your current prompt into ChatGPT or Claude and detail what’s wrong with the current generation and ask it to improve your prompt to fix this specific issue.
Negative Prompts
Negative prompts allow to edit your reference images or the current output of the AI video model by asking it not to do specific things. In Artlist some of the video models, for example the series from Kling,
#6 Sound Design Makes All The Difference

It really is a good idea to think of AI videos as animation, not filmmaking.
By this I mean that animated videos are all mute of sound. Every footstep, cloth rustle, line of dialogue, background sound etc. has to be added in during Post Production.
If you were filming out in the real world you’d get most of that for free!
So taking as much time to as you, and more than you might anticipate, to layer in the right sound effects, foley, background ambiences, music and dialogue is key to creating a believeable, immersive final product.
Sound is at least 60% of filmmaking.
Thankfully Artlist has a broad range of sound effects and royalty free production music to choose from.
Investing the time in this part of the process will elevate everything else.
#7 – Edit, re-generate, re-edit again.
In my own projects I’ve discovered that creating with AI is not a linear process. It’s much more iterative and experimental.
Some ideas don’t translate to a prompt very easily. Some ideas just don’t come out correctly from the ‘roll the dice’ AI video generation machine.
This is why I think it pays to edit as you go, so that you can cut in the shots that are working and be flexible and creative enough to adapt the shots that aren’t working into new ideas and new approaches that do work.
Luckily, as an editor, I’ve had decades of experience doing just this – adapting the materials I have to make something new.
Hit the Comments
Discovrered a useful prompt I should know about? Found a clever way to navigate the AI video generation maze? Hit the comments and let me know!