New Features in Assimilate SCRATCH 9.1
- What’s new in Assimilate SCRATCH 9.1
- Using Assimilate SCRATCH for the first time
Assimilate the makers of SCRATCH have recently released a major update to their flagship product, which boasts a huge range of new features for both dailies and finishing workflows. Although it’s just a dot one update, it feels more like a .5 of full digit increase given the size of the new improvements.
In this sponsored post I take a look at these new features and hopefully cast a little light on why working in SCRATCH might be a valuable addition to your own post-production workflow.
I think it’s also worth pointing out how responsive Assimilate are as a company, when it comes to rapidly adding support for new codecs, such as ProRes RAW and Blackmagic RAW back in April of this year. Or when they added support for realtime 8K RAW processing via the R3D SDK on nVIDIA GPUs.
The public beta of 9.1 started back in the middle of May and the full release is now available to download here.
Headline new features include:
- Dailies workflow templates for PIX, DAX, MediaSilo and COPRA
- Faster transcode speeds on the GPU
- Greater ProRes RAW debayer control
- New Timeline automation – Explained later – this is great!
- Support for comments and ‘circle-take’ metadata from external audio
- Enhanced Colour Space management including new Colour Space plugin
- Updates to the Animation Editor
- New Animation Editor keyboard shortcuts
- New Hue-Saturation and Hue-Luminance Grid tools
- Cycle through and preview LUTs in a folder with ease
- New native effects – Denoizer, Grain, Diffusion and Highlight Bloom
- A whole lot more!
Using Assimilate SCRATCH for the first time
If you’re completely new to Assimilate SCRATCH and wondering what it is and how to get started with it, then this part of the post is for you!
Assimilate SCRATCH is a powerful online editing and finishing application, which also holds its own as an on-set colour grading and dailies creation tool.
It’s not built or designed for offline editorial work, but rather is able to import a timeline from Apple’s Final Cut, Avid Media Composer or Adobe Premiere Pro, so that you can do your final colour grade, composites and deliverables in one place.
That’s a snippet from this previous post on all the new features in Assimilate SCRATCH 9.0, which also includes a breakdown of the four variants of SCRATCH that Assimilate offer;
- SCRATCH – Dailies and Finishing
- SCRATCH VR – Dailies and Finishing + VR toolset
- SCRATCH Web – Online dailies, video review and approval
- Play Pro – Professional level media player with metadata management and file rendering
Depending on the client base you’re working for the ‘vanilla’ SCRATCH will likely cover most of your bases when it comes to both on-set DIT work and fully fledged finishing workflows for colour grading and compositing.
When it comes to handling dailies on shows like HBO’s Big Little Lies or Paramount’s Yellowstone, SCRATCH can handle a vast number of image formats and metadata, as well as work with live SDI feeds for on-set colour grading work.
It also has powerful reporting capabilities, which are essential for providing DIT’s with peace of mind and the entire post-production chain with a foundation for seamless turnovers.
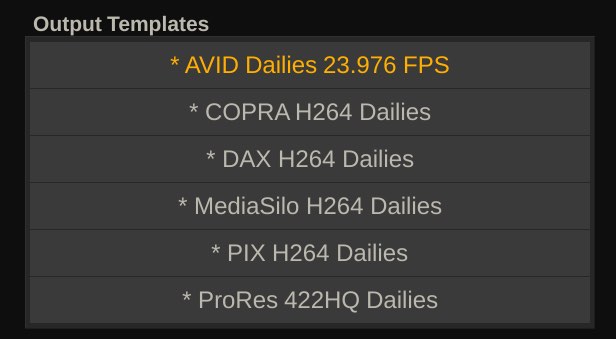
The latest improvements in version 9.1 also double down on this, with the addition of output templates for four of the main web dailies platforms used by features and TV shows; PIX, DAX, MediaSilo and COPRA.
Assimilate has also added support for Avid Locators (markers) in EDLs (or as a separate file) which will is super-useful when say, turning over to VFX and finishing from offline as notes and locators will carry over too.
I’ve previously written a ‘beginner’s guide’ to using SCRATCH here, but after taking a read of that you should head over to LowePost.com to get 3-months free access to the entire training site, including a 15-part introductory training series from Kevin P. McAuliffe. You can also snag a promo code to get 20% off SCRATCH itself!
This training course will guide you through everything from opening your first project to colour grading your first shot. There’s also 3 specific lessons on using SCRATCH for a comprehensive dailies workflow (lessons 11-13) which is worth absorbing too.
If you’ve never heard of LowePost.com before, you can check out my full review here. (TL/DR – it’s amazing value for money!)
New Dailies and Colour Grading Tools in Assimilate SCRATCH 9.1
There’s a lot of new and improved features in Assimilate SCRATCH 9.1 but some of the most attention grabbing are likely to be the colour controls.
The new Vector Colour Remap Grids allow you to push and pull specific colours from one level of hue, saturation or luminance to another with ease. This is reminiscent of the Nobe Colour Remap plugin available for DaVinci Resolve and other apps.
You can configure the controls as either a circle or a grid, although the circular vectorscope layout will be more familiar to most and the muscle memory is there so may as well use it. But either way, you’re dragging a dot from one colour to another so it’s easy to see where you are taking it.
Having played around with the public beta version of SCRATCH 9.1 the Vector tool is really intuitive to use and updated flawlessly in real-time.
The black arrow coming from the red dot, in the image above, shows you where the colours originated from before you adjusted them.
The Mode control has three settings: Linear, Log, Log 2. This “Adjusts the distribution of saturation used by the control” such that, when you toggle between them, you’ll notice the background colour gradient under the mesh updates.
Smooth Saturation, toggling this on will prevent possible saturation clipping, so be aware that the adjustments you’re making might not show up as powerfully in the canvas if this is on.
The Pick control makes it easy to highlight specific hues in your image with the eye-dropper and then adjust them in the Vector control. You can also click and drag with the picker in the image (in a direction mirroring the Vector layout) to make adjustments directly on the image itself.
This is also reminiscent of the way in which the Cinema Grade plugin functions, in which all of the grading adjustments happen on the image itself. It will be interesting to see if other apps also adopt these more interactive user interfaces.
This on-screen adjustment also works in the Curves editor too, which makes making targeted adjustments much quicker and easier.
Want to roll off a highlight? Just select the spot in the Lum Curve editor and drag it down to pull it back a bit, then adjust the bezier curve handles in the curve editor itself for even greater precision.
The new LUT Cycler tool makes choosing a LUT a bit easier, as you can just cycle through all of the other LUTs in the currently selected Grading LUT folder and see them applied to your current clip.
It would be nice if there was a visual thumbnail preview window of all of these LUTs, like in DaVinci Resolve, so you could see what each one would look like when making your selection. But it’s still a great time-saving improvement to not have to click back and forth so much.
The ‘All’ drop down menu lets you select from a list of the LUTs in the currently selected folder without having to click out to the navigation tree. You can also ‘refresh’ the list too.
The Animation Editor has been overhauled in this version of Assimilate SCRATCH, and given how verbose the release notes are on it, I’ll let them speak for themselves.
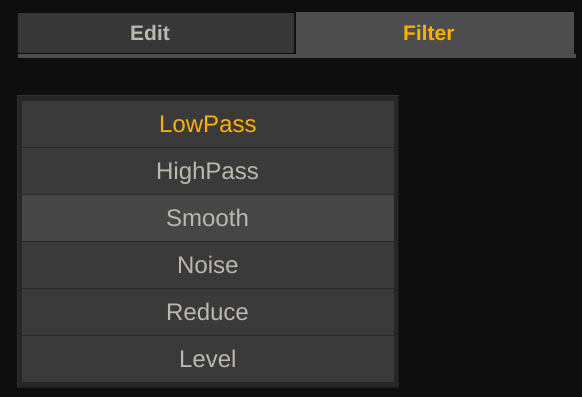
The Editor now supports a series of filters to tweak your animation: LowPass, HighPass, Smooth, Reduce (the number of keyframes) and Noise (to generate random values).
To manage all animation channels more easily, the editor now has filter options only show active channels or only the channels of the selected layer.
Furthermore, you can now directly enter values in the editor by shift-clicking a keyframe.
When selecting layer-vertices in the View Port, SCRATCH will now automatically select the corresponding channel in the editor and vice-verse.
Note that SCRATCH will now by default only show the x and y of any vertex in the Editor. If you want to see also the in/out handle of each vertex then you need to enable to relevant Advanced System setting.
To be honest I wasn’t really sure how these would work in practice so Mazze Aderhold, Assimilate SCRATCH’s product manager, kindly provided more details.
Lets assume you have a shot, where the camera pans, and also jitters and you want to do stabilization, so you track the movement.
Now you open the X-axis animation channel, where the track has created one keyframe per frame. With the high-pass filter applied to the X-axis animation channel, you can filter out the lower frequencies (i.e. the “pan”), and just keep the high ones (the “jitter”) to be compensated.
So you get rid of the jitter, but keep the pan.
The other way round, if you use low-pass, you would remove the high-frequency keyframes, but keep the lower frequency keyframes. This way, you remove the pan (as the low-frequency keyframes that compensate it will be removed), but keep the jitter.
The other filters are:
noise: i.e. you want to introduce camera jitter – you’d put a keyframe for x- and y-axis at the beginning of the shot and one at the end – straight line. Then apply the noise filter to those channels to create random keyframes in between the two you have just set to create a “wiggle” camera motion.
smooth: Well.. smoothens any curve – this can interestingly also be used to smoothen 1D LUTs (i.e. load the 1D LUT into the LUT menu, and click “Create Curve” – this will remove the LUT and create a Master curve (see Curves menu).
All the filters can also be applied to a Curve (Grade) in SCRATCH.
reduce: removes points from a curve. If you think of a simple curve (sinus curve for that matter), that consists out of one keyframe per frame.
This simple curve does not need a keyframe on every frame to be “created”. 4 keyframes are enough to define a sinus curve. The reduce filter removes “unnecessary” keyframes to simplify the animation channel. Obviously, at some point it gets coarse.
level: This one is tricky to explain. It “levels” a selected portion of an animation channel. Kind of like an axis node. Say you tracked a face, and on top of the track, you want to offset the whole animation by X and Y pixels.
This is sort of what this does, but in a smoother way.
There is also a comprehensive set of additional keyboard shortcuts to help you work more efficiently with keyframes in both the ColorFX and Edit tabs, which you can check out in detail here.
For example, Ctrl + click parameter, will reset it.
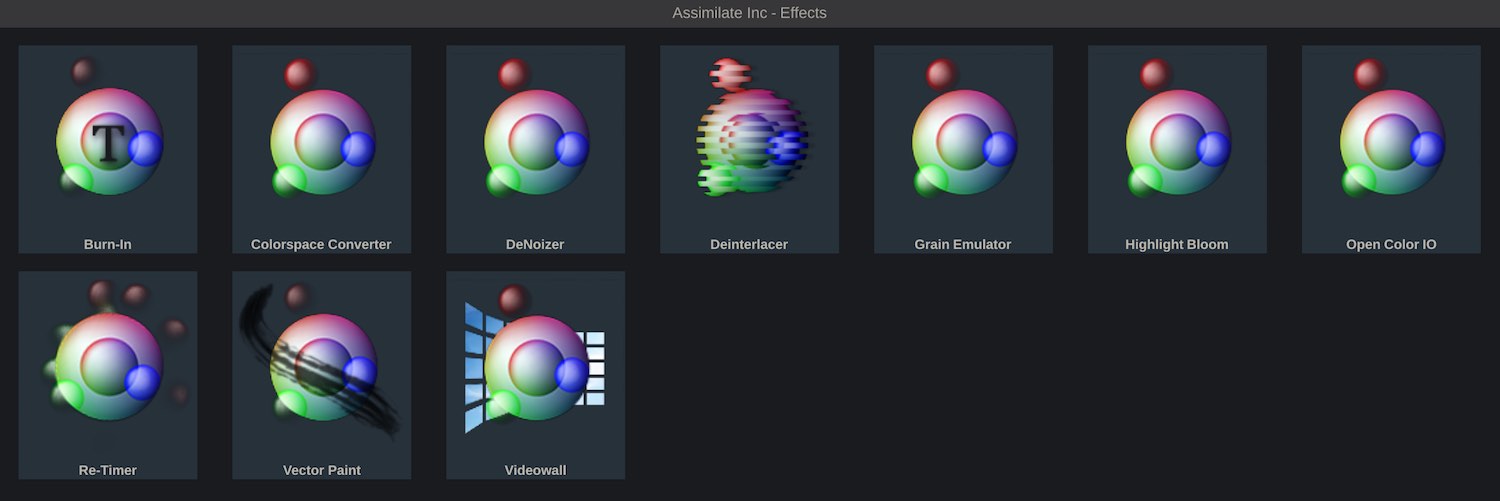
There are several new plugins in the ‘Plug-ins..’ browser window. These are Denoizer, Grain, Diffusion and Highlight Bloom.
According to the Assimilate official release notes these are designed to give you quick and simple results but aren’t looking to emulate the full functionality of paid-for third party tools.
All of these effects are aimed to be simple and fast and usable in an environment where you need a quick grade. They are not aimed to replace more advanced third party tools you might use in a finishing context.
As a quick example, the grain plugin does a decent job of adding some convincing grain emulation to a shot in a couple of clicks, although you can only have two parameters to control it. These are the mode (add or multiply) and the grain strength from 0-32.
The other strength of these plugins is their speed.
For example, if you pull in a live 4K signal over SDI, you can grade and apply plugins like the Denoiser, and still maintain a real-time feed. This isn’t really possible with other third-party plugins which would drop you out of real-time playback.
SCRATCH 9.1 Dailies Workflow Improvements
On the dailies side of things there have also been a lot of smaller improvements, which in aggregate will save you a lot of time and make life much simpler, especially when working in an Avid Media Composer workflow.
Assimilate have improved the speed at which the software can readback the images from the GPU which means increased render speeds, although your milage may vary depending on your specific configuration.
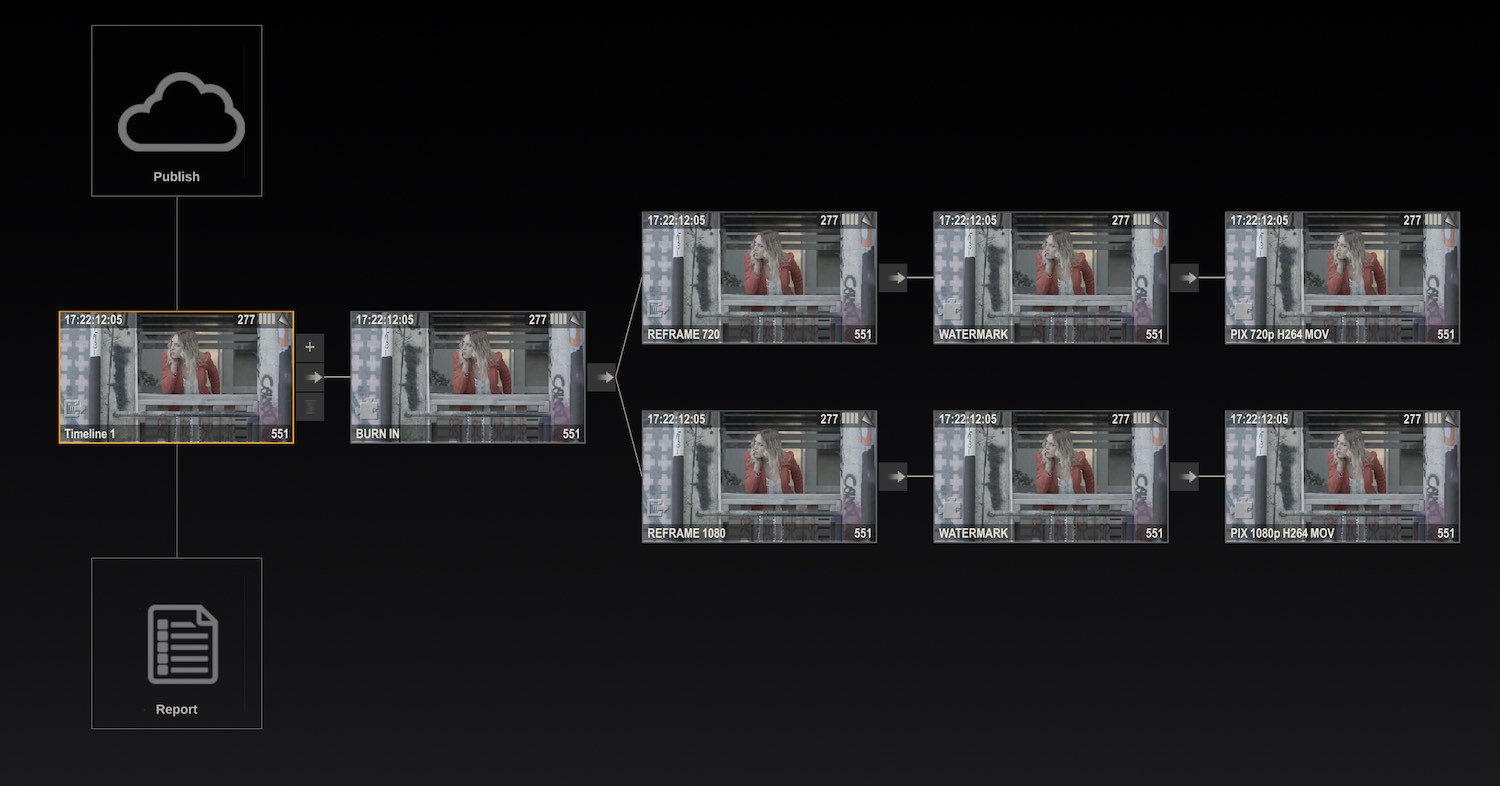
They have also added four new Output Templates for fast dailies creation, when uploading to PIX, DAX, COPRA and MediaSilo.
As you can see in the image above, this creates watermarked 720p and 1080p H.264 files in the PIX specification ready for upload.
For COPRA you can also trigger a post-render action which will automatically create a COPRA XML packed with all the required metadata.
Another new addition that caught my eye was the option to export multi-track audio in QuickTime/mp4 (ProRes/H264|5) files. Each channel of audio is directed to a unique track in the QuickTime and you can specify the audio channel layout (mono, stereo, 5.1 etc) in the QuickTime ProRes encoder too.
As I mentioned there are quite a few improvements targeted at Avid Media Composer workflows including Avid Locators in EDLs, a new Advanced System setting which automatically sets a clip’s reel-id to the clip name when loading media, and enhanced MXF DNx output:
MXF DNx output now includes the audio timecode (slip) in the metadata, which is properly interpreted by Avid Media Composer. The DNx writer now also adds a TapeID column with the audio file name if the source clip has audio synced/linked to it.
This way you do no longer need to supply separate ALE files with your output to editorial to transfer this information.
Other metadata improvements include audio timecode metadata added to the Construct, Edit and ColorFX tabs, the addition of ‘Circle Take’ metadata – which can be carried through to on-screen burn ins – as well as read along with any other comments in audio metadata, including the WAV filename, used in a sync’d clip.
This should make it much easier to find and filter all of your Circle Takes if required, or add this metadata as you go.
Mazze from Assimilate also informed me that the inclusion of the audio timecode metadata is currently unique to SCRATCH and is crucial if you will be round-tripping to Pro Tools after editing with the offline files.
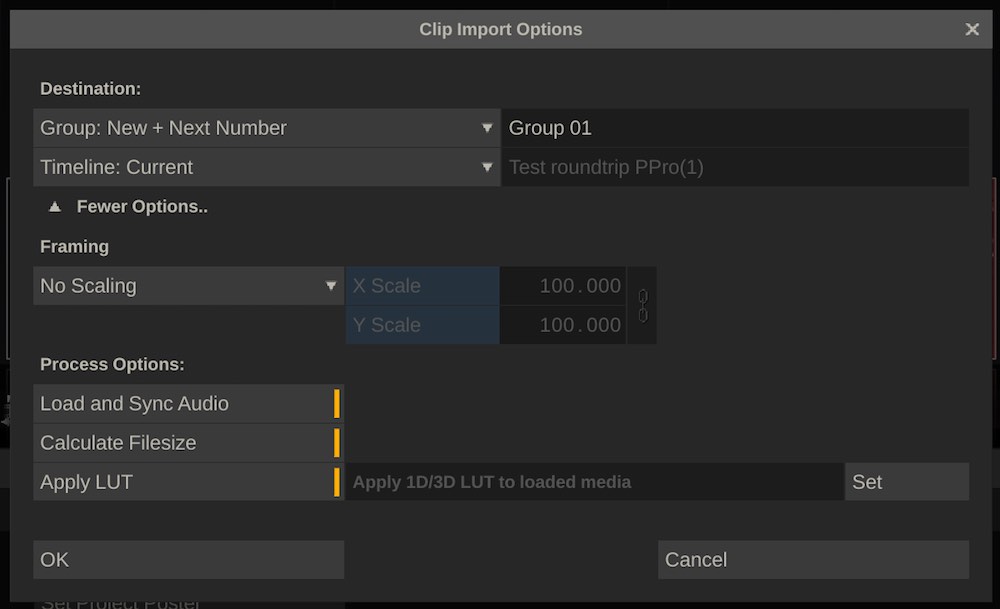
One of the really powerful new features that should drastically improve dailies creation for DITs, is the New Timeline automation settings, available when importing media.
As you can see in the image above, you can select a folder and sub-folder of media, and have SCRATCH create new timelines for each of these folders with the following options:
The Destination settings will set the group in SCRATCH and if want it to create a new timeline per sub-folder, or simply add it to the current timeline.
The Process Options allow you to automatically re-frame, add LUTs and even add the file size of each of the selected shot as metadata.
Presumably the Load and Sync Audio works with the newly added Audio Timecode to match up your audio and video files, rather than reading waveforms etc like PluralEyes does.
The new timelines can be named based on either the folder name the media originated from, or a new timeline with an incremental number count.
Improved Colour Management and OCIO Support
There are a trio of improvements to the way that SCRATCH manages colour space conversions. For starters, the gamut and transfer functions are now separate entries giving you more flexibility and precision.
There are also also a series of newly added camera specific gamuts and gamma spaces (image above) to use natively with your footage.
If that wasn’t enough you can also use the new ColorSpace plugin, to perform specific colour space transforms within your composite or on the entire output.
Assimilate have also added a new OpenColorIO plugin too.
OpenColorIO (OCIO) is a complete color management solution geared towards motion picture production with an emphasis on visual effects and computer animation. As such, OCIO helps enforce a color management methodology that is required for the high fidelity color imaging in modern computer graphics.
While OCIO is a color management library, it’s only knowledge of color science comes from it’s execution of the transforms defined in the OCIO configuration file. These transforms are either defined by the end user in a custom OCIO config or inherited from the publicly available configs.
By specifying your desired config.ocio Config file in the local environment all OCIO compatible applications and software libraries will be able to see your defined color transform “universe”, and direct the transformation of image data from one defined OCIO.ColorSpace to another, in addition to the other transforms documented elsewhere.
The addition of support for OpenColorIO (OCIO) will be a boost for VFX artists and animators who need complete control of their colour-management pipeline, and especially for it to match when working across different applications.
As per the release notes:
This plug-in automatically hooks into your OCIO settings from other applications you might have or you can set it to a specific configuration file from the Advanced System settings.
Using this plug-in ensures that certain conversions are exactly the same as done in other software that uses OCIO (note though that most, to all of the transforms in SCRATCH color management are based on standard transfer-curves and gamut-chromatices).
You can read more about how OCIO works, and how Sony Pictures Imageworks set’s up their colour pipeline here.
Final Thought
So there you have it, a brief overview of just some of the new features in Assimilate SCRATCH 9.1, be sure to head over to the Assimilate site to check out the full feature list.
This update brings with it some sought-after features and workflow enhancements that are sure to save DIT and colorists a ton of time, leaving them either capacity to be more creative, or just get home early.
If you’ve never tried SCRATCH before and want to give it a whirl for yourself, download the free trial and make use of the extensive free training on LowePost.com

