How to add Real Optical Lens Flares to your Edit and Grade
- How to add optical flares to your shot
- Create bespoke animated custom lens flares
- DaVinci Resolve Studio vs Video CoPilot Optical Flares vs mFlare 2
In this post I’m going to take a look at adding optical flares to an edit and grade, using three different paid-for tools; DaVinci Resolve Studio, Video CoPilot’s Optical Flares for After Effects and mFlare2 for FCPX from MotionVFX.com.
These three tools allow you to create bespoke lens flares that you can animate and composite into a scene in a far more seamless way than ‘baked-in’ lens flares like the ones you can download (in 4K and up!) from this post:
Download Free 4K Anamorphic Lens Flares
These baked-in flares are handy when you just want to quickly add a lens flare and don’t have one of these paid for apps to hand, or installed on your client’s system, but they can only take you so far.
Although you could hand animate these ‘baked-in’ layers to some degree, being able to control the size, position, intensity and movement of individual elements in the flare makes for a far more convincing effect.
That’s why spending the money required to enable you to build your own 3D flares – which can go behind objects, reflect off their edges and a track with your camera movement – can be such a good investment.
We’ll get into the detail of each plugin as we go, but for a quick summary here’s how I would describe them:
ResolveFX Lens Flare – It’s great to have something built-in to DaVinci Resolve Studio for creating lens flares, but feels like a beginning rather than a fully featured and finished plugin. There are a few handy presets and very detailed controls but nothing very visual to aid creating your own presets.
mFlare2 – This FCPX based plugin has the best looking interface of any of the plugins, in terms of interface usability and features. The on-screen controls and in-built tracker also make it really intuitive to customise the flare and animated it’s position.
Optical Flares – Video CoPilot’s plugin has been used on numerous Hollywood films and is without doubt the most powerful lens flare plugin you can get for After Effects. The Pro Preset flares look fantastic and are really well designed.
Thanks to all three companies for providing me with a copy of their product for the purposes of this review.
For a history of the use of lens flare in cinema then this short video essay from Vox has got you covered. If you can believe it, there used to be a time when cinematographers actively worked against lens flare!
Understanding the elements of a Lens Flare
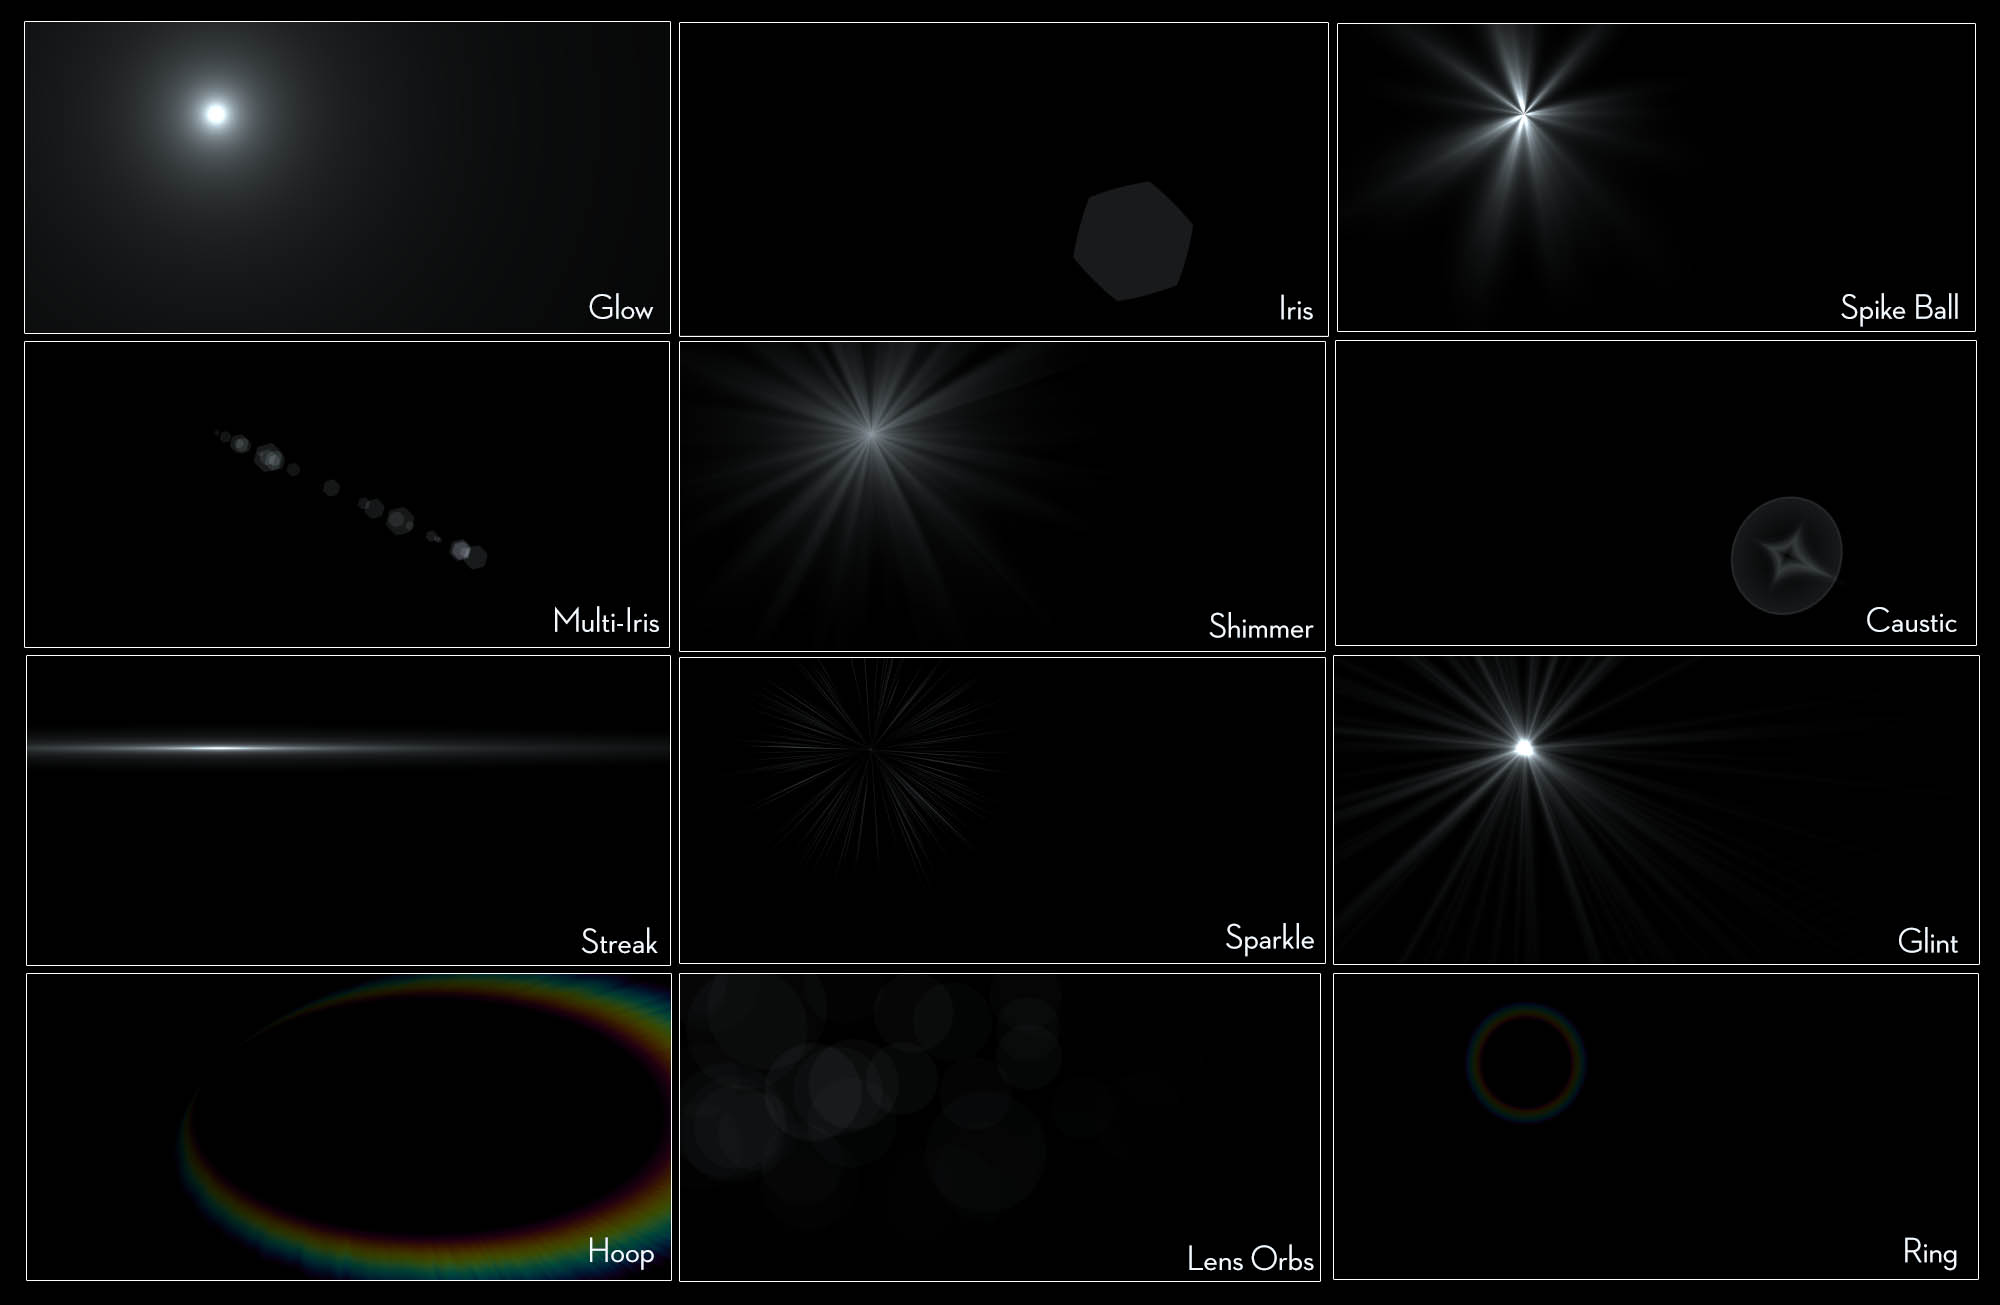
Each of the plugins describes things a little bit differently, when it comes to the elements of their lens flares, but each plugin allows your to control and customise them to high level of detail.
The image (above) duplicates the elements that Video CoPilot’s Optical Flares offers, but most of the plugins contain the same kind of shapes and effects.
Watching the Vox video above will help to explain some of the mechanics behind these kind of shapes, but if you’re looking for that classic ‘anamorphic’ lens flare then streaks are mostly what you want.
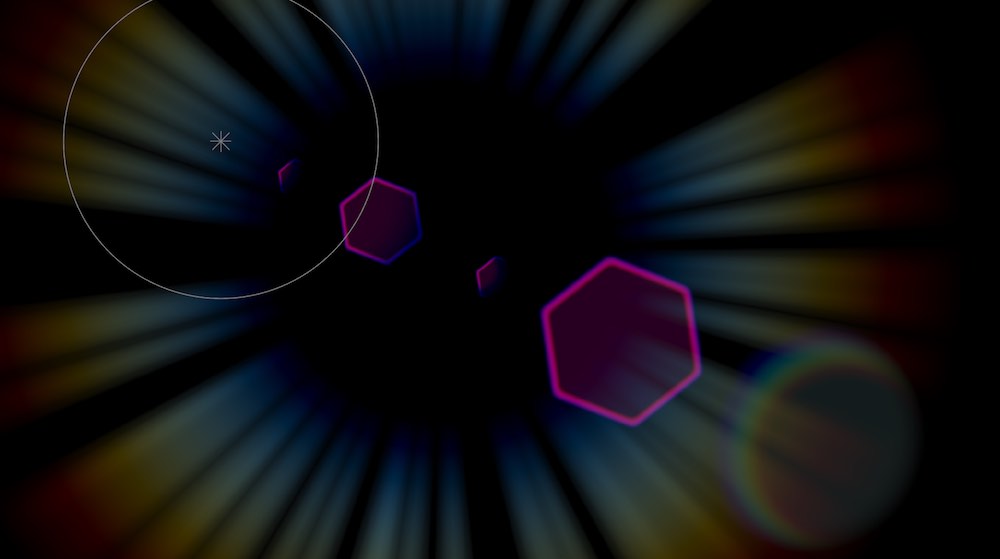
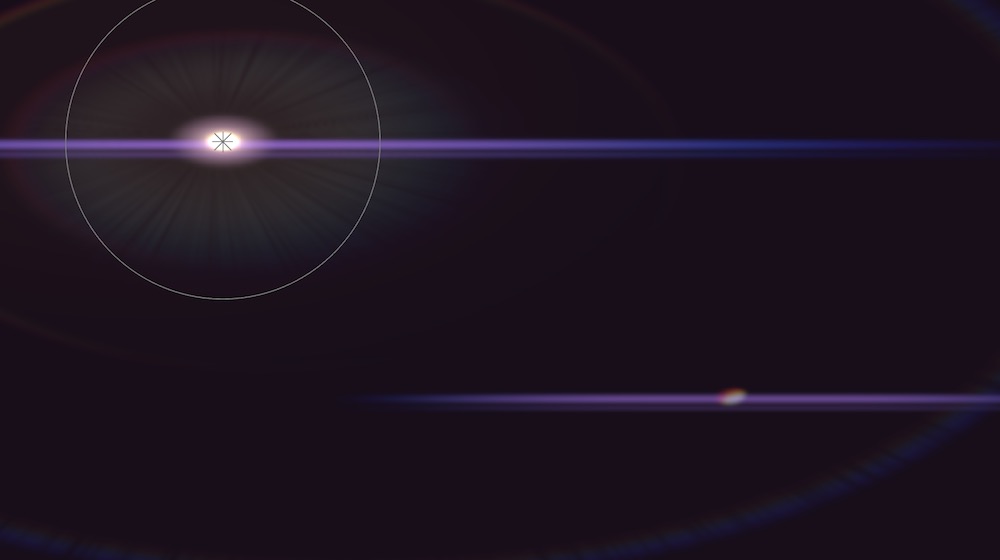
In this image, I’ve cranked up the size and intensity of some of the iris shapes and a really large corona ray within DaVinci Resolve so it’s easier to see what’s going on.
Given that there are so many different moving parts you can use to create your own lens flare, it’s probably best to find a preset that comes fairly close and then break that apart and customise it from there.
That said, both mFlare2 and Optical Flares have really intuitive visual designers that make it easy to build something from scratch if you want to take the time and have the design aesthetic.
You can then save and re-use these presets whenever you like. mFlare2 comes with 100 pre-built flares and you can buy more Preset Pro packs for Optical Flares too.
I’ve yet to find anyone making and sharing ResolveFX lens flares, but it should be as simple as just distributing an exported still. I’m not sure though how you would be able to share presets that actually appeared in the ResolveFX Lens Flare list though.
Using Video CoPilot’s Optical Lens Flares
Video CoPilot’s Optical Flares is a powerful 3D flare plugin for After Effects that allows you to composite realistic looking light sources into your projects with ease.
Of all the plugins it seems to have the most powerful feature set, including:
- On-Lens Simulations – Simulate dust & scratches on your lens that becomes visible by the light source.
- 3D Occlusion – Obscure layers by alpha or luminance to simulate the light source going behind objects in the foreground.
- Luminance Tracking – Generate a lens flare from bright spots in your video such as a particle system or matte layer.
- Mask Positioning – Animate lens flares along the contour of complex shapes with ease. Great for detailed shapes that would require extra key framing.
- Chromatic Aberration – Simulate realistic color bleeding around the outside of the lens.
- 32 Bit & GPU Ready – Optical Flares renders up to 32 bpc offering high color fidelity as well as enhanced speed with Graphics card acceleration.
- Flexible Core Objects – Build stunning lens flares with the use of 12 powerful core objects. These elements offer unmatched flexibility with detailed control settings.
- Precise Translating – Control the position of each object with distance, offset and custom translation. These features are essentials to building anamorphic elements.
The Optical Flares plugin ships with 60 custom presets including 23 natural flares, 19 for motion graphics, and 20 ‘Lights’. I also had access to a Pro Presets pack, which personally, looked the best designed of all the flares in the plugins in this post.
There are now two Pro Presets packs which you can purchase separately or bundle in with your purchase at a discount.
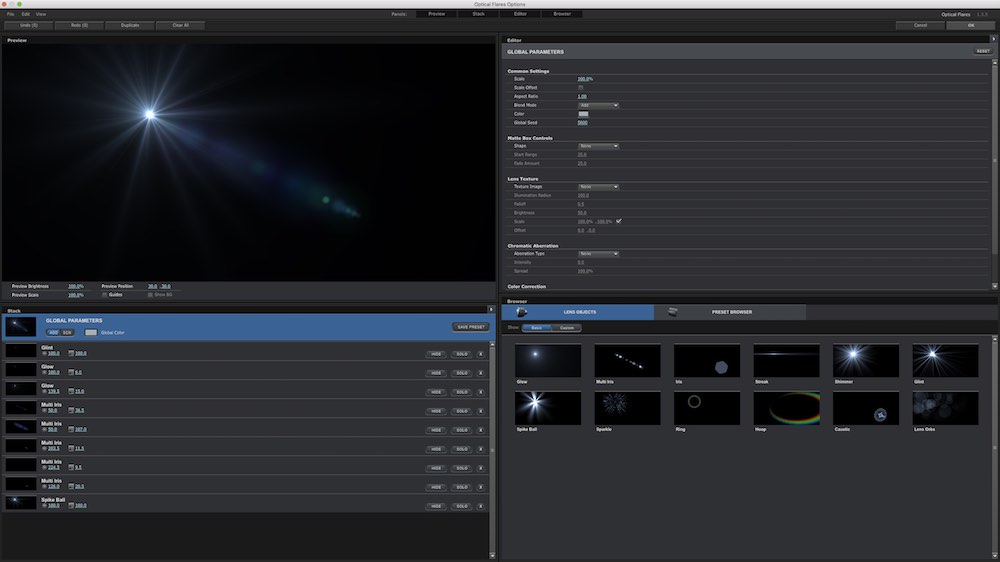
Here is a screen grab of the full plugin interface. One of the great things about this is that it scales with your screen resolution – which was a bugbear with the mFlare2 visual designer which was locked to a fairly small size.
As it is the oldest of all the plugins, the interface looks a little bit dated, although it’s purely an aesthetic thing, as the interface layout and functionality are really well executed.
Even with no prior knowledge it’s really easy to start playing around with the settings and composite objects to start building your own flares, as well as to animate them with just a couple of keyframes.
Although it is well worth watching the free tutorials below, so you do actually know what you’re doing.
The essential steps are:
- Create a new solid (Layer > New > Solid)
- Add the flare to the layer as an Effect (Effects > Video CoPilot > Optical Flares)
- Right click on the solid and set the blend mode to Screen
- Open the visual designer to customise your flare by clicking on ‘Options’ in the Optical Flares effect controls
- Animate the position of your flare using the Position XY controls in the effects controls
- To ‘occlude’ your flare behind other layers use the ‘Foreground Layers’ option in the effect controls to tell it which layers to move behind (e.g. a text layer)
- You can easily manoeuvre your light in 3D space by adding a light to your scene (Layer > New > Light)
- Then select ‘Track Lights’ under Positioning Mode in the Optical Flares effect controls

The look of the flare adjusts depending on it’s position within the scene
Price
The plugin itself costs $124.95 or when bundled with both Pro Preset packs comes to $165.
I’ve included affiliated links to Toolfarm.com in this post, which will actually save you 5% on Video CoPilot products, so make the most of the discount!
Buy Video CoPilot’s Optical Flares from Toolfarm.com
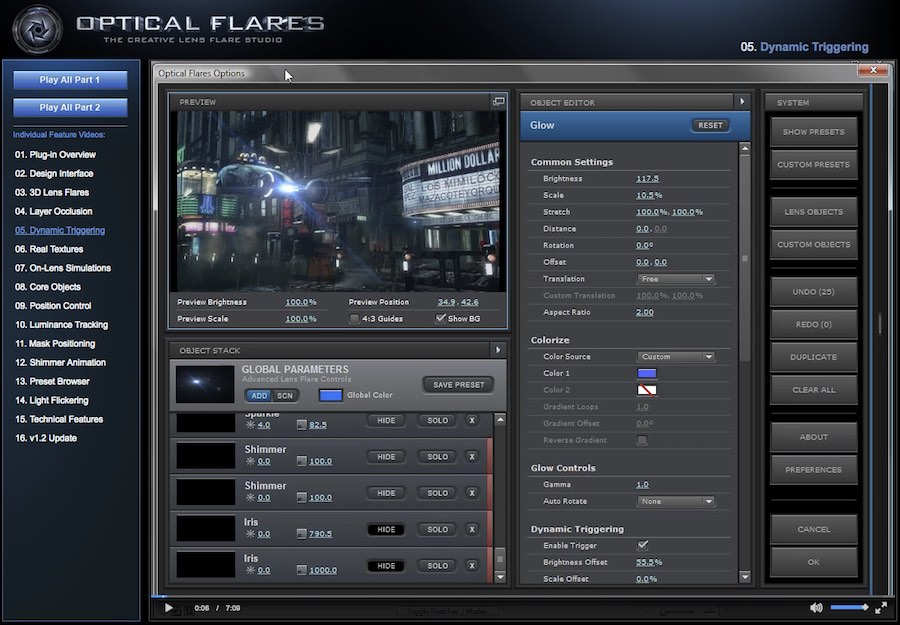
Video CoPilot Optical Flares Tutorials
There’s a really useful set of tutorials and demos created by Andrew Kramer, on the Video CoPilot site here.
These are well worth watching if you want to get the most out of the plugin as some of the features require a little explanation, such as how to use real textures in your objects and copy and paste them between objects in your stack.
Taking the time to watch these tutorials (about 90 minutes) reveals just how intensely powerful the plugin is, especially when you start to dive into the customisation tools.
Andrew Kramer describes how he used Optical Flares to create the title design for Star Trek Into Darkness in this short making of video.
How to Add Lens Flares in FCPX with mFlare2
mFlare2 from Motionvfx.com is a highly customisable lens flare plugin for FCPX editors. It’s a very intuitive plugin to use which makes it easy to create fantastic results in just a few clicks.
There are three main parts to the plugin; the visual designer in which you can full customise every element within your flare, the preset gallery and the tracker.
You can choose to use the FCPX user interface to customise the global settings of any given flare, once you’ve applied it to your shot, or pop back into the plugin’s own interface to be able to edit the individual components of the flare, in detail.
Adding a lens flare to your shot is a simple drag and drop procedure, as with any effect in FCPX, from the effects panel to the right of the timeline.
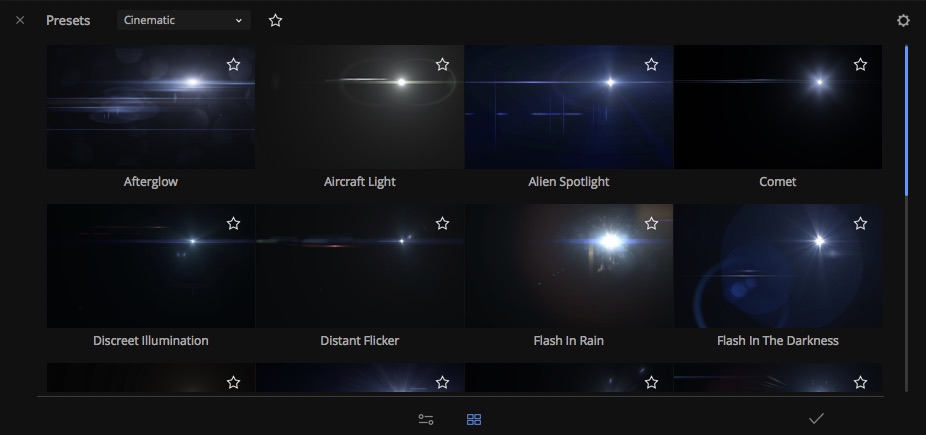
There are 100 presets to choose from, which can be found in the FCPX effects browser, or the Preset gallery in the plugin’s UI.
It’s much easier to get a better look at each flare inside the dedicated Preset gallery though simply due to the size of the thumbnails.
These are helpfully grouped into the following categories, or you can add your own:
- Anamorphic
- Cinematic
- Offscreen
- Organic
- Sci-fi
If you’re using the plugin’s browser you can click on each preset to see how it will look on the shot before you commit to it, or another nice way to achieve the same result, is to simply hover-scrubbing over any of these presets in the FCPX effects browser, to see the flare overlaid on the selected clip in the viewer, before you even apply it. This really speeds up the process of finding the exact flare you want.
It’s nice that you can also favourite flares to quickly navigate to your go-to options, whilst still retaining the category groupings.
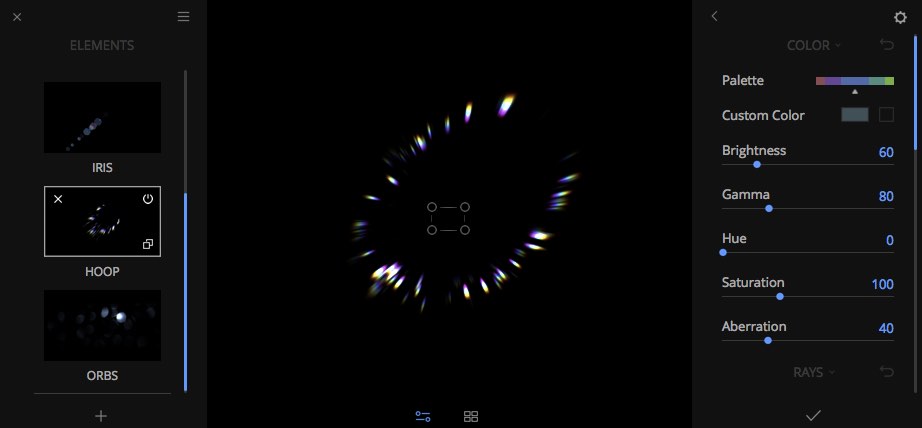
In the mFlare2 Visual Designer (see top image in this section) you have fine-grain control over every part of the flare presets, including things like colour, size, gamma, fill, aberration, blur, animation properties and more.
Once applied to a shot, this screengrab shows you the full list of all of the parameters you can control within a lens flare. There are a lot of options to play with to dial in the flare to your precise requirements.
There are more controls for the individual flare elements that you can only access in the flare editor, and some elements have more options than others.
The on-screen controls for the light source and end-point positions, as well as the overall brightness of the flare make establishing a solid foundation for your composite that much more efficient, as does the in-built colour palette to better blend the flare into your shot.
It’s nice that there is also an included grain overlay too, to add some texture to your overall image. I suppose if you stripped everything back in a custom flare, you could get away with applying it just as a grain overlay.
Animating the movement of your flares and their individual elements is also very easy using things like the Flicker properties or the Dynamic Animation setting.
Getting your flare to be ‘occluded’ by foreground objects is as easy as turning on the ‘Track Brightness’ setting and letting it do it’s magic, in conjunction with the tracker.
One thing that you will definitely notice is just how fast and responsive the plugin is when moving the flare around on screen, or adjusting it’s parameters and playing back. This is thanks for a complete coding re-write between version 1 and 2.
It’s also brilliant that the plugin has a built-in tracker to make your lens flares stick to objects, or match your shots camera movement. Where as After Effects and DaVinci Resolve have superb in-built trackers, FCPX obviously doesn’t so having a tracker built right into the plugin is hugely valuable.
In the case of mFlare2 the tracker is powered by mocha.
Price
The mflare2 plugin is a powerful, easy to use plugin for FCPX and Motion which delivers stunning results with very little time or effort.
Given that you also get 100 smartly designed preset flares included in the price, it feels like great value for money, especially if you’re spending all your time in FCPX or Motion.
However, as someone who spends most of my time in Adobe Premiere Pro, I’m tempted to start bringing a few shots into FCPX just to add flares to them! It really is that good…
mflare2 costs $149 from motionvfx.com
mFlare2 Tutorials
Robin Kurz delivers six official tutorials for getting to grips with all the new features in mflare2, which range in length from 8 to 18 minutes, but are all content and no fluff.
Robin does a great job of walking through each step of the process for absolute beginners as well as diving into some of the more advanced features too. He also shares a great deal of tiny but really useful tips and tricks along the way, such as the fact that the Edit | Presets | Tracker buttons can be dragged around on the viewer.
In the third tutorial Robin creates a custom flare from scratch and tracks it into a shot, which could be a good place to start if you’re in a hurry.
If you’re using mFlare in Apple’s Motion you’ll have a few more options than in FCPX, which Robin covers in the last tutorial.
MotionVFX and Erwan Le Cloirec from yakyakyak.fr have released a new 20 minute tutorial on compositing lens flares in mFlare2.
Adding a lens flare using DaVinci Resolve Studio
The in-built ResolveFX Lens Flare plugin is only available in the $299 paid version of DaVinci Resolve Studio, but it’s a great example of why it’s worth stumping up the cash for the full software.
In DaVinci Resolve not only do you have software that used to cost nearly $1000, but not too long ago, it used to cost tens of thousands of dollars. Today Resolve is a powerful editing, audio mixing, colour grading and visual effects package, with extensive deliverables and dailies abilities. All for $299!
Other Studio only features include the camera tracker, spatial and temporal noise reduction, collaborative project sharing, motion effects, remote grading and a host of other specific ResolveFX tools.
You can check out an exhaustive comparison between the free, Studio and ‘Apple Store App’ versions of DaVinci Resolve in this new official document.
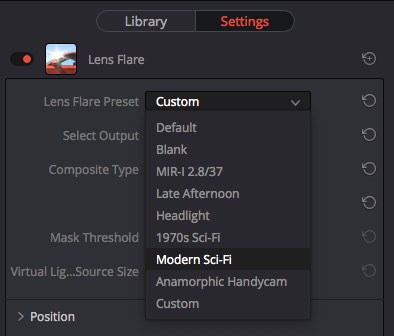
There is a small selection of preset flares, including a ‘blank’ one if you want to start from scratch.
If there becomes an easy way to create and export flare preset then maybe an online market will develop for creating and selling ResolveFX flares to help give you a few more options beyond these 7.
But, as I mentioned before, the flare data is carried across in a saved Gallery still.
Adding a flare is incredibly easy, just drag and drop the ResolveFX Lens Flare onto a node.
To do this in the Color page, in the top righthand corner, open: OpenFX > ResolveFX Light > Lens Flare
Each flare has three main components and then several sub-components; a full-screen glare, a flare spot and a starburst, as well as up to 8 ‘Ghost’ artefacts including:
- Aperture shape
- Disc shape
- Anamorphic streak
- Bubble shape
- Corona Rays shape
Opening up all of the twirl down menus you’ll see that you have access to a myriad of controls for each part of the flare.
In the Elements controls section, under the first dropdown menu, you can switch between each component of the flare. (Here it shows ‘Ghost 1’).
Customising your flare with all these sliders isn’t as intuitive as the other plugins interfaces which have visual builder layouts and still shots of all the presets so you can roughly see what each one looks like before you apply it.
The on-screen controls within Resolve are helpful but also limited to simply the global position and scale.
So all-in-all with no visual previews and lots of sliders to control a more visual approach would be better, but it’s great to have something natively available in the app.
Light Source Masking
These controls let you create a quick and dirty luma key to create a mask that you can use for occluding the lens flare effect with foreground elements in the scene.
For example, if you’re using lens flare to simulate the sun in the sky, these controls let you mask trees in the foreground so that the lens flare appears to be behind the trees, as the sun would be.
This quote comes from page 1011 of the DaVinci Resolve 15 manual, which describes all of ResolveFX Lens Flare’s capabilities in more detail, including this point about using Light Source Masking for ‘quick and dirty’ occlusion of objects in the foreground.
Price
ResolveFX Lens Flare is one of the effects that is restricted to DaVinci Resolve Studio, which costs $299.
Given the huge breadth of post production capabilities that DaVinci Resolve Studio has to offer and that all updates of Resolve (e.g. from version 14 to 15 etc.) have been free to existing owners, it is a very sound investment to make!
DaVinci Resolve Lens Flare Tutorials
These tutorials also appear in my post on free ‘baked in’ lens flares, as I’ve not found many other good ones than these.
In this episode of Resolve in a Rush, from Alexis Van Hurkman and Ripple Training, you can learn the basics of tracking in a lens flare into a shot and how easy it is to achieve.
Alexis also wrote the incredible user manual which is absolutely worth reading in full. All 1500+ pages of it.
The most in-depth tutorial I’ve seen on using lens flares in DaVinci Resolve comes from Dan Moran, a founding colorist of MixingLight.com, which is well worth signing up for the free 7-day test drive to be able watch it.
In Dan’s tutorial he starts with the Mir preset, making it large and soft and placing it off-screen for a subtle effect.
He also demonstrates how to customise the global settings of the flare before getting into the specifics of each element of the flare.
It’s a great tutorial and seeing as you can access it for free, you should; Grading with Lens Flares.


