DaVinci Resolve 16 Tutorials and Training

DaVinci Resolve 16 is now officially out of beta and available for download from BlackmagicDesign.com. In this post I’ve rounded up the best DaVinci Resolve 16 tutorials and resources I could find that will help you get up to speed with some of the exciting new features.
In this sister-post, Understanding the New Features in DaVinci Resolve 16, you can can take a much deeper dive into all of the new features, improvements, bug fixes and changes that the software has gone through in it’s seven-iteration beta. I’ve also read through the 86 page official New Features Guide and highlighted a few important sections and rounded up some excellent training videos too.
It’s definitely worth a read to get your head around more than just the headline new features in this huge release.
If you’re new to the blog, then you might want to check out the entire DaVinci Resolve category of posts (175 and counting) for a wealth of quality information on this industry leading software.
In this post I’ll highlight some excellent and affordable paid training, round up some more free resources on DaVinci Resolve 16 and share a few specific tutorials focused on working in the new Cut page.
Most sites, like RippleTraining.com or MixingLight.com, have been waiting for the ‘golden master’ release of the official non-beta DaVinci Resolve 16, before setting about recording their normal in-depth paid training. This is a sensible decision as it helps them avoid having to re-record their lessons for user interface or feature related changes.
Now that we’ve finally hit an official release, expect to see more detailed DaVinci Resolve 16 training becoming available very soon.
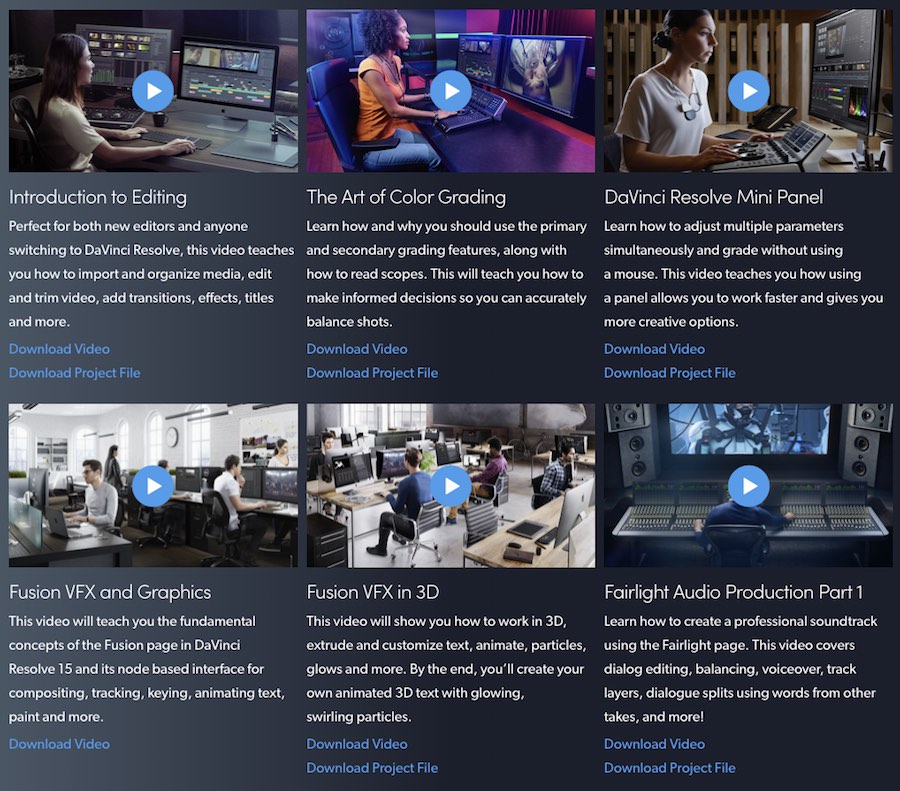
That said it’s worth reminding you that Blackmagic Design have drastically improved their own official training page, with 9 detailed video tutorials, including downloadable videos and project files and assets to help you follow along at home.
There are also the 5 free PDF ebooks of their extensive training manuals, which also come with downloadable project files and assets too. There are excellent free resources from the official maker of the software so you’d be crazy not to spend some time with them!
If you do complete the training you can also take a free certification exam to prove it too.
Hours of DaVinci Resolve Video Training
Probably the best DaVinci Resolve training site, when it comes to delivering the greatest value for money, online today is LowePost.com. At just $79 a year it works out to less than $7 a month for a massive library of training!
They’ve been releasing new series of DaVinci Resolve training from some highly experienced instructors on a very regular basis, each one largely focusing on a specific topic or task. These are also supplemented by a free and active forum of professional users, while subscribers also get detailed written articles too, which are not to be sidelined by the excellent video training.
Here is a quick run down of their current training library:
Editing in DaVinci Resolve 16 – With 6 hours of training from Kevin P. McAuliffe this is the most extensive training on editing in Resolve 16 available online today and includes a 3-part lesson on using the new Cut Page. There are also 27 other lessons on everything from import through to DCP creation (Studio only), as well as working with 5.1 audio, text and motion graphics, round-tripping to After Effects and Pro Tools and much, much more.
DaVinci Resolve Paint Fixing is a new 11 lesson short course taught by Lee Lanier using both the Color and Fusion pages to teach you “the invisible art of removing unwanted objects and improving shots.” You’ll learn how to use the Patch Replacer, masks, planar tracking and animated strokes in Fusion to perform common VFX tasks such as object removal and shot clean up, giving you an edge as an editor or colorist to bring an extra level of polish to your projects.
Colour Management Workflow in DaVinci Resolve – 11 lessons from Lee Lanier on the more technical side of colour grading including ACES, colour space transforms, using DCTLs, multiple colour space outputs and a whole lot more.
Introduction to Visual Effects in DaVinci Resolve – Lee Lanier delivers 36 new insights on performing tasks outside the scope of the ‘Essential training’ course, covering topics such as optical light and light effects, 2D/3D tracking, paint fixing/artefact removal, rotoscoping for colour correction, warping and morphing, chroma keying and much more.
Fusion Essential Training – 3 hours of introductory training to help you get up to speed on working with in a node-based compositing environment and achieving some basic tasks.
Fusion Background Replacement Masterclass – Motion tracking, stabilisation, rotoscoping and compositing are all covered in this 7 lesson course from Lee Lanier.
Sky Replacement in DaVinci Resolve Fusion – Lee Lanier delivers the course you can preview in the teaser trailer above, on motion-tracking and replacing a sky in Fusion.
Advanced Techniques for Background Clean Up in After Effects – Learn highly transferable skills from Lee Lanier such as keying, masking and tracking to perform effective background clean up.
DaVinci Resolve Beauty Retouching – Something every colorist is asked to do, including blemish clean up, flyaway hair removal, skin softening and much more.
Conforming in DaVinci Resolve – 5 hour training course from Kevin P. McAuliffe, on ingesting, conforming and delivering a project from Avid Media Composer, Adobe Premiere Pro and Apple Final Cut Pro X.
Creative Looks in DaVinci Resolve – An ‘in progress course’ that will be updated over time, it’s focus is on re-creating specific grades in Resolve, which kicks off with the classic, bleach by-pass look.
Each course comes with downloadable project files and assets so that you can follow along at home.
Take a look for yourself at LowePost.com
Free DaVinci Resolve 16 Tutorials
If you want some free training on the new features in DaVinci Resolve 16, then these video tutorials and by extension their creator’s YouTube channels are a great place to start.
I also wanted to point to a couple of really useful articles as well, before you get lost down the YouTube rabbit hole.
- Wipster has a nice article on the new improvements to the scopes, which Tristan Kneschke does a great job of summarising, such as using the CIE chromaticity diagram, the low pass filter, GPU acceleration and a lot more.
- This post on PremiumBeat.com reviews the quality of the new object removal tool and compares it to the content aware fill in Adobe Premiere Pro, with some ‘wait for it to get better’ conclusions.
- If you’re a MixingLight.com subscriber it’s worth watching this practical guide to the new scope improvements from Joey D’Anna, which will help you make the most of these updates in your day-to-day grading.
Mary Plummer from Blackmagic Design, opened an evening of presentations on DaVinci Resolve 16 at a recent LACPUG event. In this hour long demo Mary focused primarily on editing in the new Cut page, using the all-new Editing Keyboard and then demonstrating some of the new features in the Fairlight audio page, such as bus tracks, automation preview and the Foley Sampler plugin.
In this presentation from Jason Druss of Blackmagic Design, you can learn a lot about the new features in the latest release, including many of the ‘little things that make a big difference’ such as tape-style audio scrubbing, better super-scaling, better caching and improved collaboration workflows. This was recorded live at the same LACPUG evening.
It’s always worth watching anything from the employees of Blackmagic Design vs YouTubers, because sometimes the YouTubers are just guessing, while these guys always know the inside story!
JayAreTV takes a look at the updated curve controls in the Color page and talks about how to make the most of those curve controls while grading, including setting up the new histogram scopes behind the curves to work in the way you might expect them to.
Alex Jordan from LearnColorGrading.com works through some of his favourite new features in DaVinci Resolve 16, including the same histogram curves, the new independent timeline settings, which work in the same fashion as those in Adobe Premiere Pro, and working with adjustment layer clips.
Using the new DaVinci Resolve Cut Page
The new Cut page is one of the big headline new features in DaVinci Resolve 16, so I thought I’d give it it’s own section in this post.
As Tristan Kneschke points out in his short article on the Cut Page, it is in essence a streamlined version of the Edit page which is designed for “content that just needs a quick pass before uploading (perhaps under tight deadlines), which serves the rapid pace needed for social media content creators.”
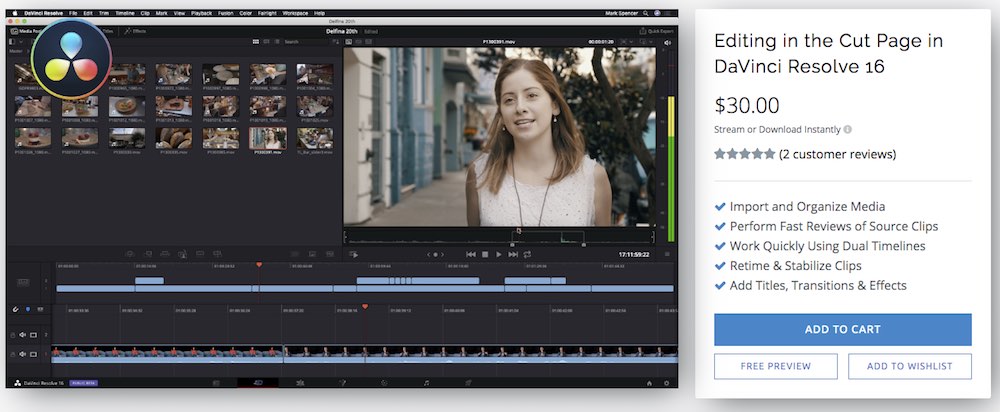
To get started with the Cut page you can watch Mary Plummer’s demonstration above, but for a more in-depth and methodical tutorial it’s worth taking a look at RippleTraining.com’s new shorter format training; Editing in the Cut Page in DaVinci Resolve 16.
At just over an hour in length it’s easy to digest in one sitting, or a couple of lunch breaks, and covers everything from organising and reviewing footage, editing it quickly and accurately, adding transitions and effects through to exporting the final file.
There is also an insightful Q+A section at the end for answers to particular points. You can watch a few sample snippets and check out the full breakdown of the video here.
I’ve always enjoyed using RippleTraining’s really well thought through video tutorials, and supporting website, which makes working your way through a multi-part series of lessons much easier and more sustainable.
Mark Spencer from Ripple Training recently shared this guide to some of the new enhancements to the Cut page in the 16.1 beta – click here for more info on that. Mark walks you through many of the specific improvements to multi-camera syncing and organisation and it’s well worth a few minutes of your time!
Chris Colton often shares really useful DaVinci Resolve tips on Twitter, so it’s well worth following him for further gems like this one.
In the following trio of videos from various YouTubers you can get a sense of how the Cut page is being received and also how to work with it from a beginner’s perspective.
These are also worth watching alongside ‘official’ training as they tend to point out gotchas and slightly less intuitive stumbling blocks, that you might get stuck on, when trying it out for yourself.
In this first video, Alex Jordan discusses the differences between the Edit page and the Cut Page and why working in it really is faster through eliminating some of the bottlenecks in the workflow of the editor. After the introduction he pits the Edit and Cut page in a head-to-head comparison for common editing tasks.
In this shorter video CineChimp walks through some of the details of the new Cut page features, and how they function with a great deal of clarity, which makes this video on the Cut page also worth watching.
Alex from MrAlexTech explores the Cut page in this video and helpfully explains where some of the tools and panels from the Edit page are hidden in the Cut page, should you want to access them without jumping between pages.


Hi,
Lowepost of redacted there offer pop $59 for the year.
Hey Dean
If you’ve not yet signed up you can get in before the end of the year for just $69/year for the lifetime of your membership.
Details and link are here: https://jonnyelwyn.co.uk/film-and-video-editing/christmas-gifts-for-film-editors-2019/
cheers
Jonny