
DaVinci Resolve 14 Training Courses Reviewed
DaVinci Resolve 14 is another huge update to arguably the industry’s leading colour grading software. Each year Blackmagic Design seem to exhaust themselves adding greater depth and breadth to the application, whilst relentlessly seeking to incrementally improve its existing feature set.
Keeping pace with all of this change, as a working colorist, junior colorist or colour grading editor is an equally demanding challenge. But thankfully, for a fistful of dollars, you can have someone explain it all to you.
In this post I’ve reviewed three very different DaVinci Resolve 14 colour grading training courses, from three quite different instructors. All of these courses are well worth taking, but to save you from hours of continuous viewing and a good deal of repetition, you might want to narrow your selection to one or two of these, depending on who you are and what you’re looking to achieve.
Hopefully these reviews will help you do just that and you can jump to each detailed review with the bold title links below.
If you’re in a hurry and don’t want to wade through all my insightful thoughts (why not?!) then in a couple of sentences here’s how I would summarise each of these courses:
Alexis Van Hurkman’s Ripple Training DaVinci Resolve 14 New Features
Essentially the ‘manual on video’ with an exhaustively detailed explanation of each and every new feature in DaVinci Resolve.
Perfect for beginners and advanced users alike who want to absorb what each new improvement or feature does and how to get the most out of them. Ripple Training’s superb online player and granular indexing of the course allows you to jump to the specific minute in the training you’re looking for.
No one knows DaVinci Resolve like Alexis does, and no one else seems to have his inside access to Blackmagic Design’s thinking and planning.
Check it out on RippleTraining.com
Joey D’Anna’s Mixing Light DaVinci Resolve 14 New Features
Although this course has the same name as Alexis’ title, they’re actually very different.
Joey’s is a refreshingly paced and easily digestible training course to enable an experienced and working colorist to get up to speed with how and why to implement the best of the new features into their existing daily workflow.
This course would be of benefit to any existing Mixing Light subscriber simply because those people are most likely to be professional or budding colorists.
A highly informative course from an engaging new trainer.
Check it out on MixingLight.com
Warren Eagles FXPHD Colour Grading Looks Course
Warren also has brand new DaVinci Resolve 14 training for both beginner and Advanced users, but I decided to review his new Colour Grading Looks course to round out this post.
Warren’s frank and informal style firmly plants you on the sofa of his grading suite, watching over his shoulder as he tackles challenging material and delivers a vast array of creative looks. Not to mention the pearls of wisdom he casually throws out as he goes.
The purpose of the course is to teach you the tips and techniques required to come up with different looks for different projects, from car and food commercials to music videos and more. Warren’s three decades of experience as a senior colorist are clearly on display as is his the creative contribution he makes to any project he takes on.
Ideal for junior colorists looking for a little ‘mentorship’ and experienced colorists looking to see how someone else does it.
TLDR
What the intro was too long for you? Kids today….
Everyone should buy Alexis Van Hurkman’s Ripple Training DaVinci Resolve 14 New Features as a reference guide to learn the new features and to efficiently refer to in the future.
Junior colorists should also pick up Warren Eagles Creative Looks course to learn a good deal about the art of colour grading, and succeeding with clients too. Experienced colorists will enjoy seeing how someone else does it.
Professional colorists and experienced junior colorists should take Joey D’Anna’s Mixing Light DaVinci Resolve 14 New Features to cut to the chase on how to incorporate the best of Resolve’s new features into their working day.
There’s a lot more to say about each of these courses, the pros and cons of each, differentiating factors and what it’s actually like to take each one, so dive into the rest of the post to learn more.
Mixing Light Resolve 14 New Features
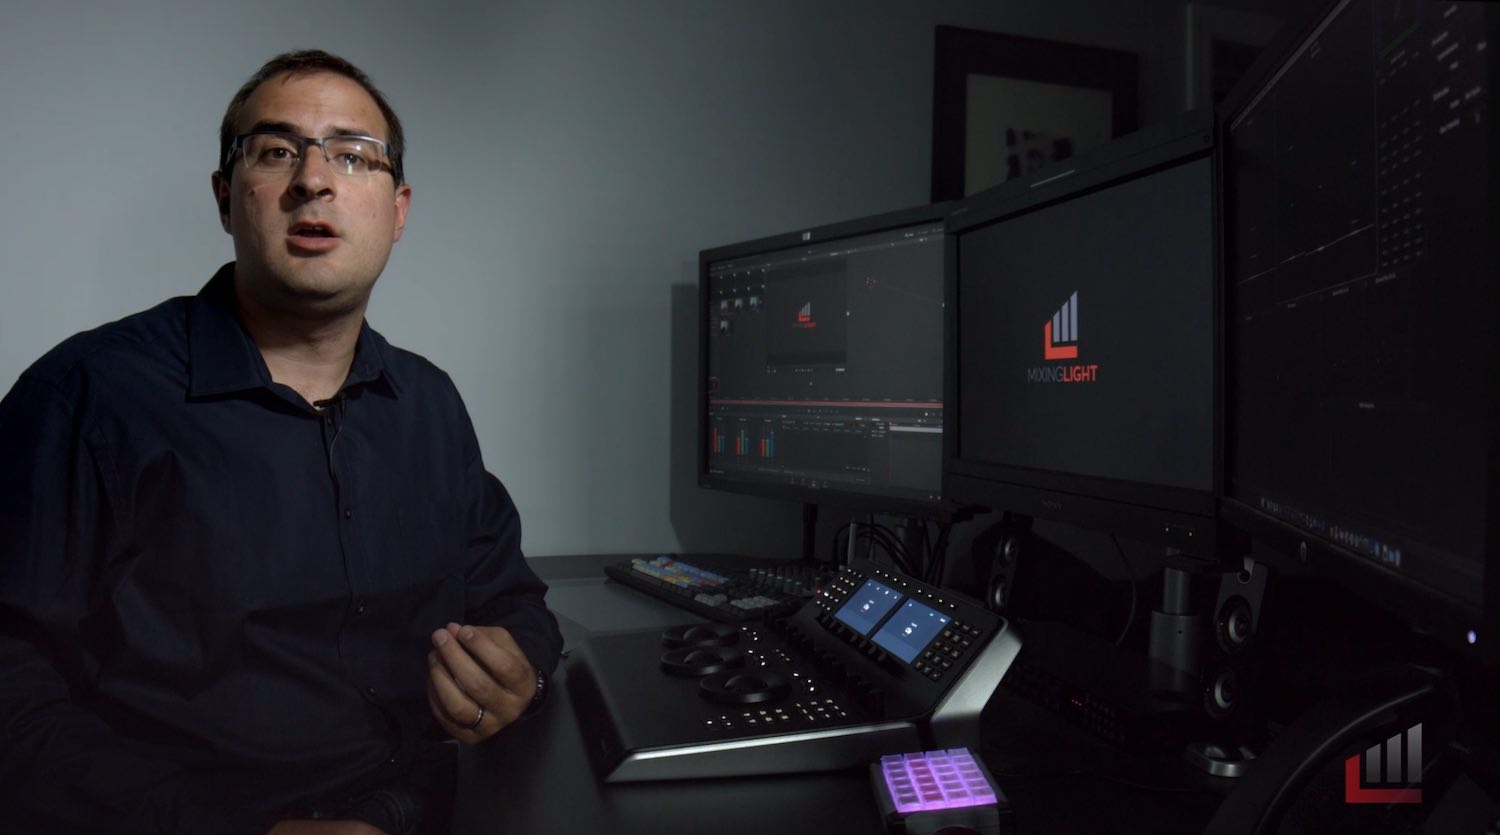
As this is instructor Joey D’Anna first online training course, I thought I’d start with his.
I have previously reviewed Mixing Light’s epic 21 hour two-volume course on DaVinci Resolve 12 here. Thankfully, Joey D’Anna’s DaVinci Resolve 14 New Features is a little easier to digest at just over 3 hours and is the shortest of all the courses reviewed in this post.
Although none of these courses are particularly short, just because with every major update Blackmagic Design crams in so many new features to talk about!
The training is squarely aimed at existing DaVinci Resolve users, and especially Resolve Studio users – presumably the core audience of Mixing Light.com – to help you get up to speed with the latest updates, and not overwhelm you in the process. This assumed understanding of terms and some concepts lends itself to the breezy pace of the course.
Stay Current. Work faster. Look beyond ‘headline features’ for the small insights that make a big difference. – Mixing Light
Joey makes for a knowledgable and engaging instructor and his use of contextual learning means that you’ll come away with not just an understanding of how and why to use the new tools, but also a bevy of great tips on working more efficiently as a colorist.
So it’s definitely not just working through the press release rap sheet of new features.
What do you get and how much does it cost?
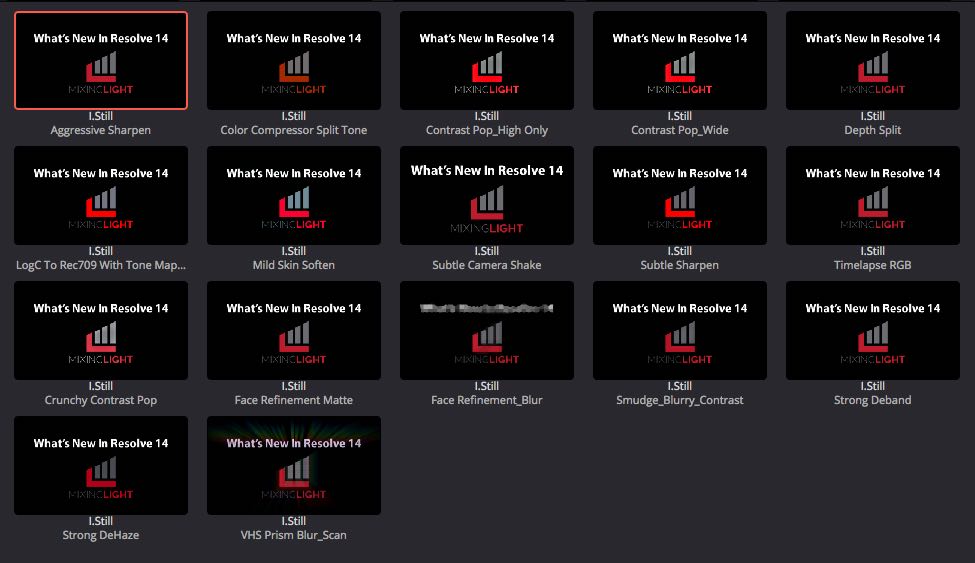
The course is broken into 50 lessons with a total running time of 3 hours and 5 minutes. They average lesson length is 3 minutes 43 seconds.
Included with the course are three further bonuses:
- 25 minute long demonstration tutorial on the new remote collaboration features in DaVinci Resolve 14
- 17 Powergrades created by the two of the founding colorists behind Mixing Light; Patrick Inhofer, Robbie Carman along side Joey.
- 20% discount on any Mixing Light Practice Project, which I’ve also previously reviewed here.
The course costs $49 with ‘special launch pricing’ and the regular full price is $59.
Bonus Powergrades
Pros
Mixing Light have done a decent job of structuring the course into bite size chunks and making the downloading and launching of the course extremely easy in their new Mixing Light 2.0 platform.
In fact if you import them into iTunes they will self organise into a TV show playlist. This also makes it a doddle to transfer them to your iPad if you wish to watch them on a second screen while you follow along on your main system.
The detailed table of contents PDF, also helps you to navigate the available training material.
You can watch four free videos from the course on the Mixing Light sales page here, just scroll all the way down:
- DaVinci Resolve vs DaVinci Resolve Studio
- Using the Updated Reconform options
- Changes to the Color Page and Node Editor
- Understanding the Color Compressor ResolveFX
These will hopefully give you a flavour of the things I’m talking about in this review!
As a quick aside, now is a great time to invest in a full version of DaVinci Resolve Studio as the gap between it and the free version is widening, although the price point is shrinking to just $299. Plus all updates have been free so far to existing users, so you’re set for Resolve 15, 16 17 etc! Joey also reckons the six of the Studio only FX plugins are some of the best new features in Resolve.
Anyway, back to the review. Each of the short, focused lessons help you to move through the content, one thought at a time, which makes it easier to absorb. It also allows you to jump to the topics that you’re most interested in learning about first.
Joey’s construction and delivery of the course is concise and to the point, which helps to keep running time down and the information focused on real-world practical benefits. The other benefit of a shorter course is that it’s much more accessible and therefore you’re more likely to actually make it to the end of the training.
So whether or not you consider more minutes as more value, (from a bang-to-buck perspective) you also need to factor in the metric of how many minutes of the content that you paid for, you actually ended up watching (and of those – how much you actually implemented!) But that’s down to you, of course.
Joey’s 15 years of industry experience are definitely tangible, not only in his opinion on the new features (and whether they are actually improvements or not) but also the wisdom he shares on how best to use them day-to-day.
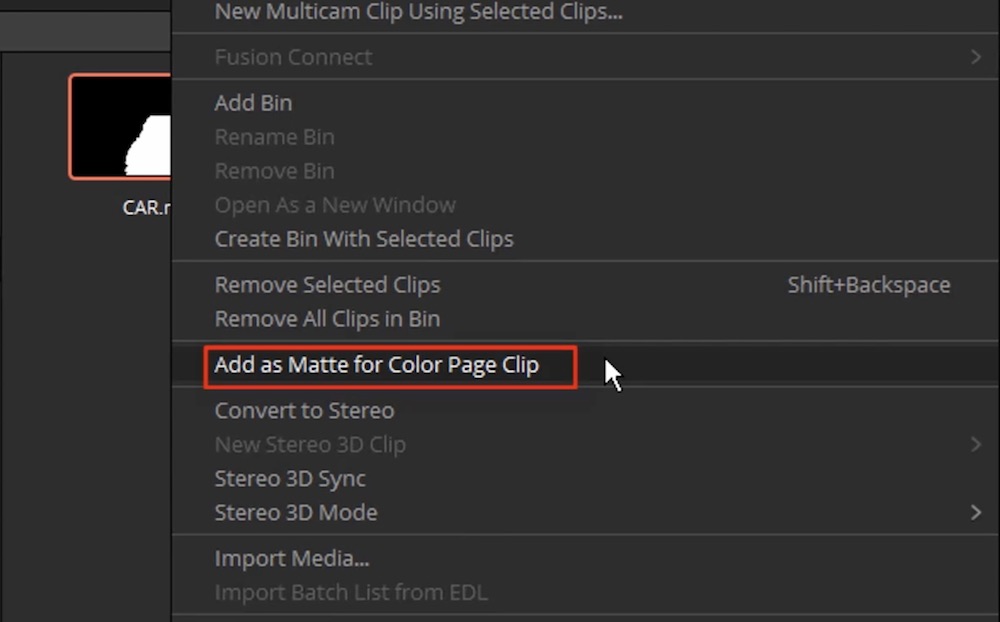
Joey’s walkthrough of the new ‘Add as Track Matte’ functionality is a good example of what make his introduction to the new features unique.
The new functionality is that track matte clips can now work just like regular clips imported into the Media Pool. Big deal.
Joey shows how this is actually very useful, how to apply those mattes in the Edit page (e.g. as a film grain overlay) and in the node tree. He then also demonstrates how to perform a sky replacement in the node tree using these same track mattes.
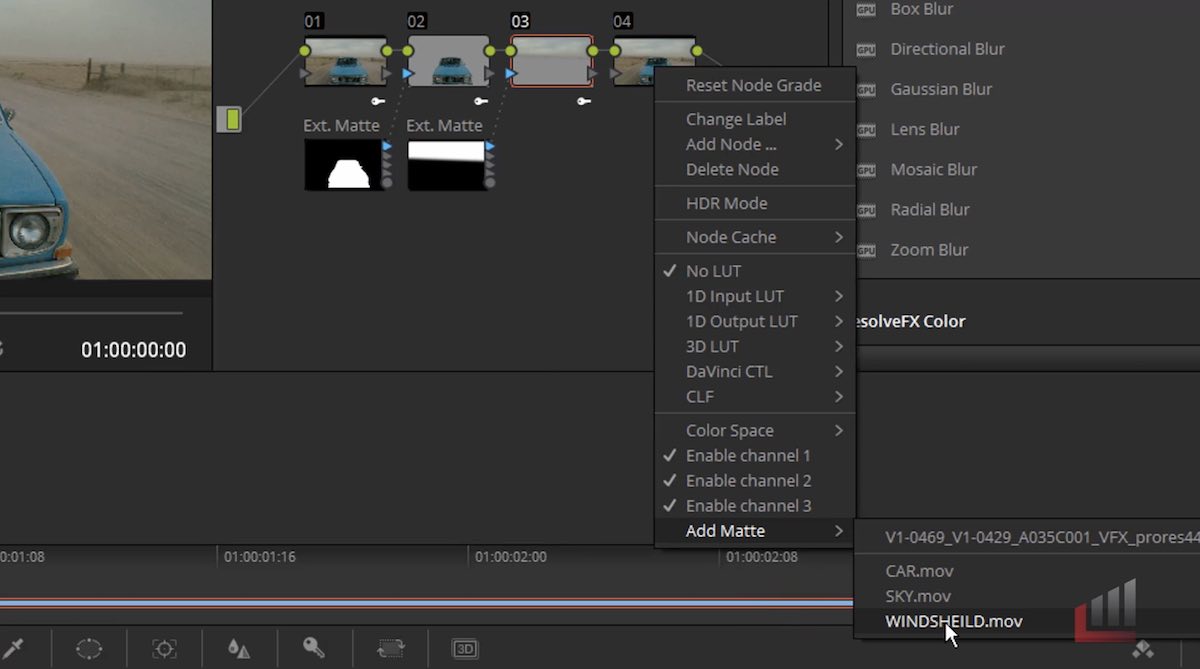
It’s also nice that he shows you the functionality in previous version and compare to R14 of regular clips vs track matte clips. All in just over three minutes.
What’s great about this is that it’s useful information translated into the real world, fulfilling Mixing Light’s mission to deliver “aha” moments.
Using the Edit Index in Resolve
Similarly, Joey’s focus as a colorist means that even considerations of the improvements made to the Edit page and the integration of Fairlight are taken from a colorists perspective.
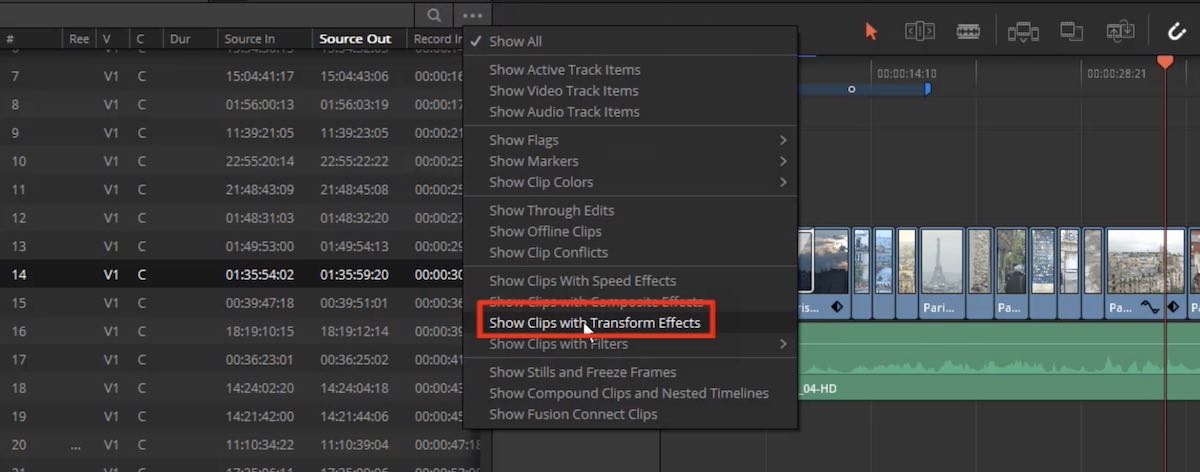
I’m a big fan of the edit index, I use it all the time. Whether I’m checking through confirms, looking at source or record timecode or looking at markers. There’s just a lot of useful features in the edit index. And in version 14, Blackmagic has added some cool new filtering options that I think are really useful….
Now the real power here is when you’re doing an online, conform or prepping something for colour.
For example in this timeline a lot of these clips have resize problems that we have to fix, in the past you would have had to find all these manually and double check your sizing. Now I can filter the edit index to just show clips with transform effects and I can very easily step through and adjust the sizing of every clip that needs to be fixed. – Joey D’Anna
Cons
One small quibble I had with the course, especially being an editor, was that the frame size jumps when cutting between the wide of Joey and the close up didn’t feel big enough to me, and so every cut felt a bit clunky. There aren’t that many of them, especially as most of the course is spent ‘inside’ Resolve, but I noticed myself noticing it.
Punching in the close up to be an actual close up would have been better, as I don’t need to see anything in the room as it’s just blank monitors! Anyway, a tiny detail.
Another easy win would have been to add QuickTime sub-chapters to the video files, like Ripple Training does, to add another level of navigation. Although as I’ve mentioned most of the lessons are very short.
There’s not much else to complain about really!
Final Thoughts
Joey D’Anna’s DaVinci Resolve 14 New Features will definitely provide working colorist a huge boost to getting up to speed with the best of the new features, in a format and scale that they can digest in a few hours of downtime at work.
The short, focused lessons make for easy navigation and digestion all delivered with by an engaging instructor with a decade and a half of industry experience under his belt.
Check it out on Mixing Light.com here.
Ripple Training DaVinci Resolve 14 New Features
As I said in the introduction to the post there is no one else delivering online training on DaVinci Resolve who knows the program like Alexis Van Hurkman.
Not only has he written the over 1000 page+ manual, which is the best and most up to date book on Resolve that you can get, (and it’s free!) but he also has insider information on the rationale behind design decisions and future development of the app from Blackmagic Design.
If that’s not a good enough reason to check out Ripple Training’s DaVinci Resolve 14 New Features, then I don’t know what is.
As a quick aside, Ripple Training’s other Resolve trainers Travis and Spencer are now Blackmagic Design certified, which means that you’ll be able to watch ‘official-level’ training very soon.
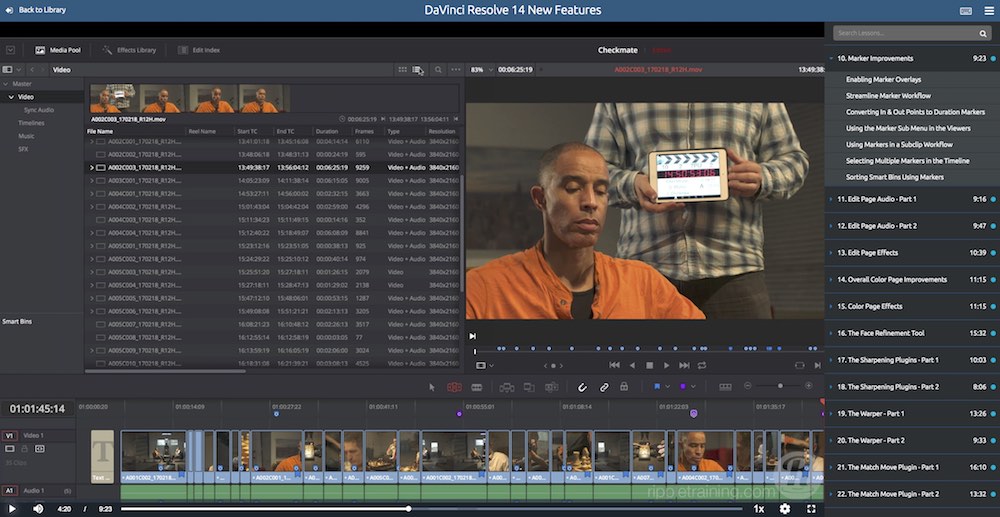
Ripple Training’s Online Player
What do you get and how much does it cost?
53 individual lessons over 7 hours and 47 minutes of training, either as downloadable, chaptered QuickTime files (3GB), or accessible online via the excellent web-based player.
There are no project files or ‘follow-along’ media, but you don’t need them for this detailed walk through of every UI update, feature set improvement and new addition.
You can watch eight free sample videos from the course in the YouTube playlist above, covering:
- New Resolution Support
- Custom Workspaces
- New Marker Workflows
- Working with ResolveFX
- Using the Updated Stabiliser
- Dead Pixel Fixer
- Copy and Paste in Fairlight
- New Deliver Page Features
DaVinci Resolve 14 New Features from Ripple Training costs $79 although it’s currently on sale at $59.
Pros
This is a ridiculous thing to start with, but one of the tiny things that I really appreciated in this training title (and maybe it’s always been this way?) is that there is no sting music on the title logos, which means when you’re watching through a series of tutorials in a row, it doesn’t pop up every few minutes and get annoying, very quickly.
Ripple Training’s superb online player and course organisation is worth talking about in some detail as it’s so good and entirely a cut above what everyone else is currently offering.
The main thing that makes using any Ripple Training title so great is that you can instantly access what you want to learn about, in just a few clicks.
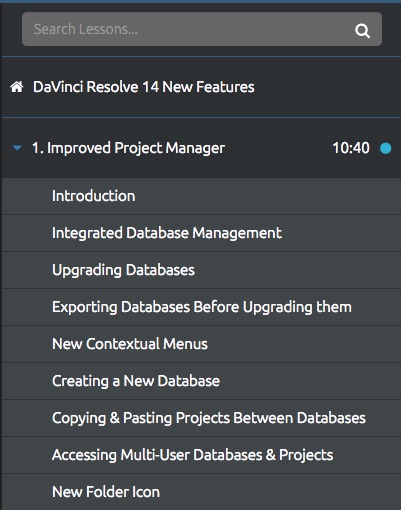
In the images above you can see just how detailed the chapter and sub chapter breakdowns are. These also work well in the downloadable QuickTime file sub-chapters menu (see the example in the Warren Eagles review below) as you also get timecode references so you’ve got a rough idea how long each section is.
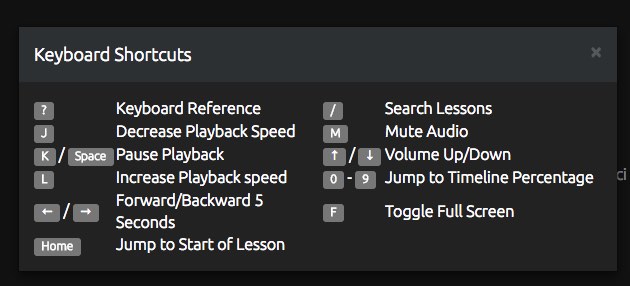
There are also some handy keyboard shortcuts to make your life even easier, it works well on all your preferred devices and it remembers where you left off.
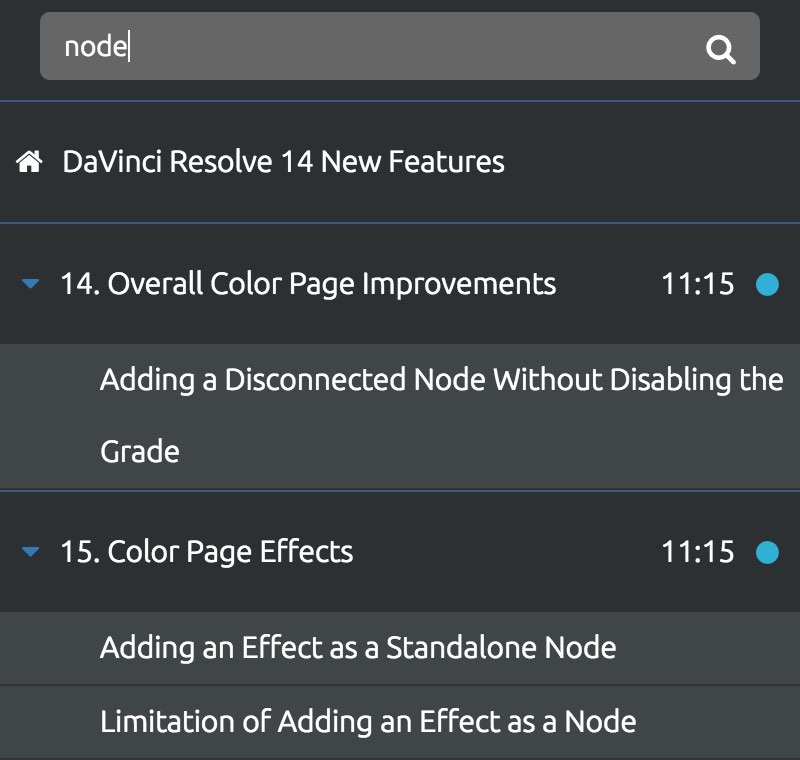
If that wasn’t enough there is also a really handy search functionality that helps you find that crucial explanation of a particular new feature, without scrolling through nearly eight hours of material.
You can’t get that from the downloaded files though as I don’t think there is a way to search chapter markers in iTunes or QuickTime. (Please correct me if I’m wrong!) Although you could keyword search through the detailed, 12 page, downloadable course breakdown pdf here, I suppose.
I’ve not experienced another online training provider whose user interface is this good. And it makes a world of difference, especially when you want to get maximum value out of the training you’ve paid for, by actually referring to it, well after your initial viewing, to find the information you need when you need it.

This excellent user experience goes hand in hand with Alexis’ exhaustive detail and ‘completionist’ nature. (He once described himself as that in a training video).
A good example of this in action came when the team added a whole extra 15 minute video to the course, after originally publishing it, to cover even more of the new features added to the on-going public beta (version 4), to ensure the course was up-to-date.
If you want a deep understanding of all the controls, far and above what you would get from just playing with them by yourself, then this course is definitely for you.
Alexis’ approach is to break down the parameters of any particular effect to the last detail. For example, in the camera shake tutorial (16 minutes long with 14 topics – see the image above) he walks through each parameter within the plugin individually and explains how they interact collectively.
Here is Alexis talking about the top three of those parameters:
The fastest way to manipulate the quality of motion in this plugin is to use the motion scale and speed scale sliders.
So if I reduce the amount of motion and I slow the speed down, these are global settings that govern more detailed orientated amplitude sliders else where…
There is also a motion blur setting. So if I want to create a veritable earthquake I can jack up the scale, I can jack up the speed and now I’ve got this real wobble going on.And If I turn on motion blur you can see I get this very naturalistic look to this rapid motion.
Now this makes this plugin a little more processor intensive. You can see my frame rate dropped a little bit, at least until this plugin cached. I’ve got the smart cache turned on right now.
But If I up the speed and up the motion to really make this aggressive, now you can see I get a very smooth quality of motion, because of that motion blur.
This exhaustive approach also means that you might get a lot of information about certain things that you may or may not care about. But at least you get the whole hog.
This is however all delivered with a beginner’s level accessible clarity, which means you won’t get lost even if you’re brand new to colour grading in DaVinci Resolve, although any prior experience will obviously be a bonus.
All in all the comprehensive attention to detail, excellent organisation and enjoyable user experience enables you to gain a mastery of the software, from a functionality point of view at least. Your creativity will be improved too as the more you know the tools the easier it is to execute on a given creative vision.
5 Things I learned about Fairlight in DaVinci Resolve 14
- Alexis demonstrated the features of Fairlight as of DaVinci Resolve 14 beta 3, but he knew about all of the features still to be implemented
- Fairlight integration in Resolve is incredibly powerful, rivalling any NLE’s audio feature set
- The Fairlight page can have independently locked track heights
- The Zoom control zooms into the position of the mouse pointer not the playhead on the Fairlight page
- There’s about 2 hours of training dedicated to the Fairlight page in the Resolve New Features Training
Cons
In terms of the delivery, the organisation and the course content there isn’t really anything to fault in the Ripple Training DaVinci Resolve 14 New Features.
If anything the nearly 8 hours of training might be just too overwhelming and too detailed to absorb in any one, two or five sittings.
But as it is almost ‘the manual on video’ it’s probably the only course that you will want to digest bite by bite, referring to it as needed over time. Thankfully, given it’s superb organisational set up the ability to dip in to any topic at will, this is entirely possible.
Final Thoughts
With a software application as complex and detailed as DaVinci Resolve, I can’t think of anyone working with application, at any level, who I wouldn’t recommend buying this training title to.
Alexis Van Hurkman knows how each and every single function works within Resolve and why you would want to use them in any given context.
Everyone can learn more about mastering Resolve by taking this course and the team at Ripple have worked incredibly hard to make that very easy.
Check out DaVinci Resolve 14 New Features at Ripple Training.com
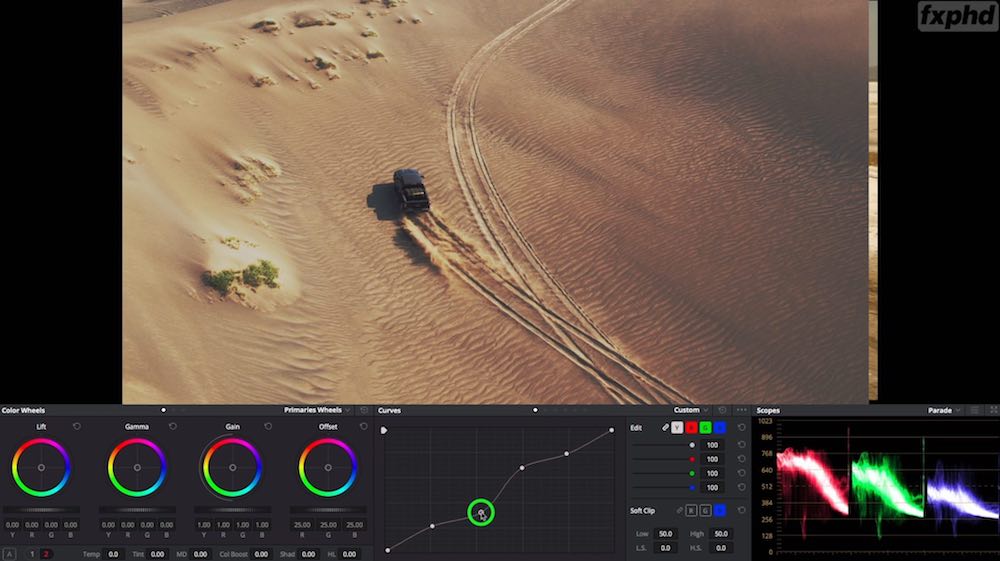
Warren Eagles Colour Grading Looks Training Course – FXPHD
Warren Eagles is a highly experienced colorist with nearly 30 years of working and training under his belt. He is also co-founder of the International Colorist Academy.
The premise of Warren’s Colour Grading Looks training course, which you can hear all about in the trailer video above, is that you get to watch an experienced colorist tackle a variety of different colour grading projects and the various creative looks they require.
Not only that, but you can also download and grade the same professionally shot footage (albeit with some restrictions on what you can do with it afterwards), which you can then upload to FXPHD.com to get feedback on your work from Warren or other colorists taking the course.
As far as I’m aware there are very few opportunities to do purchase this kind of course online. The kind of course in which you can grade such a wide variety of high quality material and get direct feedback on your work from a professional colorist. Mixing Light have new Practice Courses which allow you to do a similar thing but in only one creative project – currently either a documentary or a horror short film.
Colour grading is a subjective creative discipline, that’s what makes all colorists unique. Different people approach things differently, so there is actually a huge amount of value in taking these kinds of courses from several colorists, just to see how different people solve the same kind of problems.
Either way, Warren delivers a very enjoyable and enlightening course, that should make for informative viewing for most colorists.
What do you get and how much does it cost?
Warren’s Colour Grading looks class costs $199. It is delivered in 12 lessons totalling just over 4 hours (4:14) of training, along with over 8GB of high resolution media (in Pro Res LT), project XMLs, reference movies, and several Powergrade looks.
Jump here for a full description of each lesson but here are the headlines:
- Matching Part 1 and 2
- Creating Specific Looks
- Grading Music Videos
- Grading Pack Shots
- Beauty/Skin and Fashion, Part 1 and 2
- Grading Action Footage (Underwater, Drones, Go Pro)
- LUTS vs. PowerGrades vs. The Tools
- Grading for the web
- Drama workflow and Matching Part 1 and 2
One of the things I like to do is have a lot of visual in my Powergrades (folder)… you’ve got to collect images that you like and be creating a library of useful references to keep at your fingertips.
Grading and certainly when we’re talking about looks, is a lot down to experiences. It’s very hard for you to grade things if you haven’t experienced it… so I think that’s an important thing as well. – Warren Eagles
Pros
Warren covers a lot of ground in this course and there were extremely valuable tips, applicable to most grading scenarios, scattered liberally throughout each lesson.
Sometimes it was something as simple yet incredibly useful as adding Resolve’s default anchors to a curve to create a lovely contrast adjustment in just three clicks. One that you would likely have had to do a lot more work to achieve with Lift, Gamma and Gain.
I really enjoyed the lessons on grading pack shots (as Warren says “the shot every client pays attention for…“) in which you can work on a KFC burger pack shot as well as a couple of honey bottles. In both cases Warren uses a fair amount of power windows to relight the image, shaping the focus of the viewers attention as well as deploying several key fixes to keep everything look as it should.
I also really enjoyed the lesson on working with LUTS, Powergrades and Resolve’s toolset (to see what each one offers and the relative merits of each) and the lesson dedicated to grading for the internet and the special considerations it requires (more than you would think! Including banding, colour spaces and testing the post-processing of various delivery services).
One of the things that surprised me about the course was how much advice Warren shared specifically on relating to clients, directors and other collaborators, which in many ways is just as much a part of the job as delivering cool looking images. This is a massive benefit to any junior colorist who wouldn’t otherwise have a way to take on the kind of wisdom you only get from years of being in the room with a paying client.
Overall there is a fantastic amount of wisdom to glean from Warren, you just need to be making notes, and keeping tabs on what he’s doing while you’re watching, as he doesn’t always call it out as he goes in the level of detail that a beginner could pick up. This is one of the reasons I would suggest that this course is mainly for intermediate to experienced colorists seeking to pick some creative tips and tricks.
Taking this course will absolutely help you to build your own library of saved Powergrades, increasing your arsenal of creative options, as well as learning some useful compositing tips to save troublesome shots.
The real focus of this course is on the subjective creativity of colour grading and the collaborative nature of working with clients and for that it is well worth the price of admission.
Cons
There is one major thing that I think could be improved about the course and a couple of other niggles that you might want to be aware of going in.
First the niggles. Warren grades fairly quickly and although he does call out what he’s doing, and you can see it on screen, and he stops to turn nodes on and off so you can see the difference, if some of these techniques are new to you (which hopefully many of them are!) then a lot of it might go over your head at first. This might then necessitate scrubbing backwards and forwards a bit to really understand what he’s talking about.
This is also why I would say it’s not really a course for beginners or merely interested editors, unless you just want to see what it looks like to watch a colorist grade. But you might have a better way to spend $199.
Another niggle is that the course is fairly unstructured, which is mostly just a result of the fact that Warren is instinctively responding to the material in front of him, pulling out of his bag of tricks whatever the shot requires. So the lesson on shot matching using the car commercial footage wanders into a fair bit of detail on sky replacements.
This isn’t a negative thing per se, but as the lessons are delivered in 20 minute chunks, it can be easy to get lost if you’re trying to re-find a specific moment or technique.
This leads me to my main suggestion for improvement.

An example of Ripple Training’s detailed chapter markers
The organisation of the course from a ‘metadata’ perspective could be drastically improved. Each of the 12 video files is delivered ‘as is’, with no further information about what each lesson contains.
Conversely Ripple Training’s execution of this is exemplary – both in their online player and the downloadable QuickTimes. Each video file has several sub-chapter markers allowing you to not only see what is in each lesson, but to jump to that point as well. Warren’s FXPHD course would have benefitted from something like this, particularly because it is so organically unstructured.
The FXPHD Colour Grading Looks sales page does a bit of this with the detailed chapter breakdowns, but it would have been really useful to have these available whilst watching the training, especially when you’re looking for a specific technique.
So this complaint isn’t a reason not to buy the course, it’s excellent and well worth the money, but it could have fundamentally improved the end user experience.
Lastly, although you can upload your grades to FXPHD for feedback, the tricky part of gathering and licensing this variety of footage (for FXPHD) is that it can’t then be splashed about online. So you’re not allowed to share your grades publicly online or use them in your showreel. If somehow that’s a deal breaker for you then, at least you know before you buy.
Final Thoughts
A great course for anyone looking to beef up their creative abilities and a welcome contrast to the normally “push this-do that” heavy world of video training. You will have to take the time to watch through it a few times to really juice it for all it’s worth, and greater metadata on the contents of the course would have made this easier for the viewer.
It’s very easy these days to learn what the software does, but it’s great to have an online opportunity to learn some of the artistic sensibilities that will make your projects look more interesting and your clients more willing to come back.
Play. Just have fun. That’s what grading is. You play around you have fun, keep a look. Can you take that look to the next look? Match that? – Warren Eagles
Warren also has a DaVinci Resolve 14 Fundamentals course ($149) and a Advanced training course ($149) available from FXPHD.
As far as I understand FXPHD’s business model, you can either buy these as one off purchases, or subscribe to their monthly training library and access them that way. Standard membership costs $79/month or Premium (with access to downloadable project files and footage etc.) is $99/month.
This might be a more affordable way to engage with the course, especially if you plan to avail yourself of any of FXPHD’s other excellent curriculum.
Colour Grading Looks is slightly more expensive at $199 and you can check it out in detail here.
I’ve also previously reviewed Warren’s DaVinci Resolve 11 training courses here.


[…] offer and how it compared to some of the colour grading training I’ve reviewed in the past. (Like, here and also […]
Since he’s not listed here…. Question: Is Denver Riddle’s color grading product any good? I watched a webinar that’s deceptively made to appear ‘live’ but it’s not as I found out when I watched it a second time. I’ve been pretty put off by the strong arm, over the top, hammering spam. It’s like this whole bulldozing marketing that since I haven’t heard his name in the circles of professionals like Mixing Light, Ripple, Lynda etc. makes me very suspect.
Just a heads up, the Warren Eagles courses are NOT available to subscribers to FXPHD, they must be purchased as stand-alone titles, regardless of subscription.
Thanks for the clarification Derek.