Using Palette Gear For Film Editing and Colour Grading
- Palette Gear gives you tactile and versatile control over your creative software.
- Work faster and more efficiently with custom keyboard shortcuts and pre-built interactions.
- Download my Premiere Pro profiles to edit with Palette.
Palette Gear is a powerful and fun way to interact with your favourite creative software in a whole new tactile manner. Buttons, dials and sliders/faders give you a versatile way to adjust any keyboard-shortcut-controlled part of your software such as adding keyframes, adjusting effect’s parameters and much more, through pre-programmed functionality.
What does that mean in reality?
Imagine you’re a Premiere Pro editor working on an cut and you notice a shot needs a little exposure lift. Instead of selecting the clip, moving to the effects tab, dragging on a Lumetri effect, moving to the effects control panel, twirling down the Lumetri options and clicking on exposure to adjust the setting, you simply move your hand to a slider and move it up a little bit.
That’s what’s great about Palette. Yes it looks really cool and it’s an exciting gadget to have on your desk (that’s undeniable) but the real power comes in it providing time-saving shortcuts that allow you to work faster and more fluidly.
What is Palette Gear?
Buy Expert Kit on B&H ($299) | Buy Professional Kit on B&H ($499) | Buy Starter Kit on B&H ($199)
I first heard about Palette Gear back in it’s Kickstarter origins when it raised more than $150,000 to get off the ground. I also included it in my round up of Affordable Colour Grading Control Surfaces, so I was extremely happy to find my way onto their reviewer’s list and the team were generous enough to send me an Expert kit for the purposes of this review.
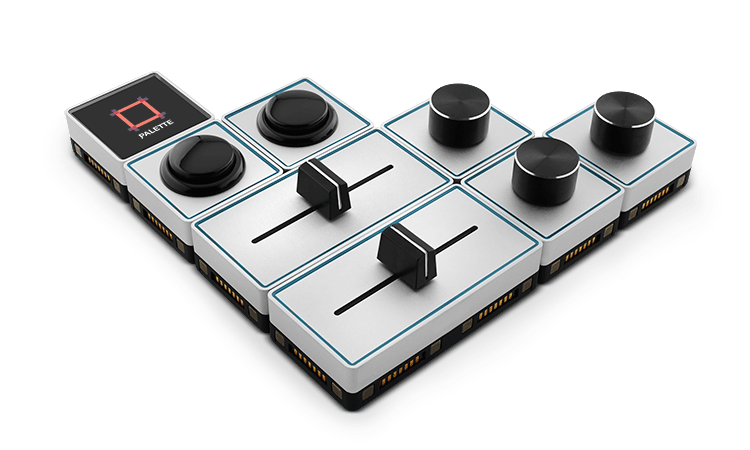
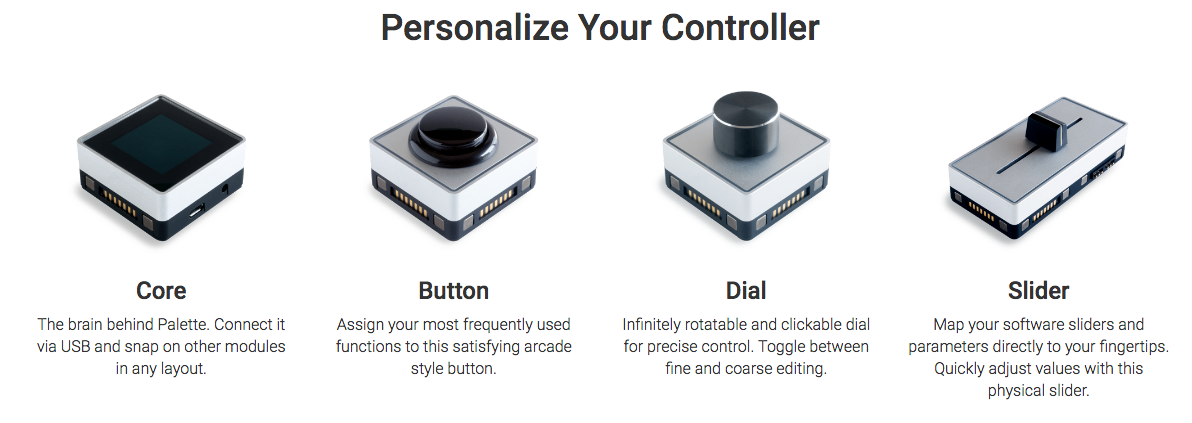
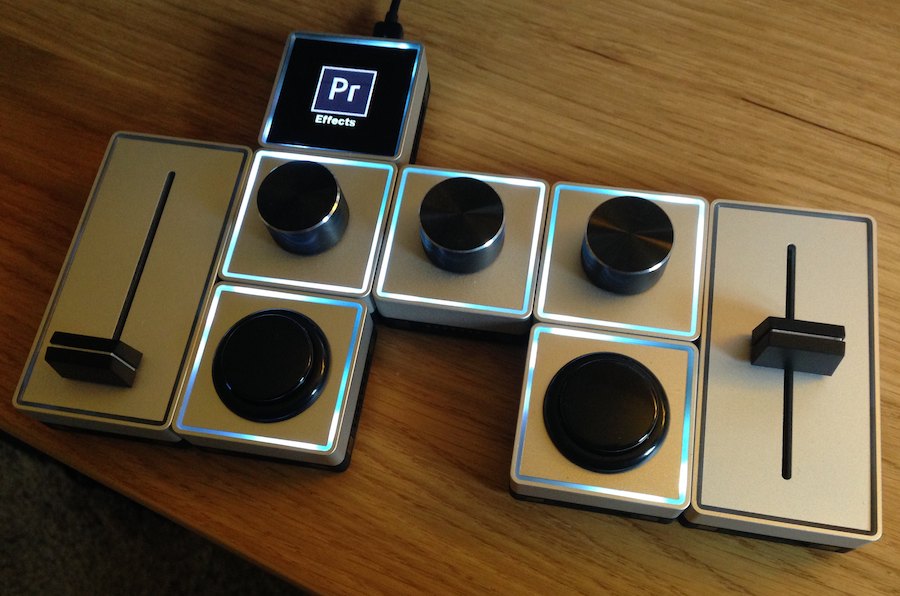
Palette Gear is a modular system comprised of four separate units which magnetically connect together into a myriad of combinations, all with a satisfying click. The build quality is excellent and each unit is a delight to interact with. The arcade style buttons are a great design choice, the dials have a satisfying weight to them and the sliders are gracefully fluid.
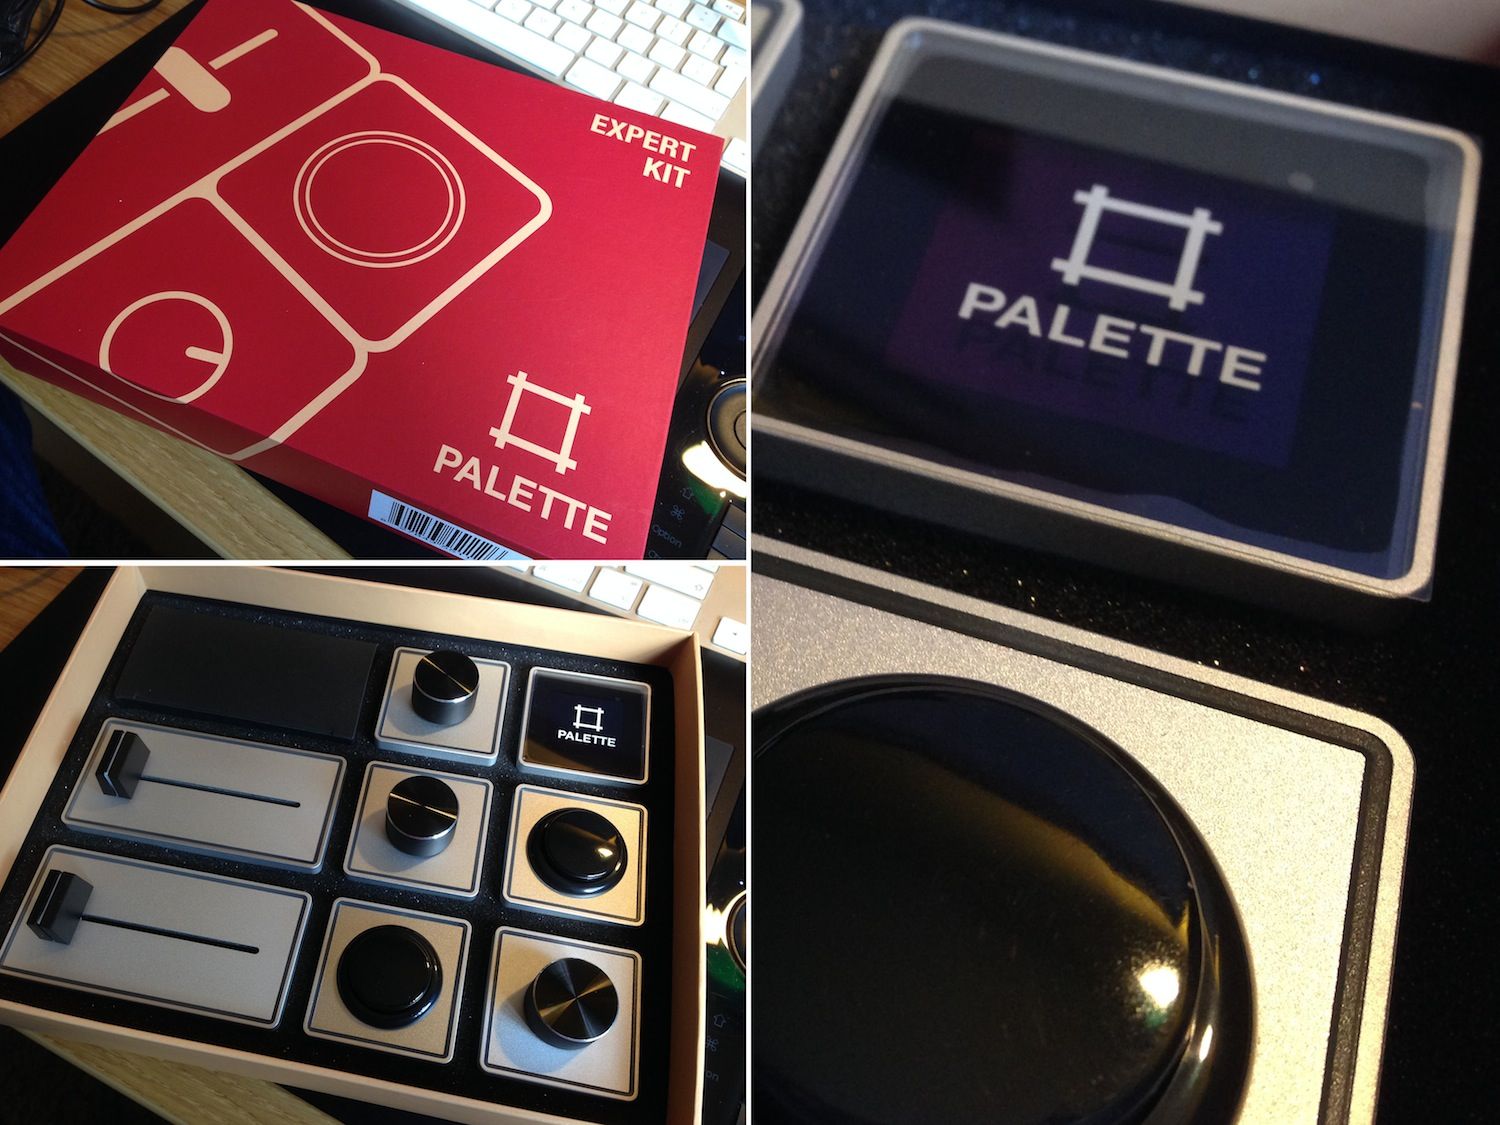
You can currently buy three different levels of boxed kits from Palette or B+H. The expert kit is probably best trade off in terms of price and functionality, if you’re just getting started, as it comes with the core screen, 3 dials, 2 buttons and 2 sliders. The Starter kit contains only the core, 2 buttons and one dial and one slider.
The ‘Professional’ box set is the best value for money however, as it comes with double the number of buttons, sliders and dials as the Expert kit but for only $499, saving you $100. You can build out your own bespoke configuration by purchasing buttons, dials and sliders individually at $29 per button and $49 per dial or slider.
They even make a Premium Wooden edition if you want to go all out, but it will set you back $899!
How does Palette Gear Work?
In essence you can assign the 3 different controls to interact with any keyboard shortcut as well as the parts of the interface that the Palette Team have created pre-built interactions for. For example in Premiere you can assign a dial or slider to adjust Exposure, Scale, Audio Volume and so on.
The keyboard shortcut side of things means you can use Palette with pretty much any application, including system wide controls like Volume and Brightness.
Palette Gear currently supports pre-built interactions with Lightroom, Photoshop, Premiere Pro, After Effects, Audition, Illustrator, InDesign and FCPX (beta). The MIDI and joystick options also expand the functionality.
The key to making Palette Gear work for you is to know what parts of your current workflow could do with a smarter overhaul. Are there parts of your creative software you’re regularly using in a cumbersome fashion, a bit like my Lumetri example at the start of this post?
You can even play Tetris with just one dial.
Palette Gear First Impressions
The first impression you get when unboxing the Palette Gear Expert kit is how great it looks! Which really means that a lot of thoughtful care and attention has gone into each and every part of the design. Even the box has a lovely thickness to it that feels just right in your hands.
The finish and build quality of each module is fantastic and their reassuring weight makes them feel even more expensive than they really are. The magnets are easily strong enough to hold your bespoke configuration together and keep it stable on your desk.
Working out just quite how you’d like it put together takes a little trial and error but the beauty of the system is that you can change and reform it whenever you like. That’s the whole point!
Some of the video tutorials in this post have them nestled around a keyboard, which for a few buttons and dials, seems like a smart idea as you don’t have to move your hand very far to reach it. In working with it, I chose to keep them clustered together as more of whole interface (see profile pictures below) and I found I could reach over and find the right dial or slider without looking down.
The software interface has also been very well thought out and is very intuitive to use for the first time. When creating your profile mapping it’s important to think of the dials as buttons as well as twiddly knobs, because they have that dual functionality, because you can also press them.
The only problem with having a limited number of modules to work with is that once you start mapping one thing, you want to map everything! I’ve already thought of picking up some extra buttons and dials to add that ‘one more control’ so beware that building a bigger kit might become addictive.
The actual responsiveness of Palette is very good. It’s not 100% instantaneous, but the lag must be only a few milliseconds. It’s perceptible, but not bothersome. Maybe this can be improved in future updates.
There is room for improvement, and I’ll talk a bit more about what I’d like to see change later on, but what the Palette team have created is exceptionally well executed.
Setting up Palette Gear
The official video tutorials from Palette Gear do a great job of helping you get set up quickly, so watch those first, but here is a quick step-by step guide.
Simply download the Palette Gear App software, install and open it and then connect your Palette Gear ‘brain’ unit, the Palette Core, via the supplied mini-USB. It might need to automatically update the core if there’s been a more recent software release.
Attach the different modules one by one and the app interface updates to match the reality in your hands. Although this is a small thing it’s actually really cool that the software updates in real time as you physically connect or move additional blocks as you try out different configurations.
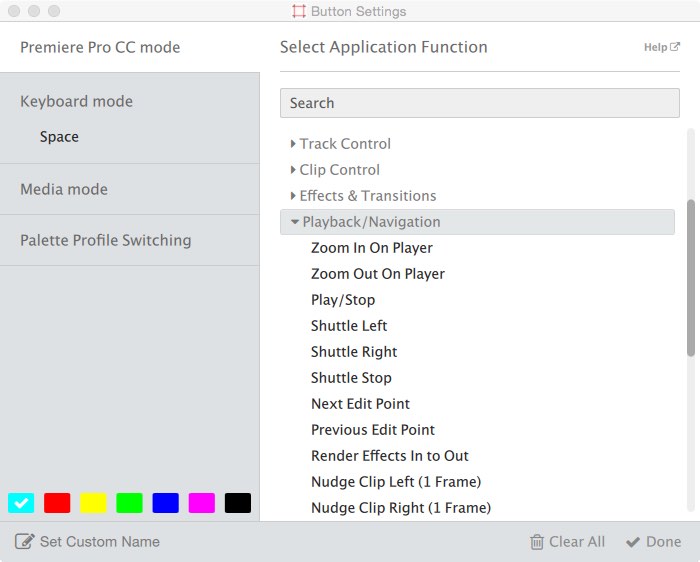
You then use the Palette app to easily create different Profiles for each application you’d like to create a control mapping for, in a few clicks. Select a creative application such as Premiere or Photoshop and then click on the module you want to set up for a list of pre-built interactions or type in an keyboard shortcut.
Palette will automatically switch to the correct app’s profile when it comes into ‘focus’ – i.e. when you’re using it.
If you’re not sure where to start in regards to creating your own bespoke mapping for your Palette Gear, you can download numerous profiles for various Adobe applications from the Palette Community site. The short video tutorial above, covers everything you need to know.
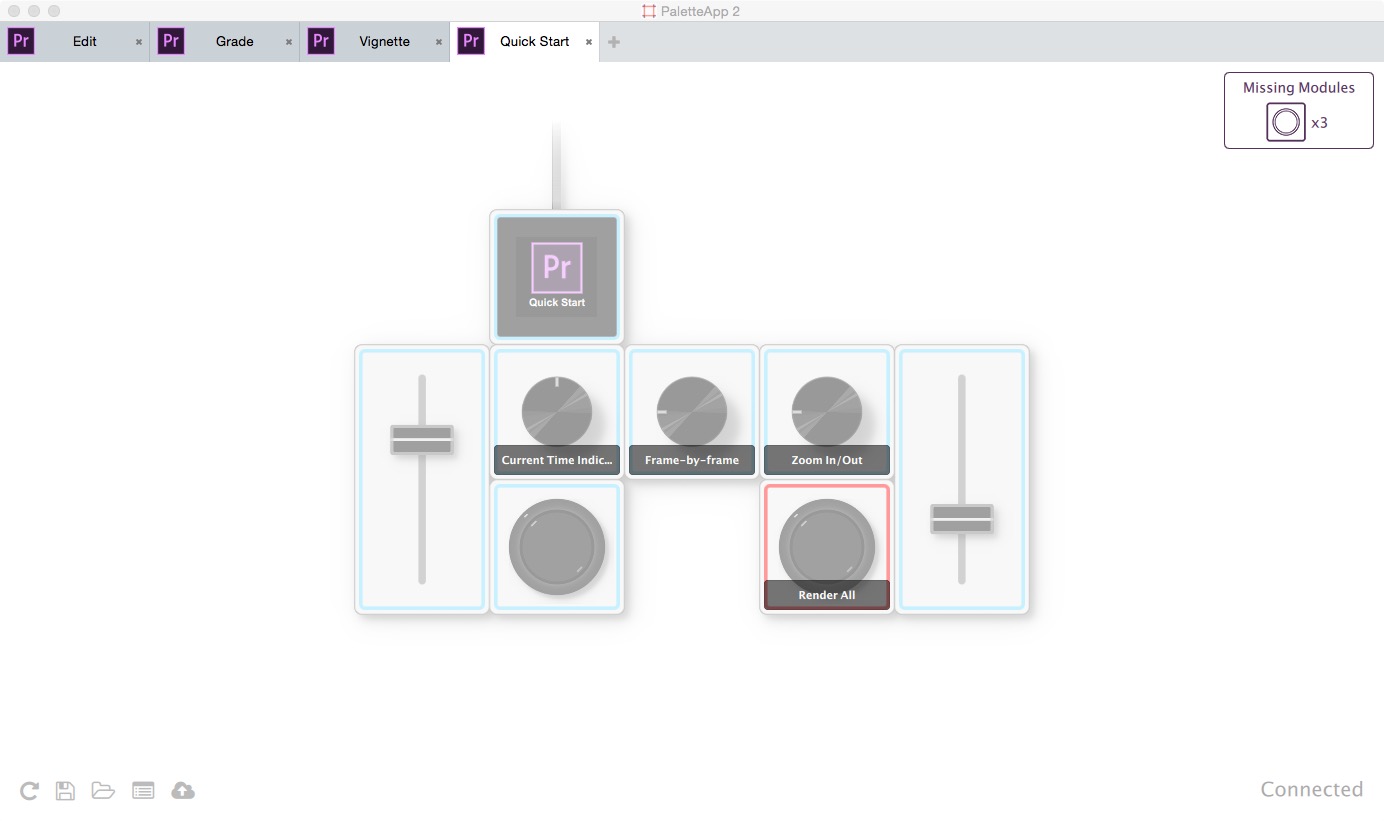
There are now also numerous ‘Quick Start’ profiles included with the app download, which means you can get up an running without having to do the brain-work of deciding what to map where. Just click on the ‘quick start’ profile button in the bottom left hand corner (2nd from right) to load one up. If nothing else it should give you some ideas as to where to get started.
It seems a bit odd that the Premiere quick start profile requires 5 buttons to work as none of the kits come with this configuration, so it’s not all that helpful. But the Premiere side of things has only just come out of beta.
The team recently added a new function to allow you to see the name of each control (as it’s activated) on the Palette Core screen which really helps you keep track of what’s what, when you’re first getting used to the kit, although you can assign colour codes to each unit’s LED halo as an aide memoir too.
Palette Gear Premiere Pro Tutorials
The latest update to the Palette Gear App software was on June 22nd 2016 and included enhanced functionality for working with the latest release of Premiere Pro. Improvements include:
- June 22nd, v2.0.54
- Premiere Pro – new functions with the latest 2015.3 release (v10.3). Please install the latest Adobe CC version (June 21st, 2016)
- Premiere Pro – Lumetri color, transitions, effects, track & clip control and various other new functions
- New hardware screen feature – see the name of the invoked funtion directly on the Core
This is great news for any editors looking to make the most of a Palette Gear and the new functionality is a great partner for the Lumetri colour grading improvements in the 10.3 update of Premiere.
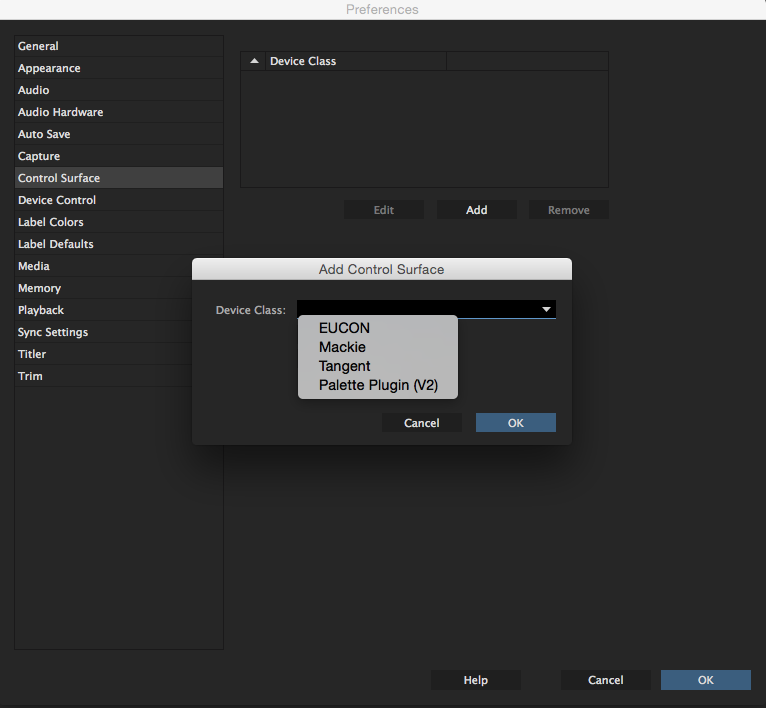
The only thing you’ll need to set up within Premiere Pro to get Palette working, is to add it as a control surface in the Preferences pane. Click Add and select Palette Plugin (V2) as the Device Class.
You can check out the official Premiere Pro page on the Palette site here for more info. Below you can watch a couple of short tutorials demonstrating a little of what you can do with the Palette and Premiere Pro.
Download My Palette Gear Profiles for Premiere Pro
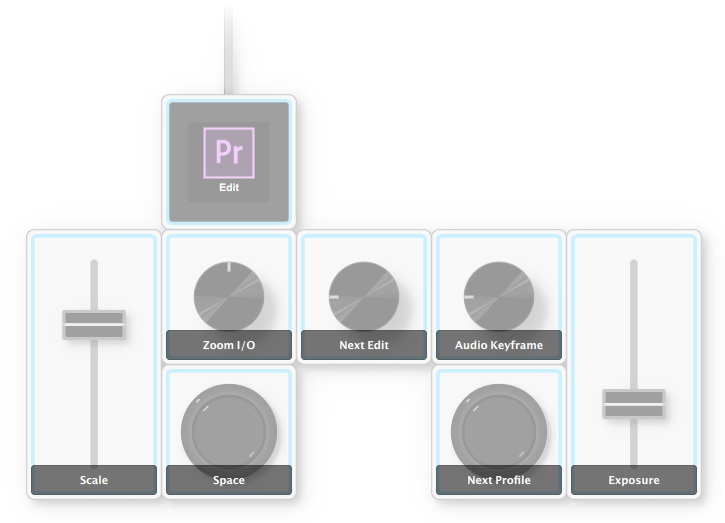
Edit Profile in Premiere
In this section of the post you can check out and download the four Premiere Pro Palette Profiles that I’ve created as a first attempt at improving my workflow using Palette. Download the profiles from the link below and then click on the open profile button (middle button bottom left – see the Premiere Quick Start Profile image) and navigate to the downloaded profile.
DOWNLOAD ALL FOUR PREMIERE PALETTE PROFILES
The first profile is a general ‘Edit’ set up which allows you to:
- Adjust the Motion Effects Scale parameter
- Zoom in and out of the timeline
- Navigate to the next/previous edit point
- Add an audio keyframe and adjust the volume
- Adjust the Exposure setting in the Lumetri colour panel. If not effect is applied to the clip Palette automatically adds one.
- Hit space (play) and on the second button tab to the next Palette Profile.
The Audio Keyframe dial is set to my own custom keyboard shortcuts, but it would be easy to adapt it back to the Premiere defaults.
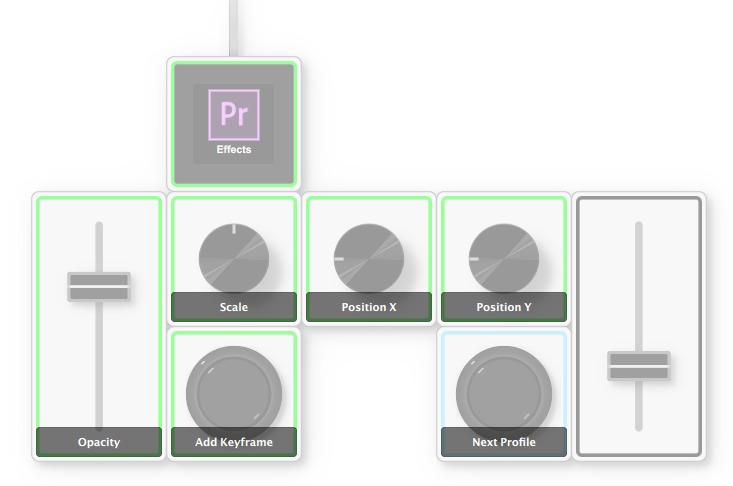
Premiere Motion Effects Profile
In this Effects profile I’ve mapped the most commonly used Motion Effects parameters. The benefit of having the Scale adjustment on a dial is that it will Scale past 100%, which it won’t on a Slider.
For the Add Keyframe I’ve mapped ‘add video keyframe’ to keyboard shortcut inside Premiere and assigned that in Palette. This defaults to Opacity if the timeline panel is selected, but you can click on Scale or Position in the Effects Controls panel to add keyframes there, if they are selected.
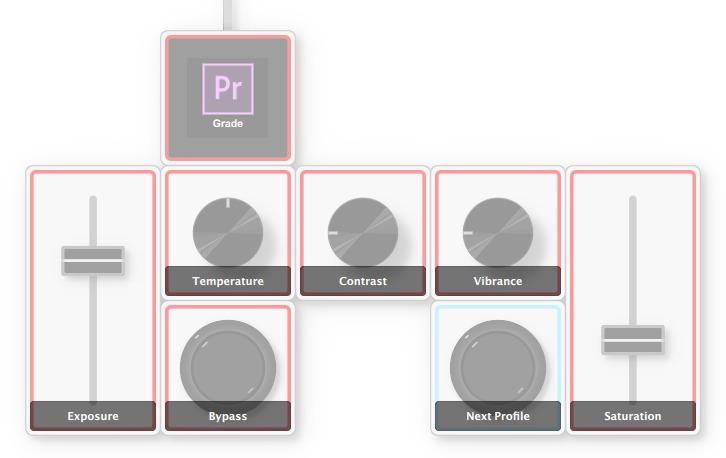
Premiere Lumetri Colour Grading Profile
In my ‘Grade’ profile I’ve used the pre-built Lumetri Color Panel interactions that ship inside Palette with the exception of the ‘Bypass’ button. This is just mapped to a keyboard shortcut I assigned in Premiere to bypass the selected effect in the Effects Controls panel. The colour correction roughly flows from left to right.
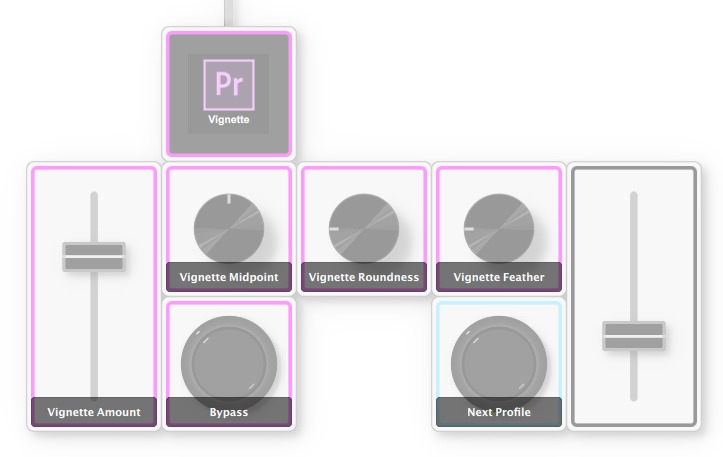
Premiere Lumetri Vignette Palette Profile
In this final profile I’ve assigned all of the pre-built Palette Lumetri Vignette controls, which works quite nicely as a tactile interface. The end fader is not enabled.
Palette Gear After Effects Tutorial
I’m not going to dive into using the Palette with After Effects in this post, but I thought I’d share this excellent review and tutorial from Mickey’s After Effects Youtube channel, which covers both Premiere Pro and After Effects. It’s important to note that Mikey’s review is a little out of date now, in that you can now use the slider/faders in Premiere and there is a great deal more functionality.
What’s helpful about Mikey’s review is that you can see the interaction between the blocks and the interface, as well as pick up a few ideas based on his chosen shortcuts.
Final Thoughts, Tips and Recommendations
Before I wrap up with a few further pros and cons here are a few tips for making the most of the Palette Gear system.
- I would recommend permanently setting up one of your buttons as a ‘next profile’ toggle.
- Make the most of the colour coding options to help you keep track of which profile you’re in.
- When working with a customised keyboard profile in your creative app you might need to manually re-map the keyboard shortcuts (inside Palette) to match your personal settings.
- Having multiple profiles for the same app allows you to map many more functions and simply cycle between your profiles, for greater functionality.
In experimenting with the Palette Gear there are a few things I’d like to see changed.
For example, in some situations the fine grain control is too delicate. When adjusting the X and Y position of in the Motion Properties, the fine adjustments will have you spinning the dial for ages to move your image a few pixels on screen. But holding down the dial and turning, activating the ‘coarse controls’ for bigger adjustments, is a little cumbersome.
Therefore my suggestion would be that you could access a preference, per dial, to dictate whether holding down the dial set’s it to coarse or fine adjustments.
UPDATE – Rashid from the Palette Team got in touch to share a handy tip on using dials in almost any Adobe Creative Cloud app with Palette.
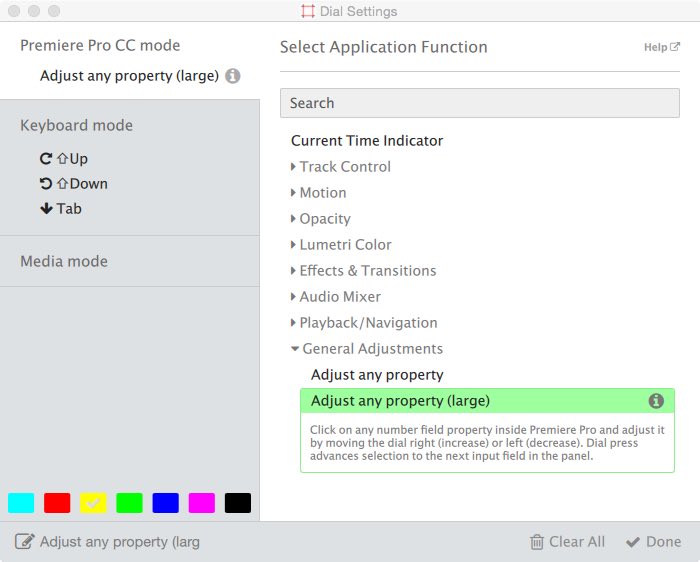
After you select a number property field within Adobe CC, you can adjust it with the dial. Then you can press the dial to toggle the selection to the next number field. In this way, you can actually adjust numerous properties just with one dial function.
Having tested this in Premiere it’s actually a great way to make bigger changes to the Scale and Position parameters with ease.
Another ‘wish’ is that when assigning Scale (again in Motion effects) to a Slider that it was calibrated so that the mid point of fader was 100% scale, which would enable you to enlarge the image past 100%, not just go from 0-100.
It’s worth noting that different modules can have different effects on the same attribute. So the Scale parameter will only go from 0-100 on a Slider but will scale infinitely on a dial.
Another suggestion would be to enable keyboard macros (multiple keyboard shortcuts combined in a sequence) to really boost the power of what you can do.
Lastly it would also be nice to be able to change the custom colours to anything you’d like, rather than the pre-defined few colours. But that really is a triviality.
So to sum up, is the Palette Gear Expert kit worth $299?
Yes and no. Yes it will be if you set it up in a smart enough way to really maximise the benefit of what it can achieve, but not if you simply remap keyboard commands to it that are actually better off staying as just that, keyboard shortcuts.
But, when you leverage the real power and value of the interface, like with the Lumetri Exposure example, Palette can save you a great deal of time and effort and make working in your creative apps much more enjoyable.
The Premiere support has only just left beta status so it’s great to see it advancing along with the latest updates in Premiere itself. The Palette team are only just getting started and have lots more exciting ideas in development so it’s worth sticking around to see how things progress. As the community of user’s grow, we will definitely see more hacks, inventions and shared profiles becoming available, to everybody’s benefit.
Personally, I’m hooked.
Buy Starter Kit on B&H ($199) | Buy Expert Kit on B&H ($299) | Buy Professional Kit on B&H ($499)



Does the Palette work with DaVinci Resolve 12, out of the box? if not, can it be configured to do so?
Resolve isn’t one of the apps that Palette ships with a preset for and it doesn’t have native integration in the way that Premiere does for example.
You can still create a set up based on mapping keyboard shortcuts to it though.
This seems really amazing. I’ll probably need to find someone who has one so I can demo it myself before I’d get one. Have they announced or teased any upcoming modules? It seems like a joystick like the old DVEs had that controlled all direction and had a rotating knob on top would be a natural next step, or just a joystick for maybe moving a layer around.