You should know that since its inception nearly 10 years ago, I’ve been a big fan of Artlist.io.
In 2016, Artlist transformed the industry model for royalty-free production music, offering an all-you-can-eat subscription with unlimited downloads, watermark-free tracks, and high-quality music you actually wanted to use.
And then they did the same for royalty-free stock footage and sound effects.
And then motion graphics templates, LUTS, and custom editing tools.
And then AI-generated voiceovers.
Now they’ve pivoted once again to where the creator industry is headed by embracing the leading generative AI for images, video, and audio, including Kling, OpenAI’s Sora, and Google’s Veo models.
And best of all, you only need one monthly subscription to access all of this!
Update: Artlist AI Toolkit
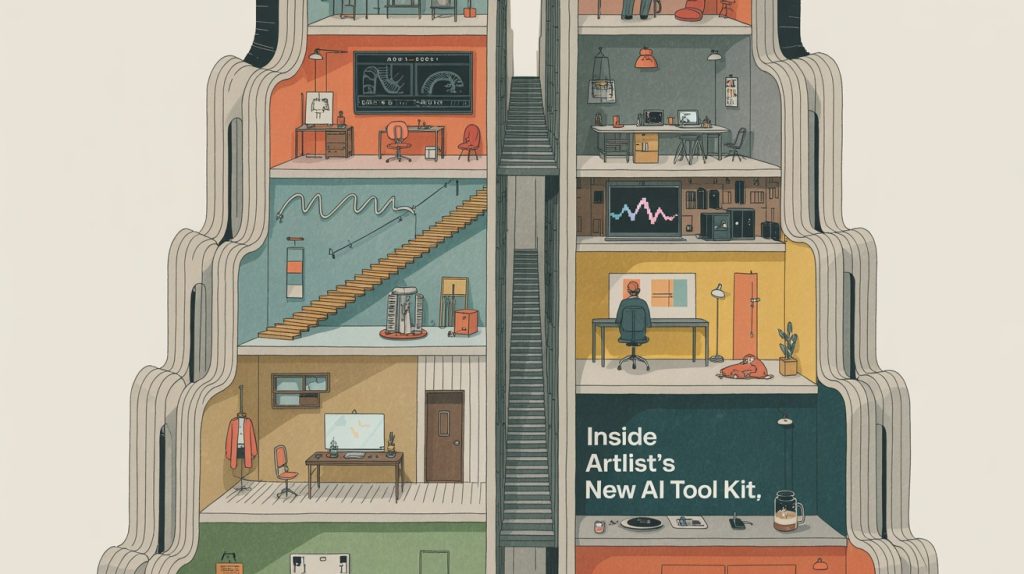
Artlist has launched a new AI toolkit that brings all its AI tools into a unified workflow. They’re building towards making Artlist into the best one-stop-shop AI-creator platform online.
There’s a way to go down that road, but I explore their ambitions and initial launch in more detail here.
Plus, I stress-test their (actually very impressive) first in-house image generation model, Artlist Original 1.0.
I also give you a credit cost comparison of all their supported third-party image models, and argue why you shouldn’t throw Nano Banana Pro at everything.
Inside Artlist’s New AI Toolkit
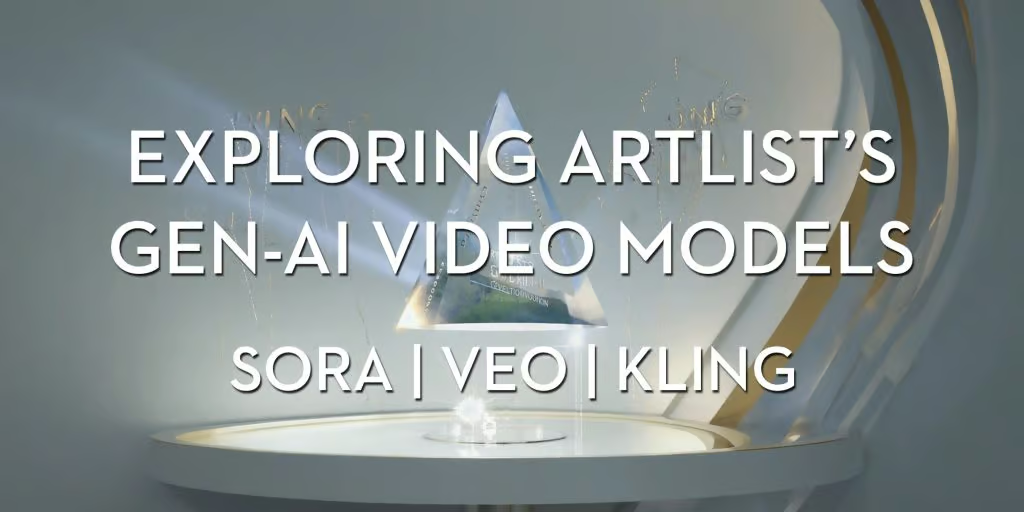
Artlist’s Gen AI Video Models Explained
This everything-under-one-roof approach is especially great for anyone living and working in a country that doesn’t yet have direct access to the latest Gen-AI video models like OpenAI’s Sora 2 or Google’s Veo 3.
It’s really great for anyone who doesn’t want to pay for seven different subscriptions just to get their day-to-day creative video editing work done.
But which Gen-AI video model should you use and why?
In this sponsored post, I’ll walk you through all of the different AI tools Artlist has to offer with a special focus on their generative AI video tools.
We’ll cover:
- What each AI video model is best for.
- Simple AI video principles beginners need to understand.
- A step-by-step guide to generating AI videos.
Artlist’s suite of AI-powered tools includes:
- AI-powered search of their massive music and stock libraries
- AI-generated voiceovers in multiple languages and accents:
- Text to voice
- Voice to voice
- Voice cloning
- Voice effects
- AI Image creation
- Artlist Original 1.0
- Nano Banana Pro
- Nano Banana
- Kling 01 Image
- Kling 03
- Kling 3.0
- GPT Image 1.5
- Flux Pro Ultra
- Flux 2.0 Pro
- ImagineArt 1.5
- Seedream 4.5
- Imagen 4.0 Ultra
- Ideogram v3
- Wan 2.6 Image
- Hunyuan v3
- Z-Image Turbo
- AI Video generation
Currently, Artlist offers these Gen-AI video models with their latest versions first:
- Kling
- 03 Pro (NEW)
- 3.0 Pro (NEW)
- 3.0 Standard
- 01 Video (only Image to video)
- 2.6 Pro
- 2.5 Turbo Pro
- 2.1 Master
- 2.1
- 1.6
- Sora (OpenAI)
- 2 Pro
- 2
- Google Veo
- 3.1
- 3.1 Fast
- 3
- 3 Fast
- Hailuo (NEW)
- 2.3 Pro
- 2.3
- 2.3 Fast
- Seedance
- 1.5 Pro
- 1.0 Pro Fast
- Wan 2.6
- LTX 2.0 Pro
Before we go any further, if you want to know what I, a professional video editor, think about this AI-enabled world we’re sliding into, take the time to read through this carefully hand-crafted essay: #433 – How to Become Great in the Age of AI
Don’t worry, there are funny gifs and memes sprinkled throughout…
TLDR: The future belongs to those who read the original sources.
Budget Your Credits
One thing to be aware of when choosing between the models is the difference in price, charged in credits, for each one.
The Artlist MAX base plan includes 7500 credits per month, but you can pay to increase this to 120,000 credits per month if you wish.
Here’s what using each AI video model generation will cost you:
| Video Model | Duration | Resolution | Credits |
|---|---|---|---|
| Kling 03 Pro (audio) | 5 seconds | 1080p | 3000 |
| Kling 03 Pro (mute) | 5 seconds | 1080p | 2500 |
| Kling 03 Standard (audio) | 5 seconds | 1080p | 2500 |
| Kling 03 Standard (mute) | 5 seconds | 1080p | 1750 |
| Kling 3.0 Pro (audio) | 5 seconds | 1080p | 3500 |
| Kling 3.0 Pro (mute) | 5 seconds | 1080p | 2500 |
| Kling 3.0 Standard (audio) | 5 seconds | 1080p | 3000 |
| Kling 3.0 Standard (mute) | 5 seconds | 1080p | 1750 |
| Kling 01 | 5 seconds | 1080p | 1500 |
| Kling 2.6 Pro (audio) | 5 seconds | 1080p | 1250 |
| Kling 2.6 Pro (mute) | 5 seconds | 1080p | 750 |
| Kling 2.5 Turbo Pro (mute) | 5 seconds | 1080p | 750 |
| Kling 2.1 Master (mute) | 5 seconds | 1080p | 2500 |
| Kling 2.1 | 5 seconds | 1080p | 1500 |
| Kling 1.6 | 5 seconds | 1080p | 500 |
| Sora 2 Pro (audio) | 4 seconds | 1080p | 3800 |
| Sora 2 (audio) | 4 seconds | 720p | 800 |
| Veo 3.1 (audio) | 4 seconds | 1080p | 2000 |
| Veo 3.1 (mute) | 4 seconds | 1080p | 1200 |
| Veo 3.1 Fast (audio) | 4 seconds | 1080p | 1120 |
| Veo 3.1. Fast (mute) | 4 seconds | 1080p | 700 |
| Seedance V1 Pro | 5 seconds | 1080p | 1500 |
| Wan 2.6 (audio) | 5 seconds | 1080p | 1500 |
| Hailuo 2.3 Pro (mute) | 5 seconds | 1080p | 1250 |
| Hailuo 2.3 (mute) | 6 seconds | 768p | 900 |
| Hailuo 2.3 Fast (mute) | 6 seconds | 768p | 600 |
| LTX 2.0 Pro | 6 seconds | 1080p | 900 |
| Grok Imagine | 5 seconds | 720p | 875 |
Doubling the length of the shot will double the credit cost. Toggling off audio (if possible) will reduce your costs.
For example, a 10 second clip with Kling 2.6 will cost you 2500 credits with audio and 1500 credits without audio.

If you run out of credits (which it is easy to do!) you can always purchase more, but these will be added as a recurring monthly expense.
It would be nice if you could buy additional credit packs as one-off expenses and keep track of your spend on a per-project basis, so you can pass on the cost all of the credits you’ve used.
If you’re a freelancer, your monthly subscription is probably a tax-deductible business expense.
AI Video – Kling Vs Sora Vs Veo
When it comes to comparing the different video models, the best thing you can do is try each of them yourself using your own prompts, reference images and projects and generating the same idea in each model.
This is because each generation will be unique to the model, the prompts and the references. That said, watching videos like this one from Dan Kieft, and the others in this post, will give you a solid overview of the general capabilities of each model.
You’ll notice that Dan is also using Artlist to generate his videos, as it’s so handy to have multiple video model options in one place.
So which AI video model is the best?
This isn’t a trick answer, but they’re all the best and the worst – at different things and in different situations, depending on the topic and training data available to each model.
This is one of the main challenges with AI-generated video – you never know exactly what you’re going to get, and you can burn through a lot of credits trying to get to what you want.
So it’s an impossible question to answer with any consistency.
But, based on Dan’s tests in the video above, and my own experimentation, here are some overall observations:
Best Overall — Kling 2.6 probably delivers the best all-round model for straightforward shots at affordable credit costs. It handled the skateboard physics test really well and can deliver very compelling visuals.
But it struggles in more complex situations such as the egg-cracking scene and the car-to-robot transformation shot. It also has the weakest audio generation quality in some situations, but excels in others, like the multi-person dialogue scene in the Artlist video in the step-by-step guide section below.
Best Sync Sound — Google Veo 3.1 delivered the best sounding videos consistently and produced some convincing UGC-style content with audio. Veo also failed in the complex physics skateboard scene.
Best visuals — While limited in some situations due to the ‘real people’ restrictions, Sora 2 Pro (occasionally) delivers some of the most convincing visuals and audio, such as in the car-crash news report and the penultimate multi-shot action scene examples in the video below.
This video from Dom the AI Tutor also showcases the various strengths and weaknesses of each model in different situations. Useful to see which models adhere best in for each type of shot.
Quick Tips and New Features
Here are a few tips and useful things to know that I learned while putting this post together.
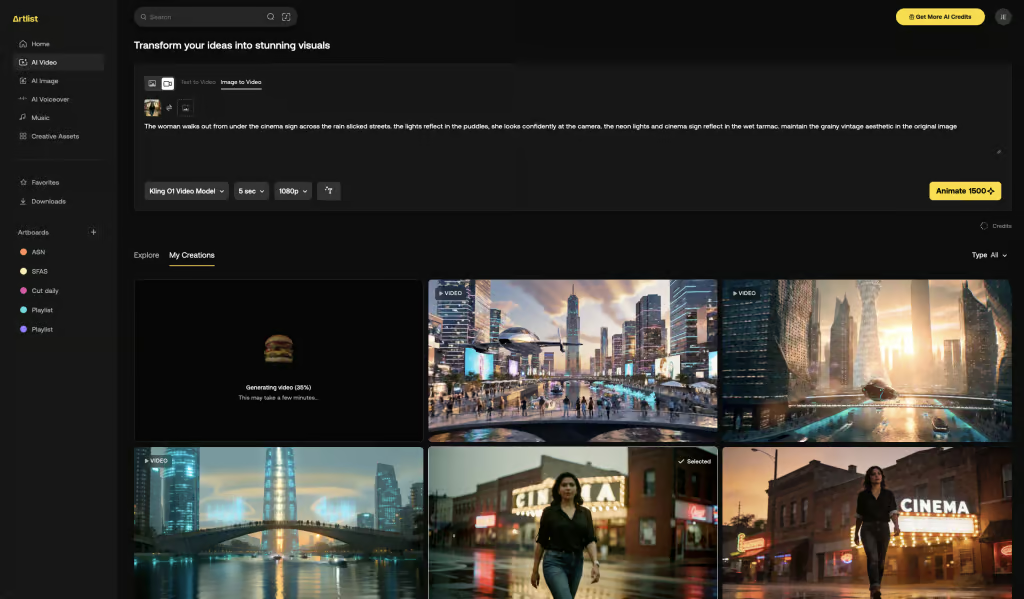
Kling 01 needs a starting image reference for the prompt, so you can’t generate video with it from a text-only prompt.
Sora doesn’t allow the use of realistic people as references to prevent nefarious use of the tool, so you’ll need to take that into consideration if you want to use that model for specific use cases.
Pro Tip — Choose your model and settings before you enter your prompt. Otherwise, if you switch your selected model, currently, the Artlist website will lose your prompt.
Kling 01 New Features:
- Kling 01 can now use start and end frames to guide your shot progression
- Kling 01 supports up to 7 reference images (e.g. costumes, props, locations)
- Kling 2.6 now includes sync audio generation to deliver complete shots
- Kling 01 and 2.6 maintain large text elements accurately.
One benefit to using Nano Banana Pro (also included in Artlist) to create your starting reference images for your video generations is that it now delivers much more detailed images, better prompt adherence and more consistent character generation across multiple images.
Prompt Tip — When describing your camera movement, specify no morphing between reference images, so that it doesn’t inadvertently create unintended transitions.
AI Video Creation For Beginners
If you’re new to this, which most people are, there are a few guiding principles that will save you from wasting your credits and time on creating that next viral AI video.
In the next month or two, I’ll share some more tips and tricks for incorporating AI-generated assets into professional editing projects, here I’m thinking of set replacements, generating missing close ups, and other fix-it-in-Post solutions.
Story matters most: While it’s cool that you can create ‘anything’ you can dream of, this actually gets old pretty quickly. What doesn’t get old is storytelling. Focus on the story you want to tell more than how cool it looks.
Think then prompt: To some extent, you never know what you’re going to get with AI, so you need to leave time and credits for experimentation, surprising failures, and delightful surprises.
But if you’re planning a sequence of shots that hold together as one cohesive project, then start by getting a pen and paper to script, doodle and storyboard out your concept before you type any prompts.
Follow a professional workflow:
- Storyboard your shots and transitions
- Create still image to iron out the look and feel of each shot
- Use these as references when generating video clips
- Use start and end frames to tie together multiple shots in sequence
- Use AI to improve the quality of your initial text prompts
- If you get generated audio with your clips consider replacing/augmenting with music and sound effects added in by hand
- Edit your shots for timing, pace and maximum impact.
Use references: Sketch out a quick storyboard on paper to quickly iterate on your ideas and take a photo of it with your phone to use it as a reference for the still frames you first create.
Add in existing references for key elements, such as props, locations, character references and mood board images to combine into your AI-generated still images to establish the world of your project and set the look.
Prompt matters – the content, format and technical details of your prompts matter a great deal, as these (and your reference images) are giving the model all of the specific context it has to work with – other than the generalised mash up of its training data.
Improve your AI-Video Prompts
One of the best ways to learn how to improve your prompts is to read the prompts behind the images and videos in the Artlist ‘Explore’ section. If you see a video you like then read through the prompt and see which parts of it are potentially producing the results you like.
While you can always see the prompt that you used to create something, it would be nice if there was a feature to save other prompts to create a little library in your account.
Prompts can be text-based in natural language or formatted as json inputs. You can use GPT’s from the ChatGPT app to transform your text prompts into json inputs or specialised prompt optimisers like this one from EditingTools.io for Google Veo 3.
Either way, getting AI to improve the initial text prompts you come up with into more AI-friendly or complex versions is a good idea. Or you can try the ‘enhance’ prompt button in Artlist.
One effective test to conduct early on to improve every prompt you write is to generate an image or video with your prompt, then use a prompt optimiser to refine it and compare the results with your own. What do you learn from the differences that you can carry forward?
The models understand filmmaking-specific language such as pans, tilts, dolly, crane etc. so be sure to use these in your prompt when you want to re-create a specific movement.
Step-by-Step Guide to Making AI Videos
This video from the Artlist YouTube channel is a great starting point for learning how to create your first AI-generated videos.
Here’s a quick step-by-step guide you can follow along with to create extended single shots:
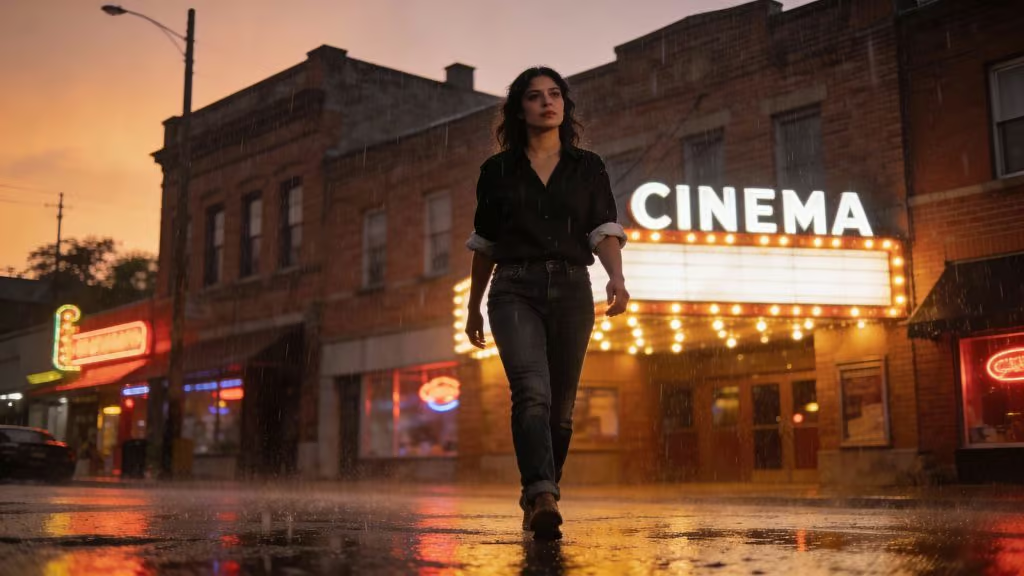
1. Define the Look and Character: Establish the desired look of the character and setting first, this saves time and generation credits later by providing the AI with clear information.
2. Initial Image Generation (Chat GPT): Generate the initial image for the character and scene using Chat GPT or the image generator and model of your choice in Artlist.
3. Enhance Image Realism: Bring the generated image into Nano Banana Pro in Artlist to refine its realism, adding elements like shallow depth of field and realistic skin textures.
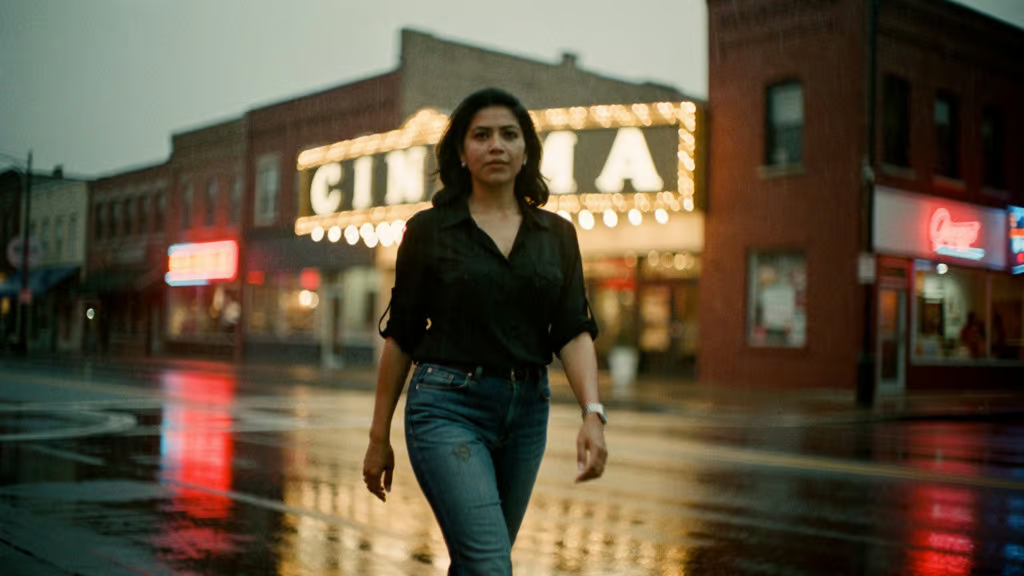
4. Generate Scene Images: Use Nano Banana Pro to generate the multiple different images needed to map out the scenes of the sequence (e.g., character looking at a projection, running, a hallway POV, alien monster reveal, etc.).
5. Select First Start and End Frames: Select the first two sequential images generated in Step 4.
6. Prompt Generation for First Transition: Bring the first two start and end frame images into Chat GPT to get it to forumlate a detailed prompt.
7. Input Specific Camera Movement Prompt: Input a descriptive prompt focusing on camera movement and ensuring no unwanted transitions occur.
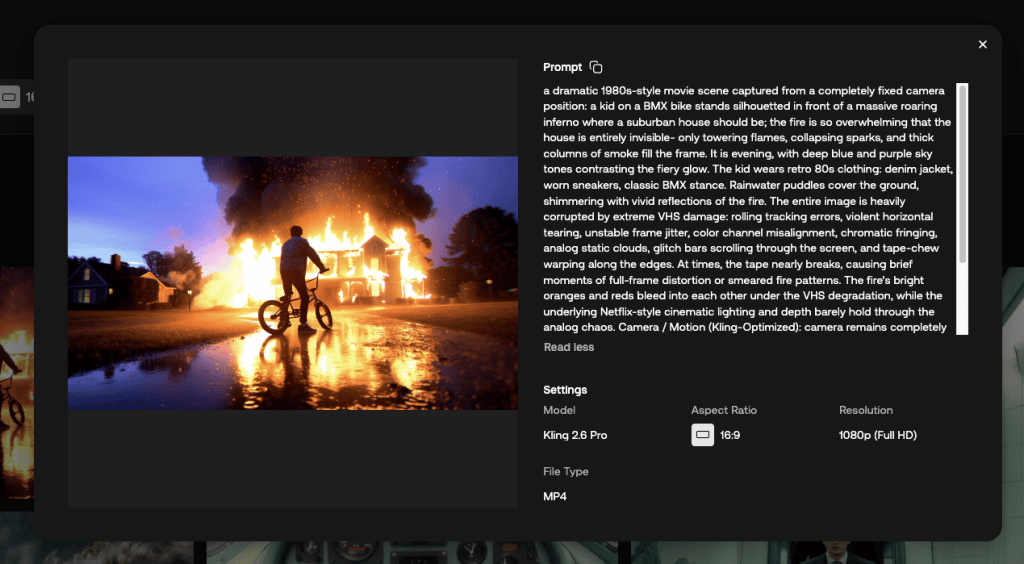
The prompt was:
Use these two images for start and end frame for Kling 01 I want a slow orbit and push into the right. There should be no morphing of the background Just move the camera to reveal the different background.8. Copy Prompt and Prepare Generation: Copy the detailed prompt generated by ChatGPT.
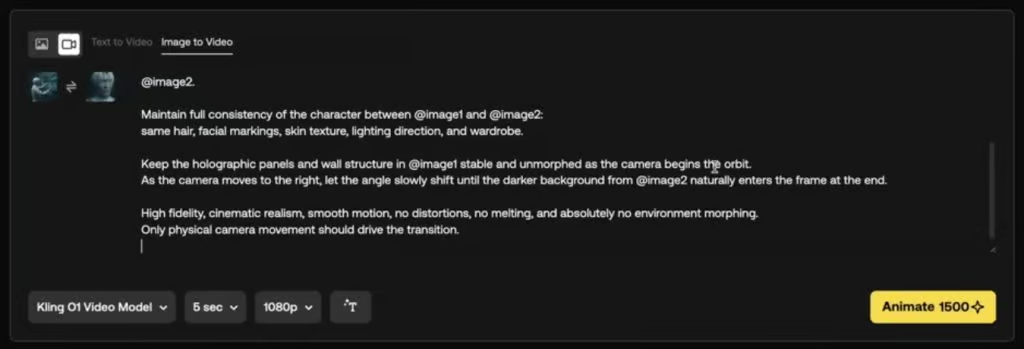
9. Generate First Video Clip: Navigate to Artlist and use the Kling 01 model, uploading the two images as the start and end frames. Paste the copied prompt, set the video length (e.g., 5 seconds), and hit animate.
10. Select Next Start and End Frames: Use the second image from the previous transition as the new start frame, and select the next sequential image as the new end frame.
11. Prompt Generation for Subsequent Transitions: Return to Chat GPT and type a prompt describing the action and camera movement for the next clip.
The prompt used for the second transition was:
This is the start and end frame for Kling 01. Have image one have an emotion of slight fear on his face Then bring up the projection. There should be no morphing only a slight camera fan to the right.12. Repeat Generation: Continue repeating steps 10 and 11 until all necessary images for the entire sequence have been animated into separate video clips.
13. Assemble Clips: Bring all the generated video clips into your editing software to stitch them together.
14. Adjust Speed and Flow: Address any resulting “weird speed cuts” (where the end of one clip differs in speed from the beginning of the next) by using speed ramps to ensure everything flows smoothly.
15. Final Polish: Apply a colour grade, grain and sound effects to complete the sequence.
Hit the comments
What do you make of all this? How have you successfully used AI-generated videos in a professional project? Do you have any cool prompting tips and tricks to share?
Hit the comments and let me know!