Understanding FilmConvert’s New Nitrate Colour Grading Plugin
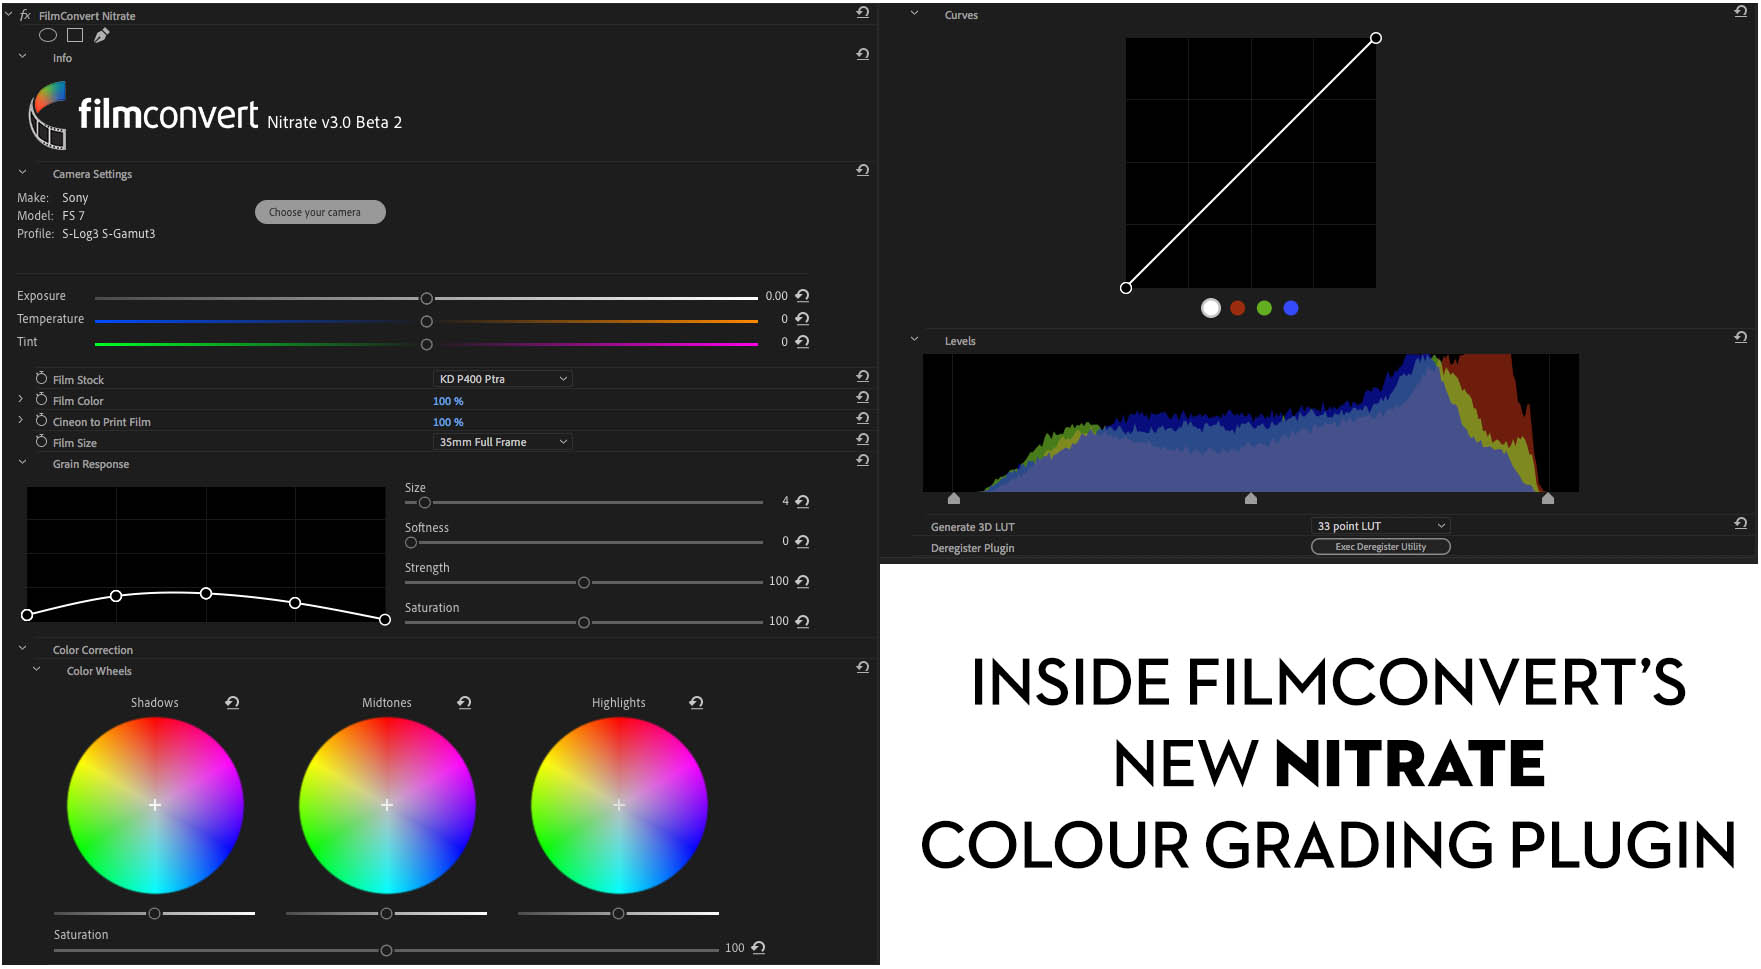
FilmConvert have just launched their eagerly anticipated new and improved film emulation colour grading plugin, Nitrate, and in this post I take a look at what’s new, how it works and get the inside story of what went into making this vastly improved video editing software-based colour grading tool.
I’ve previously written a detailed post on creating a real-film look with FilmConvert’s original plugin, back in 2016, which will take you through the fundamentals of what FilmConvert is and does. But for the sake of brevity, FilmConvert and the new updated Nitrate plugin, allows you to quickly give your footage the emulated look of specific film shooting and print stocks, including a range of film grains, in a couple of clicks.
These are all tailored to the specific source footage you’re working with, via free camera profile pack downloads, to ensure you’re getting a nuanced look, from sensor to screen. Nitrate doubles down on this giving you a whole new Cineon Log workflow, greater precision controls and an enhanced user interface.
During the launch week existing FilmConvert owners will be able to upgrade their license for $69, and new customers will get 20% off all plugin and Bundle purchases.
After that FilmConvert have been kind enough to offer my readers the chance to save 10% across their entire site, with the coupon code ‘ELWYN‘ or click this link to have it automatically applied.
Using FilmConvert’s new Nitrate plugin
FilmConvert’s Nitrate plugin is essentially a massive overhaul to their original FilmConvert film emulation colour grading plugin, bringing with it a new name, and a host of new workflows and new features.
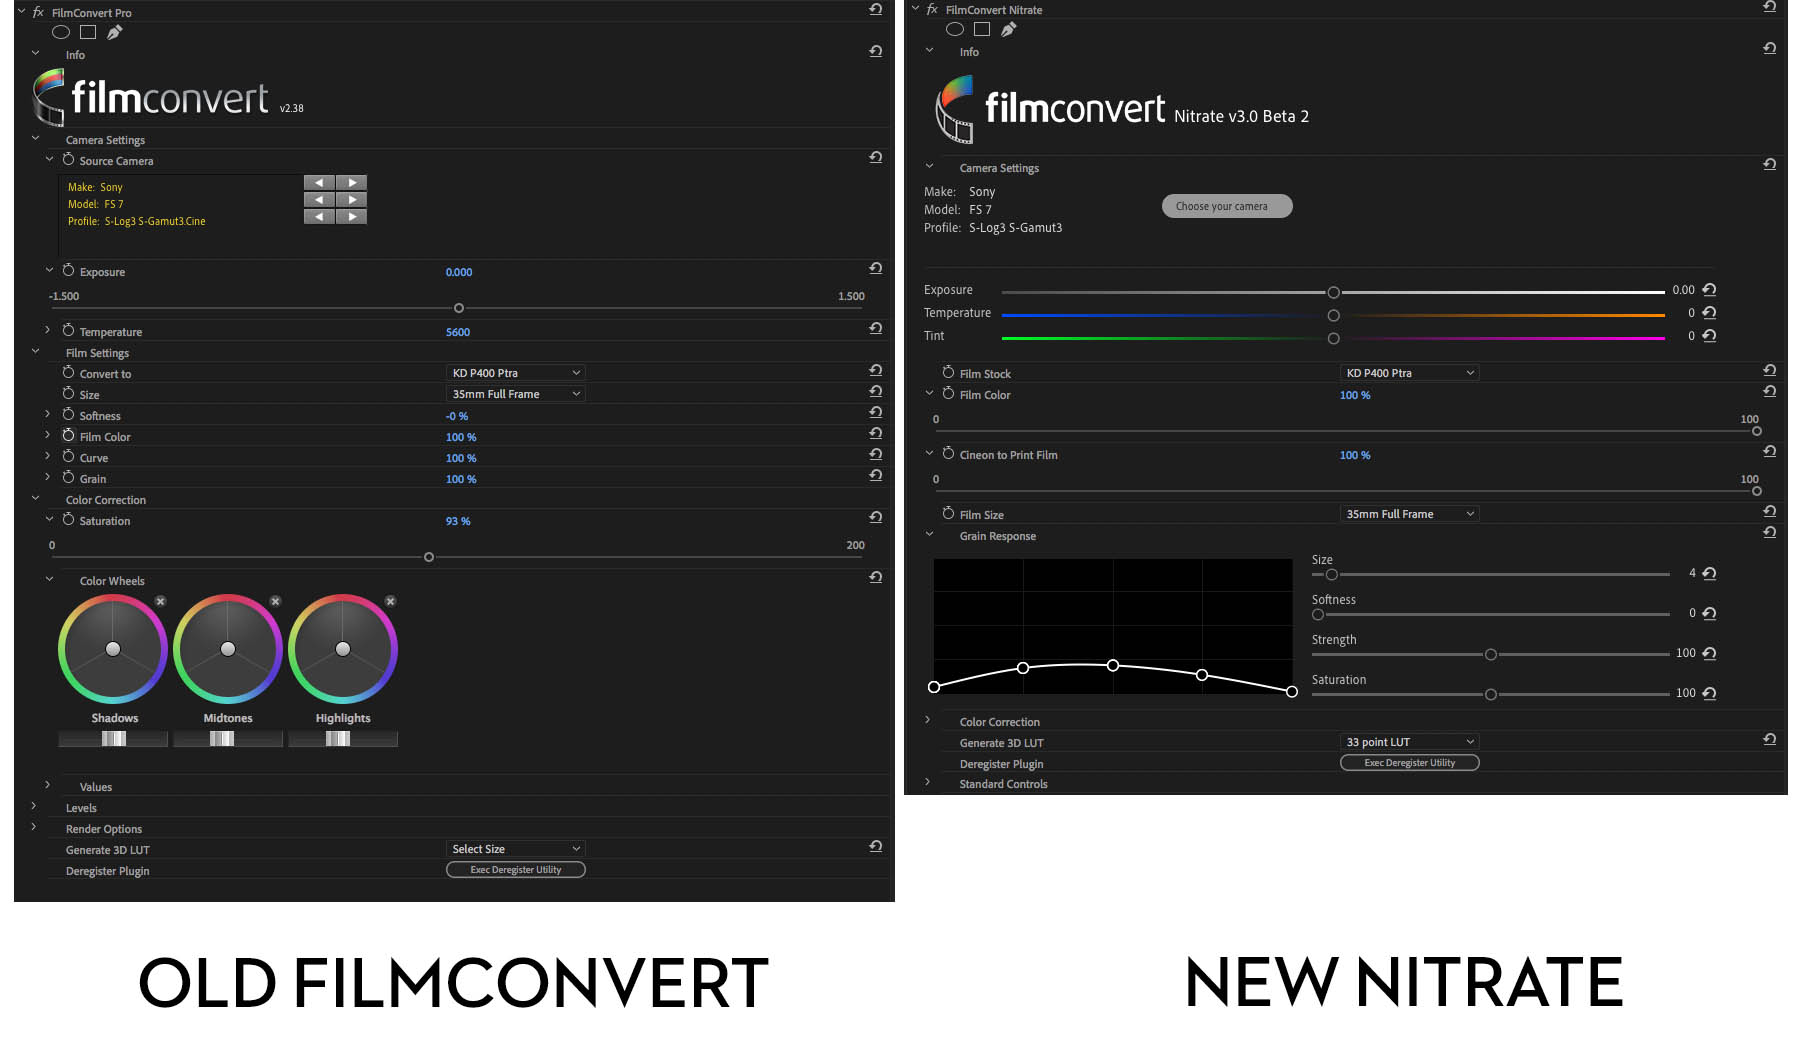
As you can see in the comparison image above, this makes it a much more engaging and versatile plugin, helping you to create cinematic, filmic looks in just a few clicks, with much more finesse than before.
Nitrate is currently only available for Adobe Premiere Pro and After Effects users, although the FCPX and DaVinci Resolve versions should be available by the end of the year.
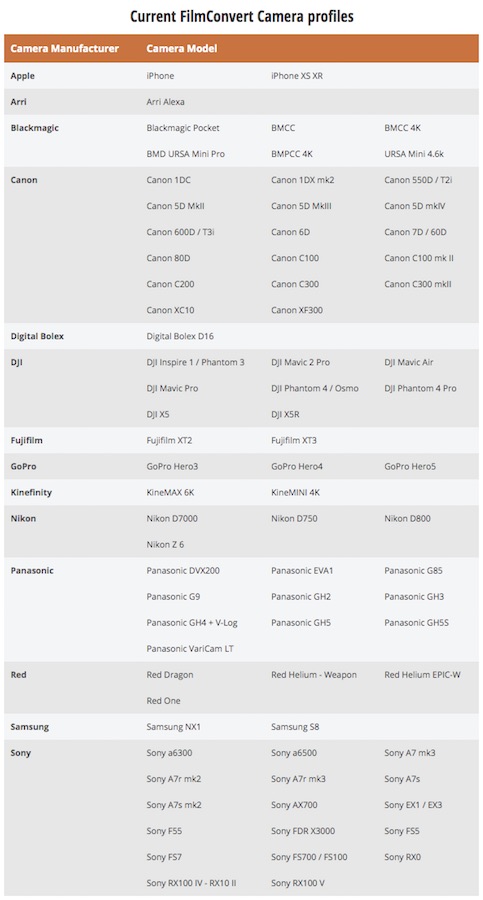
It supports all the same camera profiles as the original FilmConvert, which now stands at over 80 unique profiles including cameras such as Apple iPhones, fistfuls of cameras from Canon, Panasonic and Sony, as well as the workhorse cameras from ARRI, Red and Blackmagic Design.
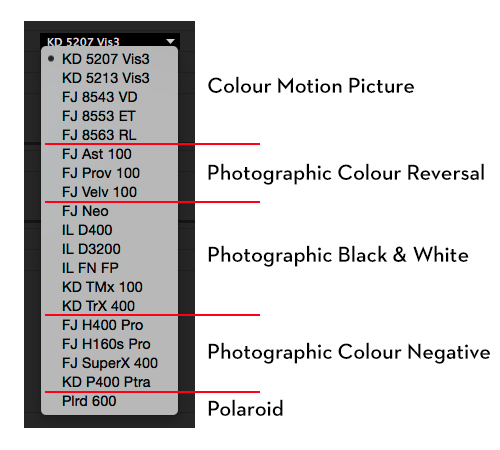
As with FilmConvert, Nitrate features 19 different film stocks to choose from, but now they are available in a Cineon Log workflow, which means that “Nitrate will process all colour changes in Log without clipping or crushing any information prior to applying the film stock.“
This log workflow also has the benefit of allowing you to make changes to the exposure, white balance and tint, as if they were made in-camera and in that specific camera, before applying and adjusting the film stock emulation itself.
It also means that, unlike the old FilmConvert, you’ll no-longer be parsing your Log footage through an sRGB colour pipeline, so you’re maintaining the full dynamic range in your source footage as you create your bespoke grade.
The new and improved film grain controls are a good example of how the improvements to the features and the user interface make for a more enjoyable and satisfying experience.
On the left the Grain Response curve allows you to increase or reduce the grain in specific areas of the image allowing you to craft your own response curve as you see fit. The sliders on the right also give you control over the size, softness, strength and saturation of the grain particles themselves.
Before this you also have a selection of 8 different film grain styles ranging from (the largest) 8mm through to (the finest) 35mm full frame. So there’s plenty of scope for refinement now.
A few thoughts after playing with Nitrate
Having had access to the private beta of Nitrate, I’ve had a bit of time to play with it, it’s a welcome improvement to the original FilmConvert plugin.
In my previous review of the original FilmConvert plugin I gave a step-by-step guide on how to use the plugin, as well as a few tips and tricks on getting more out of it. Including managing your camera profiles, saving your bespoke looks and much more. These all still stand for Nitrate.
To summarise my thoughts on Nitrate it retains the incredible ease and simplicity of creating excellent looking grades, based on their detailed film emulations.
The power of these are in the quality of the default settings, which delivers striking, grainy textured images out of the box.
The new Log workflow really is a great improvement, especially given that 90% of the footage I work with these days is delivered as Log, (and I’m sure it’s similar for you) which not only means that the plugin proves it’s worth more readily, but that you aren’t fighting against the sRGB constraints of the original plugin.
I feel like I will use the plugin a lot more now as a result.
The greater depth of control was welcome, especially with the detailed grain controls which really helps to balance out the end result such that you can produce very subtle grainy looks, without looking like you’ve slapped on some heavy grain to
As a quick aside, my currently preferred method of using FilmConvert is to balance out my individual clips first, using the Lumetri Color effect, and then applying a single FilmConvert Nitrate across the whole project on an adjustment layer.
Incidentally, the plugin was pretty responsive on my 2013 Mac Pro and happily, very accurately with my Wacom tablet too, which is not always the case inside Premiere Pro.
Both FilmConvert Pro and Nitrate are GPU-accelerated. Nitrate adds support for Metal, in addition to CUDA and OpenCL. Although you may need to change your render mode in Premiere to make sure it uses the correct GPU-acceleration.
I would love it if they could include further film stocks, but 19 is a great spectrum of aesthetics and the new greater level of control means that you can create an even wider range of grades anyway.
Nitrate is a really valuable update which takes FilmConvert’s offering to a whole new level. If you’re an existing user you should definitely take advantage of the launch discount.
Nitrate Launch Discount
Normally Nitrate will cost $179 for a single platform or $249 for the entire bundle.
However, during the launch week existing FilmConvert owners will be able to upgrade their license for $69, and new customers will get 20% off all plugin ($139) and Bundle ($199) purchases.
If you’re reading this after the fact, then fear not. FilmConvert have kind enough to offer my readers the chance to save 10% across their entire site with the discount code ‘ELWYN’ or click this link to have it automatically applied.
Making FilmConvert’s New Nitrate Plugin
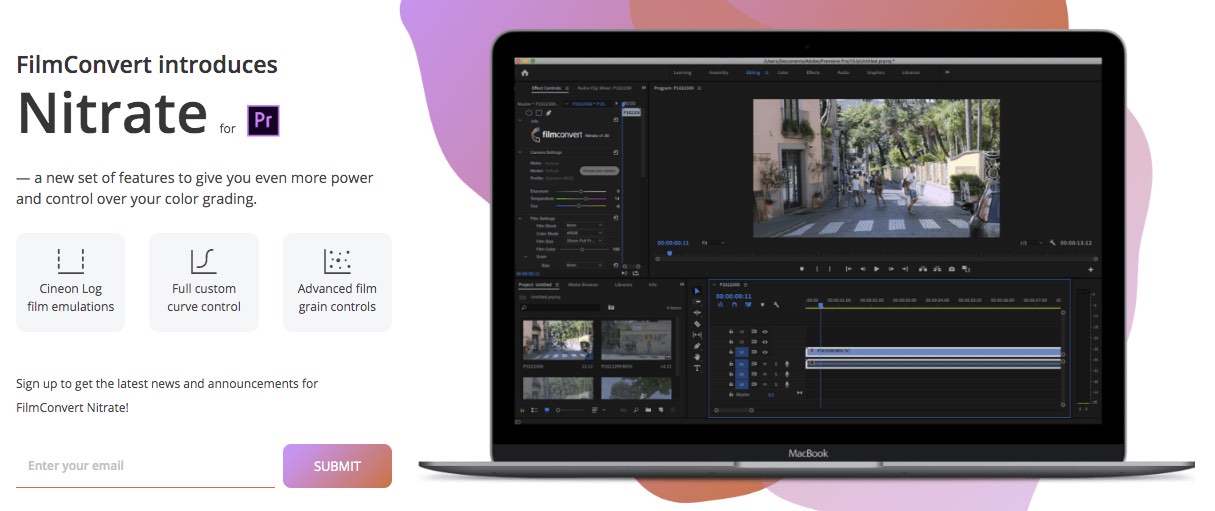
FilmConvert’s Senior Marketing Manager, John Parker was kind enough to answer some of my questions over email, to get a bit more detail on the story behind Nitrate.
Why did FilmConvert want to make Nitrate when you already have a successful film emulation plugin?
When FilmConvert first came out, most of our users were using the Canon 5D Mark II, which didn’t have Log output – most people were capturing in sRGB, and FilmConvert was originally designed to work with sRGB-originated footage. FilmConvert does give good results on Log footage too, but it will convert your footage to sRGB, which naturally compresses your highlights and shadows.
Over the past few years there’s been a big shift in digital cinematography towards acquiring in Log and spending more time colour grading in post. Now nearly every significant camera has Log output, and capturing in Log is best practice in most situations (as well as much easier, with on-board LUTs and viewing monitors becoming more common).
Nitrate supports native Log workflows and provides a fast, easy-to-use workflow for maximising the potential of your Log footage, giving users much more power and flexibility over their colour grading.
How long did it take and what were some of the challenges involved? How were these overcome?
Nitrate took around 18 months to complete, though it built on a lot of the R&D we’d completed for our camera-matching tool CineMatch.
The biggest issue was finding facilities to rescan our film prints for the R&D. In the time FilmConvert has been available, nearly all of the film processing labs have shut, and it’s also getting increasingly difficult to source motion film stock.
Beyond that, we had to put in a lot of work re-processing an enormous amount of data from our camera packs, and ensuring the data would work with the new Log workflow.
How does it work and how is that different to the original plugin/other solutions?
FilmConvert Nitrate has been substantially rebuilt from the previous FilmConvert Pro plugin.
If your original footage is shot in Log, Nitrate will process all colour changes in Log without clipping or crushing any information prior to applying the film stock. This makes the plugin behave quite differently, and users will notice all the colour controls operate in a far more natural, intuitive way.
The white-balance, exposure and tint controls now work native to the specific camera profile you’ve chosen, so when you make adjustments using these controls in Nitrate, it’s like you had made the adjustments in-camera while you were shooting.
We’ve also totally revamped the film grain controls. Film grain in FilmConvert Pro was a very blunt affair, without much control – you could choose the grain size, and strength, but that was all.
In Nitrate, we’ve added a film grain curve, which allows you to control the appearance of the grain in the shadows, mid-tones and highlights independently, and also control the saturation and colour information in the film grain.
What did you learn/change from running private/public beta program?
Users really love being able to enter precise, numerical values for controls! We redesigned the entire UI to make the controls more accessible, but in the end most people wanted the ability to enter a specific value for parameters such as saturation.
We also tweaked the names of some of the controls to make their function more obvious – the ‘Cineon to Print Film’ slider didn’t exist in the original design, and went through some evolution before it reached its final version.
Why should existing film convert users consider upgrading to Nitrate?
If you’re a regular FilmConvert user, upgrading is a no-brainer. All the existing functions of FilmConvert are preserved in Nitrate, but we’ve given you much more power and control over your grade, and made it even easier to use.
What’s special about Nitrate that would persuade someone to use it for the first time?
The look of film has become part of our collective imagination over the past 120 years of cinema history. Film images have a timeless authenticity about them, something that people connect with almost unconsciously. Short of actually shooting film, we think Nitrate is the closest you can get to reclaiming that aesthetic and heritage.
The second, more pragmatic reason, is that Nitrate will help speed up your colour-grading process by giving you an immediate, usable image from your Log footage right out of the box.
You don’t need to hunt around for LUTs or apply a huge number of manual adjustments to every clip – just select your camera profile and film stock, and you’ll have a beautiful, filmic-looking image right out of the box.
What camera packs does it currently support?
FilmConvert Nitrate supports all of the same camera packs as FilmConvert Pro, and the camera packs on the website are backward-compatible with FilmConvert Pro so your old projects will still work. Customers will need to download new Nitrate-enabled camera packs for free from our website to get the Nitrate support.
What host applications does it run in and when will the others become available?
Nitrate is available for Adobe Premiere Pro and After Effects this week, with support for FCPX and DaVinci Resolve coming by the end of the year.
Check out Nitrate for yourself in detail over at FilmConvert.com

