DaVinci Resolve 12.5 Grading Tutorials
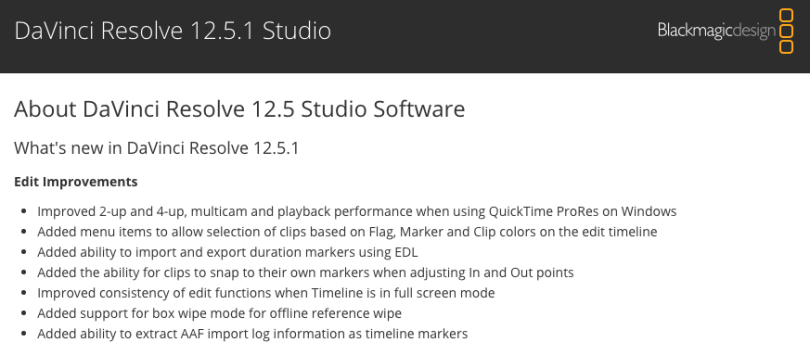
Blackmagic Design is relentless in it’s pursuit of improving DaVinci Resolve and especially it’s editing capabilities. Hot on the heels of the 12.5 release comes the latest 12.5.1 update. You can see all the new additions in the official release notes, and here are a handful of highlights.
- Added support for ProRes decode on Windows
- Added menu items to allow selection of clips based on Flag, Marker and Clip colors on the edit timeline
- Next node and previous node operations now loop around the node graph
- The ‘displayed’ node graph now automatically updates when the current still is changed
- Added ResolveFX Generate Color (GPU accelerated)
- Added ResolveFX Tilt-shift Blur
- Added support for anamorphism in ResolveFX Lens Blur (Studio version)
- GPU acceleration support for ResolveFX Lens Flare (Studio version)
In this free video from the colorist subscription site, Mixing Light.com you can hear colorist Patrick Inhofer’s thoughts on the latest update, in which he pulls out his favourite features and those that will have the biggest impact on his day-to-day colour grading.
There are so many new features coming out that even trainers like Patrick can’t keep up to what’s been added in 12.5 and what’s in the 12.5.1 update. Either way, there’s a lot of new features to keep up to date with!
UPDATE – Resolve 12.5.2
DaVinci #Resolve 12.5.2 "Added ability to copy local grades to remote" Cool, I needed that recently
— Jamie Dickinson (@dickij10) September 9, 2016
So hectic is the pace of Blackmagic Design’s updates, they’ve already released another dot update at this year’s IBC just a week after I originally wrote this post.
It’s also worth mentioning that BMD also announced their recent acquisition of both Ultimatte and Fairlight which means they will continue to deepen their expertise in both audio and live keying.
This post on Redsharknews fills in some of the few available details.
It’s a much smaller update than the 12.5 or even 12.5.1 update but it contains the following improvements.
- Added support for new URSA mini camera metadata in RAW files.
- Added support for Color Space tags on QuickTime export.
- Added support for Fusion Connecton Linux.
- Added ability to filter timeline on Color Page based on clips that have OFX applied.
- Added support for up to 24 audio channels on the Edit and Deliver Page.
- Added support for manually enabling and disabling GPUs in Preferences.
- Added support for Display Name on ALE export.
- Added support for Apply Grade and Append Node Graph in the main menu.
- Added the ability to clear tracking data for the current Power Window.
- Added support for OpenCL on NVIDIA cards on Microsoft Windows.
- Added ability to copy local grades to remote.
- Added additional utility functions in DCTLs.
- Added support for Date Created and Data Modified for timelines when using Smart Bins.
As these updates continue to roll out at some point it will be pertinent to ask yourself, is it time to upgrade?
This quote from the 12.5.2 release notes serves as a useful reminder of the widening gap between the free and studio versions.
If you need features such as support for multiple GPUs, 4K output, motion blur effects, temporal and spatial noise reduction, HDR tools, Lens distortion correction, de-interlacing, Resolve FX Lens Flare, Lens Blur and Film Grain, 3D stereoscopic tools, remote rendering, an external database server and collaboration tools that let multiple users work on the same project at the same time, please upgrade to DaVinci Resolve 12.5 Studio.
In this 25 minute presentation from the Supermeet at NAB 2016 colorist, author and director Alexis Van Hurkman, walks through ‘some’ of the new features in the massive 12.5 update.
Just as a reminder there were over 100 improvements to the editing in Resolve in the 12.5 update and at least 60 updates to the colour grading tools, plus a bunch of others that took the running total to 250.
If you want to take a more systematic tour of every single new feature in the 12.5 update then check out Alexis’ 4 and a half hour training course on Ripple Training.com. I’ve reviewed it in detail in this previous post.
Alexis is fantastic instructor and it’s reassuring to be learning from someone who has not only been using the software for decades as a professional colorist, but also has the inside track with Blackmagic Design, as he is the author of the exemplary and ever expanding User Manual. All this adds up to a deep knowledge and keen ability to navigate the changes and understand how to best use them.
If you’re after a go-to reference manual to the complex world of colour grading from soup to nuts, then check out Alexis’ excellent Color Correction Handbook 2nd Edition.
Free DaVinci Resolve Crash Courses
Colorist and founder of Color Grading Central.com Denver Riddle shared this action packed 12 minute crash course on colour grading in Resolve. If you’re an editor looking to get a quick overview of how to get clips into Resolve, create a look and get them out again, then this for you.
One of the most helpful parts of the crash course happens at about 2.30 in, when Denver overlays the image with the scopes. This is a really helpful way of understanding what the scopes are showing you in both the Waveform and the Vectorscope. This is shortly followed by a great tip on how to white balance a shot very quickly.
Denver moves through things pretty quickly, so if you’re new to grading you might want to stop and start it after each point to take it all in. Another good thing about this tutorial is that Denver has provided a download link, in the YouTube description, so you can grade along with him using the same shots as Pro Res LT files.
One of the most popular posts on this blog is this collection of over 70 free LUTS, which includes some of Denver’s finest from his very popular Osiris, Impulz and Ascend LUT packs.

For another tip on white balancing and fixing problem shots in Resolve, check out filmmaker Noam Kroll’s tip on using colour keys over on Premiumbeat.com.
Noam’s example covers what to do when tackling a shot with mixed lighting in it, and having white balanced for appropriate looking skin tones, how to remove any problematic areas of colour by using Resolve’s Qualifier tool.
As with any qualifier selection, you’ll want to refine things by adjusting the softness, symmetry, and other settings until you have perfectly isolated the problem area. From there, simply use your color wheels to adjust the color as needed. In the scenario described above, you’d likely want to push a lot of warmth into the highlights and midtones, and desaturate things overall.
Casey Faris, a colorist and avid YouTube tutorial creator shares his own beginners guide to using Resolve 12.5 for the first time. You’ll need to be working in Resolve 12.5 to keep up with Casey and also because he refers to some of this favourite new features in the update too.
Casey’s tutorial is much more step-by-step than Denver’s and provides a lot more explanation to what he’s doing at each point. It’s a great watch for anyone who is new to Resolve.
DaVinci Resolve 12.5 Tutorials
For over 100 free bite size tutorials on achieving specific things in Resolve 12 and 12.5 check out the YouTube channel from London based post-house Goat’s Eye View – as you can see we’re on tutorial 78 but there are actually 106 videos in the playlist as some of them are multi-part.
Scroll through the YouTube playlist to find accessible and articulate tutorials from colorist Daria Fissoun, on topics like these and many, many more! It really is a great resource.
- Working with Flags and Markers
- Using Take Selectors
- Motion Tracking with the Cloud Tracker
- Adding a Data Burn In
It’s also nice to have some tutorials presented by a female colorist for once, given that there are actually many women working at some of the highest levels in the industry. As a great example of this check out this making of post on Elysium which features several interviews and articles on colorist Andrea Chlebak. Ps. Andrea graded Elysium on a Baselight.
Colorist Jason Bowdach demonstrates how to use some of Rampant Design’s lens flares in this tutorial on how to add them as an overlay layer. Jason shares some good tips on adjusting the look and movement of lens flares for a more seamless integration into the shot at about 6 minutes in.
DaVinci Resolve also has it’s own new GPU accelerated lens flare effects plugin and in this 2 and a half minute tip Theo from Miesner Media demonstrates how to use it along with the new point tracker.
In this most recent episode of Resolve in a Rush from Alexis Van Hurkman, you can get his take on tracking some of the new effects in Resolve 12.5 into a scene using the built in, and superb, tracker in just under 4 minutes.
Nice video. Hope you have checked out multiGPU accelerated lens flares and ability to track them too! #resolve12_5 https://t.co/n0BREGnlKR
— Rohit Gupta (@rohit_bmd) August 30, 2016
Or you can use the overlay, zoom out, and just drag the Lens Flare to a position outside the frame…. (2/2)
— Rohit Gupta (@rohit_bmd) August 31, 2016
For even more bite size training check out these Resolve in a Rush tutorials from Alexis Van Hurkman. Check out previous episodes in the full YouTube playlist and this previous post on DaVinci Resolve Training.
In this slightly longer Resolve in a Rush episode Alexis walks through several different ways of improving your playback performance. It’s well worth a watch especially if you’re grading on a less-than-ideal machine.
It’s quite detailed though so take the time to work through it point by point, but creating some notes for future trouble shooting would be a valuable resource.
DaVinci Resolve Colour Grading Tips
Mytherapy colorist Dado Valentic shares these excellent micro-tips via Instagram video. For more of these follow @colour.training on Instagram or check out this previous post which has all the other previous tips so far.


