
Adding Closed Captions in Premiere Pro – Fix Common Problems
If you’re new to working with Captions in Adobe Premiere Pro, whether for adding subtitles or closed captions, there are a few things you should know to make your experience as straight-forward as possible.
UPDATE MARCH 2021 – A Whole New Captioning Workflow!
Thanks to the latest updated to Adobe Premiere Pro (2021, 15.0) there is now a completely new captioning workflow and one that actually works!
The previous captions panel is now gone and replaced by a much more useful and functional Text panel and a brand new ‘Subtitle’ track has been added too.
The whole process of importing, working with and exporting captions has been drastically improved, so hopefully you won’t need the tips in the rest of this post going forward, but if you do, then dive on in.
The Premiere Gal has a really great and detailed tutorial on everything you need to know about the new Captions workflow in Adobe Premiere Pro 2021, in this 15 minute video.
Jason Levine, one of Adobe’s chief evangelists, delivers a deep dive, including some really helpful keyboard shortcuts and insider details, into using the new Captions and Subtitles panel in Adobe Premiere Pro CC 2021.
Here are some handy timestamps for the tutorial:
- 00:21? The Captions Workspace
- 00:48? Keyboard Shortcuts for Captions
- 01:45? Creating a New Captions Track
- 02:23? Creating a New Captions Segment
- 03:26? Trimming and editing caption segments like video
- 03:51? Stylising your captions with the Essential Graphics Panel
- 04:53? Creating a reusable Track Style for captions
- 05:51? Adjusting the Appearance of the caption track style
- 06:28? Exporting track styles
- 07:24? Following along with the finalised captions in the Text Panel
- 07:51? Importing track style files
- 08:41? Search, replace, split & merge options in the Text Panel
- 11:12? Creating multiple caption tracks (for multiple languages, etc)
- 12:39? Exporting a standalone .SRT file
- 14:09? Exporting video with embedded captions OR an .SRT sidecar file
Update Feb 2023 – Transcription Only
If you need to export a transcript from your Premiere Pro captions but you don’t want the Speaker Name and Timecode to be included, export it as a CSV file, whereby you can then copy the 4th column (the transcribed text) and side step the extraneous information.
Original article…
I recently had to add captions to a bunch of vertical social videos in Premiere Pro and the user experience left a lot to be desired!
There are a few things that might catch you out, like they did for me, so I’m hoping I can save you some time and stress with this quick post, rather than leaving you to your own furious Googling.
I’ll quickly guide you through how Captions are supposed to work in Premiere and then discuss a few of the common problems with adding captions in Premiere Pro that you might need to work around, along the way.
How to add Closed Captions in Premiere Pro
This short video tutorial from Justin Odisho will quickly take you through the basics of adding captions manually in Premiere Pro, which will help familiarise you with all the controls and parameters.
Before you get started make sure you’re set up in Premiere for working with captions by:
- Opening the Captions editing window (Window > Captions)
- Turning on the ability to see captions in your Program Monitor (Wrench icon > Closed Captions Display > Enable)
- Ensuring when you import media files with embedded captions those captions are included (Premiere Pro > Preferences > Media > Include captions on import.)
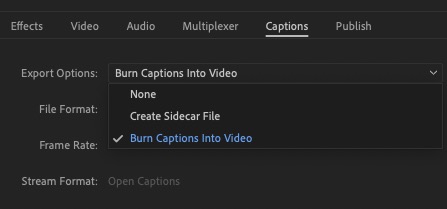
When it comes time to export, make sure you’ve selected either Burn Captions Into Video, or Create Sidecar File in the Captions tab of the Export Settings window.
It is also possible to export Closed Captions embedded within the media file, instead of as a separate sidecar file, but this depends on the media container you choose such as QuickTime or MXF.
The whole captioning process should be pretty simple:
- Import/create captions to required styling and specifications.
- Check duration and appearance of captions on the timeline.
- Export captions as sidecar file or burned in text.
This official Adobe Premiere Pro help article explains many of the essential things you need to know such as understanding import and export settings so read that too.
There are two basic options when it comes to captions:
- Closed Captions – these are delivered in a side car file and can be turned on/off by the viewer, like YouTube captions.
- Open Captions – burned into the video file like regular ol’ subtitles.
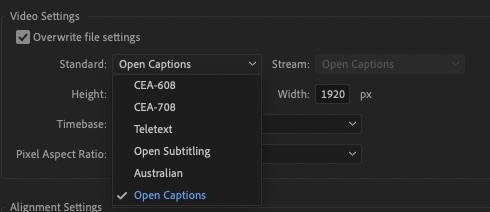
Within Premiere Pro there are several different options for the type of Closed Captions you’re wanting to create and work with, these are essentially just different specifications depending on the geographic region.
- CEA-608 = USA Standard Definition
- CEA-708 = USA High Definition
- Teletext = UK PAL format
- Open Subtitling – Export as sidecar file to EBU N19 format.
- Australian
- Open Captions – Burned in captions/subtitles
If you’re just creating burned in captions for social media clips, or as a sidecar file for YouTube you can choose Open Captions.
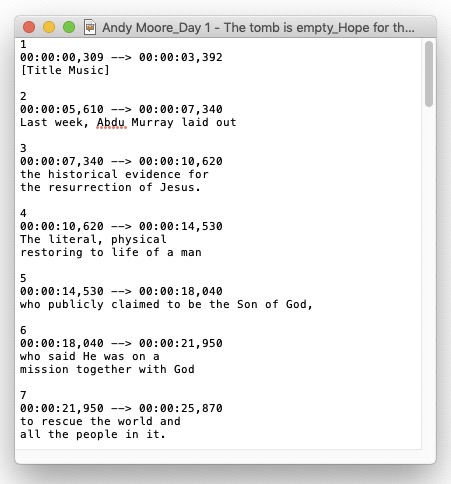
If you’re using a transcription service like Rev.com, or any other service, you’ll be able to download an .srt file to import into Premiere Pro. This is a very simple text file with the captions and start/stop timecodes.
This guide from Rev.com also covers a handy workflow for managing multiple foreign language captions for the same video and their overview of working with Captions in Premiere, which is also worth a read.
The best time to correct any errors or typos in the transcript is while it’s still in this .srt file format, as it’s easier to scroll through and fix them in a text editor rather than doing so inside Premiere.
TIP: If you import a .srt file of transcribed captions, you will want to check the duration of each individual caption as they compare to the actual edits in your timeline, to check that a caption doesn’t bleed across an edit point, creating a messy and hard to read final result.
The fastest way I found to do this was just to hit the down arrow key, with my video tracks selected to jump down my edits and see how the captions lined up with the cuts.
Common problems when working with Captions in Premiere Pro

Here are the five main problems I ran into when working with Captions in Premiere Pro for the first time and the solutions I found in the time I had.
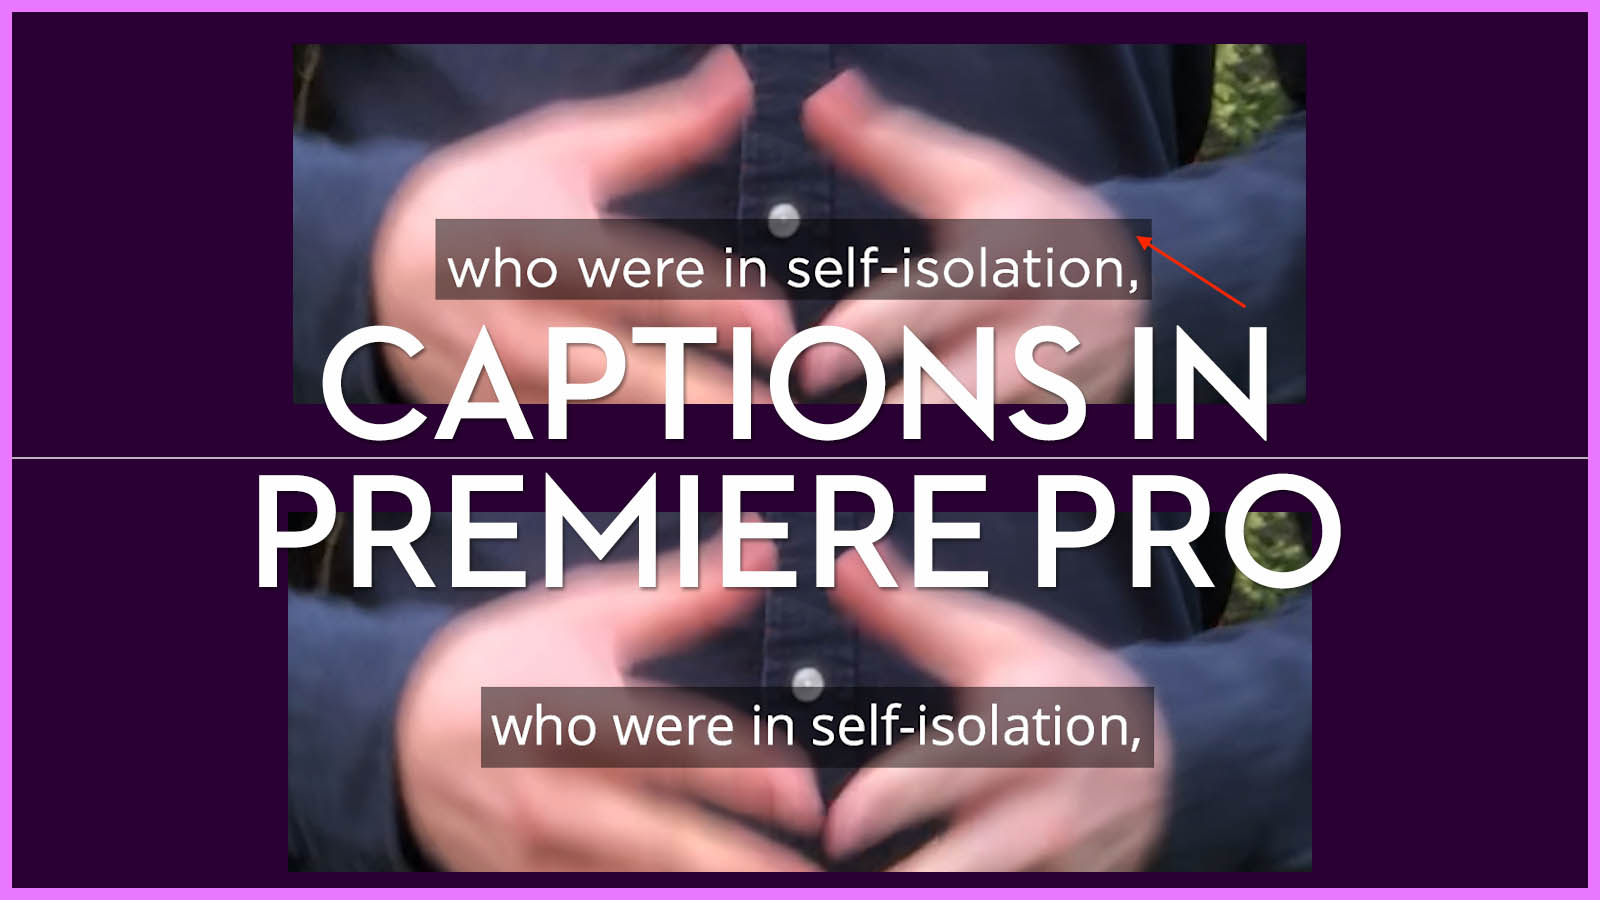
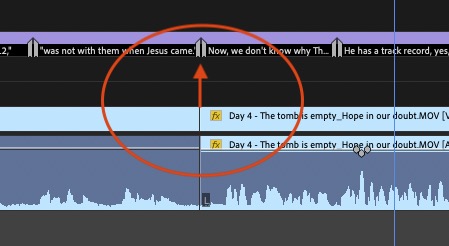
1. Text doesn’t centre align in the caption box correctly
This was a really annoying gotcha, where the client’s preferred subtitle font Gotham, wouldn’t align correctly in the caption background box.
After some searching online I discovered the not all fonts will play nicely with Captions in Premiere, but a font like Open Sans will. So I opted for that. There are probably other options that will work equally well.
The image at the top of this section shows the problem with Gotham on the left and the Open Sans solution on the right.
2. Confusing Caption Import Settings in Captions panel
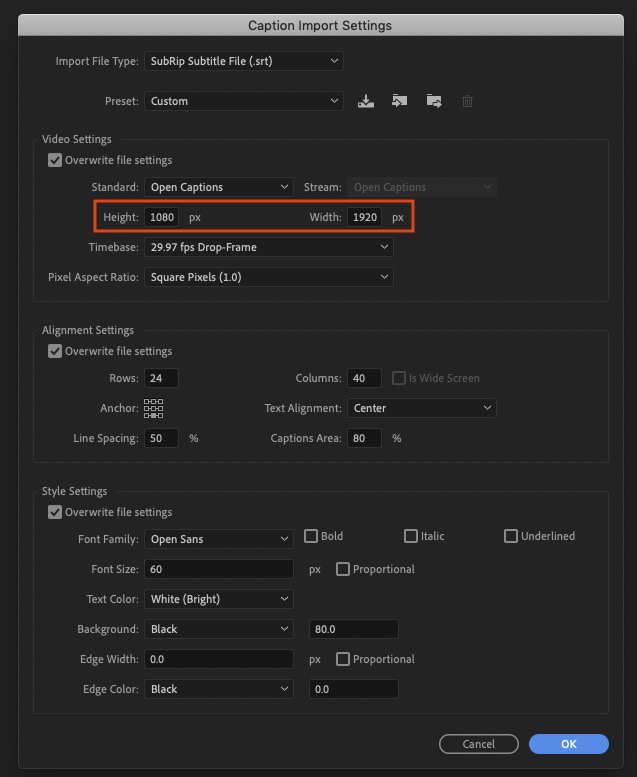
Most dimension input boxes in Premiere Pro have the width first and then the height, for example 1920 x 1080 in the Sequence settings window.
For some reason these input boxes are reversed in the Import Settings window in the Captions panel and this might confuse things if you input numbers manually!
3. Applying Import Settings to the next .srt import
I’m writing this article a little after this project completed but I’m pretty sure that the configuration of settings you create in the Import Settings window of the Captions panel will only apply to the next import of the captions file, which make sense.
But this means that if you’ve already brought your .srt captions file in but want to make global changes to it, it’s best to delete it from the Project window, and then re-import it once you’ve made the appropriate changes in the Captions Import Settings.
For me, this was an iterative process the first time I tried to apply captions in Premiere!
4. Line breaks in the text create visual errors
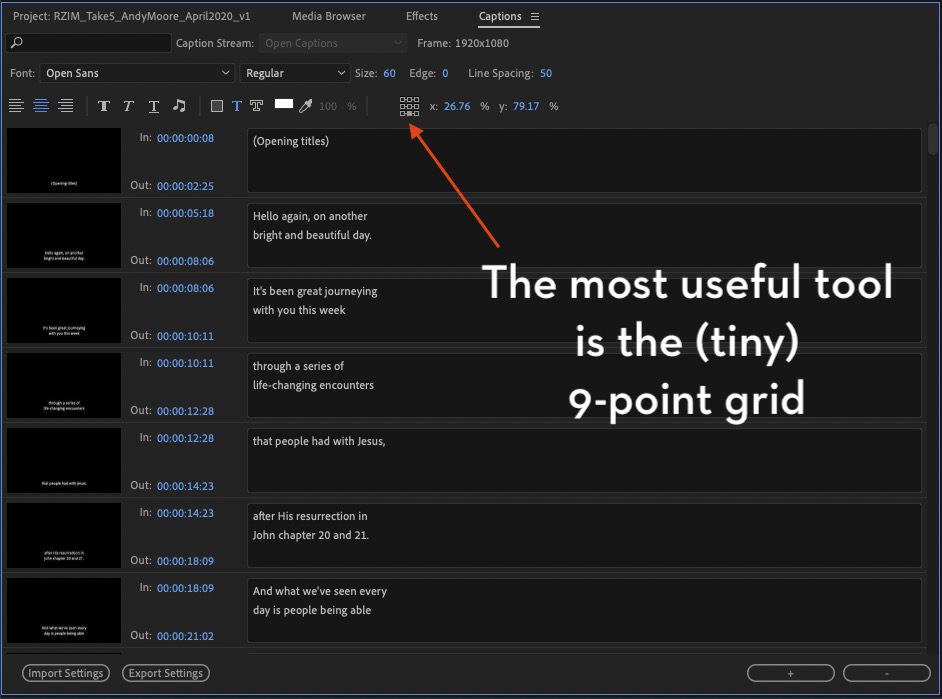
It’s frustrating that one of the most useful tools in the Captions panel is the 9-point grid alignment tool and that it’s tiny.
You’ll likely want to keep your captions in the ‘traditional’ spot of the bottom centre of the screen, which is therefore the middle bottom dot in that grid. (Or you can use the axis controls to move it where you’d prefer.)
When I was adjusting my captions from the usual HD 1920 x 1080 frame to a narrower vertical video 9:16 frame (1080 x 1920) I had to add a few line breaks to my captions so that they ran across two lines.

This led to some random visual errors, where the text didn’t align correctly in the centre of the screen.
This is because each line in the per-caption text editing box can be aligned differently with depending on what is selected in the 9 point grid tool. The easiest solution is to simply select both lines in the text box before hitting the 9-point grid tool again to make sure everything lines up correctly, within the caption.
It’s also worth ensuring you have all the text centre aligned too.
5. Can’t see Captions in the Program Monitor
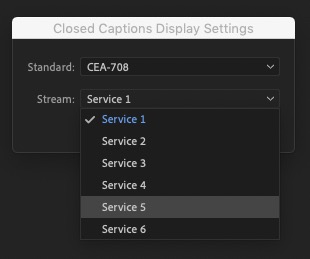
If you’re importing a caption file that’s been made to a specific standard, say CEA-608 and you don’t have matching settings in the Program Monitor you may not be able to see the captions at all.
This is especially true if there are multiple streams available within the caption file, as, for example, CEA-708 can have six different language streams available within it.
Check your caption viewing settings by clicking on the wrench icon in the bottom right corner of the Program Monitor > Closed Captions Display > Settings…
More Options for Creating Captions
Here’s a few more pointers on using Closed Caption Creator, if you are delivering enough closed captions to make the investment worth it. Or just consider how many hours of your time you’ll save vs the subscription cost, which you can expense.


Hi there! I have a common issue where my desired 2 lines of captions populate as 3 lines. Are there settings and/or presets I can make that will ensure that captions will never exceed 2 lines? I select 2 lines in my settings and I almost always have instances where 3 lines of captions are populated. Thanks in advance if you have any advice on this topic.
Hi, im having a problem with captions.
I have a video file (4.54 m) wich i want to combine with a srt file.
When i watch it in vlc everything is fine but when i put the video file and the srt file in adobe premiere pro 2023 the srt file is only 43 seconds? Its like a big piece of the subtitles is gone? How can i fix this problem?
Can you describe your process in Premiere Pro?
I open adobe premiere pro, make a new project. drag the video file (4:54 min) and the srt file (43 sec) in the media browser on the left. But when i open the video with vlc the subtitles are also 4.54 min.
Hmmm I’m now having the exact same problem on a project! Did you find a fix at all?
I need to know how to break Premiere so I’m able to show two subtitle tracks at the same time. I don’t want a giant background box across the bottom of the screen. I have a small text block describing the soft music that is playing and a separate line with the text of the VO from the video. They show at the same time for the first line of copy and worked fine right up until the 15.0 version. These are 15 and 30 second spots so not a ton of time to work with.
Hi Travis, thanks for checking out the blog.
I’m not sure how I would replicate your issue but your best bet might be to have two versions of Premiere installed side by side.
If it worked correctly in a previous version of Premiere you could just keep that one installed for this workflow??
https://community.adobe.com/t5/premiere-pro/how-can-i-rollback-to-a-previous-version-of-premier-using-the-creative-cloud-app/m-p/10844401