
DaVinci Resolve Tools and Productivity Hacks

When you’re working in any application for a career then you want to continuously keep learning new ways of doing old tasks, new ways to save time and fresh ways to remove repetitive actions from your life.
In this post I’ve rounded up some excellent third-party custom tools for DaVinci Resolve including bespoke colour interfaces, time-saving productivity hacks and a new collection of power grades (as opposed to LUTs, here’s over a hundred of those!).
In the post you’ll find:
- Productivity tips and tutorials
- 15% discount code for Nobe Color Remap
- Pixel Tools PowerGrades review
- 800 Stream Deck icons for DaVinci Resolve
- Meta Fide tools for setting up complex projects
- FUgraph beta for advanced Resolve/Fusion users
DaVinci Resolve Productivity Tips and Tutorials

In this thread on Lift Gamma Gain several colorists discuss some time-saving productivity tips including using the Lightbox to speed through grades, or as an efficient way to start a client session.
Some of the tips include feeding the Lightbox to a second monitor via SDI or using it to create grading groups to help navigate a timeline with greater speed. There are also some important ‘be careful if you…’ comments. It’s well worth a read!
I typically start a client session with the Lightbox up on screen, after i’ve done the base pass, and have a sense where the issues might lie…. great way to start a day – looking at the big picture
I use that so much that i have a soft-key mapped to Lightbox + screen, and another one mapped to Lightbox +screen + color tools displayed, again for tweaking outliers. – Dermot Shane
If you’ve not used the Lightbox before then this image from Vashi Visuals gives you a good illustration of what that looks like for the brilliant film Traffic.
Scott Simmons from Pro Video Coalition demonstrates a work-around way to get pretty close to ‘FCPX-style-range-based keywords’ in DaVinci Resolve.
In the 30 minute tutorial above Scott compares his keywording technique to that of FCPX and how to use both keywords and markers in DaVinci Resolve to create his work-around keywording technique.
Once you add those keywords to clips in Resolve you can do things with them, like collect them into a Smart Bin. If you add Marker Keywords you can add them to a range of frames by setting a duration to that marker.
You can also collect them as sub-clips into other bins or even selects sequences. And there are probably more things you can do with them that I haven’t discovered yet.
As this is a work-around it obviously isn’t a perfect solution but it does demonstrate some great creative thinking on using Resolve’s tools more effectively.
If you’re interested in replicating this approach check out the full video above as well as Scott’s initial article here, and the follow up, which includes the video tutorial here.
Lastly, if you’re not yet working with a colour grading control panel in DaVinci Resolve then this video from Theo of Miesner Media does a good job of illustrating the experience of working with a panel for the first time.
Theo discusses why you would want a panel, the benefit of being able to make subtle adjustments quickly – especially compared to working with a mouse, and the speed of working with two hands at once while keeping your eyes on the grade.
Definitely worth the time if you’re considering upgrading your suite to include a control panel.

In the video Theo is working with a Tangent Element suite and DaVinci Resolve, although any panel not made by Blackmagic Design (e.g. BMD Micro or Mini) will most likely work with numerous other applications.
If you want more details on affordable colour grading control panels check out these previous posts:
- Affordable Colour Grading Control Surfaces
- Blackmagic Design Micro and Mini Colour Grading Panels Reviewed
- Colour Grading with a Tangent Ripple
- Editing and Grading with a Tangent Element Kb
- Affordable Colour Grading Panels – Tangent Wave2 Reviewed
- Inside Tangent’s new Tsunami and Wave2 Colour Grading Panels
Using DCTLS in DaVinci Resolve
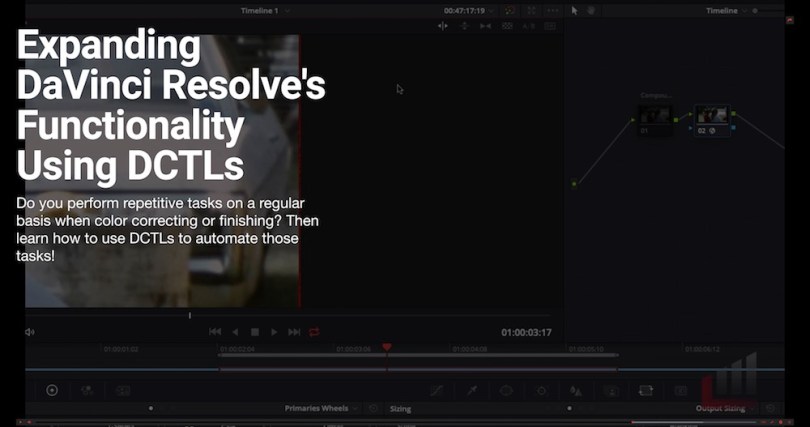
I would rather spend a full day writing a script to automate a repetitive task – then spend a single hour toiling through that task. – Joey D’Anna
Colorist and MixingLight.com contributor Joey D’Anna is sharing some really excellent productivity hacks for DaVinci Resolve of late. If you’re a member of Mixing Light you should definitely check out this tutorial on using DaVinci Resolve Color Transform Language (DCTLs) to effectively create his own custom plugins.
It is behind the paywall, so if you’re not a member you’ll need to sign up for the week long free trial to access it, but that will also give you access to everything else too!
In the tutorial Joey demonstrates what DCTLs are, how to work with them and the three tools he has created, which you can also download for free.
Those tools are:
- A better letterbox overlay
- A totally customisable Title-safe generator, with a complete range of aspect ratios
- A blanking-error detector/visualiser with custom controls
This last tool is particularly handy for documentary work where you might be managing a lot of different source material and allows you to see where the image might not be completely filling the frame, which could result in embarrassing and time-consuming QC rejections.
DCTLs can be used in the node tree just like LUTs. But unlike a LUT they don’t hard clip. You maintain 32-bit floating point processing using them.
To me, the real power of the DCTL is in the OpenFX panel – DCTLs can be created to expose properties for the colorist to adjust. They work like a plug-in, but are much easier to write. – Joey D’Anna
It’s insights and free scripts like this that really bolster the value of sites like Mixing Light and the value they can deliver to working post professionals on a weekly basis. If you’re a working colorist, you’d be crazy not to become a member!
I recently reviewed MixingLight.com in more detail in as part of this post on learning how to use the Fusion page in DaVinci Resolve, if you want more information on what you get for your money.
In the tweet above you can see how Joey has used a Python script to import a client’s notes from Premiere Pro into the DaVinci Resolve edit index, with frame accurate results.
In the follow up Tweets Joey explains that he’s exported a text file of Premiere Pro’s markers and then imported them into Resolve’s timeline using new Python API. He even has a script to do the same thing to create Avid locators. Pretty clever stuff!
Color Nobe Remap
Nobe Color Remap for DaVinci Resolve (and FCPX/Photoshop) is one of the add on tools from TimeinPixels creator Tomasz Huczek. NCR gives you a unique, intuitive and visual way of interacting with and manipulating the values within your image.
I put together the video playlist above which contains 12 different videos which will guide you through much of Nobe Color Remap’s feature set, starting with the 2 minute demo film. The playlist includes short tutorials on finessing skin tone, isolating corrections and using the frame reference feature, among other things.
It’s worth mentioning that Tomasz is also the creator of a really useful False Colour plugin too, which I’ve previously written about here, and you can check out the updates in the latest version of it here.
Nobe Color Remap Discount Code
Tomasz was kind enough to offer the readers of this blog 15% off Nobe Color Remap with the coupon code “jonnyelwyn” so if you’re already planning on buying it, then you may as well save a little in the process!
The coupon code should save you about £22/$30 off the Pro version and £11/$15 off the Lite which normally costs €170/€85 for DaVinci Resolve.

This screengrab will give you a basic run down of the difference between the Pro and Lite versions of Nobe Color Remap, although there is a free trial you can download to test things out for yourself.
These euro prices convert to roughly £83/£150 or $107/$192 for the Lite and Pro versions in DaVinci Resolve.
There are also cheaper versions available for FCPX and Photoshop.
The Pro version notably delivers the ability to work in LOG colour spaces and ACES as well as the Overlay mode, which puts all NCR’s interactions into the Resolve viewer, rather than in a separate ‘modal window’.

The meat of the plugin are two adjustment grids – the Hue vs Sat (circular and rectangular grids) and the Luma Vs Sat rectangular grid where you can make detailed adjustments.
I’ve not had too much time to play around with it just yet, but if you’re willing to spend the money, and invest the time to learn a new tool, in the right hands it seems like a more efficient way to make specific adjustments to skin tones and isolated colours.
Although I would wager that to be in the market for something like Nobe Color Remap, you’re more likely to be a professional colorist, than an editor who grades.
It is however worth mentioning the keyboard shortcuts which will make you a little more nimble.
The keyboard shortcuts that can be used in both modes (Overlay Mode and Window Mode):
- A – switch to Hue Grid
- S – switch to Luma Grid
- D – show/hide Adjustment Window
- Alt + Click / ? + Click – reset selected point
- C – show/hide color picker
- Shift + drag – precision mode when dragging the color directly in the image
As well as the really well written User Guide which includes details on all of the functions and features of the plugin, help on GPU acceleration and some examples of specific use-cases and interactive sliders.
It really is worth reading in detail if you buy the plugin to help you make the most of it.
Check out Nobe Color Remap for yourself and save 15% with the coupon code “jonnyelwyn” here.
Theo from Miesner Media gives a pretty detailed demonstration of typical colour corrections using Nobe Color Map and discusses why it’s one of his favourite plugins for DaVinci Resolve.
I think it’s helpful to see someone else experimenting with the plugin in real-time, rather than only watching a compressed demo video.
In this interesting video from Theo he compares working with Resolve’s built-in curves controls vs Nobe Color Remap and vs 3D LUT Creator to perform the same adjustment tasks and their quite different results.
Pixel Tools PowerGrades Review

Professional colorist Jason Bowdach has recently released a pack of 100 DaVinci Resolve PowerGrades which delivers a legion of useful looks and utilities for colorists of all kinds.
The first thing to make clear is that PowerGrades are not like LUTs.
A LUT is a baked in mathematical transform. It will look the way it looks and you can’t tweak its inner workings. You can work with or against at LUT but you can’t change them.
A PowerGrade on the other hand is completely different.
It is as if another colorist has sat down at your desk, added a combination of nodes and effects to produce a specific result and then left you to customise it to your hearts content. A PowerGrade is a far more flexible and controllable template for turbo charging your grade.
This what you get when you purchase PowerGrades Collection Volume 1 from Pixel Tools.com and Jason was kind enough to send me this pack for the purposes of this review.
If you want to try before you buy there is also a free collection of 8 specific looks available for download right here.
What do you get?

Looks, Log Looks, Utilities… and LUTs.
Because these Looks are not baked in LUTs it means you have complete access to the node graph, which means if you right click and say ‘Show Compound Node’ you can see all of the inner workings and specifically customise each individual element to taste. And learn how Jason created them in the first place.
To be more specific there are 56 individual Looks and 57 Utilities by my count, although each Look also comes with a LOG counterpart and you also get 50 3D LUTS which is a great added bonus for use in other applications or hardware scenarios (e.g. cameras, on-set monitors etc.)
Please Note: Not all PixelTools PowerGrades can be converted into 3D Look-Up Tables (LUTs) as they include ResolveFX which do not properly translate.
The ones that can be converted (50 looks) are included for your use in other applications such as Adobe Premiere Pro or FCPX or for a look preview in-camera.
These looks display a nice range of creativity with everything from a convincing ‘Worn VHS’ Look, to subtle Fuji and Kodak emulations as well as stronger cross processed and Duotone grades.
Depending on the kind of work you’re doing, for example music videos vs charity and corporate work, there’s something for everyone with a good blend of more ‘in your face’ styles, as well as more nuanced adjustments.
Because Jason has made the background still for each PowerGrade so legible, it’s really easy to find what you need regardless of the level of zoom your Gallery is set to.
When it comes to the utilities, these are a good mix of pre-made vignettes, film grains, time-saving node set ups, skin softening, compression artefacts and much more.
Here’s a flavour of some of the Utilities:
- 6 Colour Vector Parallel Node Set-Up
- Colour Space Transform 3 Node Set-Up
- 35mm Film Grain Medium
- Skin Soften – Mild Adjust Key
- Highlight and Shadow 2 Way Grain Set-Up
Many of these utilities come in a variety of ‘intensities’ so you can quickly try different approaches, as well as preview all of them with DaVinci Resolve’s hover-scrub functionality.
This is a great way to quickly find the Look or Utility you need without applying each one to the shot and then having to remove it before you apply the next one.
As these are PowerGrades you could obviously combine different elements from numerous node graphs to create your own custom results.
As an editor and not a professional colorist, I’m not sure that all of these will be immediately useful to me, but knowing that they’re tucked away means that, should I need to suddenly create a believable night vision look or throw on some effective skin-softening, I know I can do so in a couple of clicks.
One of the things that impressed me about Pixel Tools PowerGrades Collection Volume 1 was that between receiving the pack and getting around to writing this review, there was a fairly major update to the collection, which is a great reflection of Jason’s desire to deliver a high calibre product and respond quickly to user feedback.
“Today we are releasing a free update for our PixelTools Vol. 1 PowerGrade Collection. This update (version 1.1.0) changes the following:
- Added LOG versions of every Look PowerGrade
- Introduced additional Camera Log Transform Utility PowerGrades
- Introduced additional Utility PowerGrades – Noise Reduction, Saturation Limiter, & S-Curve.
- Adjusted LAB Saturation Boost Utility PowerGrades.
- Renamed Blue Yellow Look PowerGrades to Cyan Red Split.
- Adjusted Old Worn VHS Look PowerGrades to be less aggressive.
- Replaced Kodak 4 & 5 Look PowerGrades with alternative film emulations, based on user feedback.
Is it worth the money?
All that for less than $100 bucks?! Yes it’s worth it.
The Pixel Tools PowerGrades Collection Volume 1 is currently on sale for $89.99 which works out at less than $1 a node-graph. Even if you only end up making use of one tenth of the collection on a daily basis that’s still great value.
A side benefit and an additional layer of value, from being able to purchase someone else’s grades is that if you’re a junior colorist it’s a great way to breakdown another professional colorist’s node graphs to understand how they combine different DaVinci Resolve functions and effects to create their looks.
All for less than a dollar a time.
Download the 8 free grades for yourself at Pixel Tools.com or buy the complete collection here.
How to install PowerGrades
Here is the installation tutorial from the pack, which shows how quick and easy they are to install.
You will need to be running DaVinci Resolve Studio to get the most from this pack, as Jason explained to me:
About half will work on the free version no problem. The others will work but you would need to disable a node or you’d get a watermark. About a third won’t work in the free version simply because they rely on ResolveFX from the Studio version.
If you end up running into problems as a DaVinci Resolve free user, Jason says he’s happy to offer you a ‘no-hassle’ 30-day money back guarantee.

Jason is also a professional instructor for Ripple Training and currently has two DaVinci Resolve tutorial courses on offer:
Problem Solving in DaVinci Resolve 15
Working with LUTs in DaVinci Resolve 14/15
I’ve previously reviewed the latter course here.
Free DaVinci Resolve Stream Deck Icons
One of my favourite new tools in my edit suite is my Elgato Stream Deck, which I previously reviewed here in detail. It’s a 15 button customisable keypad that allows you to create your own app-specific one-button shortcuts for things like macros, scripts and system wide functions. Each button is essentially it’s own LCD screen which means it can support full colour icons, gifs and updating apps.
It’s a really fun and effective device to use and I’ve seen it appearing in the background of more and more editors and colorists suites of late. In my review I also shared some custom icon sets and profiles, including a nifty Hal 9000 and Blade Runner 2049 set.
On of the most time-consuming things to do is to create your own custom icons for each shortcut that you create, but thankfully someone else has gone to the trouble!
Todd from SideShowFX.net got in touch to share his 800 strong icon pack for DaVinci Resolve editors and colorists using an Elgato Stream Deck in their suite set up. This nifty promo showcases everything that’s included.
There are two versions available – a free 127 icon Essential Collection and the paid for Complete Collection which features 800 individual icons for the Stream Deck.
The Complete Collection is currently half price at just $14.99, which works out to less than 2 cents an icon!
This low-resolution watermarked PDF showcases just what those 800 icons are.
Each icon is 350 x 350 pixel resolution and comes in 2 sets, Full Color and an identical set grey on transparency so you can customize your own colors. This grey set, when imported directly to Stream Deck is ideal for lighting controlled environments such as colorist suites.
The digital download also includes a video tutorial on how to use the icons and a full colour printable PDF so that if you’re using an X-Keys you can cut and stick them into your keypad.
In this screengrab you can see some of the top-level organisation of how the icons are organised, but again if you check out the demo-PDF here you can browse the full list.
It must have taken an amazing amount of work to create 800 icons (even with help from the Noun Project) and Todd already has plans for packs for Adobe After Effects, Premiere Pro and Illustrator. He is currently offering a similar free (190 icons) and paid for (900 icons!) pack for Photoshop too.
One thing I definitely would have paid a few extra bucks for, would be the inclusion of at least a few pre-made Stream Deck profiles for DaVinci Resolve, assigned to the default shortcuts. This would save you a fair bit of time and effort in actually putting the icons to use straight out of the box.
Update – Todd has created a preset profile and included it in the pack. You can also download a ‘no icon’ version of the preset profile for free here.
That said, to use all 800 icons however, would require at least 54 individual profiles, which could get a bit tricky to navigate, and most editors and colorists I know prefer customisation over standardisation, so if you’re already running your own bespoke set up, you may well enjoy giving your icons an upgrade with this pack.
You can download the free Essential Collection profile packs from Todd’s site here, or check out the complete collection of 800 icons here.
An Elgato Stream Deck costs 
Meta Fide Tools for DaVinci Resolve
Igor Ri?anovi? is behind two new tools for DaVinci Resolve 15, released through his new Meta Fide software company. These make use of DaVinci Resolve 15’s new scripting functionality and add some fun and useful features.
Projector works a little like Post Haste from Digital Rebellion, but taking things up a level in that it allows you to create a complex nested bin structures within DaVinci Resolve and import specific media into those bins, based on a customisable template.
The tutorial above demonstrates how to create and use your own custom templates by doing a small amount of very simple scripting.

Currently there are three tokens you can use to customise your Bin names:
- Sequential Multiplier
- Date and Time Stamp
- File Substitution (read a list from a text file)
Projector costs $34.95 and works on Linux, Mac OS and Windows. You can learn more about it and download a user guide here.
The second tool, the @ Button is more of a joke than a real tool, as it will export an ASCII art version freeze frame of the last saved Gallery still, if you want to send your client’s a little curve ball when they ask you for still for approval.
We all know it’s next to impossible to approve colour on a non-calibrated display like a phone or a tablet. And we’ve all had that request to email a freeze frame to a client.
So why not play a little joke and send out an ASCII image instead?
FUgraph for Fusion
Designer and Technical Director behind Fifty50 has created his own Resolve/Fusion shortcut plugin-app, FUgraph which you can download in a trial form here.
The following tweets will guide you through what it can do and how to install it.
It will be really interesting to follow the development of this plugin.
If you want to learn more about Reactor, a really handy tool which lets you install a plethora of Fusion scripts in a couple of clicks.
Learn more about getting started with Reactor here.
Hopefully this will be fixed soon!


